I’ll show you how to style kitchen shelves like a pro using warm wood, hand-glazed ceramics, and plenty of breathing room so things feel curated not cluttered. Start with a clear palette and one statement piece per shelf, mix odd-numbered groupings and varied heights.
Tuck a small plant in for life, and balance open shelves with closed storage for bulky items. I’ll also cover lighting, measurement tips, and budget swaps so you can get the look yourself.
Quick Checklist: Style Kitchen Shelves Like a Designer
Even if you’re short on time, I’ll walk you through a simple checklist to style kitchen shelves like a designer—think balance, texture, and function in equal measure.
I recommend grouping items in odd numbers, mixing ceramics with wood, leaving breathing room, and alternating heights.
Keep everyday pieces accessible, add one small plant, and step back to edit until the arrangement feels warm, lived-in, and purposeful.
Consider incorporating everyday functionality by styling with pieces that are both decorative and useful.
Choose a Cohesive Style Direction Before You Start

Before I start styling, I pick a clear color palette so every piece feels like it belongs.
I also choose one dominant style—farmhouse, modern, or vintage—to anchor the shelves and keep things from looking scattered.
With those choices made, it’s easy to add pieces that harmonize rather than compete.
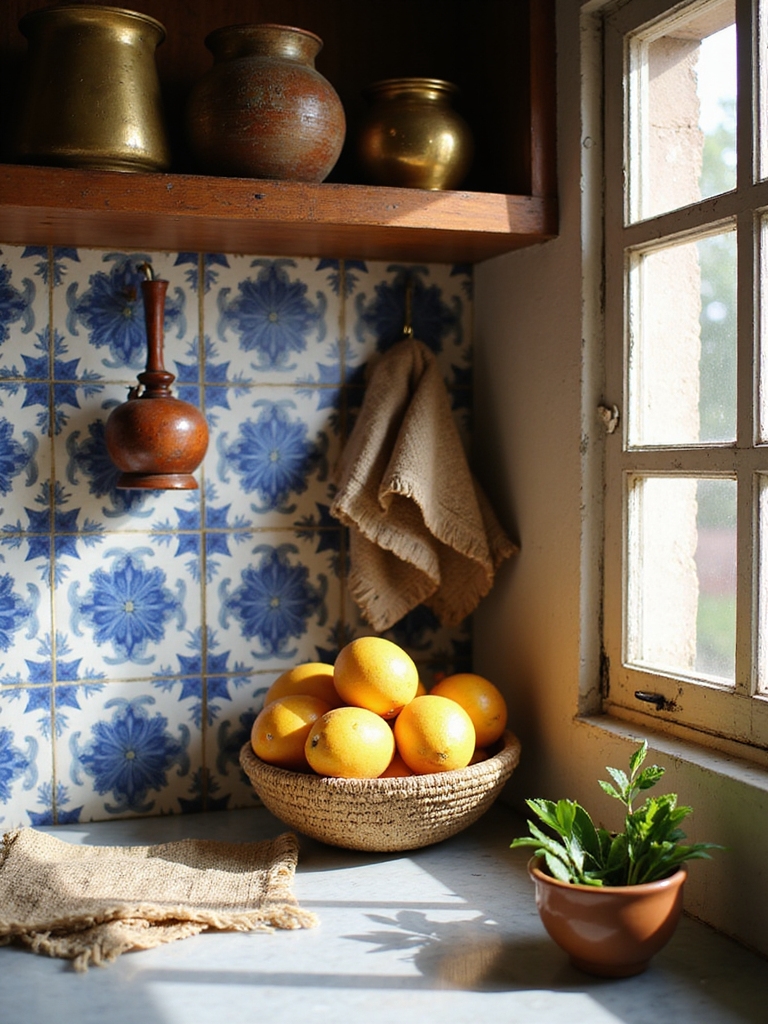
Neutral kitchens rely on layering textures and finishes to keep the look timeless and chic, so I mix matte ceramics, warm woods, and soft linens for depth without color overload.
Define A Clear Palette
Since I like my kitchen to feel intentional, I always start by choosing a clear palette that guides every shelf decision; it keeps things from looking like a mismatched collection.
I pick two or three core hues—warm neutrals, a faded green, and a matte black accent—and repeat them in ceramics, linens, and small decor.
The result feels calm, lived-in, and quietly curated.
A timeless white kitchen can be achieved by focusing on classic materials and finishes, which is why I often reference Timeless White Kitchen Design when selecting durable surfaces and fixtures.
Pick A Dominant Style
After I’ve locked in a clear palette, I pick a dominant style so every piece on the shelf feels like it belongs to the same story.
I choose either farmhouse warmth, minimalist modern, or vintage charm, then edit ruthlessly.
Sticking to one vibe guides material choices, textures, and accents, making styling quicker and the result calm, cohesive, and unmistakably intentional.
Adding curated accents and storage pieces helps maintain a stylish kitchen shelf decor while keeping items organized and functional.
Measure and Plan Shelf Spacing for Display and Use
I always start by measuring the shelf heights so mugs, jars, and bowls fit without crowding.
Then I plan functional zones—everyday dishes down low, pretty pieces up high—so the space works as well as it looks.
Finally, I leave a little extra clearance around decorative items so they breathe and catch the light.
Above-cabinet styling benefits from adding decorative accents like baskets, greenery, and framed art to create visual interest and polish.
Measure Shelf Height
When I’m planning shelf spacing, I start by measuring the tallest items I want to show—mixing in a few decorative pieces and the everyday dishes you’ll reach for keeps the layout useful and pretty.
I measure vertically from shelf to shelf, allow clearance for lids and stems, and note adjustable bracket holes.
That way each shelf feels intentional, tidy, and easy to style. I also keep open plan principles in mind to maintain a cohesive flow with the rest of the kitchen.
Plan Functional Zones
Now that you’ve mapped heights, I plan shelf zones so each area works for both display and everyday use.
I group frequently used items low and near the counter, reserve eye-level for pretty ceramics and cookbooks, and tuck seasonal pieces higher.
I leave space for functional baskets and hooks, balancing utility with charm so the shelves feel lived-in, tidy, and welcoming.
I also draw on classic styling tips for decorating above cabinets, like mixing textures and varying heights to create visual interest without clutter.
Allow Display Clearance
Because pieces need room to breathe, I measure current shelf heights and plan spacing so each item sits comfortably without looking cramped or lost.
I leave intentional gaps for crockery, jars, and a few decorative bits, adjusting for tall bottles or stemware.
This simple measure-and-arrange habit keeps the look airy, functional, and quietly charming—like a well-loved farmhouse display.
I also incorporate top-of-cabinet decor to create a cohesive, custom-made finish that ties the whole kitchen together.
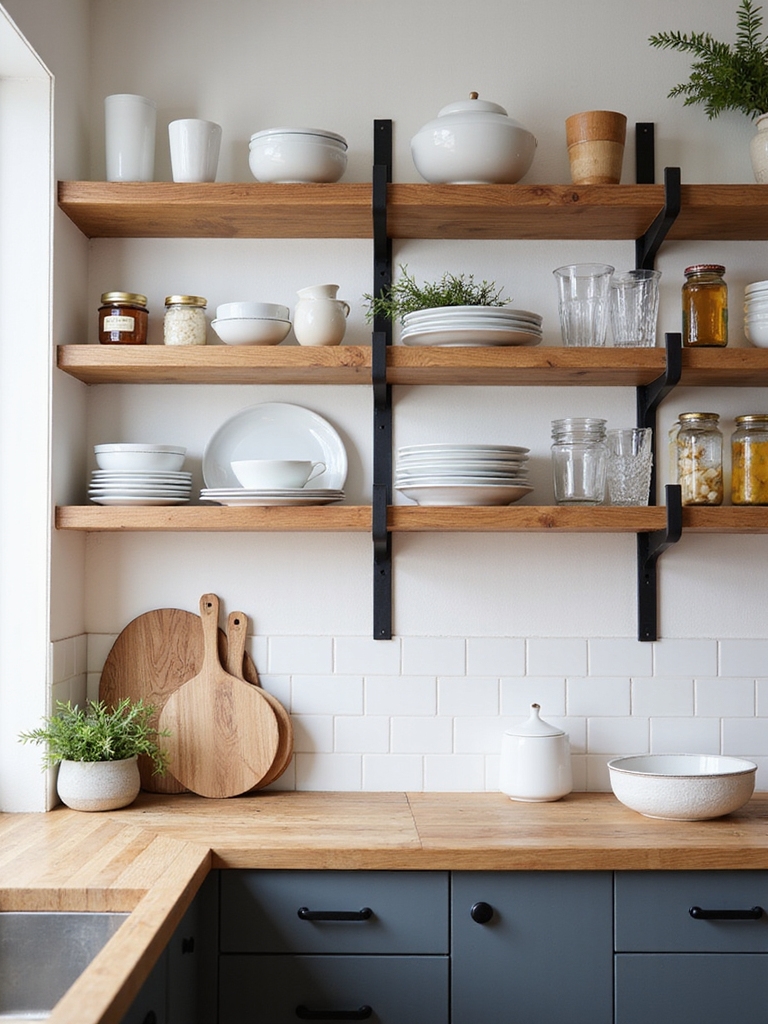
Mix Open and Closed Storage to Reduce Visual Clutter

I like to balance open shelves with a few closed cabinets so the kitchen feels lived-in but not chaotic.
I tuck bulky appliances and mismatched items behind doors, leaving weathered pottery, wooden bowls, and a couple of cookbooks out to breathe.
That contrast keeps surfaces calm, highlights textures, and makes daily life simpler—practical, cozy, and quietly styled without fuss.
Use a 3‑Tier System: Daily Tools, Decorative Pieces, Personal Accents

When I arrange shelves, I think in thirds: the things I reach for every day, the objects that add texture and interest, and the small pieces that tell our story.
I place daily mugs and bowls within easy reach, group a few rustic jars or woven baskets for visual rhythm, and tuck in framed photos, a single herb stem, or a travel memento for warmth and personality.
Anchor Your Shelves With a Consistent Color Palette
I like to pick one dominant hue—say a warm ochre or muted sage—and let it lead the shelf story.
I keep accent colors to a minimum and repeat textures and tones so everything feels collected, not cluttered. That simple consistency makes the shelves feel cozy and intentionally rustic.
Choose A Dominant Hue
A good rule of thumb is to pick one dominant hue and let it lead the rest of the shelf styling—I usually choose a color that pairs naturally with the wood tones in my kitchen.
I anchor shelves with that hue in ceramics, textiles, and a few cookbooks. It creates cohesion, feels intentional, and warms the space without fuss while keeping a rustic, lived-in vibe.
Limit Accent Colors
Since you’ve already picked a dominant hue, keep the rest of the palette tight so the shelves don’t look busy—stick to two or three accent colors max.
I like choosing one muted shade and one brighter pop, then repeating them sparingly across ceramics, cookbooks, and small art. That restraint feels cozy, anchored, and intentionally curated without fuss.
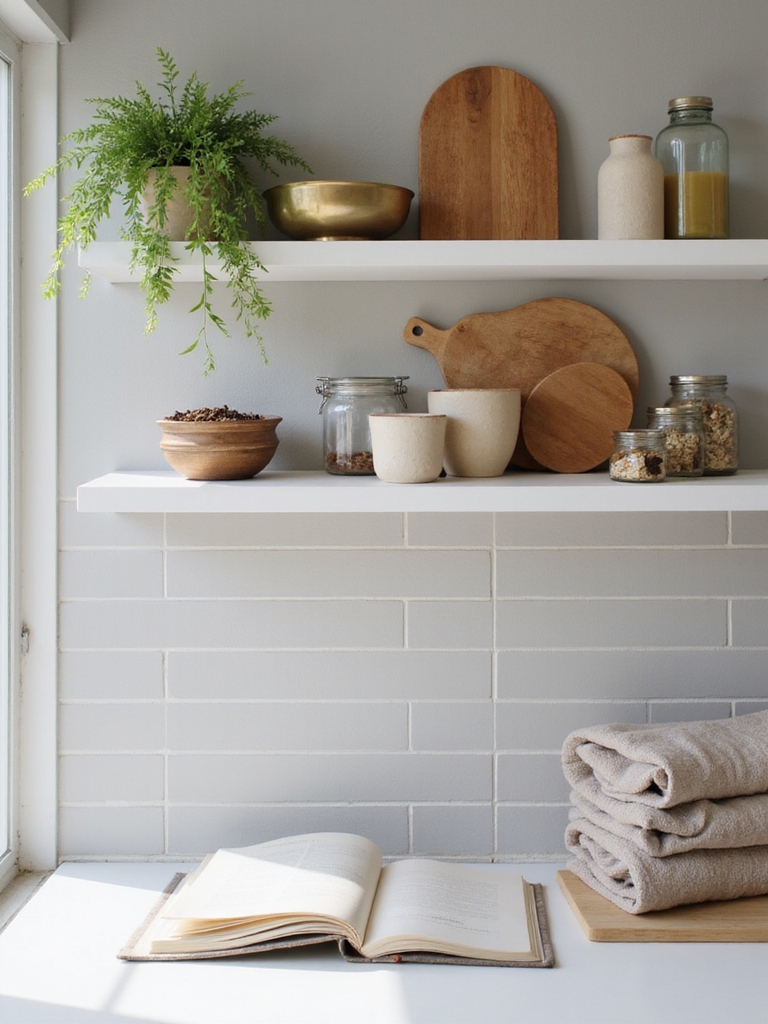
Repeat Textures And Tones
Often I lean on repeating textures and tones to make shelves feel effortlessly pulled together, and you can do the same.
I mix wood, linen, and matte ceramics in a tight palette so each piece echoes the next.
This anchors the space and calms visual clutter.
- Warm wood
- Soft linen
- Matte ceramics
Layer Textures: Wood, Metal, Glass, and Ceramics
With a mix of wood, metal, glass, and ceramics I create shelves that feel lived-in and intentional; I like each material to play a clear role so nothing fights for attention.
I layer rough wood for warmth, matte metal for edge, clear glass for lightness, and hand-glazed ceramics for soul. The result feels balanced, tactile, and quietly curated without fuss.
Arrange Objects in Odd‑Numbered Groupings for Flow
After balancing wood, metal, glass, and ceramics on a shelf, I look to odd-numbered groupings to keep the eye moving and the display feeling natural.
I arrange trios that read as a single vignette, mixing sizes and finishes for charm without clutter.
Try these simple trio ideas:
- Mason jar, small cutting board, ceramic cup
- Olive oil bottle, spice tin, wooden spoon
- Succulent, linen napkin, stone mortar
Build Depth With Height Variation and Risers
When I want a shelf to feel layered instead of flat, I play with height—stacking a couple of plates under a jar, propping a small riser beneath a framed recipe, or using a turned wooden pedestal to lift a plant.
I mix low bowls with taller bottles, tuck a short stack behind a taller object, and let varied silhouettes catch the eye for rustic, lived-in charm.
Use Functional Props That Look Intentional (Canisters, Trays)
I like to group canisters and trays so they feel like they belong together—matching wood, ceramic, or metal gives the shelf a quiet, pulled-together look.
I arrange items by how I use them, keeping daily staples within easy reach and decorative pieces slightly back.
That way everything looks intentional and actually makes the kitchen work better.
Match Materials And Textures
Because texture and material tell a story, I like to choose functional pieces that look deliberate—think ceramic canisters, woven baskets, and a reclaimed-wood tray to corral things.
I balance finishes so shelves feel cohesive and lived-in. Match rough with smooth, matte with gloss, and natural with crafted.
- Clay canisters
- Rattan basket
- Wood tray
Arrange By Purpose
Although shelves can look pretty with random bits, I like to arrange everything by purpose so each item earns its place—canisters for staples, a tray to catch odds and ends, baskets for produce.
I group tools by use, keep frequently reached items front, and let pretty labels and worn wood lend charm. Functional props feel intentional, tidy, and welcoming in a lived-in kitchen.
Add Greenery and Seasonal Accents for Freshness
Adding a few sprigs of greenery and swapping in seasonal accents makes the whole shelf feel alive and welcoming.
I tuck herbs in mason jars, rotate wreaths or garlands, and swap ceramics for muted seasonal tones.
Small changes refresh the kitchen without fuss.
- Fresh herbs in simple jars
- Dried blooms or eucalyptus
- A seasonal cloth or small vignette
Pick One Statement Piece Per Shelf Run
I like to let a single object anchor a run of shelves so the eye has a place to rest after the little bursts of greenery and seasonal bits.
I choose one bold piece—a vintage pitcher, woven basket, or weathered cutting board—and center it.
That focused choice keeps shelves feeling curated, grounded, and intentionally lived-in without overcrowding or competing elements.
Light Your Shelves With Task, Accent, and Ambient Options
When I light a shelf, I think in layers—task lights for chopping or reading recipes, accent lights to show off a favorite bowl, and soft ambient glow to make the whole space feel cozy.
I blend function and charm, choosing warm bulbs and dimmers so shelves look lived-in, not staged.
- Under-cabinet puck lights
- LED strip with warm tint
- Small directional spotlights
How to Style Small or Shallow Shelves
Because small or shallow shelves demand intention, I work with scale and function so every inch feels useful and charming.
I tuck narrow baskets, stack shallow plates, and lean a slim herb pot for greenery.
I alternate low and tall pieces to create rhythm, keep colors muted, and leave breathing room so the shelf reads tidy, cozy, and thoughtfully curated.
Budget‑Friendly Swaps to Get a Designer Look for Less
Small shelves set the tone, but you don’t need high-end pieces to make a kitchen feel curated—I’ve learned a few swaps that give the same designer polish for a lot less.
I favor thrifted ceramics, trimmed linens, and clever repurposing that feel warm and lived-in.
- Swap expensive vases for painted mason jars.
- Replace branded trays with wooden cutting boards.
- Use linen scraps as shelf runners.
I’m telling you, once you style your kitchen shelves this way, friends will assume you secretly enrolled in a fancy design school — or hired a tiny, handsome stylist who only drinks coffee and praises your taste.
Keep it cozy, pick a strong focal piece, and mix pretty with practical; you’ll make even the ugliest cereal box look intentional.
Do a little planning, a little editing, and your shelves will finally feel like home.