I love using kitchen arches to add quiet drama without closing a room — they frame sightlines, soften hard edges, and make an open plan feel intentional. Pick a slim passage arch for a galley, a wide portal for open-plan flow, or a timber-clad curve to warm a modern scheme.
Match materials to use: plaster for calm, wood for coziness, tile for easy care, and check structure first. Keep going and I’ll show how to size, finish, and light them.
Why Choose a Kitchen Arch
A kitchen arch brings character and calm to a busy room, and I’ll tell you why I reach for one when I want style that’s both practical and welcoming.
I love how an arch frames sightlines, softens hard edges, and defines zones without closing space.
It adds subtle drama, improves flow, and fits both vintage and modern elements—making kitchens feel intentional, cozy, and efficient.
Designers also use arches to create defined zones within open-concept kitchen-living areas, helping delineate function while maintaining sightlines.
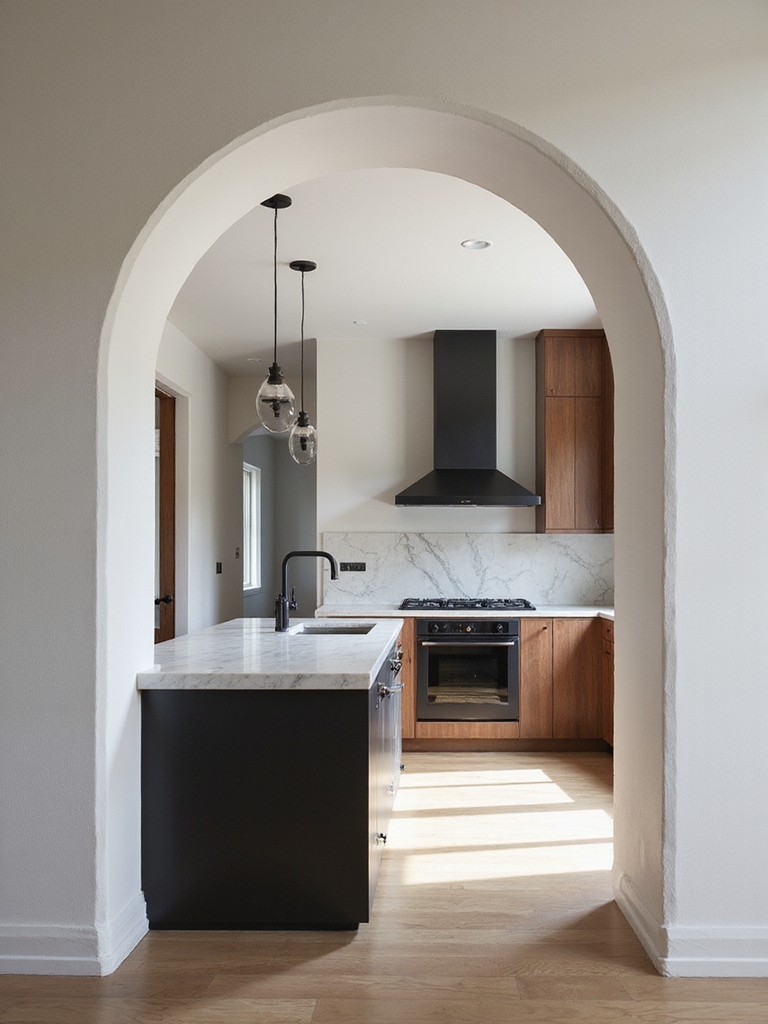
Which Kitchen Arch Fits Your Layout (Galley, Open-Plan, Island)
If you’ve got a narrow galley kitchen, I recommend a simple passage arch to keep traffic flowing without closing things in.
In an open-plan space, a wider portal arch helps define the kitchen while keeping sightlines to the living area.
I’ll walk you through practical sizes and styling tips so you can pick the right shape for your layout.
Open Kitchen Layouts to Fit Any Home Shape with helpful diagrams for planning and scale open kitchen layouts.
Galley Passage Arches
Because galley kitchens demand efficiency and clear sightlines, I recommend passage arches that lift the space without stealing function.
I favor slim, low-profile arches that preserve headroom, add gentle character, and frame the run without interrupting workflow.
Choose painted wood or simple plaster for a farmhouse vibe, keep scale modest, and align the arch with cabinetry lines so movement feels natural and cozy.
Italian kitchens often blend modern luxury with European elegance, making design choices that feel both timeless and refined, like modern luxury.
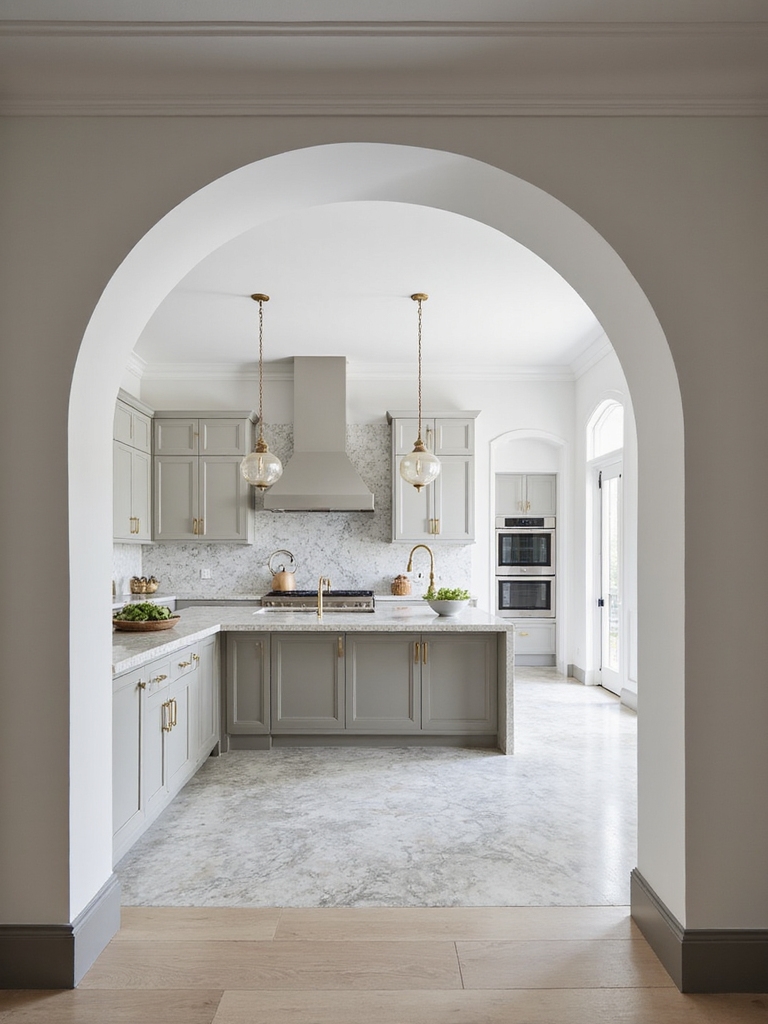
Open-Plan Portal Arches
Moving from a snug galley to an open-plan kitchen means you can make a portal arch do more than simply mark a passage — it can define zones, invite light, and keep sightlines flowing.
I often recommend a modest, timber-clad arch to frame the dining area without closing it off. It feels cozy, channels traffic, and complements farmhouse warmth while staying practical and unobtrusive.
Compact kitchens can still look full of style when you prioritize smart storage and finishes like timber or open shelving small open kitchen.
Openings vs. Details: When to Choose an Arch
While I love a soft arch that invites you into a room, I also weigh where it’ll actually matter—whether as a broad opening between kitchen and dining or as a simple detail above a niche.
I choose full openings when sightlines and flow matter; I pick modest arches for focal points, shelving alcoves, or over sinks. Function, scale, and traffic guide the decision.
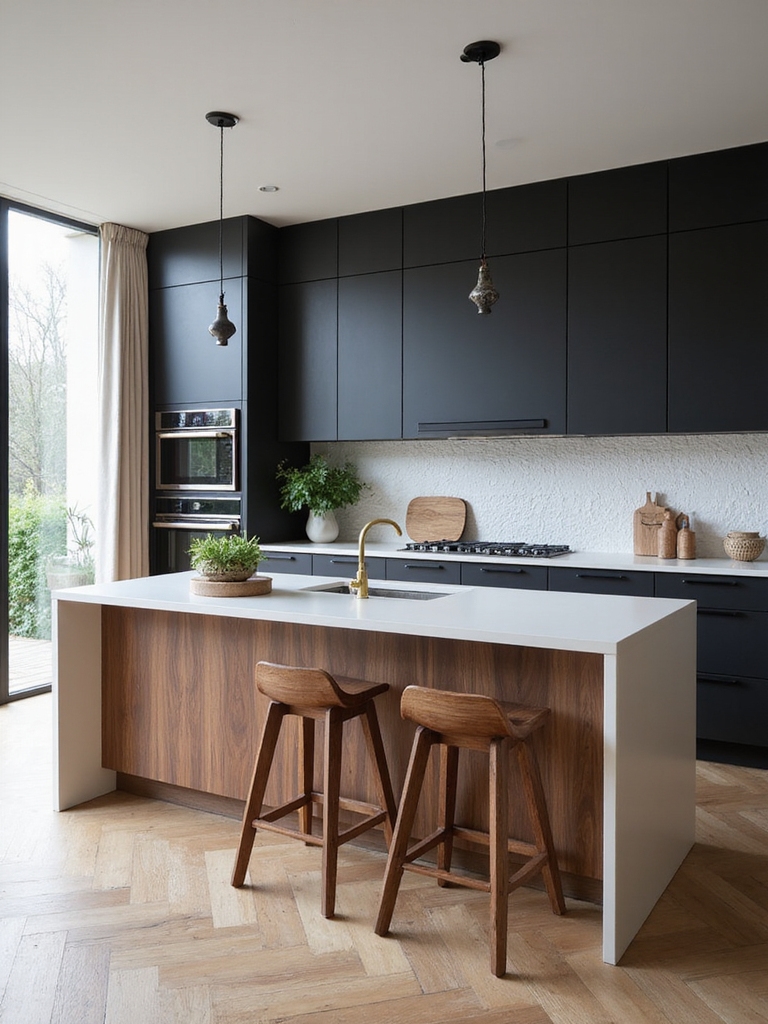
Open island kitchens encourage interaction and make cooking a social event, so I often design arches to enhance those sightlines.
Minimalist Curved Kitchen Arches
I like how a minimalist curved kitchen arch gives a room seamless flow lines without fuss. It creates a soft, minimal silhouette that gently links spaces while keeping the look clean and airy.
Let’s talk about how simple curves can shape traffic and light with very little ornament.
Modern open kitchens often blend warmth with sleekness through thoughtful materials and layout choices, highlighting how warm and sleek aesthetics can coexist.
Seamless Flow Lines
I often find that a single, gently curved arch can quiet a kitchen’s visual noise and invite a calmer flow through the room.
I use that curve to guide traffic, frame work zones, and connect pantry, prep, and dining areas.
Kept simple, the arch clarifies movement without ornament.
It feels practical, warm, and quietly intentional — like a well-worn farmhouse path.
Semi-open layouts also benefit from thoughtful transitions that balance style with practicality, improving both flow and function.
Soft Minimal Silhouettes
A single gentle arch can calm a room, but when I’m aiming for a quieter, more pared-back look I let the curve itself become the statement—soft minimal silhouettes strip the arch to its purest line, smoothing corners and keeping profiles low and unadorned.
- Tuck-in curves for calm.
- Matte finishes, muted tones.
- Slim moldings, simple trim.
- Natural wood accents for warmth.
Creating Zen-like spaces often relies on serene modern minimal principles to maintain focus and balance.
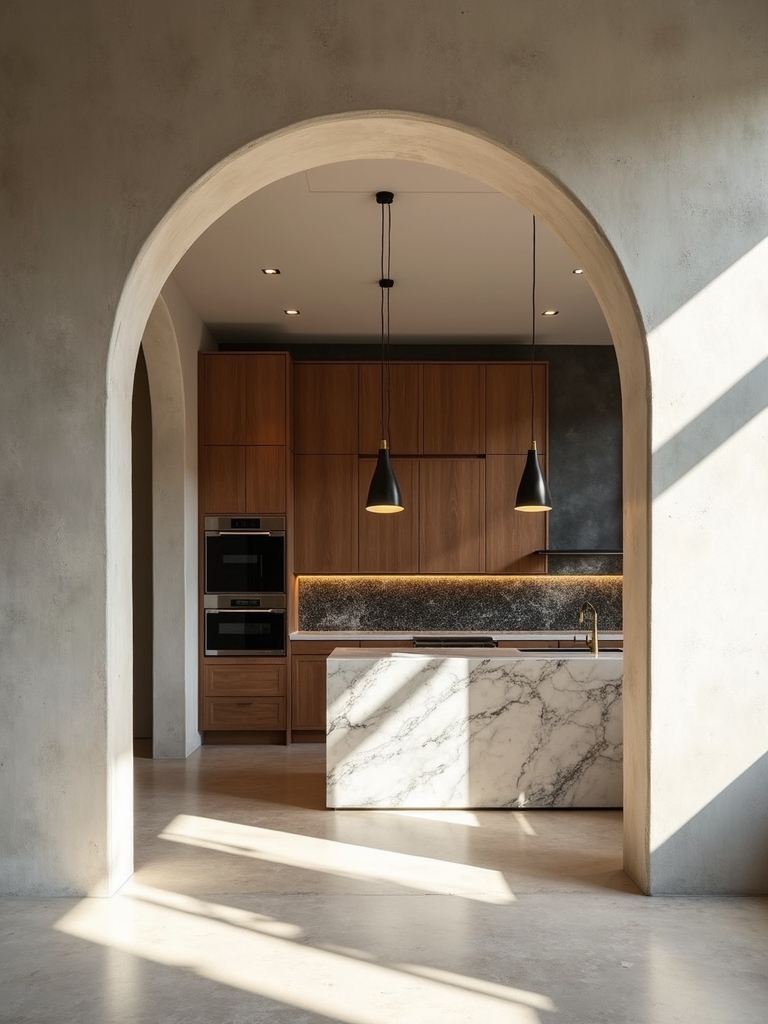
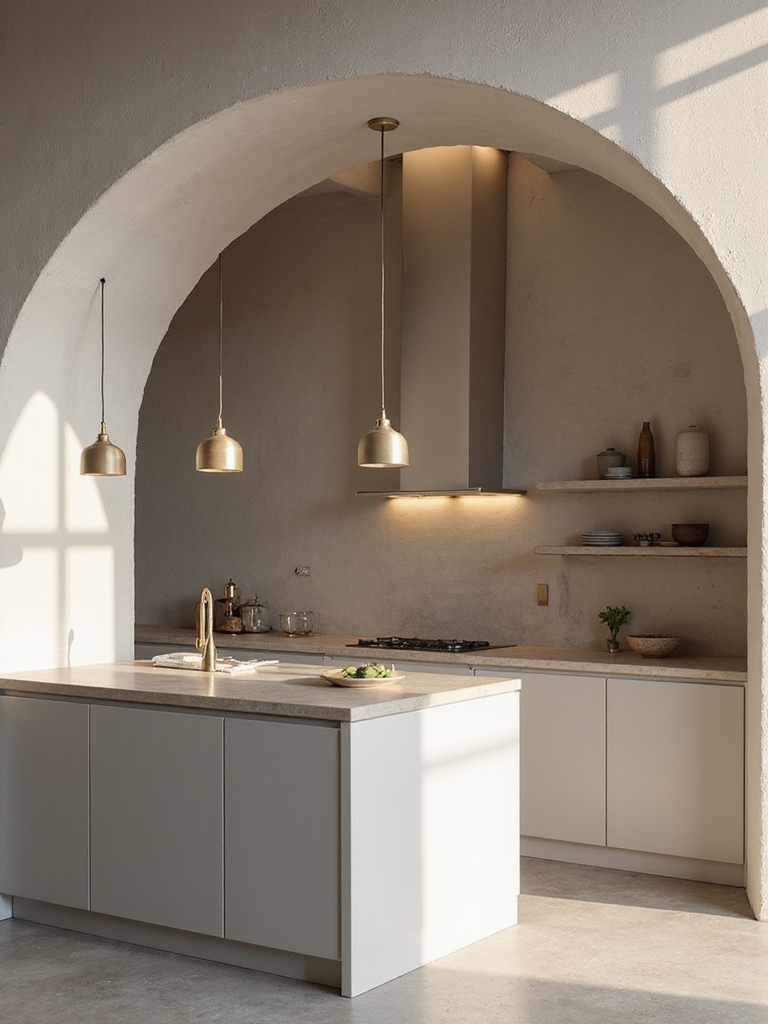
Bold Oversized Kitchen Arches for Open-Plan Homes

Picture stepping into an open-plan kitchen where a bold, oversized arch frames the room and instantly tells you this is a space built for gathering — and I’ll show you how to make it both practical and charming.
I favor wide, timber-clad arches that balance scale, create sightlines, and let light spill through. Pair with durable surfaces, cozy pendants, and simple trim for timeless farmhouse warmth.
Arched Pass-Throughs and Breakfast Nooks That Improve Flow
With an arched pass-through, I turn what used to be a wall into a friendly window between kitchen and nook, letting conversation and plates move easily without interrupting the cook.
I like simple solutions:
- Built-in counter for quick serving.
- Bench seating hugging the curve.
- Pendant light for cozy mornings.
- Open sightlines to keep kids in view.
Best Materials for Kitchen Arches: Plaster, Wood, Metal, Tile, Stone
Having opened up the wall between kitchen and nook, I like to think about what material will set the whole tone — plaster soothes and blends, wood warms and ages gracefully, metal brings a modern edge, tile adds pattern and easy care, and stone gives weight and permanence.
I usually choose based on mood: plaster for calm, wood for coziness, metal for contrast, tile for hygiene, stone for drama.
Integrating Cabinets, Appliances, and Clearances Around an Arch
Because an arch becomes a focal hinge between two working zones, I plan cabinet and appliance placement around it so traffic flows, clearances meet code, and sightlines stay pleasing.
I keep things practical and cozy with a simple checklist:
- Maintain 36–42″ walkways.
- Offset oven doors from the arch.
- Use shallow cabinets near the curve.
- Center sightline with open shelving.
Lighting Strategies to Showcase Kitchen Arches
I like to layer lighting so an arch feels welcoming and balanced, starting with warm ambient fixtures for overall glow.
Then I add focused spot or wash lights to highlight the curve and texture without glare.
Finally, integrated cove or LED strips can give a subtle, modern outline that ties the arch into the rest of the kitchen.
Layered Ambient Lighting
I often start by thinking about layers of light the way I layer clothing for changing weather — each piece has a job and together they make the room comfortable and purposeful.
I balance soft ceiling glow with task and mood, keeping arches gentle and inviting.
- Warm overhead diffusion
- Dimmable fixtures
- Even perimeter lighting
- Consistent color temperature
Accent Spot And Wash
With a few well-placed spots and gentle washes, I make kitchen arches read like architectural jewelry—drawing the eye to their curve without shouting.
I aim lights so they sculpt texture and shadow, highlighting plaster or exposed brick.
Adjustable spotlights add focus for morning tasks; soft washes create evening ambiance.
I balance brightness to avoid glare, keeping the look cozy, practical, and intentional.
Integrated Cove And LED
After using spots and washes to give arches a sculpted look, I bring in integrated cove lighting and LEDs to make that curve sing quietly all evening.
I pick warm tones, hide strips, and layer controls so it feels cozy.
- Warm LED strips
- Dimmer zones
- Concealed placement
- Diffusers for softness
Structural, Engineering, and Permit Considerations
Because kitchen arches change how walls carry loads, I always start by checking structure before sketching a design.
I work with an engineer to assess beams, headers, and bearing walls, and we decide if steel or laminated timber is needed.
Then I pull permits, share detailed plans, and schedule inspections so the arch is safe, code-compliant, and built to last.
Budgeting Kitchen Arches: Cost Ranges and Where to Splurge
Now that we’ve covered the structural and permitting side, let’s talk money: how much kitchen arches actually cost and where it’s smart to spend a little more.
I favor practical choices—here’s a quick breakdown:
- Basic drywall arch: budget-friendly, quick.
- Framed arch with trim: mid-range, big impact.
- Custom wood or beam: splurge for character.
- Stone or artisan finish: investment for lasting charm.
Maintenance and Durability by Material
When you’re choosing an arch, I’ll walk you through how each material needs to be cleaned so it keeps looking good without a lot of fuss.
I’ll also point out which options stand up to bumps, steam, and everyday wear so you don’t end up rehabbing it sooner than necessary.
Together we’ll match the look you love with the upkeep you’re willing to do.
Material-Specific Cleaning Needs
I usually start by matching cleaning routines to the arch material, since each finish behaves differently and needs its own care—wood soaks up moisture and grime, metal shows fingerprints and rust spots, and plaster and drywall can chip or stain.
- Wood: dust, wipe with damp cloth, oil occasionally.
- Metal: mild detergent, dry to prevent rust.
- Plaster: soft brush, spot-clean stains.
- Paint/drywall: gentle cleaner, touch-up paint for marks.
Long-Term Wear Resistance
Although different materials demand different upkeep, I pay attention first to how each will age under daily use so I can plan maintenance that actually preserves function and look.
I choose finishes and hardware that resist scratches, dents, and moisture.
I schedule gentle inspections, touch-ups, and fast repairs to prevent small wear from becoming costly.
That steady care keeps an arch charming and sturdy.
Styling Kitchen Arches: Finishes, Trim Contrast, and Colors
Start by thinking of your kitchen arch as a framing device — I treat it like a piece of furniture that needs a finish and a voice.
I pick finishes and trim to complement cabinets, then add color for personality.
Practical tips I use:
- Matte paint for warmth
- Contrasting trim for definition
- Natural wood for texture
- Soft white to brighten edges
Small-Kitchen Hacks: Use Arches to Make Compact Spaces Feel Larger
When you’re working with a tiny kitchen, I treat an arch like a little window that borrows space—drawing the eye through a doorway or into an adjoining room so the whole area feels airier.
I use slim trim, pale paint, and open shelving nearby to keep sightlines clear.
A shallow arch above a pass-through or breakfast nook tricks the eye into thinking the room breathes more.
Common Mistakes to Avoid When Designing Kitchen Arches
I love using arches to make small kitchens feel larger, but I’ve seen plenty of projects stumble because a little romance gets ahead of good planning.
Here are common mistakes I warn clients about:
- Oversized arches that overpower the space.
- Ignoring traffic flow and appliance clearance.
- Skimping on structural advice.
- Mismatched styles that look tacked on.
I’ve always loved how a simple arch can change a kitchen’s whole mood, and it’s funny that the same curve that softens a farmhouse sink also makes a tiny galley feel generous.
When I choose an arch, I think about scale, material, and daily wear — because beauty should be honest and durable.
If you pair the right arch with thoughtful trim, paint, and layout, you get drama without fuss and a kitchen that really feels like home.