Here are 17 budget-friendly, weekend-friendly backsplash ideas I can pull off fast: peel-and-stick tiles for a reversible swap, paint tricks with satin finishes to brighten the room, fresh tile sheets you install in a day, and even turning found objects into a chic mosaic. Keep grout light, seal where needed, and stay within a practical color palette for cohesion. Want more smart tips to save time and money? I’ve got you covered if you keep going.
How to Choose a Weekend-Friendly Backsplash (Budget, Permanence, and Skill)
Choosing a backsplash that fits your weekend vibe is all about balancing budget, permanence, and skill.
I’ll help you pick smartly: align material costs with your wallet, choose install ease to match your hands-on tempo, and test permanence against how long you’ll stay in this kitchen. Additionally, consider exploring budget-friendly options that can elevate your kitchen’s aesthetic without breaking the bank.
You’ll feel confident, shopping light, crafting bold style without turning the project into a saga.
Peel-and-Stick Tiles: Fast, Affordable, Reversible Options
Peel-and-Stick Tiles: Fast, Affordable, Reversible Options
Peel-and-stick tiles are the DIY superhero you didn’t know you needed: fast, affordable, and perfectly reversible if you change your mind (or kitchen style) later.
I love how simple they are—trim with scissors, peel, and press. No mess, no grout, no drama.
If a careless spill happens, remove, reattach, and keep going. Practical, wallet-friendly magic. Plus, these tiles come in a variety of easy peel and stick designs, allowing you to customize your kitchen effortlessly.
Backsplash Paint Tricks That Brighten and Simplify the Look
I’ll show you how a bright, light paint can open up a kitchen like a skylight, and I’ll share a few primer tricks to keep the finish even without extra coats. Using the right sheen and neutral tones, you can mask minor flaws while still keeping the space feeling clean and fresh. We’ll also talk about finishes that hide imperfections so you can skip the stress and just enjoy the glow. Additionally, using high-gloss finishes can enhance light reflection, making your kitchen feel even more spacious.
Brighten With Light Paint
Brighten up a backsplash in a flash by light-painted tiles or panels. I’m telling you, a pale glaze or whitewash boosts reflected light without changing your layout. I’d pick a satin or eggshell finish for easy wipeability and subtle texture. Apply thin coats, keep joints clean, and let the room breathe.
Quick, budget-friendly, and surprisingly chic without drama. Additionally, a well-chosen white kitchen backsplash can enhance the overall aesthetic and make the space feel larger.
Primer For Even Finish
Primer for an Even Finish: when you’re repainting a backsplash, the right primer is your best friend. You’ll get smoother color, better adhesion, and fewer coats.
Here’s the quick guide:
- Choose stain-blocking if needed
- Use a high-adhesion, stain-blocking formula
- Lightly sand between coats
- Let it cure before topcoat for even shine
Additionally, consider how stylish backsplash ideas can complement your oak cabinets for a cohesive look.
Finishes That Hide Imperfections
**
When you’re chasing a smoother, more forgiving backsplash, certain finishes do the heavy lifting by disguising flaws while keeping things easy to clean.
I favor matte or satin paints that minimize glare and micro-scratches, plus semi-gloss on accents for wipeable contrast. Don’t overthink it—choose one forgiving finish, and let texture, color, and grout do the brightening work.
Adding a quick and stylish backsplash can elevate your kitchen’s aesthetic without overwhelming your space.
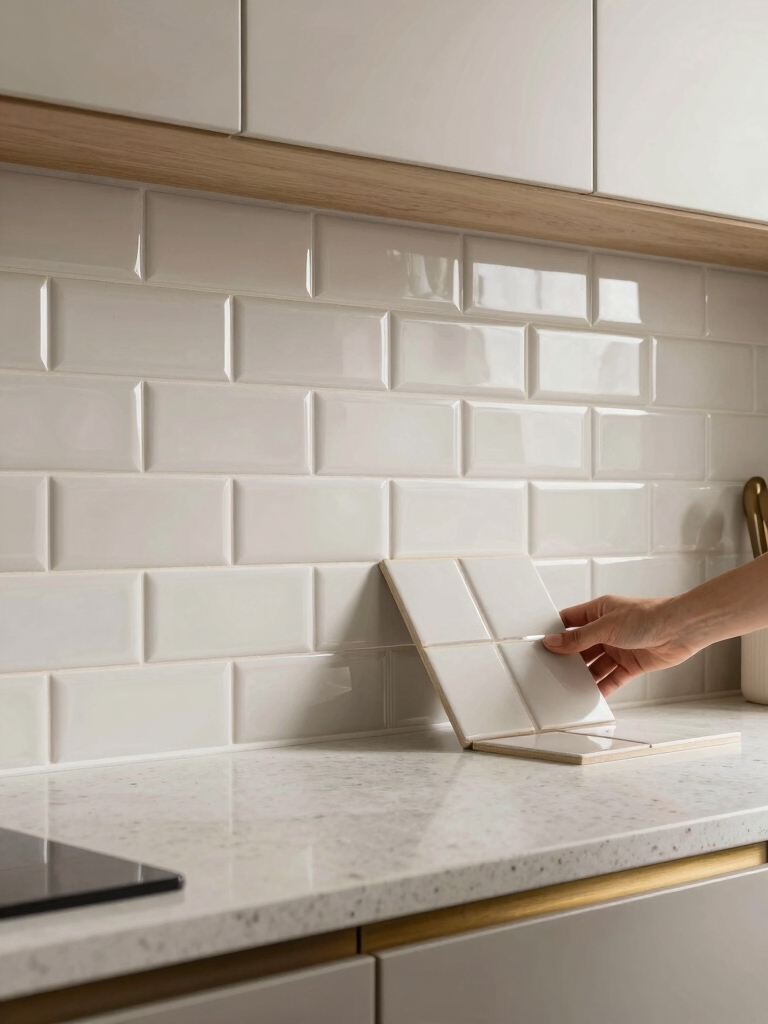
Fresh Tile Sheets You Can Install in a Day
Fresh tile sheets let you freshen up your backsplash in a single afternoon, and yes, they’re as simple as they sound.
I’m sharing quick wins that keep it real, short, and satisfying.
- Measure once, cut once, waste nothing.
- Peel, stick, smooth—no grout required.
- Align edges, use a spacer if needed.
- Clean edges with a damp cloth, finalize with a sealant.
Additionally, consider choosing stylish tile designs that complement your modern home aesthetic for a cohesive look.
Turn Found Objects Into a Backsplash Statement
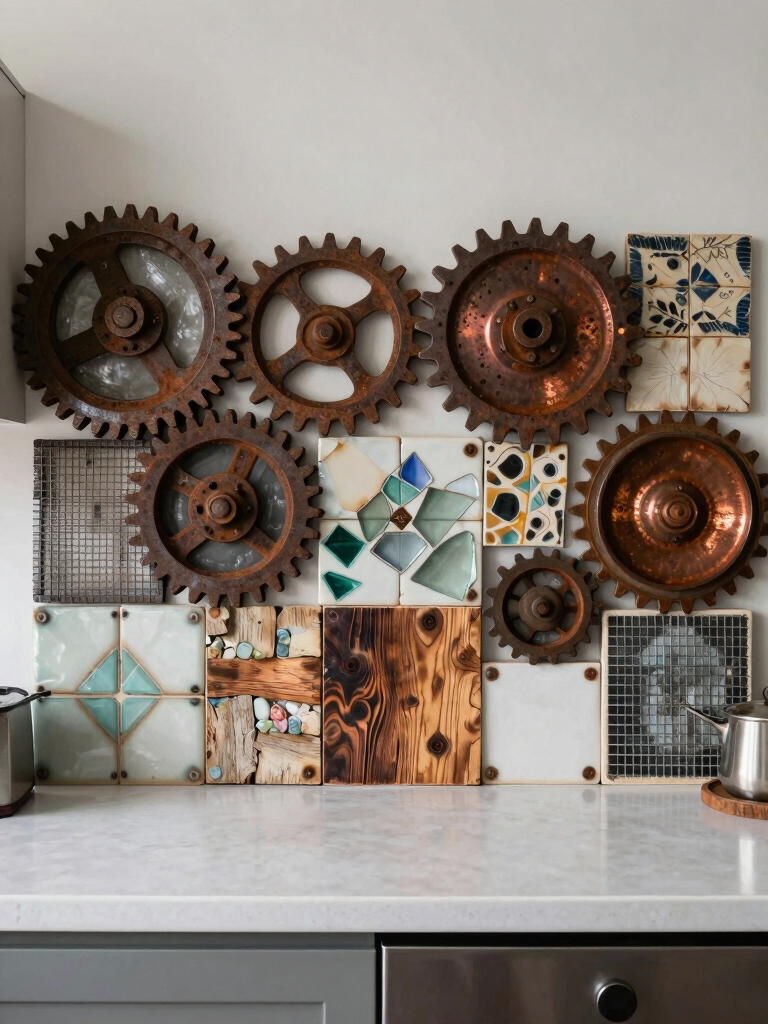
I loved how easy those fresh tile sheets were last week, but a little creativity can turn your backsplash into a real conversation starter.
I turn found objects into artful accents by choosing sturdy pieces, sealing edges, and arranging them like a mini gallery.
I mix textures, colors, and budgets, then grout lightly for cohesion—wow, cabinet-to-wall cohesion, instantly. Adding unique materials can elevate your design even further, enhancing that artistic flair.
Temporary Style With Contact Paper and Decals
I love how temporary style with contact paper and decals can instantly refresh a kitchen without a commitment—think bold patterns that peel off cleanly later.
It’s budget-friendly decor that still looks intentional, letting you test new looks before you commit to permanence.
With easy peel adhesives, you can swap textures and tones as often as you like, keeping your backsplash fresh and practical. Plus, using chic wallpaper designs can elevate your space even further while remaining renter-friendly.
Temporary Style Impact
If you’re chasing a quick, affordable upgrade, temporary style with contact paper and decals is your best buddy.
I’ll show you how it makes a splash without commitment, then you can swap as trends shift.
- Instant wow factor
- Low-commitment experimentation
- Easy cleanup and removal
- Budget-friendly customization
Additionally, using vibrant colors in your designs can create an energizing atmosphere, making your kitchen feel more lively and inviting, which is essential for a colorful kitchen backsplash.
Budget-Friendly Decor
Temporary style with contact paper and decals is a smart, budget-friendly way to test-drive a new look without a full remodel.
I love how these tricks flex with my taste, not my wallet—swap patterns, switch colors, and skip contractor chaos.
They’re printable, removable, and surprisingly durable.
Practical, witty, and fuss-free, they prove you can DIY chic on a dime.
Easy Peel Adhesives
Peel-and-stick trims like contact paper and decals are the easiest way to remix your backsplash without committing to tile or grout.
I’ve used these temporary options—they’re forgiving, affordable, and quick to swap when trends change.
- Measure twice, cut once, then test fit on a dry wall area.
- Peel slowly to avoid air bubbles and wrinkles.
- Use a squeegee or credit card for smooth application.
- Peel up cleanly if you need a remix.
Cement vs Plaster Textures: Durability, Prep, and Finish
Cement and plaster textures both bring bold, tactile drama to a kitchen, but they handle durability, prep, and finish in noticeably different ways.
I’ll weigh the basics, then share pragmatism: cement’s tougher, but dustier and harder to fix; plaster chisels closer to a smooth, forgiving finish.
Prep smart, seal well, and you’ll enjoy a durable, chic backsplash without reinventing the wheel.
Shiplap or Beadboard for a Cozy, Classic Kitchen
If you crave a space that feels warm and timeless, shiplap or beadboard brings cozy texture and classic woodgrain appeal into the room.
I’ll show you how these panels create timeless panel details without shouting, so your backsplash reads as thoughtful, not fussy.
Let’s talk practical choices, from grain direction to spacing, that balance charm with ease.
Cozy Ample Texture
Shiplap or beadboard instantly adds cozy texture to a kitchen, giving you a classic, lived-in vibe without shouting patterns.
I love how this simple wrap-around warmth hides flaws, yet still reads polished.
Here’s how to pull it off:
- Select narrow planks for a tight, tidy look
- Paint softly or stain to suit your cabinets
- Seal seams for moisture defense
- Add a light, airy trim for definition
Classic Woodgrain Appeal
Classic woodgrain speaks softly but makes a bold statement.
I love shiplap or beadboard for a cozy, classic kitchen, because texture hides mess and reflects warm light.
You don’t need a full teardown—just slap on panels, stain or paint, and caulk seams.
Practical magic: clean lines, timeless charm, and quick upgrades that feel thoughtfully intentional.
Ready to level up?
Timeless Panel Details
Timeless panel details nail that cozy, classic vibe without turning your kitchen into a museum.
I love how shiplap or beadboard adds warmth, balance, and easy maintenance—no frills, just character.
Let’s outline quick wins that won’t overwhelm your weekend project.
- Pick a width that fits your space
- Match paint to countertops for cohesion
- Use PVC or painted boards for durability
- Add a slim, rounded edge for softness
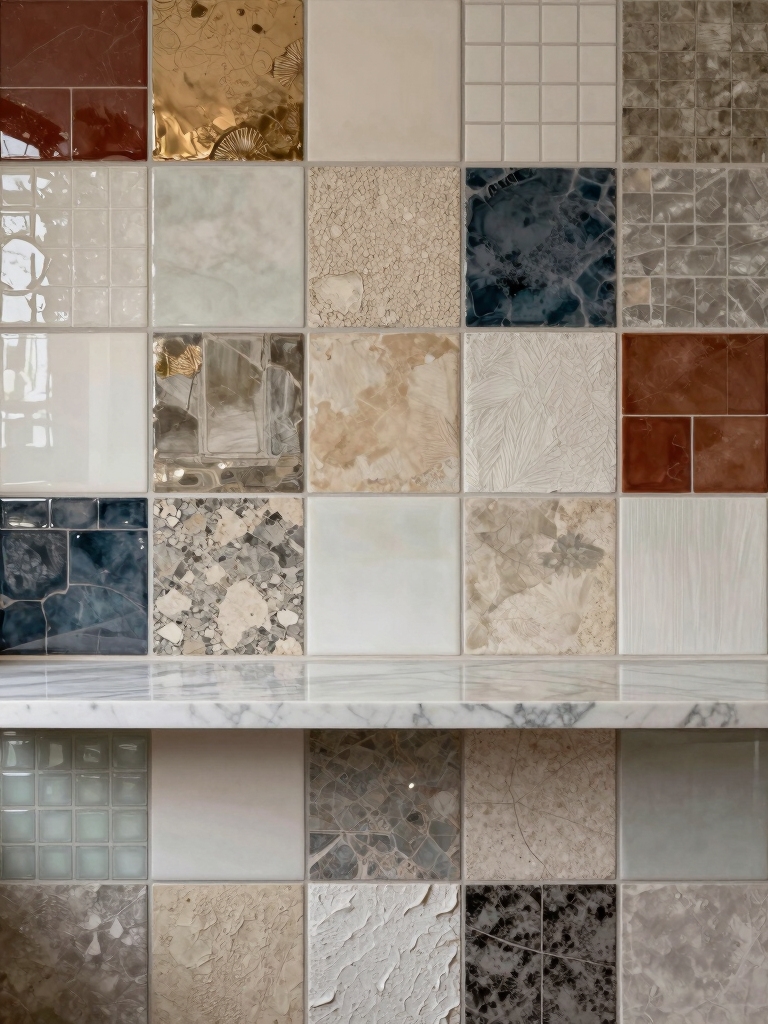
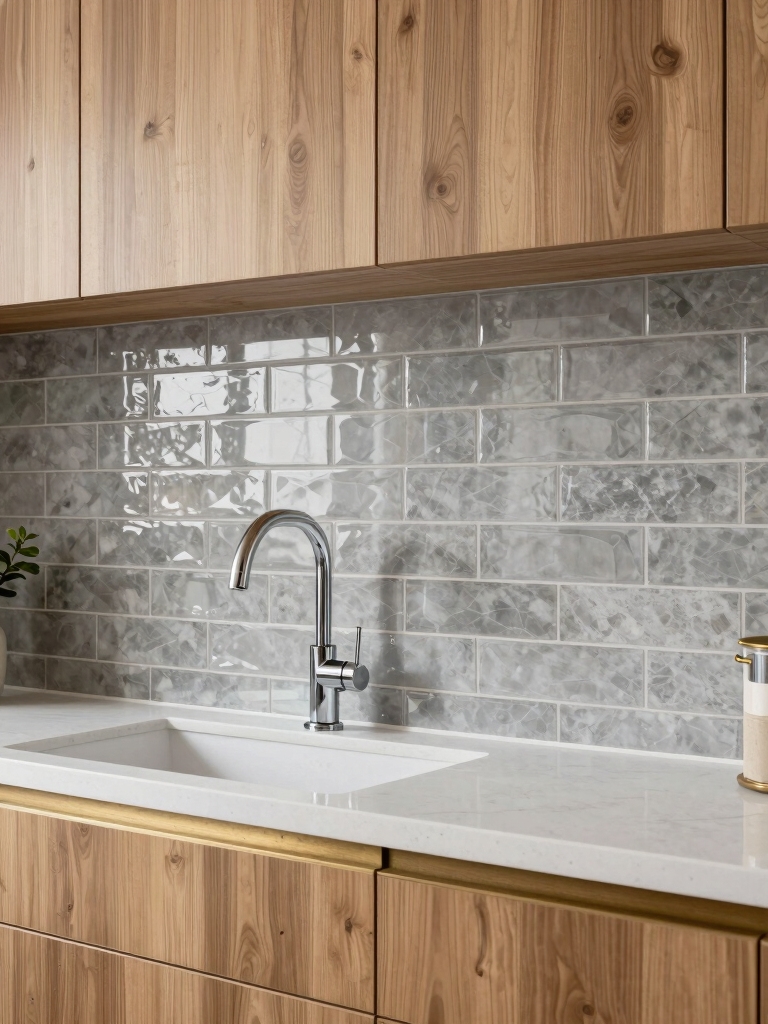
Glass Subway Tile on a Budget: What to Know
Want to know if glass subway tile can shine on a budget? I’ll be honest: it can, with smart picks and careful planning.
Choose back-painted sheets or high-clarity recycled glass for brightness without the price tag. Skip oversized formats; go for 3×6 or 4×8 to minimize cuts.
Grout in a pale, moisture-friendly shade for that clean, reflective finish. Budget-friendly brilliance, assured.
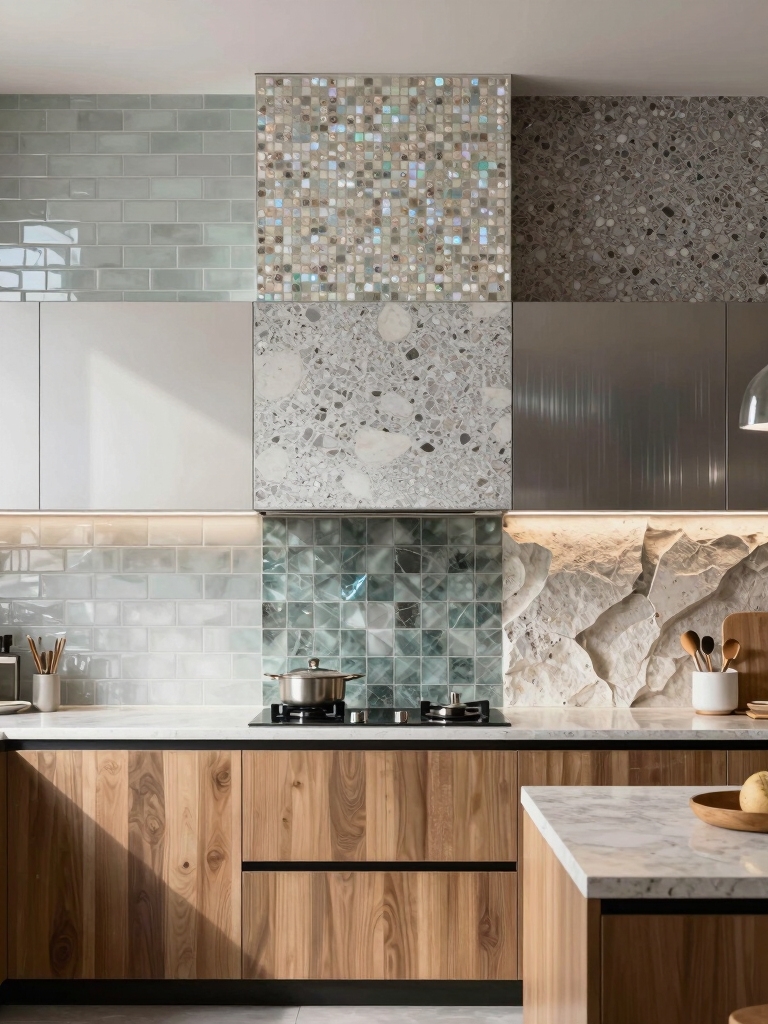
Metallics and Iridescent Accents That Pop
Metallics and iridescent accents are where kitchen spark becomes personality. I love them because they catch light, not attention, and elevate a plain backsplash with minimal effort.
Here are quick picks I actually use:
- Brushed nickel tile frames for depth
- Iridescent glass in a small band
- Copper accents around a hood
- Matte chrome grout for contrast
Mosaic Ideas With Simple, Store-Bought Pieces
If you’re chasing a high-impact mosaic without the hassle, start with simple, store-bought pieces and mix them like you mean it.
I mix bold tiles with calmer neutrals, then stagger grout lines for energy. Keep cuts clean and predictable, using a tile nipper for curves.
Priced right, they’re forgiving, adaptable, and surprisingly chef’s-kiss easy to install. Enjoyable, practical, and durable.
Epoxy Resin Splashes: Achieving a Cohesive Look With Counters
Epoxy resin splashes can tie your backsplash to the counters like a matching set, and the key is deliberate cohesion, not confusion.
I’ll show you simple steps to keep tones aligned, not loud contrasts.
- Choose neutral base colors that echo counter tones
- Add subtle swirls for depth, not chaos
- Seal edges for a seamless shift
- Test with a quick wipe to guarantee consistency
Tile Paint: When to Use and How to Seal
Tile paint can be a smart move when you want a fast, budget-friendly backsplash that still looks polished, especially on ceramic or glass tiles with decent glaze.
I’ll walk you through when to use it—like temporary updates or combo walls—plus sealing tips.
Choose enamel or epoxy paints, prep well, and seal a couple of coats.
Quick, clean, and surprisingly durable.
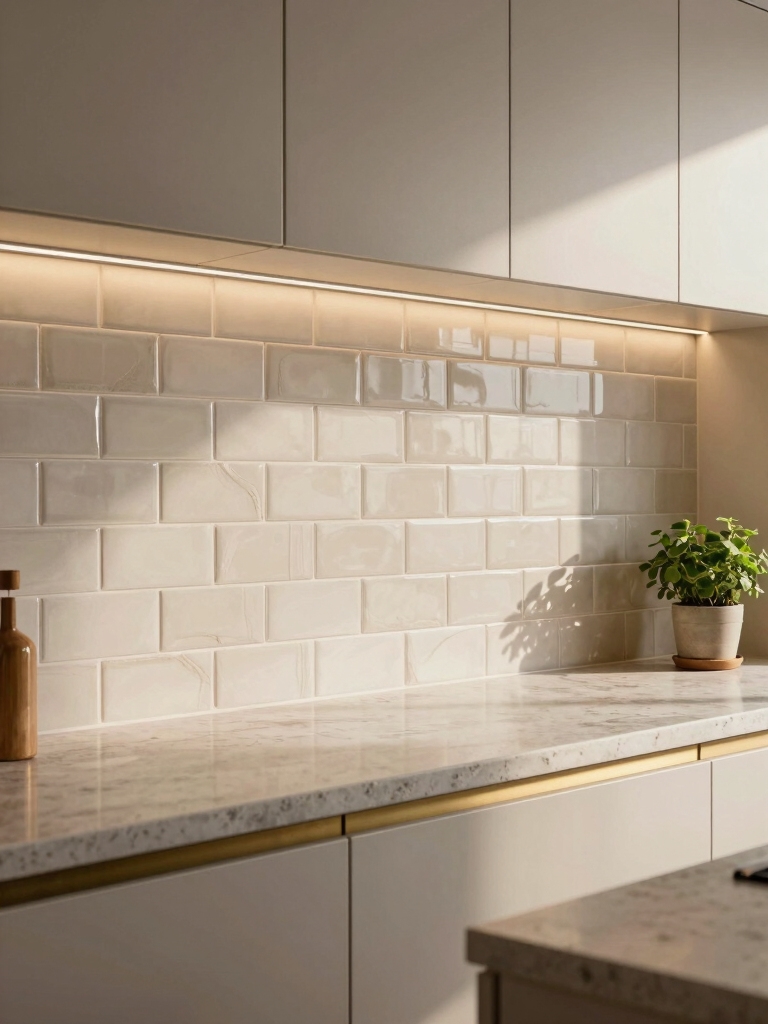
White Backsplashes to Brighten Kitchens: Tips and Tricks
White backsplashes brighten any kitchen in a snap, and I’ll show you how easy it’s to keep that glow with minimal fuss.
They’re budget-friendly, wipe-clean heroes that stay shiny with a quick wipe and a dab of elbow grease—no drama required.
Let’s chat simple ideas for easy shine, from crisp whites to glossy textures that pop without breaking the bank.
White Brightens Kitchens
White backsplashes can brighten a kitchen instantly, reflecting light and making the space feel bigger and cleaner.
I’ll show how white works without boring you.
- Reflects daylight, creating an open vibe
- Pairs with any color, from bold to soft
- Hides minor scuffs with a quick wipe
- Keeps countertops looking crisp and fresh
Easy Clean, Easy Shine
If you loved how white backsplashes brightened the room, you’ll love how easy they’re to keep sparkling.
I’ve learned simple tricks: wipe with a microfiber cloth, use mild soap for everyday grime, and buff with a dry towel for shine.
No harsh scrubs, no streaks—just steady habits that make white surfaces stay crisp and inviting.
Budget-Friendly White Ideas
Here are a few budget-friendly white backsplash ideas that brighten kitchens without bright-on-the-wallet angst.
I’ll keep it simple, practical, and a little witty, so you feel confident trying these.
- Peel-and-stick subway tiles for fast, clean lines
- White beadboard panels with sealant for texture
- Glossy contact paper over existing tile edges
- Painted shiplap for a warm, inexpensive glow
Patterned Tile Layouts You Can Master in a Weekend
Patterned tile layouts can transform a kitchen in a weekend, and the trick is picking a pattern that suits your space and skill level.
I’ll walk you through simple options, like brick, herringbone, or checkerboard, with clear steps and quick fixes. You’ll measure twice, cut once, and trust your eye.
Ready to make a bold, doable statement? Let’s get started.
Sealing, Maintenance, and Cleanup for Lasting Impact
Sealing, maintenance, and cleanup aren’t glamorous, but skimp on them and your backsplash won’t last.
I keep things simple: a quick seal, routine wipe-downs, and smart fixes before they snowball.
Here are four practical tips:
- Re-seal every couple of years.
- Wipe spills immediately with a damp cloth.
- Use non-abrasive cleaners.
- Inspect grout lines monthly for cracks.
Budgeting Smartly: A Practical Checklist to Plan and Avoid Overages
Budgeting smartly isn’t glamorous, but it sure saves headaches when you’re turning a kitchen into a backsplash haven. I map every item, compare prices, and pencil in taxes and waste.
My practical checklist: set a ceiling, list must-haves, estimate leftovers, add 10%, and track receipts. If a sale tempts me, I pause, question necessity, and stay focused on the plan.
Conclusion
Chances are, you’ll conquer a weekend backsplash and still have time for coffee. I found that 68% of DIYers save money by peeling back tile trends to simpler options—peel-and-stick, paint, or quick sheets. Not bad for a couple of days’ work, right? My advice: start with a clear plan, pick one standout idea, and don’t overthink sealing. If it looks good from across the room, you’ve won. Now go backsplash like you mean it.