
I’ve got 17 genius kitchen budget hacks under $500 that actually refresh your space without tearing out cabinets. Start with a 7-step plan, prioritize must-haves, and track every dollar. Swap hardware for a cohesive look, add peel-and-stick backsplash, and use smart storage to reclaim counter space. Peel-and-stick floors, chic lighting, and clever zones keep things stylish and functional. You’ll love the quick, high-impact updates—and there’s more coming if you keep going.
What You Get for Under $500: A Real Kitchen Refresh

For under $500, a real kitchen refresh is absolutely possible, giving you noticeable upgrades without overhauling your space.
I start with small, high-impact changes—new hardware, peel-and-stick backsplash, fresh paint, and upgraded lighting.
I pick budget-friendly organizers and a chic, cohesive color story.
You’ll see instant polish, better functionality, and a kitchen that feels like you, without the debt. Additionally, incorporating budget-friendly kitchen remodel swaps can help maximize your savings even further.
Create Your 7-Step Budget Blueprint (Under $500)

I’ll walk you through a simple, 7-step budget blueprint that stays under $500 without skimping on style.
We’ll map out our budget, spot savings in plain terms, and keep the plan actionable for real-world remodels.
Let’s grab your numbers and start planning with clear goals and chic, practical steps. Additionally, implementing budget-friendly ideas can help maximize the style and functionality of your space.
Budget Planning Blueprint
Let’s map out a seven-step budget blueprint you can actually stick to, all under $500.
I’ll guide you with clear goals, prioritized needs, and real costs.
Step one: list essentials;
step two: estimate, not guess;
step three: allocate a small contingency;
step four: track every dollar;
step five: cut nonessentials gracefully;
step six: review weekly;
step seven: celebrate progress chicly.
Additionally, consider incorporating inspiring remodel ideas that can elevate your kitchen’s aesthetic without breaking the bank.
Simple Savings Tactics
Before you plunge into it, I’ll show you how simple savings can power a sleek kitchen remodel under $500.
I map a 7-step blueprint, prioritizing must-haves, repurposed pieces, and smart coupons.
I’ll compare vendors, set a tight budget, track every dollar, and choose durable, chic finishes.
You’ll save without sacrificing style, turning budget hints into practical, elegant upgrades. Additionally, consider implementing chic kitchen upgrades that look surprisingly expensive to elevate your space even further.
Paint Hacks for a Bold Kitchen Makeover

A bold kitchen makeover starts with a daring paint plan: choose one statement wall or a cohesive palette that ties together cabinets, countertops, and hardware.
I’ll suggest matte neutrals with a pop of color on trim or an accent panel for depth.
Use quality brushes, primer, and two coats for vivid, lasting impact.
Refresh lighting to complete the chic, budget-friendly transformation. Incorporating large window styles in your design can also help to flood your cooking space with natural light.
Upgrade Hardware Without Replacing Cabinets

Upgrading hardware is my go-to move when I don’t want to tear out cabinets.
I’ll show you how simple swap-outs and budget-friendly upgrades can refresh the look without the mess.
Let’s talk smart choices for chic pulls and knobs that elevate your whole kitchen. Incorporating kitchen cabinet organization techniques can further enhance the functionality of your space while maintaining a stylish appearance.
Swap Cabinet Hardware
Swapping cabinet hardware is a quick, budget-friendly upgrade that instantly elevates the look of your kitchen without touching the cabinets themselves.
I’m sharing simple steps you can follow today:
- Measure hole patterns for accuracy
- Pick cohesive finishes that match faucets
- Swap pulls and knobs in minutes
- Tighten screws, wipe fingerprints, admire the chic transformation
Additionally, upgrading hardware can significantly enhance the overall aesthetic of your kitchen while keeping your remodel costs low.
Budget-Friendly Upgrades
If you’re aiming to refresh your kitchen without tearing out cabinets, start with hardware as a fast, high-impact upgrade.
I’m showing you budget-friendly tricks: swap knobs and pulls for cohesive metal tones, scrub and update hinges with hidden options, and seal mismatched finishes with a unifying oil-wurnished glaze. Upgrading your kitchen cabinets with simple hardware swaps can significantly enhance the overall aesthetic of your space.
Small changes, chic feel, big effect—no demolition required.
Peel-and-Stick Backsplash for Immediate Style
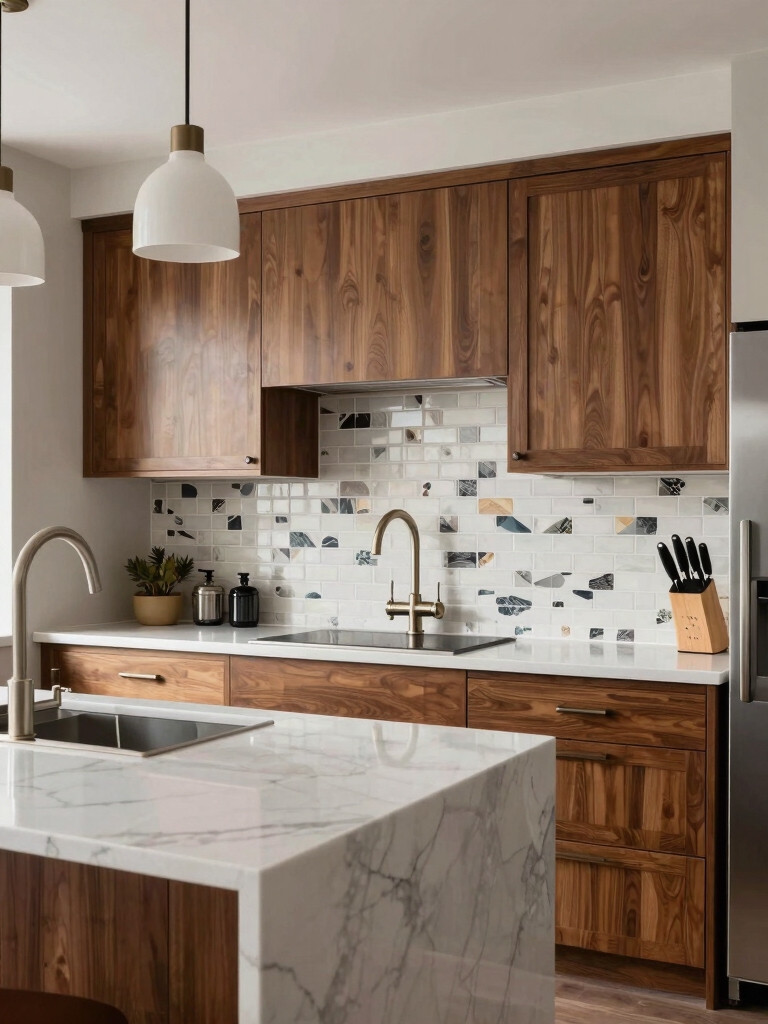
Peel-and-stick backsplashes deliver instant style with zero mess or tools, so you can transform your kitchen in a weekend.
I love how simple it is, and you’ll too.
- Snap tiles in place with a light press
- Trim with scissors for perfect edges
- Peel guiding backing for clean lines
- Wipe‑down finish to reveal chic vibes
Lighting Tricks That Brighten Your Kitchen on a Budget
I’ve got simple lighting tricks up my sleeve that layer light without wrecking the budget.
We’ll cover Layered Light Layers, quick Budget Brightening Tips, and Colorful Fixture Tricks to spark interest and efficiency.
Stick with me and we’ll brightens the kitchen with style, not spend.
Layered Light Layers
Layered lighting is my go-to for bright, welcoming kitchens, because it combines function with mood—bright ceiling light for chores, warm task lights for prep, and soft accents that make evenings feel cozy.
- Ceiling glow
- Under-cabinet warmth
- Dimmed accents
- Cozy corner lamps
Budget Brightening Tips
Now that we’ve layered in light to set the mood, I’ll show you how to brighten your kitchen without blowing the budget.
I swap dull bulbs for bright, efficient LEDs, place under-cabinet strips, and aim for even coverage.
I keep fixtures minimal, reflectors polished, and surfaces light. Quick tweaks boost opacity and mood, while saving on power and clutter.
Colorful Fixture Tricks
Colorful fixture tricks can brighten your kitchen on a budget without sacrificing style.
I choose playful, affordable updates you can actually use. Here are ideas that pop:
- Swap lamp shades for bold colors
- Add pendant bulbs in varied hues
- Install RGB LED strips under cabinets
- Paint or wrap existing fixtures in a chic tone
Countertop Makeovers That Don’t Replace Surfaces
If you don’t want the hassle or cost of replacing your countertops, there are plenty of smart makeover options that refresh the look without tearing out surfaces.
I’m sharing clever, budget-friendly moves: paint or seal, contact paper with high heat tolerance, and countertop decals for quick updates.
I’ll guide you through durable finishes, clean lines, and a chic, cohesive vibe—no demolition needed.
Clever Storage Solutions for Small Kitchens
Smart storage can transform a small kitchen from cramped to cohesive, so I’ve packed in practical, stylish ideas you can implement this weekend.
- Use wall-mounted hooks for pots and mugs
- Install a magnetic strip for knives and metal tools
- Opt slim, stackable containers to maximize cabinet depth
- Add a rolling cart to free counter space
Clean, clever, chic efficiency.
Budget-Friendly Layout Tweaks: Open-Feeling Tricks
Open-feeling tweaks start with smart sightlines and uninterrupted surfaces that make a kitchen read as bigger and calmer.
I’ll guide you to declutter visually, choose cohesive colors, and keep zones intuitive.
You’ll notice elevated space by mirroring textures and using minimal hardware.
Swap busy backsplashes for subtle, reflective tiles and position furniture to preserve flow, not crowd it.
Practical chic, always.
Budget Flooring Upgrades: Peel-and-Stick & Rugs
I’m loving how peel-and-stick options can transform a kitchen without a full remodel, and I’ll show you the solid pros that actually hold up.
I’ll also share rug pairing tricks to layer warmth and style without breaking the budget.
Let’s cover budget flooring hacks that keep it chic, practical, and easy to install.
Peel-and-Stick Pros
You can cheaply refresh a kitchen floor by choosing peel-and-stick options or layering with area rugs, and I’ll show you how to get a polished look without overhauling your space.
- Quick installation
- Wide design variety
- Cost-friendly upgrades
- Easy maintenance
Peel-and-stick wins for speed, versatility, and a chic finish that stays within budget.
Rug Pairing Tricks
Choosing the right rug pairing can tie together peel-and-stick flooring and tied-together accessories, and I’ll show you simple rules to make it look intentional—without breaking the bank.
I suggest a rug that anchors the space, a complementary color, and varied textures for depth.
Keep scale: three feet wider than furniture. Finish with a minimal runner for flow and polish.
Budget Flooring Hacks
If you’re aiming for a chic, budget-friendly update, peel-and-stick flooring and a thoughtfully chosen rug can transform a space without a big investment.
I share practical steps you can trust:
- Measure precisely to minimize waste
- Choose a durable peel-and-stick with a textured finish
- Layer rugs for depth
- Mind color palettes to unify the room
Done, stylish, affordable.
Create 3 Functional Zones Under $100
To create three functional zones under $100, I’ll start by identifying the core tasks in your kitchen — prepping, cooking, and cleanup — and then corralling tools and spaces to each area.
I’ll reuse existing surfaces, stackable organizers, and inexpensive labels to keep flow smooth.
Keep zones compact, reachable, and visually cohesive for practical, chic efficiency.
Small Details, Big Impact: Accessorize on a Budget
Small details can transform a practical kitchen into a polished one, even on a tight budget.
I show you how to accessorize without clutter.
1) Swap hardware: matte black drawer pulls for instant edge
2) Display cookbooks vertically for color and texture
3) Add a single shaded vase or bowl as a focal point
4) Layer hooks and accents to free counter space without fuss
Maximize Natural Light Without Renovation
Natural light can transform a kitchen, so I start by maximizing what’s already there.
I use sheer curtains to soften glare, mirror-backed trays to bounce brightness, and strategically placed plants near windows for depth without clutter.
I repaint walls in a bright, warm shade, declutter surfaces, and choose light-toned countertops.
No renovations needed—just smarter angles, minimalism, and welcoming ambiance.
Smart Appliance Placement for Efficiency
Smart appliance placement isn’t about cramming gadgets into every corner; it’s about making the workflow glide.
I map zones, align the fridge, prep space, and cleanup within arm’s reach for efficiency and glare-free mornings.
- Fridge near prep area
- Sink and trash within easy reach
- Stove opposite prep for smooth sauté
- Coffee station by the breakfast nook
Luxe-Looking DIY Tile Alternatives
Luxe-looking tile can transform a space without breaking the bank, and you can achieve it with smart DIY choices.
I explore affordable alternatives like peel-and-stick patterns, stencil-printed panels, and faux tile decals that mimic grout lines.
With careful placement and color tricks, a cohesive, high-end vibe appears.
I keep corners crisp, maintenance simple, and style consistent.
You’ll love the chic payoff.
One-Week Makeover Plan (Step-by-Step)
I loved showing you affordable tile alternatives, and now we’ll lock in a practical, week-by-week plan to pull this remodel off without blowing the budget.
- Audit essentials and set a target
- Source chic, budget fixtures and paint
- Declutter, prep surfaces, prime efficiently
- Implement color, texture, and lighting upgrades
You’ll see results fast, with smart choices and stylish cohesion.
Maintenance Habits to Keep Your Kitchen Fresh
To keep your kitchen feeling fresh long after the remodel, I prioritize simple, daily habits that prevent buildup and preserve the look you’ve chosen.
I wipe counters after prep, declutter weekly, and run a quick sink-cleaning routine nightly. Filtered water, proper trash separation, and a drying rack keep surfaces clear.
Regular seal checks and vent care maintain that chic, low-maintenance vibe.
Conclusion
You’ve got this—your dream kitchen is within reach, even on a budget. Think of it like a little garden: plant smart ideas, water them with effort, and watch chic results sprout. Start with a clear plan, then layer in paint, hardware, and peel-and-stick style until it wows without the wrecking crew. Remember, small changes create big impressions, and consistency beats flash. So refresh boldly, save thoughtfully, and enjoy every stylish, practical day in your refreshed space.


