I’m here to help you refresh oak cabinets without a full redo. Start by deciding between a refresh or a swap: sand, stain, and seal for depth, or swap doors for a modern profile while keeping the rustic charm. Add warmth with darkened, durable finishes paired with warm neutrals, and swap hardware for a quick transformation. Layer lighting and add practical touches like pull-out organizers. If you want more details, I’ve got step-by-step plans and timelines to share.
Do You Need to Refresh or Replace Oak Cabinets?

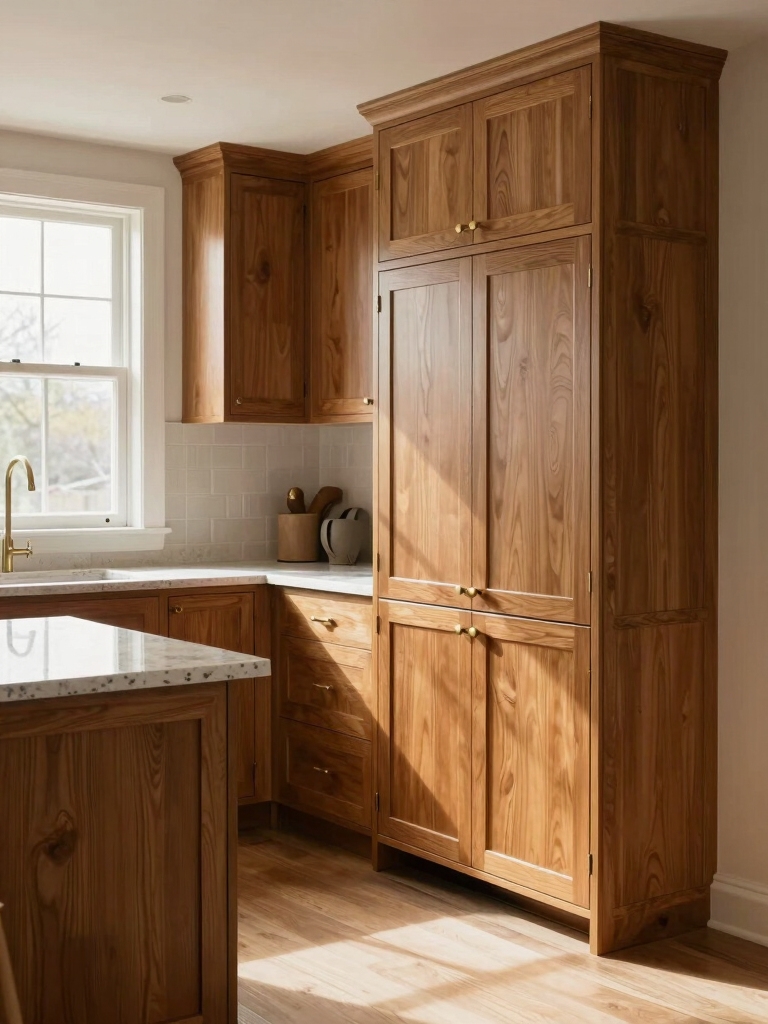
Do you need to refresh or replace oak cabinets? I’m hearing you—oak brings warmth, but trends evolve.
I inspect grains, hardware, and joints, then decide: refresh with a sand, stain, and seal for a richer glow, or swap doors for a modern profile.
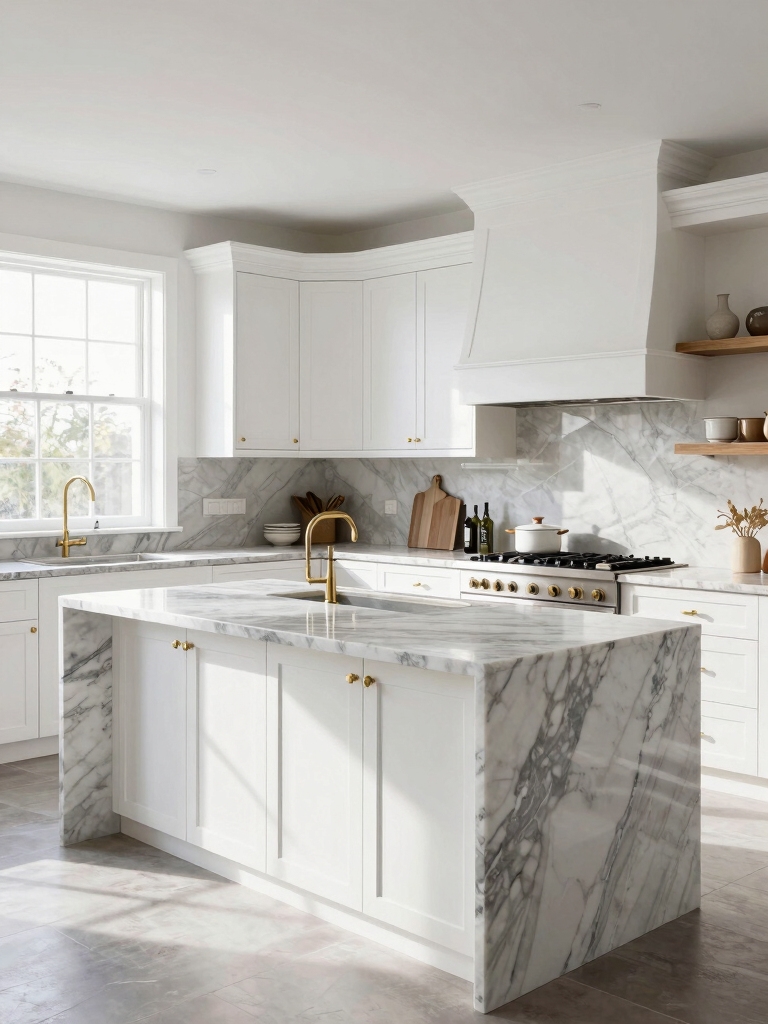
I’ll guide you to balance durability, budget, and style, keeping rustic-chic charm intact, without overhauling the heart of your kitchen. Timeless white cabinets can also complement the warm tones of oak while offering a fresh, modern look.
Modern Color Options for Oak Finishes

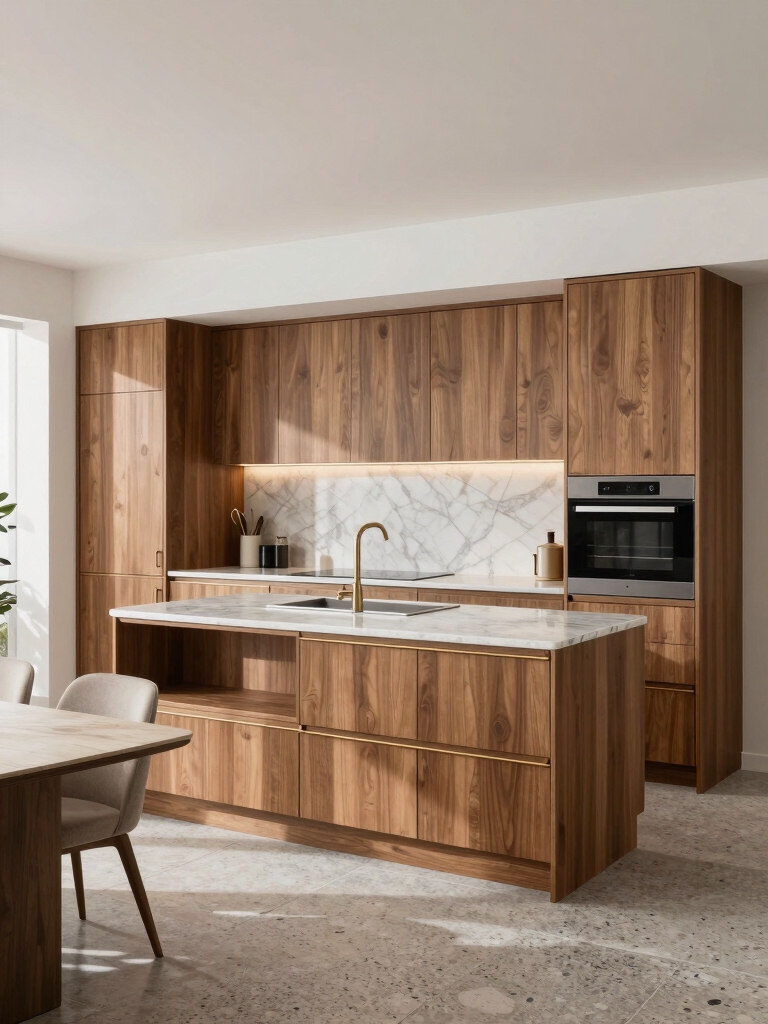
Here’s how I’d play with oak’s color drama: I’m drawn to darkened finishes that deepen grain character while keeping the wood’s warmth, and I’ll pair that with warm neutral tones to soften edges.
The result feels timeless and rustic-chic, still everyday-friendly in a busy kitchen.
Let’s explore how subtle stain picks and tinted neutrals can transform oak without masking its natural personality. Additionally, incorporating cream cabinets can enhance the overall elegance of the kitchen design while complementing the oak finishes.
Darken Oak Finishes
Darken oak finishes bring a warm, grounded feel to any kitchen remodel, and I like how they deepen grain and character without masking it. I pick true stains or layered glazes that whisper rather than shout, preserving texture. My goal is tactile depth—smoke, espresso, or charcoal—paired with matte hardware, clean lines, and practical durability for real-life kitchens. This approach beautifully complements charming oak kitchen cabinets, offering an inviting atmosphere that feels both modern and timeless.
Warm Neutral Tones
Warm neutral tones bring oak finishes into a soft, wearable warmth that still reads as modern. I lean toward soft beiges, greiges, and warm grays to complement grain without overpowering it. I mix matte and satin sheens for depth, then let natural light reveal subtle shifts. The result feels timeless, approachable, and ready for everyday, farmhouse-inspired living. Incorporating warm grey kitchen ideas can enhance the inviting atmosphere while maintaining a contemporary edge.
Should You Topcoat or Stain for Durability?
Choosing between a topcoat and stain comes down to durability and upkeep, and I’ll tell you what that means for your oak kitchen—less time sanding, more time enjoying it.
A topcoat shields against wear and shows less color change over time, but it needs reapplication every few years; stain lets the grain glow yet may fade or require fresher coats sooner. Additionally, opting for a durable backsplash material can enhance the overall aesthetic while increasing your home’s value.
Whichever path you pick, I’ll walk you through how it ages, what maintenance looks like, and how to preserve color without sacrificing the warm, rustic vibe you’re after.
Durability of Topcoat vs Stain
Durability comes down to how you protect the wood you’ve chosen, and in this case, the choice between a topcoat and a stain isn’t just about color—it’s about lasting wear.
I weigh protection, UV resistance, and ease of touch-ups, then pick accordingly. Topcoats guard against water and scratches; stains deepen grain while aging gracefully. Choosing the right durable flooring choices for your kitchen can also enhance the overall resilience of your space.
The right combo sustains beauty with minimal upkeep.
Maintenance and Reapplication Needs
Maintenance and reapplication aren’t as scary as they sound; I’ll walk you through how often you’ll need to refresh, what signs to watch for, and how to decide whether a topcoat or stain serves longer between projects.
Wood ages gracefully when cared for, with tiny liftings, dull spots, and edge wear signaling recoat time. Choose based on use, finish, and wipeability expectations. Additionally, white oak kitchen cabinets can enhance the warmth and timelessness of your space, making them a popular choice for renovations.
Appearance and Color Retention
Wood ages with a gentle patina, and the color story you chose for your oak should stay true as it wears.
I’m telling you honestly: topcoat for durability, stain if you crave a richer hue, but test first. A satin finish balances protection with glow. The right choice can enhance luxury countertop materials that complement your kitchen’s aesthetic.
Clean, sand, seal, and monitor wear; touch up promptly to preserve character.
Brighten Oak With Soft Whites and Warm Neutrals

Soft whites and warm neutrals breathe new life into oak by softening its grain and amplifying natural warmth; I’ll show you how to pair finishes, fabrics, and textures for a cohesive, inviting kitchen.
I start with creamy walls, then layer linen drapes, woven rugs, and ivory accents to mute yellowing and highlight grain.
Subtle contrast keeps it grounded and timeless.
Swap Hardware to Transform Oak Cabinets

Swapping hardware is the quickest, most visible way to transform oak cabinets.
I pick pulls and knobs that echo rustic charm—weathered brass, matte black, or aged nickel—then mount them with careful alignment for clean lines.
A small upgrade, but the impact feels big: tactile handles, lighter reflections, and cabinets that finally feel personalized, warm, and invigoratingly simple.
You’ll notice instantly.
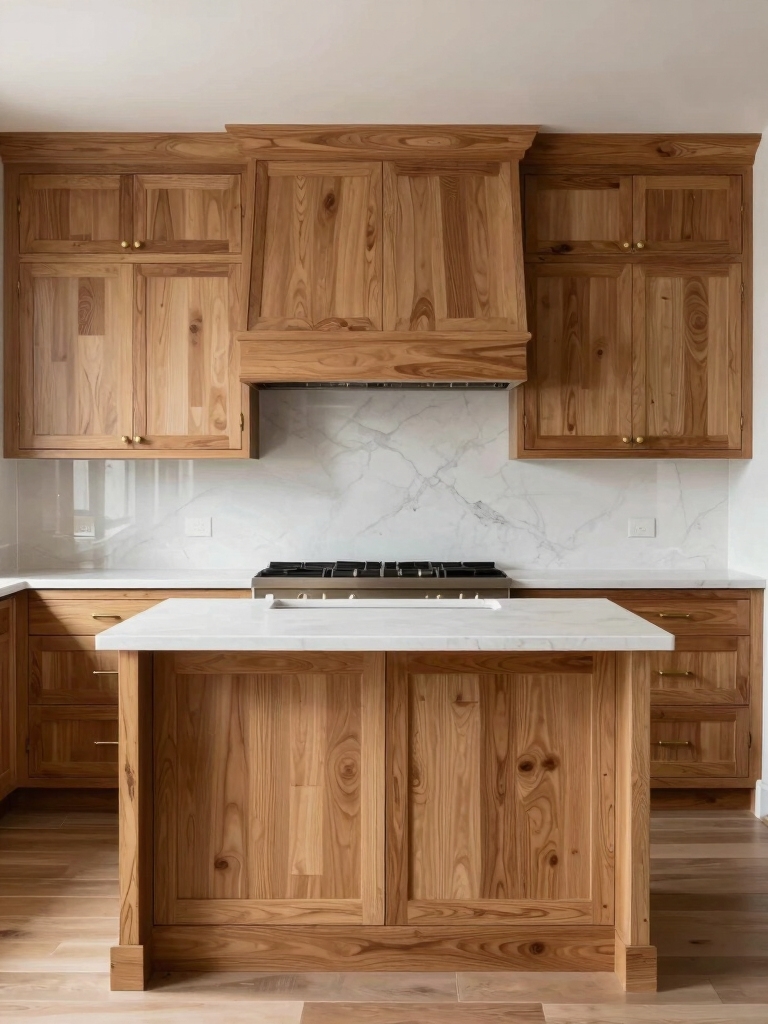
Pair Oak With Durable Countertops
Pairing oak with sturdy countertops anchors the kitchen’s look, so I’m picky about materials that stand up to daily use while keeping the room warm.
I lean into granite, quartz, or soapstone for durability and character, avoiding busy patterns that fight the grain.
Subtle textures, warm tones, and clean edges keep the oak honest and inviting.
Lighting Upgrades to Highlight Oak Grain
Lighting up the oak grain starts with choosing fixtures that draw the eye without shouting.
I pick warm, dimmable bulbs and soft metal tones that enhance grain patterns without overpowering the room.
Layered lighting—pendants, under-cabinet glow, and a subtle ceiling wash—creates depth.
I avoid glare, favor contrast, and let natural tones guide the eye across the wood.
Refresh Doors and Drawer Fronts With DIY Details
I’m itching to share simple DIY door details that add character without chaos.
Fresh front finishes and drawer face upgrades are all about textures, gessoed rims, and a touch of hardware that sings with the oak.
Let’s walk through practical steps I use to bring these pieces from plain to polished, one thoughtful detail at a time.
DIY Door Details
When you refresh doors and drawer fronts with DIY details, you’ll transform the whole kitchen without replacing the cabinets.
I lean into simple trims, subtle beadwork, and weathered hardware to echo farmhouse charm. I measure twice, cut once, and seal edges to resist humidity.
Aged glaze highlights grain, while clean lines keep it modern. Your doors become character-filled, durable focal points.
Fresh Fronts Finishing
Fresh fronts can transform your kitchen without a full cabinet swap, and I’m here to show you how.
I’ll guide you through simple touches that refresh doors and drawers with character.
1) Sand and re-stain for depth
2) Add contrasting trim edging to frame panels
3) Distress edges lightly, seal with matte finish
Drawer Face Upgrades
Drawer face upgrades can give your kitchen a new personality without the fuss of a full swap.
I’ll show you how to swap only the fronts, add routed details, and seal with a matte, beeswax finish.
Think plywood-backed panels, warm grain, and minimal hardware.
DIY tweaks? I’ll guide you step-by-step, keeping projects manageable and beautifully cohesive.
Add Clever Organizers to Replace Wasted Space
To reclaim wasted space, I’m adding clever organizers that make every inch count, so my Oak Kitchen Remodel feels both practical and inviting.
I’ll still keep a rustic-chic vibe, but with precise, useful details that you can replicate.
- Pull-out spice drawer on a narrow rail
- Deep pantry lazy susan with labeled sections
- Adjustable shelf dividers for cookware and lids
Backsplash Ideas That Complement Oak Cabinets
Backsplash ideas that complement oak cabinets start by acknowledging the warmth and grain of the wood and then choosing materials and patterns that enhance that character.
I lean toward earthy tones, textured tiles, or soft glass to mirror natural light.
Subways or honeyed herringbone add subtle contrast, while metallic trims echo cabinet handles.
The goal: cohesion, not competition, with this warm kitchen heartbeat.
Floor and Rug Accents That Harmonize With Oak
I’m choosing floor palettes and rug textures that play nicely with oak, aiming for a cohesive, warm backbone for the room.
I’ll look for subtle contrasts in color, plus tactile details that invite lingering feet—think woven fibers and softly brushed finishes that echo the wood’s grain.
Let’s balance oak’s tone with grounded hues and patterns that feel practical yet quietly refined.
Floor Palette Harmony
Oak frames this floor plan with warmth, so the palette should echo that natural glow while keeping things grounded and a touch adventurous.
I guide your eye with cohesive tones that breathe modern rustic charm, avoiding clutter.
- Warm oak and stone neutrals
- Subtle charcoal accents
- Woven fiber rugs in earthy hues
Rug Texture Coordination
Texture is where oak truly shines, so I’ll choose rugs and floor accents that echo its warm grain without fighting it.
I pair flat-weave textures with low pile backups, so the room breathes. Natural jute, soft wool, and a charcoal sisal ground the space, while subtle patterns mirror the grain’s movement.
Finish with a matte seal for cohesion.
Oak Tone Balance
Rounding out the look means balancing the tones so oak doesn’t shout or fade into the walls; it’s about letting the floor and rugs speak in a way that deepens the warmth I’ve already built with grain.
I choose:
- Soft beiges and warm taupes
- Deep charcoal accents
- Textured jute vs. smooth sisal
Cleaning and Maintenance for Lasting Oak Glow
Caring for oak isn’t about grand gestures, but steady routines: wipe spattered spills promptly, dust with a soft cloth, and seal the surface every few years to keep that warm, honeyed shine.
I keep a simple routine: wipe daily, polish monthly with a satin-non-slip conditioner, and address scratches gently.
Avoid harsh cleaners; choose mild soap, rinse, dry, and recoat for lasting glow. Rustic, practical, enduring.
A Practical Budget Plan for a Big Oak Refresh
Now that we’ve got a steady routine for keeping oak’s glow, it’s time to map out a practical budget plan for a big refresh.
I’ll guide you with clear, doable numbers, prioritizing quality and longevity, so your kitchen still feels warm and timeless.
- Prioritize essentials and set a ceiling
- Allocate for durable finishes and tools
- Build a contingency for surprises
Plan and Workflow: a Step-By-Step Refresh Timeline
With a clear plan in hand, I’ll walk you through a step-by-step refresh timeline that keeps oak’s warmth front and center.
First, I map zones: prep, de-dust, and finish, then sequence tasks to minimize downtime.
Next, I set realistic milestones, daily checklists, and a soft buffer.
Finally, I review, tweak, and celebrate small wins—oak glow intact, workflow calm, results true.
Conclusion
I tucked a little sun into our oak, letting soft whites and warm neutrals wash over the grain like pale morning light. The hardware glints, a friendly wink, and the cabinets breathe easier—never replaced, just refreshed. A simple plan becomes a cozy room: feet on a rug of quiet earth, shelves holding memories, a counter that gleams with elbow-grease pride. We didn’t chase perfection; we invited warmth to stay, and it did, in every careful detail.