I’ll show you a weekend-friendly plan to modernize your kitchen with minimal fuss: clean and degrease surfaces, sand glossy spots, fill holes, tape edges, prime quick‑dry areas, and paint in thin coats for crisp lines; swap hardware and refresh a backsplash or open shelf for instant impact.
Use satin or semi‑gloss where you’ll wipe often, pick a warm neutral plus one earthy accent, and peel tape while paint is tacky for sharp edges—keep going and I’ll cover timing, tools, and fixes.
What This Weekend Kitchen Paint Guide Covers

I’ll walk you through what this weekend kitchen paint guide covers so you know exactly what to expect: quick prepping steps, the tools and paint types that work best in a busy kitchen, simple techniques for cabinets and trim, and realistic time estimates so you can finish over a couple of days.
I’ll show practical, rustic tips for choosing finishes, minimizing mess, and pacing the work so it feels manageable and satisfying.
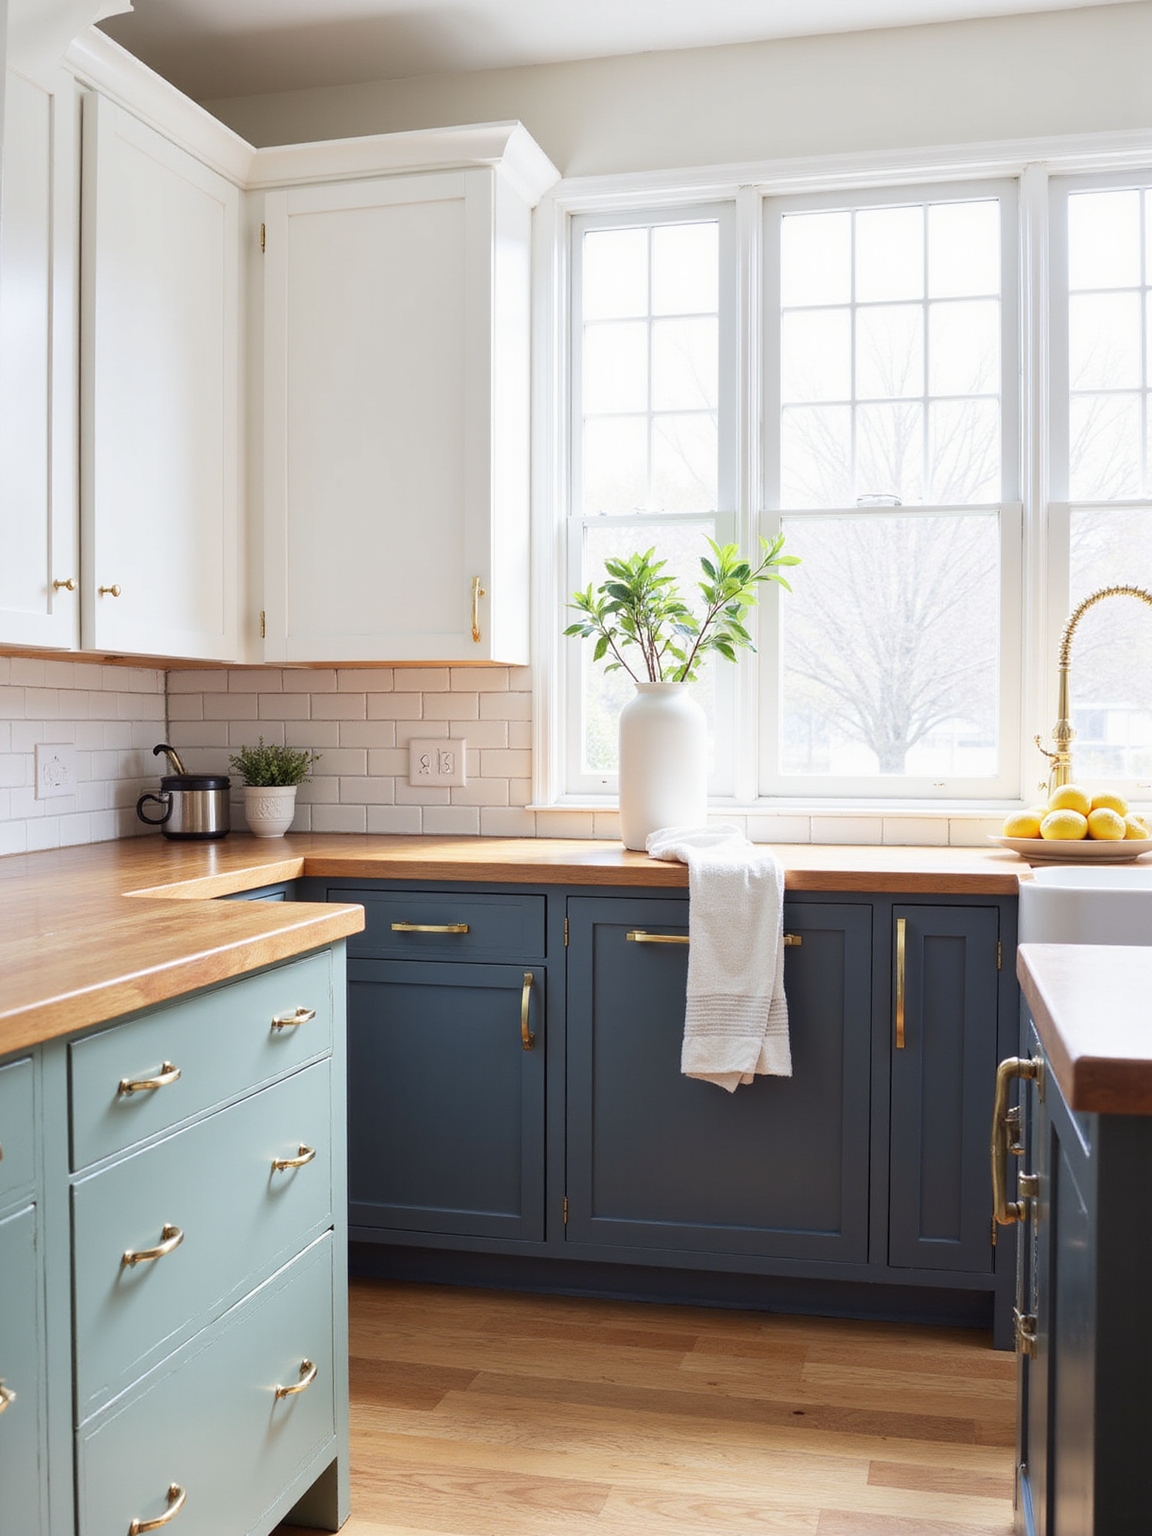
Designers often recommend sophisticated neutrals like soft greiges and muted blues for cohesive kitchen updates, which can help create an elegant, timeless look when paired with the right accents and paint finishes.
What You Can Finish This Weekend (Realistic Checklist)

Start by picturing what’s truly doable in a weekend and we’ll keep it simple: I can guide you through painting the walls, rejuvenating cabinet doors or just the faces and trim, swapping out hardware, and sealing a small island or butcher block—each task broken into bite-sized steps so you’re not pacing yourself between coats all weekend.
Consider adding smart storage solutions to keep newly cleared countertops looking great longer.
Choose a Modern Kitchen Paint Palette

I like to start with a neutral base—soft creams, warm greys, or buttery whites—that keeps the kitchen feeling open and timeless.
Then I pick one or two accent color pops, like deep navy or ochre, to give shelves, an island, or a door some personality.
Together they create a modern, cozy balance that’s easy to live with and tweak over time.
A neutral foundation combined with thoughtful accents is a core principle of Chic Neutral Kitchen Styling that helps kitchens remain stylish across trends.
Neutral Base Colors
I’ll usually reach for a soft, neutral base when I’m planning a modern kitchen palette, because neutrals let textures and wood tones sing without competing.
I pick warm greiges, creamy whites, or muted taupes to ground the space, then layer with natural materials for cozy depth.
- Warm greige for lived-in warmth
- Creamy white to brighten
- Muted taupe for subtle mood
- Soft clay for earthiness
Cabinet colors can make a home feel more luxurious when chosen intentionally, especially classic neutrals like greige and creamy white that elevate the room’s look and make your entire house look more expensive.
Accent Color Pops
After grounding the room in a soft neutral, I like to add one or two accent pops to bring personality without overpowering the calm.
I choose muted teal, terracotta, or deep olive for a cozy, modern feel. Use them on an island, open shelving backs, or a single wall.
Small doses refresh the space and keep the look intentional and lived-in.
Sage green pairs especially well to create a calming, natural vibe that complements those accents.
Pick Paint Types and Sheens for Kitchens

Think about how your kitchen gets used before you pick a paint type and sheen—I usually start by picturing morning chaos, greasy splatters, and the evening cleanup.
I choose washable, durable finishes that still feel cozy. Here’s what I consider:
- Satin for trim and easy wiping
- Semi-gloss for high-moisture spots
- Matte for cozy walls, forgiving texture
- Acrylic for quick drying and longevity
Keep your kitchen counter clutter-free with minimal rules that make daily upkeep faster and painting easier.
Buy Tools and Materials Before Saturday

Before Saturday, I’ll round up the essentials so we don’t get stuck mid-job—paint, trays, and the basics like tape and drop cloths.
I’ll pick quality brushes and a couple of good rollers that’ll give a smooth finish without shedding.
I’ll also stock up on prep materials—sandpaper, cleaner, and filler—so the cupboards and trim are ready to take the paint. I’ll swap out old knobs and handles for new hardware to instantly elevate the cabinets’ look.
Gather Essential Paint Supplies
I’ll make a quick list so we don’t get halfway through the weekend and realize we’re missing something important; for a kitchen paint refresh you’ll need quality painter’s tape, a couple of angled brushes, a 9– or 12–inch roller with a medium nap, drop cloths, a small putty knife, spackle, sandpaper (120– and 220–grit), a tray, and a good primer and paint suited for kitchens.
- Measure surfaces first
- Buy enough primer
- Pick washable paint
- Grab extra tape
Making your rental kitchen look custom can be surprisingly affordable with a few smart upgrades, like fresh paint on cabinets and walls to create a cohesive, updated look and budget-friendly upgrades that don’t violate lease terms.
Choose Quality Brushes & Rollers
Now that you’ve got the basics covered and a shopping list in hand, I want to talk about the brushes and rollers you’ll actually use—buying these before Saturday keeps the job running smooth.
I pick a 2½” angled brush for trim, a sash brush for corners, and a 9″ roller with a medium nap for cabinets and walls. Quality saves time and fuss.
Stock Up On Prep Materials
Don’t wait until the last minute—I always stock up on the little prep things that make the painting day flow: drop cloths, painter’s tape, sandpaper in a few grits, tack cloths, spackle, caulk, and a good caulking gun.
I keep a checklist so Saturday starts calm, not frantic. Gather basics, then enjoy the cozy rhythm of a weekend refresh.
- Heavy canvas drop cloth
- Blue painter’s tape
- Fine/medium sandpaper packs
- Tubes of clear and paintable caulk
Quick Prep: Clean, Sand, and Mask Fast
I roll up my sleeves and get the little things out of the way first: a quick wipe to remove grease, a light sand to give paint something to bite into, and careful taping to protect counters and trim.
I work methodically, using a degreaser, fine sandpaper, and painter’s tape. Clean edges save touchups later, and doing this fast keeps the weekend project feeling calm and doable.
Weekend Cabinet Paint Plan: One‑Day Method
With a clear plan and the basics ready, I’ll walk you through a one‑day cabinet paint method that keeps things simple and satisfying.
I’ll guide you through staged work so you finish by evening, leaving cabinets smooth and fresh without dragging it out.
- Tackle one face or door at a time
- Use quick‑dry primer and paint
- Dry between coats in a warm spot
- Rehang when fully cured
Refresh Cabinet Hardware to Match Paint
When I repaint my cabinets, I like to swap in hardware finishes that complement the new color — warm brass for cream, matte black for deep green — so everything feels intentional.
I also check mounting holes and spacing because new pulls sometimes need different placement or a little filler and touch-up.
Let me show you quick ways to choose finishes and update hardware without a full remodel.
Choose Complementary Finishes
Start by matching your cabinet hardware to the mood your paint creates — it’s a simple change that pulls the whole room together.
I pick finishes that echo the paint’s warmth, coolness, or contrast, keeping the kitchen cozy and collected.
- Matte black for modern farmhouse depth
- Aged brass to warm neutrals
- Satin nickel for cool greys
- Oil-rubbed bronze for rustic charm
Update Mounting And Spacing
Because your paint sets the tone, I like to re-evaluate not just the look of my pulls and knobs but where they sit on the doors and drawers—small shifts in placement can make the whole set feel intentional.
I test spacing, align heights, and swap knobs for slimmer pulls where paint darkens edges. It’s a quick, tactile update that ties color and hardware into a cozy, cohesive kitchen.
Accent Walls and Open‑Shelf Paint Ideas
If you want to give your kitchen personality without a full overhaul, I love using an accent wall or painting open shelves to anchor the space and highlight textures.
I pick earthy tones or chalky whites, balance contrast, and keep brushwork simple so dishes pop. It’s quick, cozy, and feels like a small farmhouse hug.
- Rustic deep green
- Soft chalk white
- Warm terracotta
- Matte charcoal
Paint Your Backsplash and Grout on a Budget
I’ll show you how to freshen a tired backsplash without ripping anything out—painting tile and grout is a smart, budget-friendly way to change the whole vibe of your kitchen.
I sand, clean, prime, then use a bonded tile paint and grout pen for neat lines. It’s cozy, rustic, and fast—expect a weekend project that feels like a small, loving overhaul.
Trim, Window, and Door Paint for Crisp Edges
Before I pick up the brush for trim, windows, or doors, I always give the surfaces a good clean so paint will stick and edges look sharp.
I tape carefully along the lines—pressing down the edges—to keep paint from bleeding onto walls or glass. With proper prep and crisp tape lines, those little details make the whole kitchen feel refreshed.
Prep And Surface Cleaning
With a damp cloth and a little elbow grease, I get the trim, window sills, and door frames spotless so the paint grabs and the edges look sharp.
I scrub away dust, grease, and old drips, then sand lightly for a smooth bite. Small prep saves time and keeps lines honest.
- Degrease with mild detergent
- Sand glossy spots
- Vacuum dust
- Wipe tack cloth
Sharp Lines With Tape
Masking tape makes the difference between a rushed job and a finish that looks like it was done by a pro.
I press tape along trim, windows, and doors, burnishing edges with a fingernail for leakproof lines.
I paint in thin coats, peel tape while paint’s tacky, and step back to admire crisp, clean boundaries that give my kitchen that polished, homemade charm.
Speed‑Paint Small Appliances and Fixtures
I like to tackle small appliances and fixtures first because they give the kitchen an instant lift without a full renovation.
I quickly sand, prime, and spray durable metallic or matte paint for faucets, toaster casings, and light fixtures.
It’s fast, forgiving, and feels like a little magic.
- Remove power, clean thoroughly
- Use high‑adhesion primer
- Spray thin, even coats
- Seal with clear topcoat
Color Combos for Small, Dark, and Dated Kitchens
After I’ve brightened up a few fixtures and appliances, it’s easy to see how color can do the rest of the heavy lifting in a small, dark, or dated kitchen.
I choose warm creams, soft sage, and muted terracotta to lift gloom without shouting. Trim in warm white keeps lines crisp; a single deep charcoal accent grounds the rustic feel while still feeling cozy.
Quick Fixes: Drips, Lap Marks, and Tacky Paint
When paint drips, lap marks, or tacky spots show up, don’t panic — I’ll walk you through fast, low-fuss fixes that get your kitchen looking tidy again.
I keep tools simple, work gently, and save time with small, careful moves that blend and smooth.
- Wipe fresh drips with a damp cloth, lighten pressure
- Sand lap marks lightly between coats
- Thin tacky areas with warm air, not heat guns
- Feather edges with a fine brush and a steady hand
Finish, Cure Times, Cleanup, and Reuse Timing
Although the paint may look dry to the touch, it’s the finish and cure time that tell you when the kitchen’s really ready for daily life; I’ll help you read those signs so you don’t rush things.
I check sheen, wait recommended cure hours, and avoid heavy use for days. Clean brushes with mild soap, store leftover paint sealed, and only rehung hardware once the finish feels fully set.
By Sunday evening, you’ll feel like you’ve pulled a kitchen glow-up out of a storybook—think Cinderella, but with paint cans instead of glass slippers.
I’ve walked you through doable weekend wins, color choices, and the quick fixes that keep things looking pro.
Roll up your sleeves, cue the playlist, and enjoy the small magic of fresh color; your kitchen will look modern and lived-in, ready for coffee, chaos, and good company.


