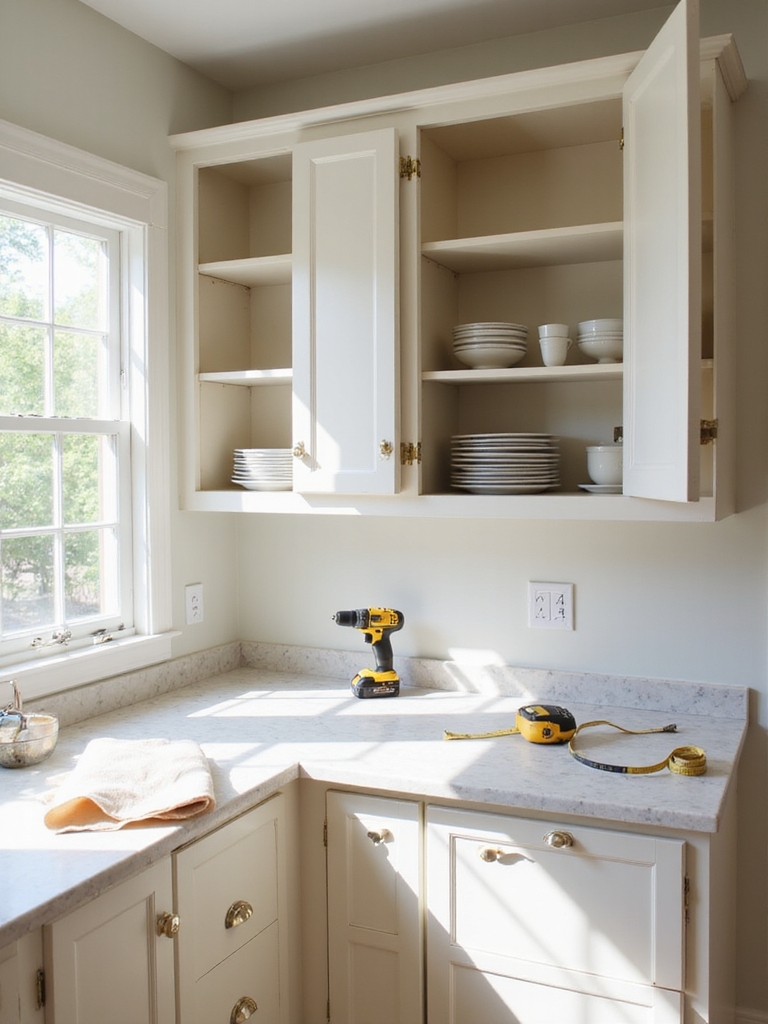
I turned cookie‑cutter cupboards into open, lived‑in shelves with almost nothing—just a screwdriver, sandpaper, paint, and thrifted baskets. I removed a few doors, labeled hardware, sanded rough spots, primed where needed, and swapped knobs for a quick refresh.
I kept everyday dishes by the sink, hid ugly stuff in baskets, and used risers for height. It’s low‑cost, fast, and surprisingly transformative—keep going and I’ll show you which cabinets to open first and how to style them.
Quick Open‑Cabinet Conversion: 5 Steps in 15 Minutes
Let’s get your kitchen feeling open and lived‑in fast—I’ll walk you through five simple steps you can finish in about 15 minutes, no fancy tools required.
First, empty a cabinet. Remove doors and hardware, label hinges. Sand rough edges lightly. Wipe clean and paint or stain if desired.
Restyle contents neatly, add baskets or hooks, then enjoy the new openness. Designers often recommend adding decorative items above cabinets to create a finished, stylish look.
Is an Open‑Cabinet Change Right for Your Kitchen?

Before you rip off doors, take a breath and think about how you’ll actually use the space—I’m all for the airy, lived‑in look, but open cabinets change how you store, clean, and style everything in your kitchen.
I’ll ask you to weigh dust, visual clutter, dish frequency, and whether your collection feels curated.
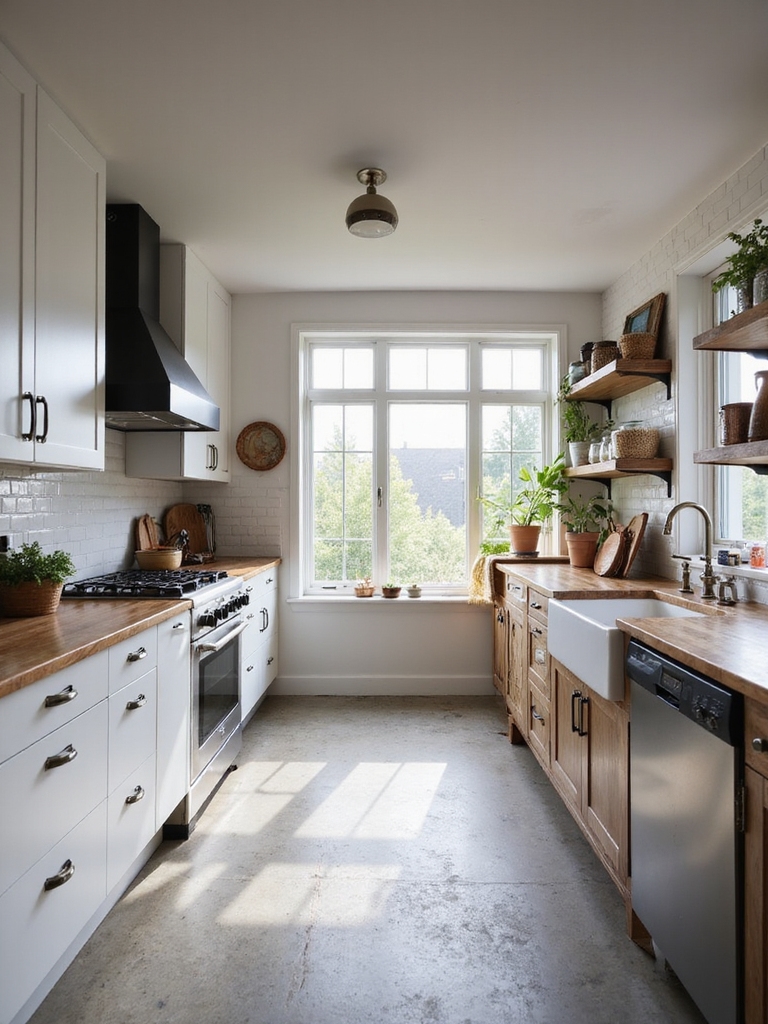
If you love daily access and tidy habits, it can be lovely. Open shelving can make a kitchen feel effortlessly chic and showcase a curated collection when styled thoughtfully.
Which Cabinets to Open for the Biggest Impact

When I’m deciding which cabinets to open first, I look for spots that’ll showcase things you actually use—open shelves should feel lived‑in, not staged.
I usually pick:
- Everyday dishes near the sink
- Favorite mugs by the coffee station
- Frequently reached spices and oils
- Pretty glassware above the prep area
These choices create cozy, practical displays that invite daily use.
Open cabinetry taps into long‑standing design trends that keep spaces feeling airy and accessible.
Tools & Materials for a Cheap Cabinet Update

I’ll walk you through the simple tools—screwdriver, level, sander—that make opening cabinets feel doable rather than intimidating.
I’ll also point out budget-friendly materials like peel-and-stick backing, thrifted shelves, and affordable paint, plus the small finishing touches—new knobs, trim, and sealant—that pull the look together.
Stick with me and you’ll see how a few modest purchases can transform your cabinets without blowing the budget.
Open kitchen cabinet makeovers can deliver stunning results on a tiny budget.
Essential Basic Tools
Need a few simple tools to make your kitchen cabinets look like new? I’ve kept it humble and handy:
- Screwdriver set — for hinges and pulls.
- Sandpaper/block — smooth edges, rustic charm.
- Paintbrush/roller — quick, even coats.
- Measuring tape & pencil — straight cuts, neat installs.
I’ll guide you through using each one, no fancy gear required.
Consider adding small decorative elements to elevate the look with stylish decor and minimal expense.
Inexpensive Materials Options
Now that you’ve got the basic tools lined up, let’s talk about the inexpensive materials that make a cheap cabinet update actually work.
I like beadboard panels, peel-and-stick vinyl, simple pine trim, and brushed-metal pulls from bargain stores. A good sandpaper pack, wood filler, and primer stretch a long way.
These choices keep the look homey without breaking the bank. Open shelving can be arranged stylishly to keep things tidy and accessible, especially when you group items by type and use consistent spacing to create a balanced look.
Finishing Touch Supplies
Usually I finish a cheap cabinet update with a few simple supplies that make the whole job feel polished: a good brush and a small foam roller for smooth paint, a tack cloth to lift dust, a couple of artist’s brushes for corners, painter’s tape, and a cartridge of clear polyurethane or wax for protection.
I also bring:
- Soft cloths
- Sanding block
- Putty knife
- Small tray
Open shelving can make a kitchen feel lighter and more open, especially when paired with neutral finishes and minimalist styling.
Remove Cabinet Doors Safely (Step‑by‑Step)
I’ll walk you through removing cabinet doors safely so you don’t chip paint, strip screws, or drop a panel on your foot.
First, empty shelves and lay a blanket beneath. Support the door, loosen hinges with a screwdriver, and remove screws one at a time.
Label doors and hardware, set hinges in a small bag, and store panels flat to avoid warping.
Consider simple hardware swaps like new knobs or pulls to instantly elevate the look with minimal cost and effort simple hardware swaps.
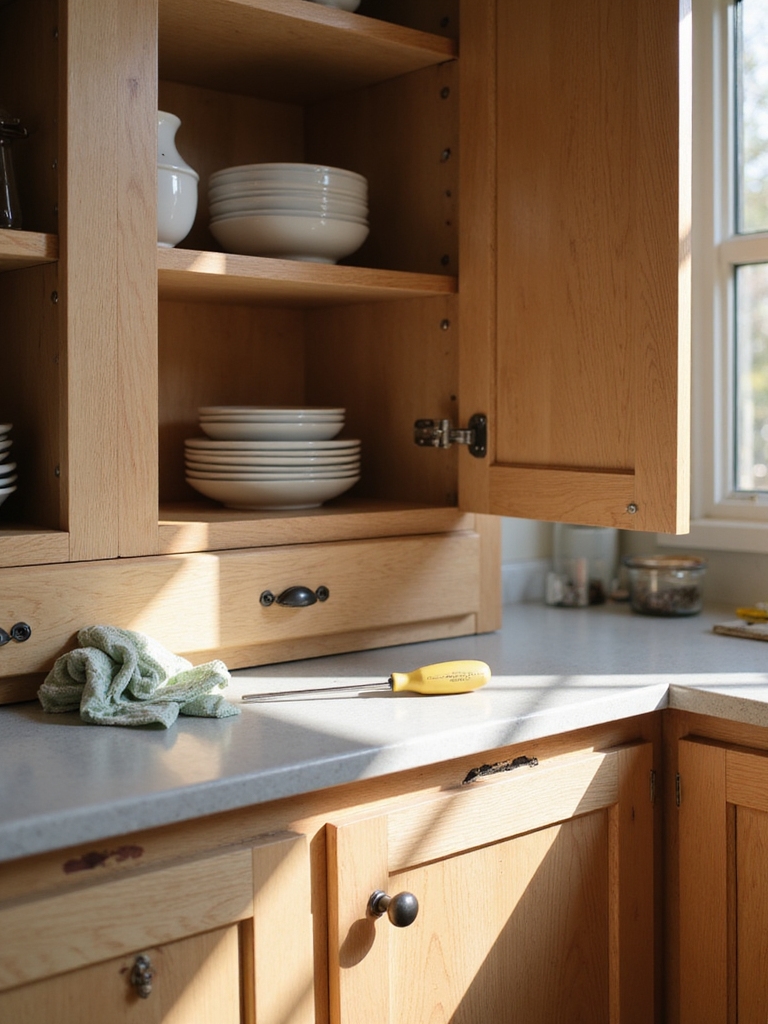
Fix Cabinet Interiors: Paint, Wallpaper, Contact Paper
Let’s freshen up those cabinet interiors so they look intentional, not afterthoughts. I’ll show simple, low-cost ways to brighten and cozy your shelves:
- Chalky paint for a matte, vintage feel.
- Peel-and-stick wallpaper for pattern without commitment.
- Contact paper for easy wipe-down durability.
- Accent the back panel in a contrasting tone to pop dishes.
Prep Ugly Shelves: Sanding, Priming, and Quick Repairs
Before we slap fresh paint on open shelves, I always take a close look for gouges, warping, or peeling finish so I know what I’m really up against.
I’ll pick a primer that’s right for the surface—oil-based for knotty wood, shellac for stains—and use a quick wood filler on dings before sanding smooth.
With those steps done, the paint goes on cleaner and the shelves actually last.
Assess Surface Damage
Start by running your hand over each shelf and cabinet face so you can feel where the damage really is—dings, peeling veneer, water rings, or rough patches tell different stories and need different fixes.
I note problems, then plan small fixes:
- Scratches to sand.
- Veneer lifts to glue.
- Water stains to dry and spot-treat.
- Loose trim to reattach.
Choose Right Primer
With a coarse sanding block in hand, I choose primers that match the shelf’s condition and the finish I want—stain-blocking if there’s tannin bleed, shellac-based for stubborn water stains or adhesive residue, and high-adhesion bonding primer when veneer or laminate needs help sticking.
I gently wipe dust, spot-prime trouble areas, and let the primer cure fully so paint lays down smooth and durable.
Quick Fill And Sand
I grab a cheap wood filler and my sanding block and get to work filling nicks, gouges, and uneven veneer edges so the shelves actually look intentional instead of tired.
I talk you through quick, rustic repairs:
- Clean dust and grime.
- Apply filler, press into gaps.
- Let dry fully.
- Sand smooth, wipe residue.
A simple, honest fix before priming.
Style Open Cabinets So They Look Curated, Not Cluttered
I usually begin by removing half the things on the shelves—then I edit until what’s left feels intentional rather than jumbled.
I group similar items, leave breathing room, and mix textures: earthenware, wooden boards, a stack of linen plates.
I keep colors muted, rotate seasonal pieces, and tuck one or two sentimental items for soul.
The result feels lived-in, warm, and thoughtfully simple.
Affordable Organization Hacks: Baskets, Risers, Repurposed Jars
I love grouping woven baskets on a shelf — they hide the mess while adding that cozy, rustic rhythm to the space.
I also use tiered risers to stack plates and bowls so everything’s visible and easy to grab.
With a few repurposed jars for utensils or dry goods, you get affordable organization that actually looks thoughtful.
Stylish Basket Groupings
Nothing looks cozier to me than a row of woven baskets tucked into open cupboards, each one corralling clutter with quiet charm.
I group baskets by purpose, size, and texture to keep things simple.
- Baking tools in a shallow basket
- Tea and coffee in a lined basket
- Produce in ventilated baskets
- Linens in a tall wicker basket
It feels practical and warm.
Tiered Shelf Risers
Tiered shelf risers are a small change that makes a big difference—I love how they turn a messy cabinet into a tidy, layered display.
I use inexpensive wooden and metal risers to stack mugs, plates, and jars, creating pockets of calm.
They raise visibility, save space, and give open cabinets that cozy, farmhouse order without costing much or feeling fussy.
Where to Hide Less Attractive Items Without Losing Access
I’ve learned to tuck away the less pretty but necessary things—plastic containers, sponges, small appliances—so they’re out of sight yet still easy to reach.
I use clever, rustic tricks that keep things handy without clutter.
- Woven baskets on lower shelves
- Slide-out bins under the sink
- Lidded jars for utensils
- Appliance garage with a pull door
Quick Hardware Swaps and Trim Touches That Polish the Look
I like to start with simple hardware swaps—changing old knobs can give open cabinets a whole new personality.
I also update hinges for smooth operation and a cleaner look, and I’ll often tack on a bit of decorative trim to bring warmth and finish to the edges.
These small, fast changes make the space feel more intentional without a major remodel.
Swap Old Knobs
Swap out those tired knobs and you’ll be amazed at how quickly the whole room feels refreshed.
I grabbed mismatched brass, aged iron, ceramic florals, and simple wood pulls to mix warmth and charm.
Try:
- Matte black for contrast
- Antique brass for patina
- Painted ceramic for whimsy
- Raw wood for rustic balance
Each choice subtly changes your open cabinets’ mood.
Update Hinges Fast
You noticed how new knobs changed the room’s personality, so let’s tackle the hardware hiding in plain sight: the hinges.
I swap tired, squeaky hinges for simple brass or matte black ones in minutes, which tightens doors and warms the vibe.
A little sanding, a matching screw set, and the cabinets suddenly look cared for—small changes, big comfort.
Add Decorative Trim
Grab a few thin strips of trim and watch a plain cabinet go from utilitarian to intentionally finished. I love nailing simple beadboard or molding for that cozy, worn-in feel.
Try these steps:
- Measure edges.
- Cut trim to fit.
- Sand and stain.
- Nail and caulk.
It’s quick, affordable, and makes open shelves feel thoughtfully made.
Clean and Maintain Open Cabinets: Dust, Grease, and Routines
I usually start my weekly kitchen tidy by wiping down open cabinets, because dust and cooking grease collect faster than I’d like—especially near the stove.
I use a soft cloth and mild cleaner, wipe shelves, rinse ceramics, and let air-dry.
I dust weekly, deep-clean monthly, and keep baskets or trays to corral crumbs. It keeps the space cozy and honest.
Mix Open and Closed Storage for Function and Flow
I like to balance open shelves with a few closed cupboards so the kitchen breathes without feeling cluttered.
I’ll keep daily dishes on display, hide pantry overflow, and create rhythm. Try this simple mix:
- Open shelves for everyday plates.
- Closed cupboards for bulky appliances.
- Glass-front cabinets for pretty glassware.
- Deep drawers for linens and tins.
It’s cozy, practical, and calm.
Seasonal and Temporary Styling Ideas on a Budget
Since mixing open and closed storage gives the room a lived-in rhythm, I like to change small seasonal accents so the kitchen feels fresh without a full remodel.
I swap textiles, add a bowl of seasonal fruit, tuck herbs in mason jars, and rotate art or plates.
These tiny shifts cost little, lift mood, and keep the space cozy and personal year-round.
Troubleshooting & Before‑and‑After Checklist for Your Project
Although a few hiccups are normal, I’ll walk you through the common snags and a compact before-and-after checklist so you can finish your open-cabinet project feeling confident.
I’ve kept this simple, hands-on, and cozy.
- Clear, clean, and group essentials.
- Secure shelving and check hardware.
- Edit styling—less is warmer.
- Photograph before/after for lessons learned.
I’ve had folks tell me a quick open‑cabinet switch felt like a kitchen reset, and it really can be — five simple steps in about 15 minutes.
Fun fact: open shelving lifts perceived space by up to 30% in small kitchens, so you’re not just dressing up cabinets, you’re expanding the room’s vibe.
Try one door off, keep essentials tidy, and enjoy a warmer, more lived‑in kitchen that didn’t cost a fortune.