
Here’s how I organize cabinets like a pro: I start with a cabinet audit to decide what to keep, donate, or relocate. Then I group similar items for instant findability and use transparent containers with clear labels. I maximize space with adjustable shelves and narrow risers, and I keep everyday essentials at eye level. I add a lazy Susan for awkward corners and adopt a simple One-In, One-Out habit plus a five-minute monthly reset. If you keep going, you’ll access even more tips.
Start With Cabinet Audit: Identify What to Keep, Donate, or Relocate

Starting with a cabinet audit is the simplest way to see what you actually use and what’s just taking up space.
I guide you to skim every shelf, pull items out, and ask: keep, donate, or relocate?
I’ll help you decide by frequency, condition, and joy factor.
You’ll gain space, clarity, and confidence to organize with intention. Additionally, this process will help you identify daily habits that can maintain your kitchen’s organization long-term.
Group Like Items for Instant Findability

I find that grouping similar items helps you find what you need in seconds.
I’ll show you how to use transparent containers and clear labels to make items easy to spot, arrange by function, and keep like things together.
Together, we’ll form quick-access clusters that turn kitchen chaos into calm, with every item in its place. Additionally, utilizing transparent containers can enhance the visual appeal of your kitchen while keeping everything organized.
Group Similar Items
Grouping similar items makes finding what you need a breeze.
I group cans with cans, spices with spices, and baking sheets with baking pans, so my shelves feel calm and clear.
When I know where to look, I grab quickly, avoid clutter, and keep momentum. You’ll notice less rummaging, fewer duplicate buys, and more cooking confidence in your organized space. Additionally, consider small kitchen remodel ideas that can enhance your storage solutions for even better organization.
Prioritize Transparent Grouping
Ever notice how much faster you find what you need when you can see it clearly?
I group like items so you can spot ovals of measuring cups beside cups, etc. Transparent bins, labeled shelves, and uniform containers keep everything visible and reachable. This approach minimizes digging, saves time, and invites you to enjoy cooking without constant rummaging. Clarity inspires confidence. Beautiful Kitchen Open Shelf Styling Ideas can also enhance the overall aesthetic of your kitchen while maintaining organization.
Create Quick-Access Clusters
If you’ve been aligning items by visibility, it’s time to pull those similar things into quick-access clusters.
I’ll help you group like items for instant findability, so you save time and avoid digging.
- Pair utensils with portable tools
- Stack spices by cuisine or use
- Keep mugs, glasses, and lids together
Additionally, consider using smart organization tips to maximize your space and efficiency in a small kitchen.
Create Hidden Height With Adjustable Shelves

When you’re tight on vertical space, adjustable shelves let you squeeze out hidden height without moving walls or buying new cabinetry. I show you how to set uprights at different levels, swap shelf supports, and stack tall items with lightweight dividers. You’ll gain usable storage fast, without costly remodels, and feel confident organizing glassware, tins, and bakeware neatly. Additionally, modular kitchen cabinets can further optimize your space by allowing for customized configurations that fit your unique needs.
Add Narrow Riser Shelves for Small Items

I love adding narrow riser shelves because they maximize space for small items without crowding the cabinet.
By elevating tiny essentials, you’re improving visibility and making every item easy to grab, which speaks to better small-item organization. Additionally, using narrow riser shelves can help you utilize vertical space more efficiently, leading to a clutter-free environment.
Let’s explore how shelf height choices, the benefits of risers, and simple tweaks can smooth your kitchen workflow.
Narrow Riser Benefits
Narrow riser shelves are a simple upgrade that makes the most of small items like spice jars, clips, and packets.
I love how they free up space without bulk.
Here are quick benefits:
- Improve visibility and access
- Prevent items from sliding behind
- Maximize vertical storage for everyday essentials
Additionally, they can enhance kitchen storage efficiency by allowing you to organize items in a more structured way.
Small-Item Organization Tips
Small items like spice jars, bottle caps, and bag clips can vanish in a deep cabinet, so I reach for narrow riser shelves to keep them visible and within easy reach.
These slim platforms double storage without crowding, letting you see every corner.
I suggest labeling tiny baskets and rotating essentials weekly for quick, clutter-free access and calmer mornings.
Shelf Height Optimization
Shelf height is often overlooked, but optimizing it can transform how you access small items.
I’ll show you how tiny advances make big differences, with simple options you can try now:
1) Install narrow riser shelves for sturdy, upright stacking
2) Use adjustable brackets to tailor each level
3) Label zones so you grab the right item every time
You’ve got this—clear, easy, reachable.
Put Everyday Essentials at Eye Level
I keep the items I reach for most often at eye level, so I can grab them quickly without bending, digging, or hunting through the cabinet.
I group daily essentials—coffee, tea, spices, mugs—into a simple, predictable layout. Clear labels, consistent placement, and a calm rhythm reduce clutter, save time, and invite confidence, even on busy mornings.
Maximize Door Space With Racks and Hooks
Door space is too often wasted, so I like to use racks and hooks to keep every inch usable and reachable.
Here’s how I do it:
- Hang measuring spoons and small tools on a labeled hook rail.
- Use slim over-the-door racks for lids and wraps.
- Mount a jar rack inside the door for screws, clips, and bands.
Simple, accessible, neat.
Name and Locate a Quick-Grab Pantry Zone
I find a Quick-Grab Pantry Zone to be a game changer for busy mornings, so I’ll show you how to create clearly defined spots for snacks and favorites.
We’ll map out a Findable Snack Station and label the area so anyone in the family can grab what they need without hunting.
I’ll share simple labeling essentials to keep this zone fast, friendly, and easy to maintain.
Quick-Grab Pantry Zones
A quick-grab pantry zone keeps everything you reach most often within arm’s reach, so you can grab snacks, breakfast items, or recipe staples in one smooth motion.
I name and locate this zone and share how you’ll feel confident.
- Identify top items
- Place them at eye level
- Rotate weekly for freshness
Findable Snack Stations
Findable Snack Stations make snacks easy to grab without hunting.
I design a quick-grab pantry zone where favorites live together, clearly labeled and reachable.
I group chips, bars, and tasty treats at eye level, near prep spaces, with a small basket for quick fruit or snacks, minimizing searches.
You’ll feel calmer, stocked, and ready for quick cravings without fuss.
Zone Labeling Essentials
Labeling is the key to a quick-grab pantry zone that actually works; with clear names and direct placement, you’ll know exactly where snacks live and how to reach them fast.
1) Name zones clearly
2) Place snacks by frequency
3) Use tactile labels for quick checks
Stack Smart With Bins and Baskets
Stacking smart with bins and baskets keeps everything visible and easy to grab.
I pair clear containers with labeled lids so I can see contents at a glance and grab what I need without digging.
I group similar items, stack vertically, and use different sizes for odds and ends.
Tidy Under-Sink Storage for Cleaning Essentials
I’ll share how I set up an under-sink zone that keeps cleaning essentials within easy reach.
You’ll see how I keep items visible at a glance, with simple access and clear labeling, so you don’t have to hunt.
I’ll offer practical tips on pop-out storage options to maximize space and keep everything organized.
Under-Sink Zone Setup
Under the sink, I start by clearing the space and choosing a few sturdy organizers that fit your cabinet.
You’ll notice instant order when labels match bins to tasks.
- Group cleaners by use
- Use a shallow tray for tools
- Put frequently needed items at eye level
This simple setup invites cooperation, speeds chores, and stays tidy daily.
Access at a Glance
Access at a glance means your cleaning essentials are visible, reachable, and organized in one quick look.
I keep only what you truly use, so drawers stay uncluttered and labels guide you instantly.
I mount slim caddies, a soap tray, and a small brush bin at arm’s reach.
Sturdy bins prevent spills, and frequent wipes maintain calm, predictable access every day.
Pop-Lout Storage Tips
I’ve found that a tidy under-sink space starts with smart, visible organization—so I’m sharing pop-out storage tips that keep cleaning essentials accessible without crowding the cabinet.
- Use a slim pull-out bin for brushes and sponges.
- Install a tiered rack for bottles and sprays.
- Add adhesive hooks for towels and cloths.
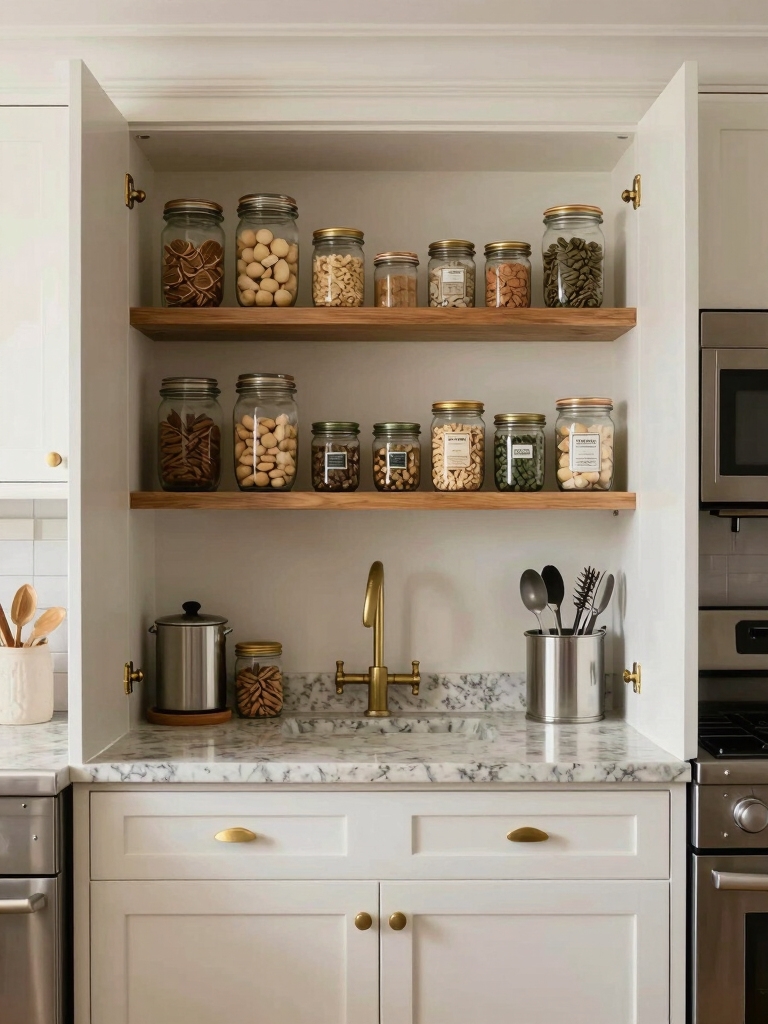
Use Clear Containers to See What You Have
Clear containers let you see what you have at a glance, so there’s less guesswork and fewer duplicates.
I use them to group staples by use, label clearly, and stack neatly. You’ll notice quicker meal prep and less wasted space.
When you reach for rice or oats, the transparent lids feel reassuring, welcoming, and totally practical for everyday cooking.
Tame Cords and Gadgets With a Drawer System
Taming cords and gadgets is easier when I keep them in a dedicated drawer system, so everything has a home and nothing tangles as you reach for it.
I’ll share simple steps:
- Group by use
- Label dividers
- Use chargers with a single, centralized plug
You’ll enjoy quicker access and calmer counters with these small, friendly fixes.
Add a Lazy Susan for Corner Cabinets
A lazy Susan in a corner cabinet makes hard-to-reach storage feel effortless.
I love looping pans, lids, and spices onto a single, rotating shelf so you don’t hunt through baffling stacks.
Install it low enough to spin, high enough to grab, and label evenly.
Your corners finally prove practical, accessible, and neat—no rummaging required, just smooth rotation and calm order.
One-In, One-Out: A Simple Habit That Keeps It Sorted
One-In, One-Out isn’t about deprivation; it’s a simple habit that keeps your cabinets calm and functional.
I share this so you try it today.
- Scan before you shop
- Remove one item for every new one
- Label shelves for quick grabs
This approach feels welcoming, practical, and doable, turning clutter into order you can sustain with ease.
Five-Minute Monthly Reset to Maintain Order
Five minutes is all you need once a month to keep your kitchen cabinets orderly.
I’m showing you a quick reset: open a cabinet, glance for mismatches, and clear anything that’s unused or out of place.
Wipe the shelves, return items neatly, label if helpful, and reset the layout.
You’ll gain clarity, reduce clutter, and enjoy instant calm during meals.
Customize the System for Your Cooking Style
When you tailor the system to your cooking style, you’ll dish out efficiency and joy.
I’ll guide you to personalize zones, tools, and presets so every move feels natural.
Here are quick tweaks:
- Map recipes to shelves
- Group utensils by frequency
- Label clearly for easy navigation
Conclusion
Ever since I started organizing with these simple tweaks, my cabinets finally feel like a calm, day-to-day partner. Here’s a quick stat to spark your drive: in a recent survey, 78% of people said they could find what they needed faster after a cabinet refresh. Imagine that relief every time you open the door. Give yourself five minutes now, pick one small tweak, and feel the space work for you—consistency, not perfection, wins every time.


