If you’re dreaming of a kitchen island on a budget, I’ve got you. I’ll walk you through 14 beginner-friendly builds that prove you don’t need a pro to get a stylish, functional centerpiece. Think compact layouts, smart storage, and mixed materials like wood, laminate, and quartz—plus two-tone combos for punch. I’ll share easy steps, budget tricks, and DIY tweaks that actually work. Stick with me, and you’ll pick up tools, tips, and tricks you can try right away.
Decide Your Ideal Island Size: Space Rules, Traffic, and Workflow

When it comes to picking an island size, start with the space you actually have and how you’ll move around it.
I’ll map traffic, then measure clearance for doors, chairs, and prep.
Think workflow: cook, prep, serve without crowding your aisles.
A compact, efficient island beats a sprawling misfit every time.
To enhance seamless flow between your kitchen and dining spaces, consider how the island will integrate with your overall layout.
Choose wisely, and breathe easy.
Build a Budget-Ready Island: What to Expect and How to Save

If you’re building a budget-ready island, you don’t have to sacrifice function for price.
I’ll focus on smart layout, shared surfaces, and simple upgrades that pay off.
Expect practical tips, shop-smart planning, and quick wins that don’t break the bank.
You’ll save without sacrificing counter space, storage, or flow—plus a few clever hacks to keep it stylish and easy to maintain. Consider incorporating stunning DIY kitchen islands that not only enhance your space but also provide additional seating options.
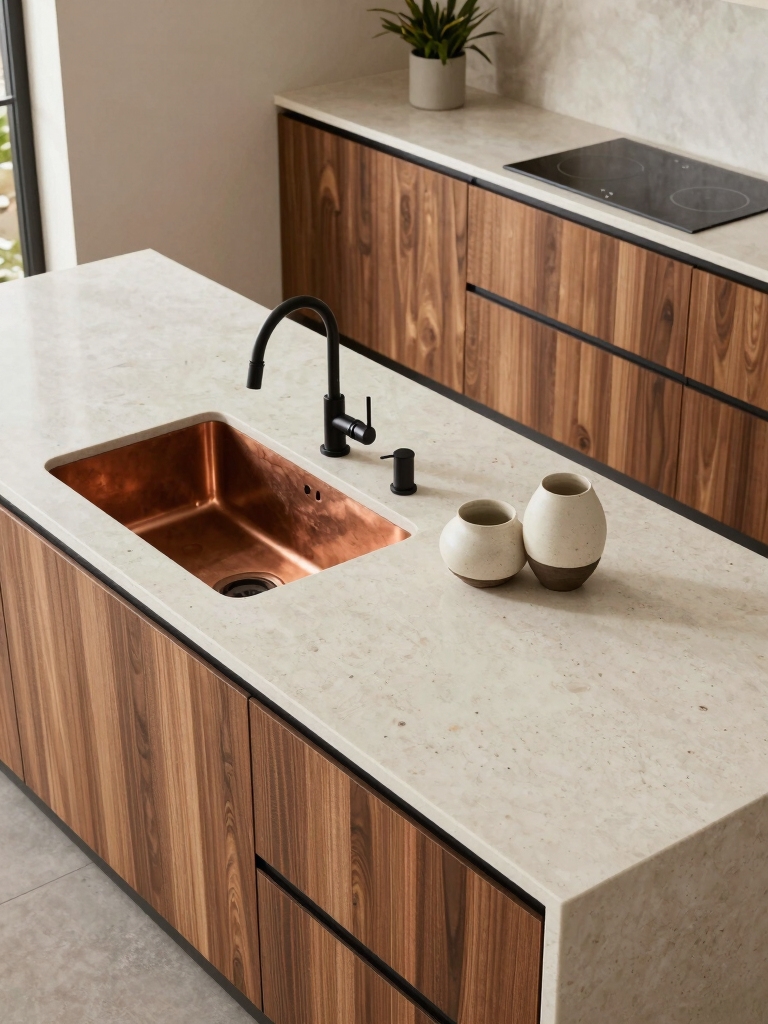
Materials Beginners Love: Wood, Laminate, and Surface Options

We’ve covered budget-friendly layouts, so let’s zero in on what your island actually wears: materials.
I’m sharing bite-sized picks you can trust.
- Wood: warm grain, timeless charm, easy to refresh
- Laminate: affordable, tough, wide color range
- Solid surface: seamless, stain-resistant, easy maintenance
- Quartz: durable, modern, low porosity
Your vibe, your finish—done with confidence. Additionally, consider incorporating unique island designs to elevate the aesthetic appeal of your kitchen.
Tools and Step-by-Step: Beginner-Friendly Island Assembly

Tools aren’t the enemy—they’re your best allies. I’ll guide you through simple steps: measure, cut, and clock in a quick assembly rhythm.
Use a level, clamps, and a friend for steadying, not drama. Follow a plan, pre-drill, then screw connections tight but smooth.
Take breaks, stay organized, and celebrate each sturdy corner—you’re building confidence and a kitchen that actually works. Maximize your space with an island solution that doubles your workspace and enhances your galley kitchen.
Compact Island Solutions for Small Kitchens

Here’s how I’ll keep a compact island functional: I lean on compact island essentials that fit tight spaces without sacrificing style, smartly pairing storage with a prep surface.
Space-saving layout tricks help me carve out workflow zones, even in a galley or open-plan nook. I’ll also share multi-use surface ideas that switch from prep to seating in a flash, so your small kitchen stays effortless and inviting. Adding a stylish storage solution can further enhance the functionality and aesthetic of your kitchen island.
Compact Island Essentials
A compact island isn’t a compromise—it’s a smart, stylish command center for small kitchens.
I’ll show you essentials that fit tight spaces without crowding counters, using smart, deliberate choices.
- Multi-use countertop surface
- Slim storage with pull-outs
- Quick-access utensil tray
- Fold-down prep extension
Ready to level up without clutter? Let’s explore. Plus, incorporating creative kitchen island solutions can maximize functionality and enhance the overall design of your compact space.
Space-Saving Layout Tricks
Space-saving layout tricks make compact island setups feel big on function.
I yank drawers, tuck appliances, and assign a sailboat’s precision to a tiny footprint.
I stagger counters, install a prep ledge, and keep clearance crisp for flow.
I choose fold-down stools and magnetic spice strips, so guests mingle without crowding.
Incorporating small galley kitchen ideas can enhance your efficiency even further.
You’ll gain room, not compromise, and love every inch.
Multi-Use Surface Ideas
Multi-use surfaces are the secret sauce for compact island kitchens.
I’ll show you how to pack function without clutter, so you actually enjoy cooking here.
Try these:
- Fold-down counters for prep when guests arrive
- Convertible island as island-and-dining nook
- Hidden prep area under a rolling butcher block
- Extendable workspace that tucks away instantly
Simple, clever, and fridge-friendly. Additionally, incorporating small open kitchen ideas can enhance the overall style and functionality of your space.
Modern Open-Frame Islands With a Shiplap Twist
I’m eyeing how an open-frame island can glow with an airy, architectural vibe while the shiplap adds warmth and texture.
That open-frame look amplifies light and flow, giving the kitchen a confident, studio-ish presence.
Let’s talk about how the open edges and the shiplap’s grain chemistry come together to feel modern yet inviting. Pairing bar stools with your island can enhance the overall aesthetic and functionality of the space.
Open-Frame Aesthetic Impact
Open-frame islands with a shiplap twist clear a path between utility and charm, letting the bones of the kitchen show while the warmth of wood keeps things inviting.
- Show off structural honesty
- Pair raw lines with soft finishes
- Let open storage breathe
- Add texture without clutter
Incorporating stylish decor ideas above your kitchen cabinets can enhance the overall aesthetic of your space. I’m here to help you pull this off—calm, confident, and a touch playful.
Shiplap Texture Chemistry
Shiplap brings texture that reads clean yet tactile, and on a modern open-frame island that means the war between wood and wall stays friendly rather than fierce.
I crack the code of texture chemistry, blending boards, gaps, and sealants to resist moisture without dulling charm.
You’ll see wood speak softly, walls whisper, and kitchen vibes stay invigoratingly balanced.
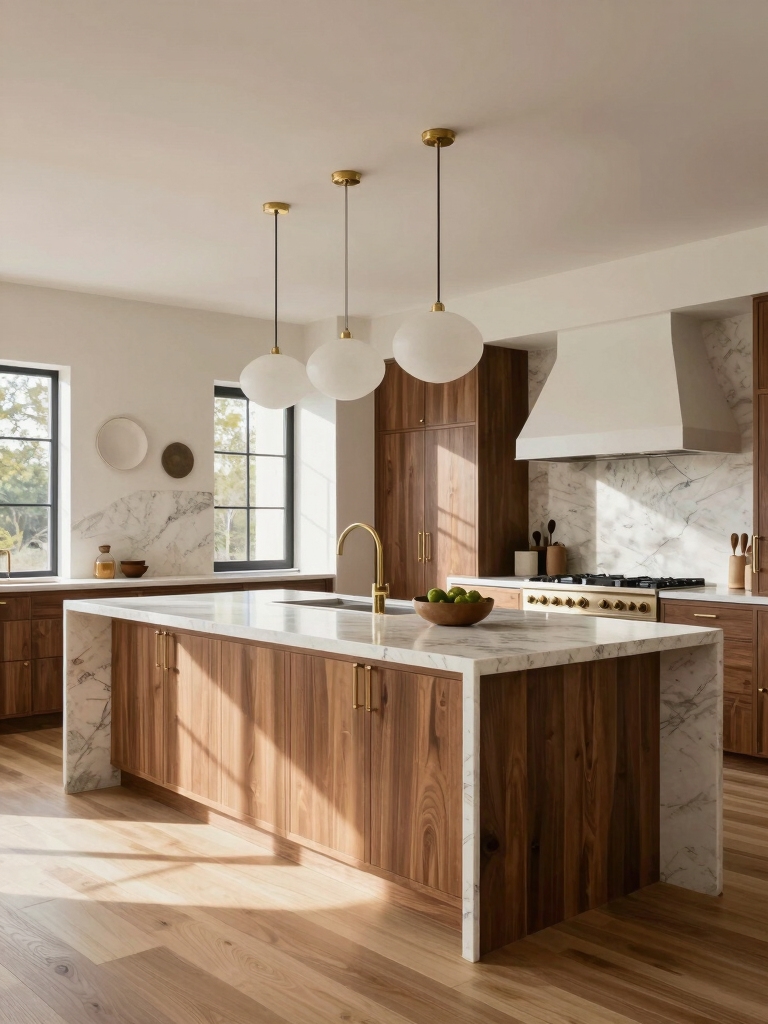
Farmhouse-Style Islands From Ready-Made Components
If you’re tackling a farmhouse-style island on a budget, start with ready-made components that you can mix and match like a good recipe.
I’ll show quick wins you can actually finish today:
1) Pick a sturdy base cabinet
2) Add a farmhouse sink with compromise-free plumbing
3) Top with butcher-block or quartz
4) Finish with a ladder-style open shelf for character
Rolling Cart Island: Portable Prep and Storage on Wheels
Rolling Cart Island is my go-to when you want prep space that actually moves with you.
I love wheels that glide, drawers that stash cords, and a top big enough for chopping, rolling, and tasting as I go.
It keeps counters clear, and I can wheel it into sunlight for photos or into corners for midnight snack prep.
Simple, practical genius.
Covered Workspace Islands: Sinks, Prep Zones, and Clean Design
Covered workspace islands are a game changer when you want a built-in feel with practical sinks, tidy prep zones, and a clean, modern look.
I’ll share actionable tips you can actually use:
1) Plan water access early
2) Keep zones clearly defined
3) Choose durable, easy-clean finishes
4) Tidy traps and cords for a sleek vibe
Storage-Forward Islands: Drawers, Bins, and Pegboard Access
Storage-forward islands put everything within reach—drawers, bins, and a pegboard wall that keeps tools, lids, and spices in sight without a minute of hunting.
I love organizing tiny chaos into clear, accessible storage. Drawers slide smoothly, bins hold tall mugs, and pegboard hooks keep frequently used gear visible.
It saves time, reduces rummaging, and sparks cooking confidence. Simple, smart, satisfying.
Two-Tone Island Combos: Color for Visual Impact
Two-tone island combos punch above their weight, giving your kitchen a shot of personality without shouting.
I mix bold and calm hues to balance energy and flow. Here are quick tips:
1) Pair a dark base with a light countertop
2) Repeat a secondary color elsewhere for harmony
3) Use matte finishes to reduce glare
4) Keep hardware simple to let color breathe
Minimalist, Low-Profile Islands for a Sleek Kitchen
I’m all about keeping the workspace clean, so a slim profile is my go-to for a sleek, unobtrusive island.
I’ll show you how a neutral color palette and compact storage keep the room feeling open rather than crowded.
Let’s talk smart layouts that pack function into a low-profile footprint.
Slim Profile Essentials
If you love a sleek, uncluttered look, a slim profile island is your best friend, delivering form and function without crowding the room.
Here’s how I keep it tight:
- Minimal countertop depth
- Hidden storage essentials
- Perimeter seating with clearance
- Integrated appliances where possible
Keeps lines clean, vibes calm, and projects look effortless.
Neutral Color Palette
With a slim, uncluttered island, color quietly sets the mood rather than shouting for attention.
I favor neutral hues—soft whites, warm beiges, cool grays—that calm the room while remaining flexible.
Textures matter: matte surfaces hide fingerprints, while subtle wood grain adds warmth.
I pair restrained tones with sleek hardware, creating a kitchen that feels spacious, calm, and inviting without clutter.
Compact Storage Solutions
Compact storage is the backbone of a sleek, low-profile island.
I’ll show you simple, practical tricks that keep counters clear and shelves smiling.
Here are crisp ideas you can actually use:
- Hidden drawers with slim dividers
- Fold-away shelves for small appliances
- Vertical peg rail for utensils
- Magnetic strips for knives and tins
Ready to declutter without losing prep space?
Finishes That Last: Countertops, Backsplashes, and Edge Details
Countertops, backsplashes, and edge details aren’t just finishing touches—they’re the workhorse trio that keeps a kitchen both beautiful and durable.
I’m talking materials that wear well and simple seams you can trust. I’ll guide you to choose low-maintenance options, seal where needed, and detail edges for grip and personality—without drama.
You’ll gain stylish resilience you can actually DIY with confidence.
Troubleshooting DIY Island Hurdles: Common Fixes and Fast Wins
When a DIY island throws you a curveball, I keep things simple: pinpoint the problem, grab a quick fix, and move on.
- Check hardware alignment and tighten screws.
- Re-seal a leaky seam with matching caulk.
- Relevel the island, then shim as needed.
- Swap a stubborn cabinet hinge or drawer glide.
Conclusion
Imagine DIYing your own island? You’ve got this. One stat I love: homes with DIY projects see a 30% boost in satisfaction when they reflect your actual daily flow. That means your kitchen becomes a personal, practical stage, not a showroom. Start small, plan smart, and embrace imperfect progress. If a wobble happens, rebuild and shrug—you’re learning. By the end, you’ll stand back, grin, and think, “Yep, I built this.”