I’m here to show you how 19 IKEA kitchen cabinet hacks can feel premium without breaking the bank. I’ll start with a smart budget blueprint and finish with luxe details like matte or satin finishes, brass accents, and timber-look doors that read high-end. We’ll conceal flaws with trim, add soft-close hardware, and layer lighting for depth. Smart layouts and DIY finishes cap it off, turning basics into wow—with more tips you’ll love as you explore further.
Can IKEA Cabinets Look Premium on a Budget?

Absolutely—yes, IKEA cabinets can look premium without blowing your budget.
I’ll show you how I elevate their vibe with smart choices: matte fronts, soft-close hardware, and cohesive color storytelling.
Swap pegboard era for curated hardware, add under-cabinet lighting, and pair with luxe countertops.
We’re talking clean lines, purposeful accents, and a polished, approachable finish that earns compliments. Additionally, incorporating stylish cabinet designs can further enhance the overall aesthetic of your kitchen.
Start With a Budget Blueprint: Budgeting Criteria for IKEA Kitchens

I’m outlining a budget blueprint that keeps my IKEA kitchen goals honest: start with a clear budget, prioritize essential upgrades, and earmark those hidden costs. It’s also crucial to consider small kitchen remodel ideas that can maximize both style and functionality without breaking the bank. I’ll walk you through what to fund first, what can wait, and how small, smart tweaks can add up fast.
Ready to map it out together so we don’t overspend or underdo the style?
Set Clear Budget
Starting with a clear budget blueprint keeps IKEA kitchen dreams from turning into sticker shock.
I’ll outline a sane framework so you don’t wander into splurge territory, then share practical moves you can actually implement.
1) Define total spend upfront
2) Allocate by zone and priority
3) Reserve a safety cushion
4) Compare options with real costs
Additionally, setting a budget can significantly enhance your kitchen remodel’s overall value, as strategic investments in high-quality fixtures and finishes tend to yield better returns in property valuation.
Prioritize Essential Upgrades
If you’re budgeting right, start by prioritizing essential upgrades that punch above their weight—the stuff that affects function, safety, and long-term value before chasing fancy finishes.
I focus on sturdy hinges, reliable drawer systems, and efficient space planning, because quality saves you headaches later.
When components perform, your kitchen feels luxe with less cash, less waste, and zero regret. Additionally, smart layout tips can further enhance your kitchen’s flow, ensuring an efficient and enjoyable cooking experience.
Allocate Hidden Costs
Allocating hidden costs starts with a clear blueprint, because what you don’t see can derail a budget faster than a mismeasured cabinet gap.
I’ll guide you with practical checks, so your IKEA kitchen stays chic and affordable.
- Account for delivery and assembly surcharges
- Include hardware and organizers beyond basics
- Plan for potential cabinet hardware upgrades
- Reserve a contingency for changes or mistakes
Additionally, consider that easy hardware swaps can drastically enhance the overall aesthetic without breaking the bank.
How to Choose the Right Cabinet Finish: Matte, Satin, or Brass Accents

Choosing the right cabinet finish isn’t about chasing trends; it’s about the mood you want in your kitchen. Matte feels calm and practical, minimizing fingerprints, while satin adds subtle shine without glare. Brass accents spark personality, warming cool palettes. I suggest pairing matte with brass sparingly, and save satin for a balanced sheen. Cabinet colors can dramatically enhance the overall elegance of your space. Pick what makes your space feel polished, not gimmicky.
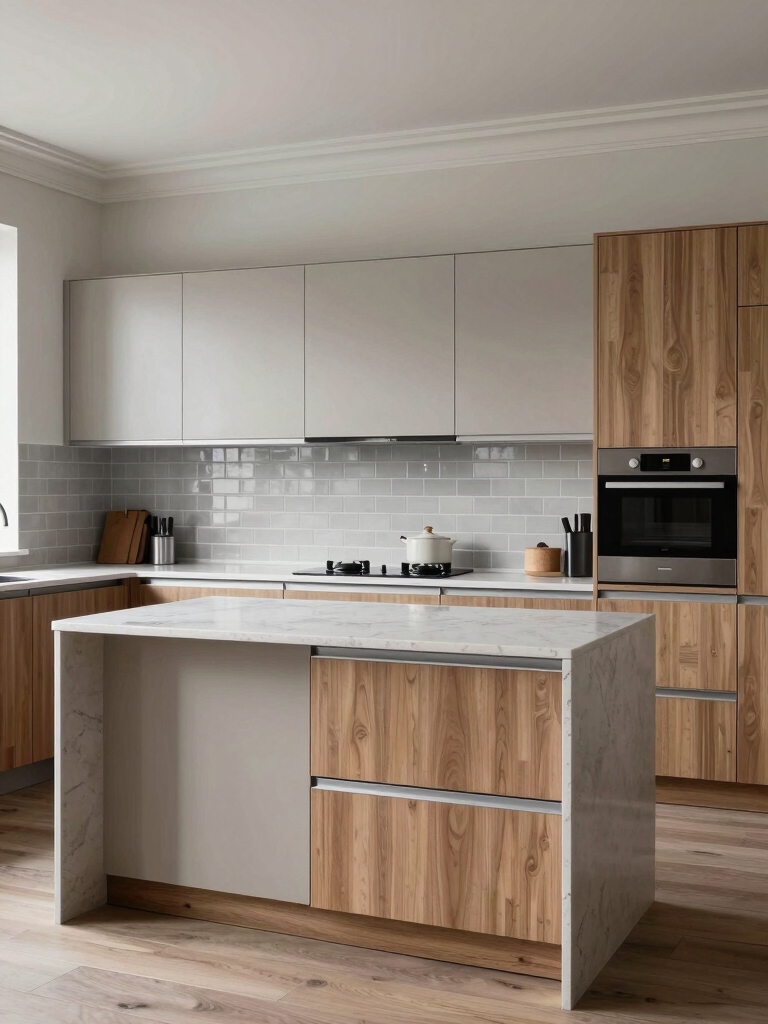
Timber-Look Doors That Read High-End Without the Price

Timber-look doors can give you that luxe vibe without the luxury price tag, and I’m here for it.
I’ll show you how timber-textured aesthetics read high-end yet stay budget-friendly, so your kitchen feels premium without the sticker shock. Sleek kitchen cabinets can elevate the overall look of your space, making it feel sophisticated and stylish.
Let’s explore smart swaps and finish details that punch above their weight but keep your wallet happy.
Timber-Textured Aesthetics
Ever since I started mixing IKEA finds with a touch of real-wood vibes, timber-textured doors have become my secret weapon: they deliver high-end warmth without the price tag.
- Match tones with warm accents
- Pair with matte brass hardware
- Use subtle grain variation
- Layer soft lighting for depth
Incorporating elements like warm and timeless white oak can enhance the overall aesthetic, making your kitchen feel even more inviting.
Affordable High-End Look
Switching from timber textures to timber-look doors lets you get the luxe vibe without the price tag, and I’m here for it.
I’ll show you how to pair matte finishes with subtle hardware for a refined silhouette, plus clever lighting that makes grain read as premium.
It’s budget-smart, chic, and totally achievable with IKEA’s adaptable framework.
Let’s elevate without overspending.
Conceal Flaws With Trim and Framing for a Seamless Reveal

When gaps and imperfect edges pop up in an Ikea kitchen, I don’t panic—I trim, frame, and call it a design moment.
- Pick thin molding to bridge gaps
- Align with level using lightweight spacers
- Paint trim to blend with cabinets
- Add reveals that catch light and eyes
Pair Open Shelving to Balance Storage and Display
I’ve shown you how to trim gaps and stage edges for a seamless Ikea look; now we balance function and flair by pairing open shelving with cabinets.
Open shelves tease display while keeping essentials reachable, so the kitchen feels curated, not crowded.
Mix heights and textures for personality, but keep grouping logical: everyday staples near prep zones, collectibles at eye level.
Layer Toe-Kick and Under-Cabinet Lighting for Depth
Toe-kick and under-cabinet lighting aren’t just décor; they layer depth and daylight-right where you need it.
I’ll show you how this simple trick elevates every line of your kitchen without loud drama.
- Aligns shadows for sculpted cabinetry
- Guides traffic with subtle glow
- Highlights countertop textures
- Keeps tasks visible without glare
Create Drama With Dark Base Cabinets
Dark base cabinets bring Luxe Depth Effects that transform any kitchen mood.
I’m curious how you’d pair them with hardware and lighting to maximize that moody, upscale vibe.
Let’s riff on Dark Base Magic and what it could mean for your space.
Dark Base Magic
In this Dark Base Magic, I’ll show you how deep tones can transform a kitchen from functional to dramatic without overpowering the space.
- Pair charcoal lowers with light countertops for contrast.
- Add matte black hardware to anchor fixtures.
- Introduce warm wood accents to soften edges.
- Use recessed lighting to highlight grain without glare.
Luxe Depth Effects
Luxe depth isn’t about gloom; it’s about mood.
I love how dark bases anchor a kitchen, yet reveal light accents like a spotlight on texture. I pair matte ink with brass hardware and subtle highlights to add dimension without shouting.
You’ll notice depth through shadows, reflections, and careful contrast—dramatic, not heavy, and totally magazine-ready.
Your kitchen, redefined.
Install Custom Panels for a Built-In Look
If you want your IKEA cabinets to feel custom without breaking the bank, start by installing panels that mimic built-in furniture.
I walk you through the process, keeping it sleek and practical, so your kitchen reads solid and seamless.
1) Choose full-height panels for a continuous wall
2) Match thickness to cabinet frames for cohesion
3) Install integrated toe kicks for a built-in vibe
4) Seal edges to avoid shadow lines and gaps
Hidden Storage Solutions That Spark Joy
Hidden storage can feel like a game of clever Tetris, and I’m here to help you win.
I’ve got practical tricks that hide clutter without shouting, from shallow pull-outs for lids to labeled jars tucked in a corner.
You’ll glide past chaos with serene compartments, smart dividers, and discreet organizers.
Joy blooms when every inch serves purpose, gracefully.
Elevate Doors With Glass Inserts
Ever thought glass inserts could make your IKEA doors glow with a little personality?
I’m curious how you’ll use that glow to bring clarity and a touch of openness to your cabinets.
Let’s chat about how Glass Inserts Aglow and Doors With Clarity can transform the vibe without sacrificing function.
Glass Inserts Aglow
Glass inserts aren’t just pretty—they’re the glow-up your cabinet doors deserve.
I guide you through subtle, high-end touches that make DIY look deliberate, not gimmicky.
Here are four punchy ideas to glow up your space:
- Backlit panels for a soft halo
- LED-strip frames with warm temperature
- Textured glass to mask fingerprints
- Mixed metal hardware for contrast
Doors With Clarity
Doors With Clarity: elevating cabinet fronts with glass inserts is where subtlety meets shine, and I’m here to show you how to do it without turning your kitchen into a showroom.
I’ll mix clear panels with LED accents, swap hardware for sleek pulls, and keep framing neutral. The result feels refined, not flashy—clean lines, clever light, and instantly elevated IKEA essentials.
Soft-Close Hardware for Quiet, Premium Feel
Soft-close hardware isn’t just a fancy touch—it’s a quiet revolution in your kitchen.
I’ll share how this upgrade upgrades feel, not just function, with a premium, serene vibe you’ll notice daily.
- Silent hinges reduce clatter
- Soft-opening drawers feel effortless
- Damped doors glide shut
- Durable components, lasting satisfaction
Functional Details: Pull-Outs and Organizers That Work
Pull-outs and organizers aren’t just accessories—they’re the backbone of a kitchen that actually works.
I design spaces so every utensil, pot, and snack finds its home without tripping over itself.
Smooth slides, sturdy dividers, and tall pantry pull-outs keep chaos contained.
You’ll save time, cut clutter, and actually enjoy cooking—without chasing items behind closed doors.
Practical, polished, repeatable.
Color Blocking for Visual Interest
Color blocking is my favorite way to add personality to a kitchen without shouting, and it’s shockingly easy to pull off.
I mix bold and neutral hues to guide the eye and create zones that feel intentional, not chaotic. Here are quick ideas:
- Pair two contrasting cabinet tones
- Use a single accent color on an island
- Paint open shelving a bright shade
- Balance with subtle hardware contrasts
Veneer Skins and Covers to Refresh Cabinets
Veneer skins and covers give your cabinets a fresh face without a full refinish, and they pair beautifully with color-blocked ideas you already love.
I apply lightweight sheets over existing surfaces, quick to resize and swap when trends shift.
You’ll gain a high-end feel with minimal disruption, plus easy maintenance.
It’s a clever, budget-smart tweak I-can-try next weekend.
Upgrade the Supporting Elements: Faucets and Sinks
Upgrading the supporting elements is where the kitchen truly feels new, so I’m eyeing high-end faucet upgrades, durable sink materials, and those sly hidden connection tricks that save space.
I’ll show you options that balance style with reliability, from sleek finishes to practical install tactics.
Let’s chat about making every splash count without the chaos of a DIY disaster.
High-End Faucet Upgrades
High-end faucet upgrades can instantly elevate your IKEA kitchen, turning a functional space into a thoughtful showcase.
I’m sharing smart, actionable choices without the fluff, so you shop once and smile long.
- Switch to a pull-down or pulldown spray for precision
- Choose a matte black or brushed finish for contrast
- Opt for ceramic disc valves for drip-free performance
- Install a single-handle design for seamless control
Sink Material Choices
Choosing the right sink material matters as much as the faucet you pair with it, because durability, sound, and style all ride on that one choice.
I’ll spell out pros and quirks, from stainless for reliability to granite composite for quiet mornings, and even farmhouse vibes.
I’ll keep tips practical, proven, and focused—your kitchen’s centerpiece, without the drama.
Hidden Connection Tricks
Now you see how the plumbing quite literally ties the room together: hidden connection tricks that make faucets and sinks behave like a well‑rehearsed duet.
I share practical upgrades, then show you four clean ideas to elevate function without clutter.
- Use mismatched hoses for flexibility
- Install a quick‑connect faucet line
- Conceal supply lines with a slim, removable panel
- Upgrade to a single‑hole, high‑arc faucet
Smart Cabinet Layouts for Better Flow
If you’re rethinking your kitchen workflow, smart cabinet layouts can feel like a design shortcut that actually saves steps.
I map zones by task, not clutter, placing heavy use items within reach and awkward corners into predictable nooks.
Pull, pivot, and glide ideas fuse function with form, so every hinge, shelf, and pullout earns time and reduces chaos without shouting “designer.”
DIY Finishing Touches: Paint, Stain, and Seal
Ready to personalize your IKEA cabinets? I’ll guide you through a crisp finish that elevates without shouting.
Think paint, stain, seal with purpose. I’m all about clean lines and durable results, so you don’t waste time.
Here are solid moves:
- Prep surfaces
- Choose a durable topcoat
- Test color on a door
- Apply thin, even coats
Budget, Timeline, and Real-World Planning You Can Reuse
We’ve got the finishing touches down, now let’s map out how you’ll actually pull this off without burning through your budget or timeline.
I’ll share practical, reusable planning tricks: prioritize essentials, set a realistic schedule, and build in buffers.
Source smart, repurpose components when possible, and test shifts early.
With steady steps and a dash of wit, you’ll nail high-end vibes without the drama.
Conclusion
Imagine walking into a kitchen that looks like it cost a fortune, but your wallet sighs with relief. With IKEA’s modular magic, you sketch the dream, then veil it in trim, brass hints, and timber whispers. The layout clicks, faucets gleam, and every drawer sighs with quiet satisfaction. You didn’t break the bank—you bent it to your will. So go ahead, savor the look, and let your space tell a story that’s stylish, smart, and distinctly you.


