I’m excited to help you blend modern conveniences into a warm, traditional Indian kitchen that keeps ritual and spice at its heart. I’d pick a U or L layout for efficient workflow, a powerful easy‑clean chimney and heavy‑duty hob for masala cooking, and pull‑out masala drawers with labeled jars to tame spice clutter.
Durable quartz counters, non‑slip flooring and layered lighting make daily life easier, and small smart appliances save time—keep going to see practical plans and phased upgrades.
How to Modernise an Indian Kitchen: A Step‑by‑Step Plan

Let’s roll up our sleeves and refresh your Indian kitchen step by step: I’ll walk you through practical updates that keep the soul of traditional cooking while making the space more efficient, safer, and visually lighter.
I’d start with better ventilation, brighter task lighting, durable counters, and compact appliances.
Add organized storage for spices, a cleanable backsplash, and non-slip flooring for everyday ease.
Stylish kitchen ventilation solutions make a statement and can transform both air quality and aesthetics with sleek ventilation options.
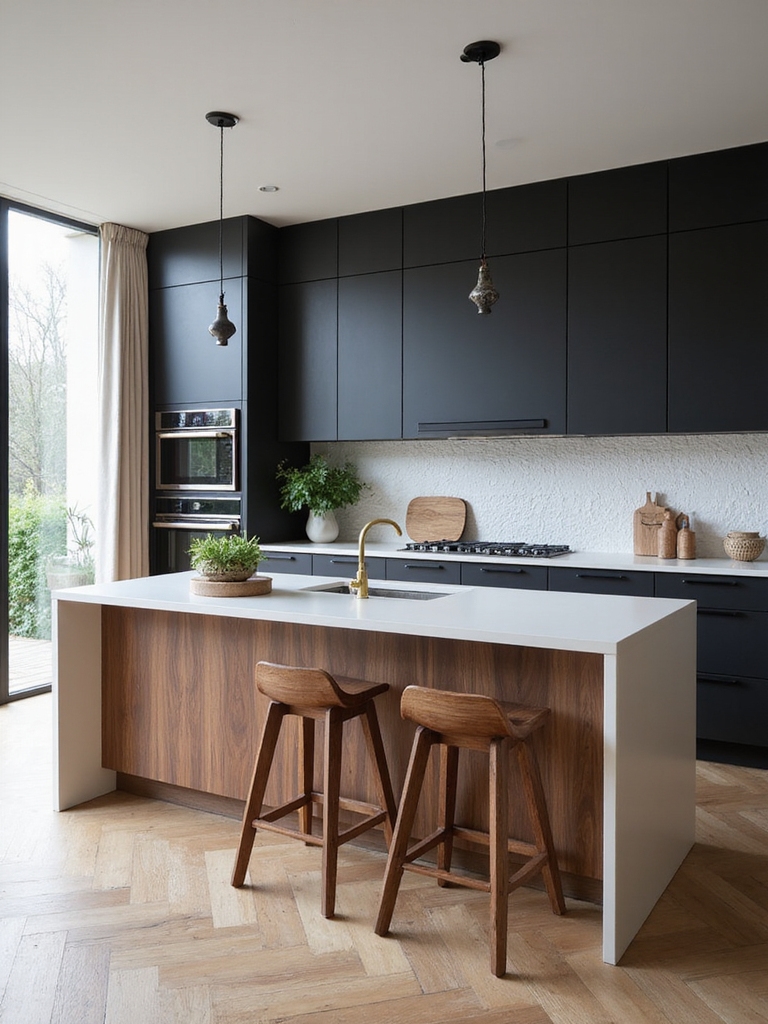
Kitchen Layouts: Galley, L, Island, U – Which Suits You?

When I’m helping someone choose a kitchen layout, I start by picturing how they move—cooking, sweeping, and passing plates—because the right plan makes daily life flow easier.
I suggest a galley for narrow spaces, an L for cozy corners, an island for social cooking, and a U for generous prep.
We balance traffic, storage, and the home’s rustic rhythm together.
Modern U-shaped configurations can maximize counter space and workflow by placing appliances and prep areas along three connected walls, creating an efficient U-shaped work triangle for meal preparation.
Zoning for Indian Cooking: Wet, Dry, and Ritual Areas

When I plan an Indian kitchen I place the wet zone—sink, dishwasher, and heavy prep—so it’s easy to clean and stays apart from the dry cooking work.
I also make sure the ritual nook is tucked away from splashes and heat, with a calm surface and soft lighting for daily offerings.
These simple zones keep cooking efficient and the sacred corner respectful.
I often incorporate authentic Indian accents and materials for a global-inspired look that still honors traditional elements.
Wet Zone Placement
Because water and heat shape how an Indian kitchen works, I place the wet zone where washing, heavy prep and stovetop cooking flow together without crossing the ritual or dry areas.
I keep durable, easy-to-clean surfaces, deep sinks, and strong ventilation nearby. Positioning drainage and gas lines thoughtfully makes chores smoother, and a simple work triangle reduces steps during busy meal rhythms.
To honor both heritage and practicality, I often incorporate traditional materials with modern layouts for authentic Indian kitchen appeal.
Ritual Nook Planning
After placing the wet zone where washing, heavy prep and cooking flow together, I make space for a small ritual nook that honors daily practices like lighting a diya or keeping fresh offerings.
I tuck it near natural light, use simple wood shelving, a stone tray and easy-to-clean surface. It’s intimate, uncluttered and sacred—accessible yet separate from intense cooking activity.
I often incorporate luxury decor elements to elevate the nook while keeping its simplicity.
Modular Cabinetry That Hides Spices, Appliances, and Clutter

If I could recommend one upgrade for an Indian kitchen, it’s modular cabinetry that tucks spices, appliances, and clutter out of sight while keeping them within easy reach.
I love hidden pull-out shelves, lift-up appliance garages, and shallow spice drawers that feel handmade yet clever.
They keep countertops calm, preserve rustic charm, and make cooking smoother without sacrificing the warmth of a family kitchen.
Smart pull-out solutions for lower cabinets can dramatically increase storage efficiency with space-saving organizers.
Smart Spice and Utensil Storage for Indian Kitchens

I love when a kitchen makes cooking effortless, so I’ve started fitting pull-out masala drawers that keep spices visible and fresh.
I also use vertical utensil racks for ladles and tongs so everything’s within reach without cluttering the countertop.
Modular spice baskets tie it together, letting me rearrange blends for festivals or everyday meals.
I often achieve this look by combining standard IKEA units into customized layouts for efficient storage and a seamless appearance, using standard IKEA units to create tailored solutions.
Pull-Out Masala Drawers
I’ve come to love pull-out masala drawers for how neatly they tuck spices and everyday utensils out of sight yet keep them within easy reach, making my cooking flow smoother.
I fit labeled jars, a mortar, and small ladles in shallow rows; everything’s visible at a glance.
They save counter space, cut clutter, and feel like a small, practical luxury in a busy, homely kitchen. They also pair well with proven storage hacks that help keep the kitchen pristine 24/7.
Vertical Utensil Racks
Think of vertical utensil racks as a way to free up drawers and bring everything you reach for most into plain sight.
I’ve mounted slim wooden and metal racks near my stove to hang ladles, tongs, and spatulas; herbs scissors and mortar tools live there too. It’s tidy, accessible, and adds a cozy, rustic charm that keeps cooking flowing.
Modular Spice Baskets
You’ll find vertical racks make grabbing tools simple, and modular spice baskets do the same for the endless jars and tins that fill an Indian kitchen.
I love fitting labeled baskets into drawers or hanging them on rails — each spice group stays tidy, accessible, and fragrant.
They save counter space, speed cooking, and keep sentimental tins visible without clutter, blending utility with homespun charm.
Durable Countertops for Heavy Masala Work
I reach for a bowl of crushed red chilies and imagine a countertop that can take the daily pounding of masala work without complaint; when I cook Indian food regularly, I want a surface that’s tough, low-maintenance, and still feels warm under my hands.
I favor granite or engineered quartz for durability, seamless joints, and easy wiping. A honed finish hides scratches and keeps the kitchen inviting.
Backsplashes: Stain‑Resistant Options With Indian Patterns
When I choose a durable countertop, I also want a backsplash that can handle splatters from turmeric and tomato without staining or showing wear.
I favor glazed ceramic tiles with bold Indian motifs, handpainted-look encaustic tiles, or glass panels printed with paisley and jaali patterns.
They’re easy to wipe, age gracefully, and add warm, rustic charm to busy kitchens.
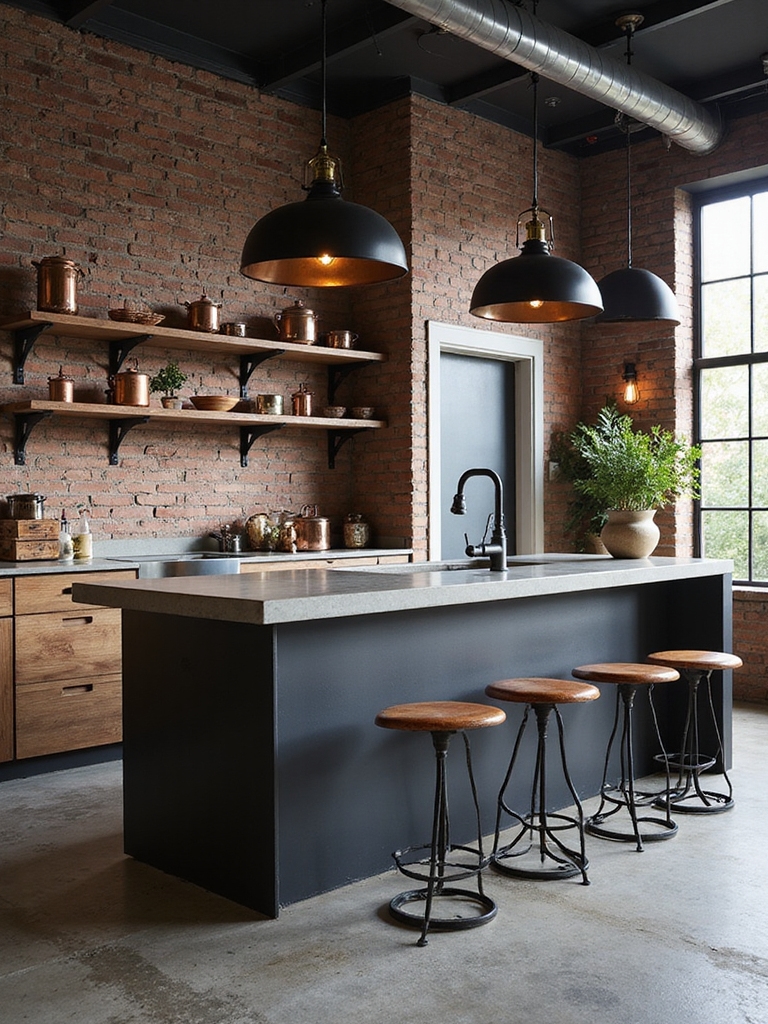
Ventilation and Chimneys for Intense Stovetop Cooking
Since a lot of Indian cooking sends up steam, smoke, and fragrant spices, I make ventilation my top priority and choose chimneys that can handle intense stovetop work without fuss.
I prefer powerful, easy‑clean units tucked into warm timber or brick surrounds, with strong extraction, simple controls, and good lighting.
They keep aromas true and kitchens comfortable during long, joyful cooking sessions.
Appliances to Prioritise: Cooktops, Grinders, Hobs, and Chimneys
Although every kitchen needs flair, I put appliances at the heart of Indian cooking because they’re the workhorses that make everyday meals possible.
I favour sturdy cooktops, powerful wet grinders, efficient hobs and reliable chimneys to tame spice-filled steam and smoke.
Choose durability and easy cleaning; they keep your rhythm steady.
- Heavy-duty gas or induction cooktops
- High-capacity wet grinders
- Silent, high-CFM chimneys
Sink and Water Planning: Double Sinks, Drainers, and RO Placement
When I plan an Indian kitchen, I think about placing double sinks so one basin handles washing and the other handles rinsing or prep, keeping workflow smooth.
I also consider drainer orientation—left or right, sloped toward the sink, or a separate draining board—so water flows where I want it.
And for the RO, I usually tuck it under the sink or in a nearby cabinet with easy access for maintenance and a short feed to the tap.
Double Sink Placement
I like to start by picturing how you move in the kitchen: do you rinse, prep, and wash in one steady flow or hop between tasks?
I place double sinks to separate soaking from prep, keep RO nearby for drinking, and align plumbing for easy maintenance.
- One sink for washing, one for prep
- RO undercounter near tap
- Plumbing access panel for service
Drainer Orientation Options
Because water movement shapes how you actually use the sink, I think about drainer orientation as a practical rhythm: a left-side drainer favors prep-to-wash flow for right-handed cooks, a right-side drainer suits lefties, and a central drainer keeps things symmetrical for shared kitchens.
I prefer rustic layouts where drainers angle subtly toward the basin, making drying and rinsing intuitive and tidy.
RO Unit Positioning
Although placement might seem technical, I treat the RO unit like a kitchen companion that should be close enough for convenience but tucked away to keep the counters honest and uncluttered.
I prefer under-sink cabinets or a nearby pantry niche, balancing access, aesthetics, and serviceability.
- Under-sink: hidden, neat, good for dual sinks
- Pantry niche: accessible, less damp
- Wall-mounted: saves floor space, service-friendly
Lighting: Task Lights, Puja Corner Illumination, and Ambience
When I plan kitchen lighting, I think about three things: clear task lights where we chop and cook, a gentle glow for the puja corner that honors ritual without glare, and layered ambience that ties the room together.
I choose warm under-cabinet LEDs for prep, a soft lamp or concealed strip for the puja nook, and dimmable overheads to shift mood from busy to cozy.
Flooring Choices That Handle Spills, Heat, and Heavy Traffic
If I’m picking kitchen floors that must stand up to spills, heat, and constant feet, I reach for materials that marry toughness with easy care—think glazed tiles, engineered stone, or high-quality vinyl that resists stains and hot pots. I prefer warm tones and textured finishes that hide wear.
- Glazed porcelain: durable, easy mop
- Engineered stone: heat and scratch resistant
- Luxury vinyl: cushioned, waterproof
Smart Appliances & Automation to Save Time and Energy
Because smart appliances now talk to each other, I can spend less time babysitting dinner and more time enjoying company, while still cutting energy use.
I’ve paired a sensor stove, smart oven and app-controlled chimney to preheat, monitor simmering and vent only when needed.
Timers, voice commands and energy reports keep routines simple, blending modern convenience with our home’s warm, lived-in rhythm.
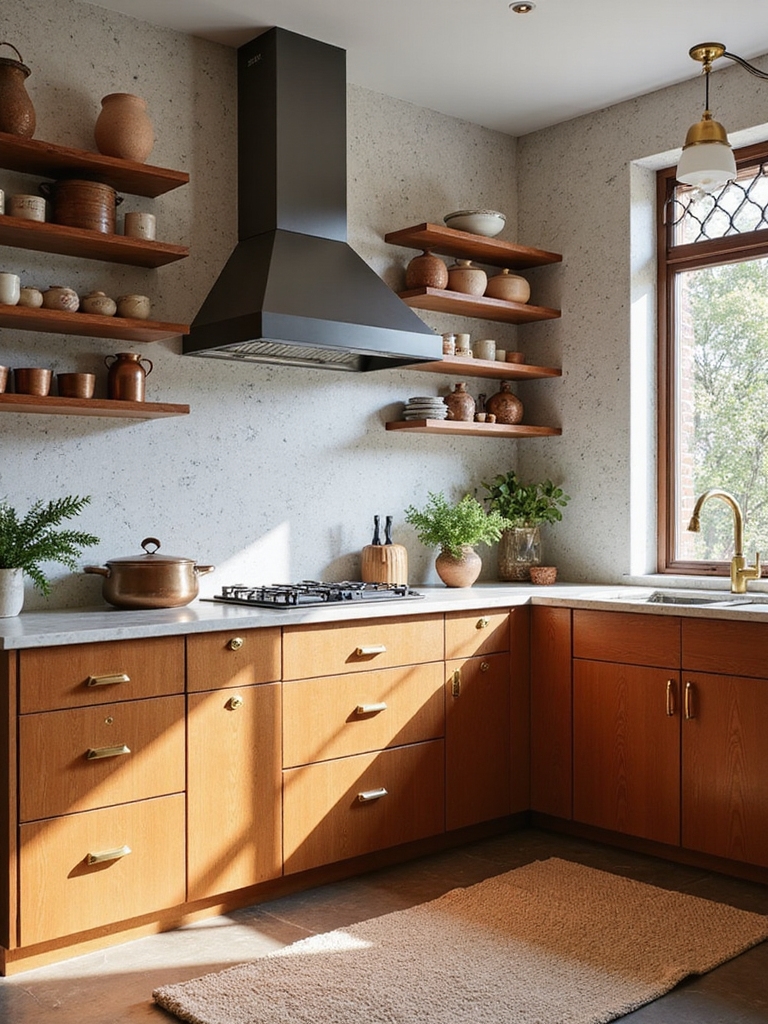
Colour, Texture, and Décor to Keep the Kitchen Traditionally Indian
While planning a kitchen that feels unmistakeably Indian, I lean on deep, earthy colours, layered textures, and handcrafted accents to anchor the space in tradition yet keep it inviting, not museum-like.
I mix terracotta, indigo, and muted greens, brass details, woven baskets and handblocked textiles to tell a lived-in story.
- Terracotta tiles and rough plaster
- Brass lamps and drawer pulls
- Handwoven linens and pottery
Budget‑Friendly Upgrades and a Phased Renovation Checklist
I’ll show you how small, clever choices—like using laminate or reclaimed wood—can give a traditional Indian look without blowing the budget.
We’ll map out which tasks to do first, so you get a working kitchen quickly and tackle bigger jobs later.
Along the way I’ll recommend simple temporary fixes, like portable burners or open shelving, to keep cooking comfortable between phases.
Smart Low-Cost Materials
Let’s roll up our sleeves and talk about smart, low-cost materials that give an Indian kitchen charm without blowing your budget.
I choose durable laminate, recycled timber accents and splashy ceramic tiles to refresh surfaces affordably.
They age well and feel homely. Small swaps make big impact; I plan them around use and maintenance.
- Laminate countertops
- Reclaimed wood shelving
- Hand-painted ceramic tiles
Prioritized Work Phases
Those laminate counters and hand-painted tiles set the tone; now I map work into bite-sized phases so you can upgrade without chaos or cost overruns.
I prioritize safety, plumbing, and lighting first, then cabinets and surfaces, finally decor and storage tweaks.
I suggest simple timelines, budget buffers, and local craftsmen for each phase so progress stays steady and affordable.
Temporary Functional Fixes
Because a full overhaul can wait, I start with low-cost fixes that keep cooking safe and sane while we plan bigger changes.
I like practical, rustic tweaks that feel immediate and comforting. Small steps build momentum and cut disruption as we phase work.
- Install a temporary splashback and better lighting.
- Swap worn handles and seal leaky pipes.
- Use portable islands and labeled storage.
As you step back from the dust and the sweet, spicy steam, remember this is your kitchen’s own Ramayana — a timeless story retold with new comforts.
I’ve shared practical steps so you can honor rituals, hide the clutter and welcome clever gadgets without losing the soul.
Take it one phase at a time, choose what sings to your family, and let the heart of your home become both familiar and freshly alive.