I’ve turned cluttered lower cabinets into calm, usable space with pull-out trays, full-extension drawers, and slim vertical slots for baking sheets. I measure at several points, pick heavy-duty ball-bearing slides and soft-close dampers, and favor steel frames or sealed hardwood for durability.
Trash and recycling fit tidy separated bins; corner carousels reclaim dead zones. I’ll share tips on measuring, matching load ratings, retrofit vs pro installs, and cost ranges if you want more.
Why Choose Pull-Out Kitchen Solutions
When I redesigned my lower cabinets, I chose pull-out solutions because they make daily kitchen work feel practical and pleasant; they turn deep, dark spaces into easily reachable drawers so I’m not crouching or fishing for pots.
They save time, protect fragile items, and let me organize by use — spices, pans, trays — with simple access that keeps the kitchen cozy and efficient.
I also added clever corner hardware like lazy susans to solve awkward storage gaps and make use of every inch.
Cabinet Measurement Guide for Pull-Out Drawers

Before we pick a pull-out drawer, I measure the interior cabinet width carefully so the slides will fit snug without rubbing.
I also check the cabinet depth to guarantee the drawer reaches the back and note the height to allow for full extension and any plumbing or shelf conflicts.
Doing those three quick measurements saves me from surprises and makes installation smooth.
For especially narrow spaces, I often rely on space-saving organizers to make the most of every inch.
Measure Interior Cabinet Width
Let’s roll up our sleeves and get the exact measurements right: I’ll show you how to measure the interior width of your lower cabinet so your pull-out drawer fits snugly and slides smoothly.
Start front-to-back at the narrowest point, measure between the side walls, repeat at top and bottom, and subtract clearance for slides.
Jot values and double-check before ordering.
Consider leaving a small gap for ventilation and movement, which often improves longevity and prevents jams when using pull-out slides.
Determine Depth And Height
Since you want your pull-out drawer to glide fully and not bang the back or hit the face frame, I measure the cabinet depth and height carefully and walk you through what each number means.
I note interior depth from face frame to back wall, subtract clearance for slides, then measure usable height from bottom shelf to underside of countertop, accounting for toe kick and hardware.
I also consider discreet storage techniques for hiding bulky appliances when planning drawer placement and size.
How to Pick the Right Pull-Out for Your Space
I’ll help you pick a pull-out that actually fits by starting with careful interior measurements of your cabinet.
Match the style and size of the pull-out to how you’ll use it—pots, pantry goods, or trash—and double-check the weight rating and hardware so it’ll glide smoothly for years.
If you want, I’ll walk through examples for common cabinet types next.
Professionals often combine different pull-out types into a single plan to create efficient, task-specific organization systems throughout the kitchen.
Measure Cabinet Interior Carefully
When I measure the inside of a lower cabinet, I start by taking three key dimensions—width, depth and height—because those numbers decide which pull-out will actually fit and function.
I use a tape, note any obstructions like hinges or plumbing, and measure at several points for squareness.
Jotting clear numbers prevents surprises and helps pick a snug, stable pull-out.
IKEA’s standard unit sizes can help you find compatible pull-outs and plan layouts with confidence, especially when you know the cabinet’s exact dimensions and how they match standard IKEA units.
Match Pull-Out To Use
Think about how you actually use the cabinet — that’s the best place to start.
I’ll walk you through choosing a pull-out that fits routines: narrow trays for spices, deep drawers for pots, tiered racks for lids, and wire baskets for root vegetables.
Match height and access to items you reach for daily, so pulling feels effortless and the kitchen stays cozy and efficient.
Transforming a cluttered walk-in pantry into an organized haven can show you where pull-outs will make the biggest impact, especially when you add walk-in pantry systems that group like items together.
Check Weight And Hardware
You’ve matched the pull-out to how you use the space, so now I check weight limits and hardware to make sure the cabinet can handle real life.
I test glide smoothness, inspect brackets and soft-close mechanisms, and confirm load ratings for jars or pans.
If needed, I upgrade slides or reinforce the base so everything moves steady and feels built to last.
Upgrading to modern cabinet hardware can instantly refresh the look and function of your kitchen.
Full-Extension Drawers or Fixed Shelves?
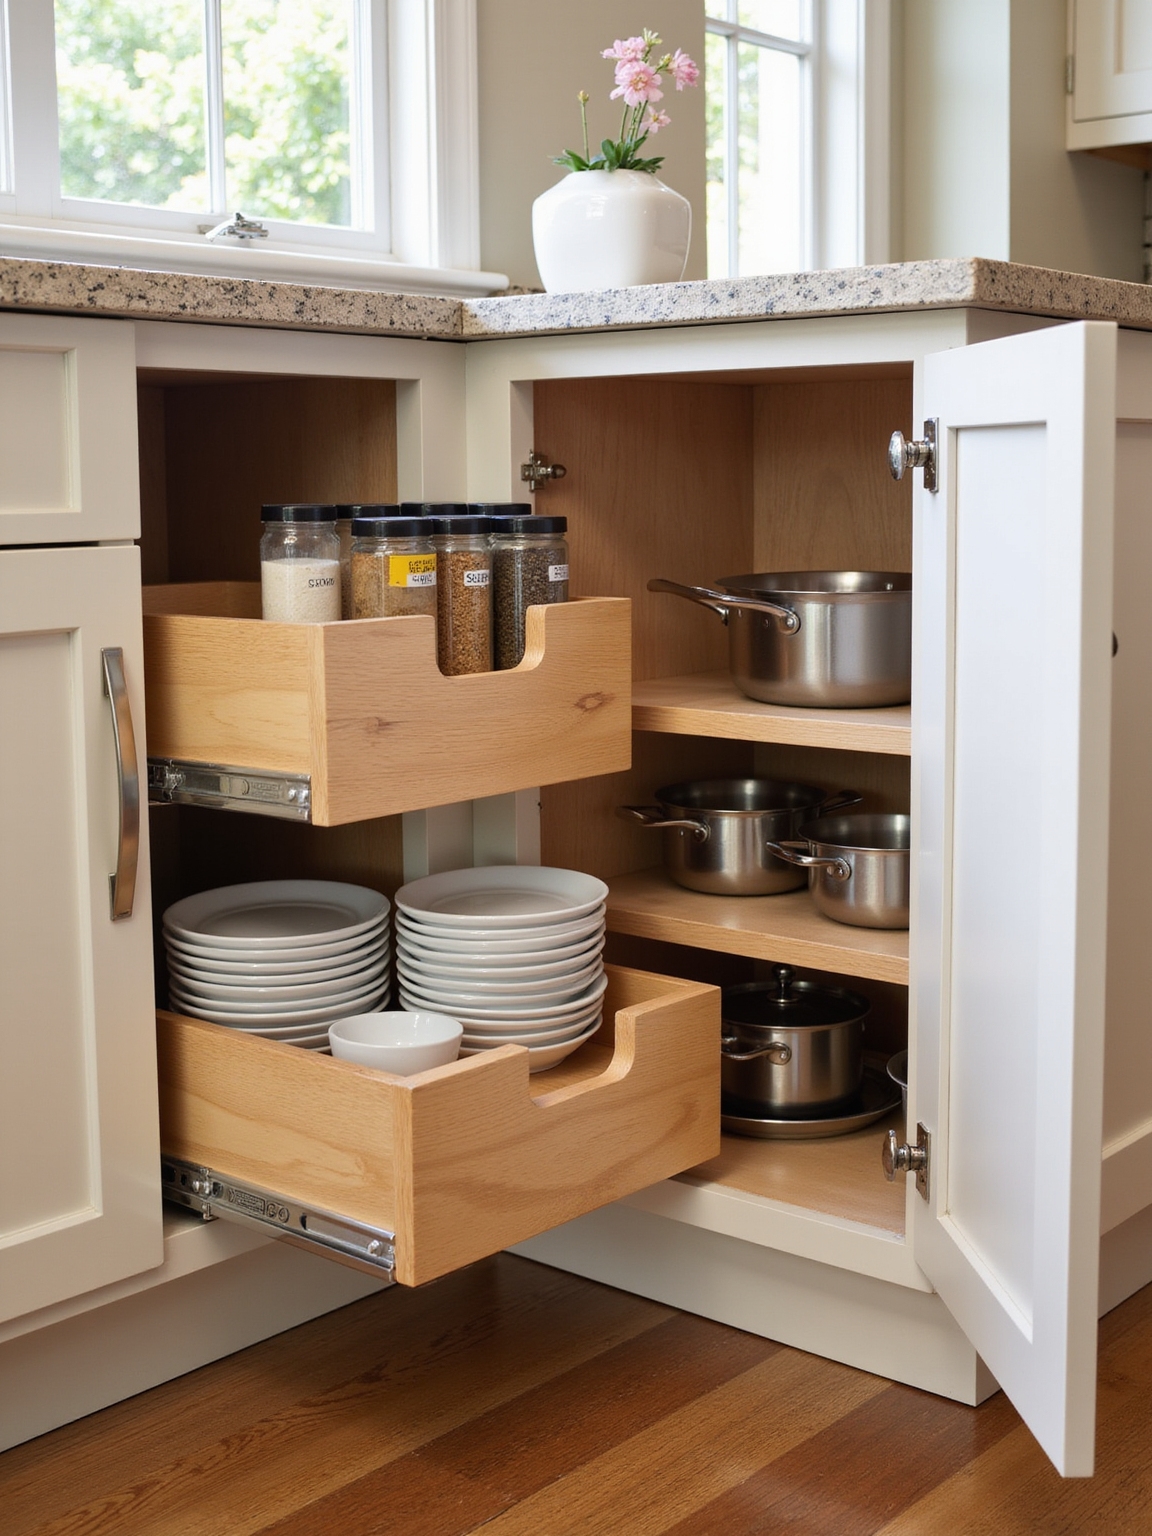
Although I love the clean look of fixed shelves, I usually steer homeowners toward full-extension drawers because they turn deep, dark lower cabinets into truly usable storage—no more digging for pots at the back.
Drawers give you easy access, better organization, and gentler handling of heavy cookware.
Fixed shelves feel tidy but often waste space; drawers feel practical, warm, and plain sensible.
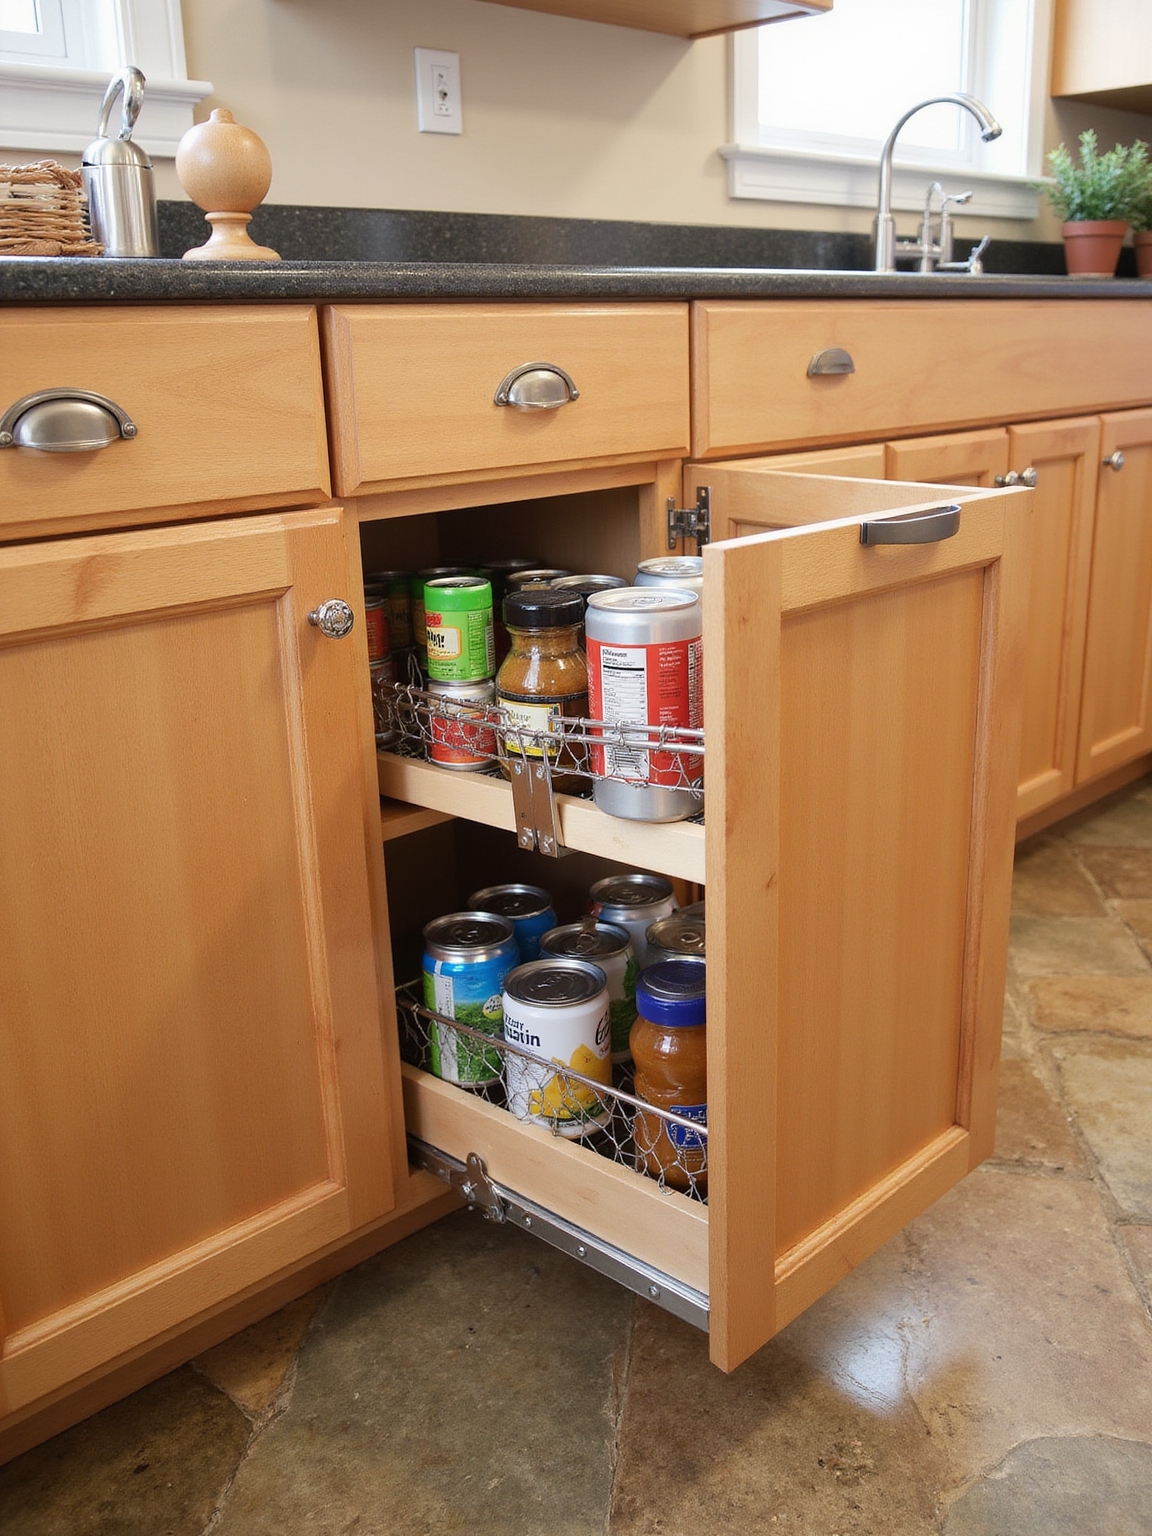
Pull-Out Pantry Shelves for Cans and Spices
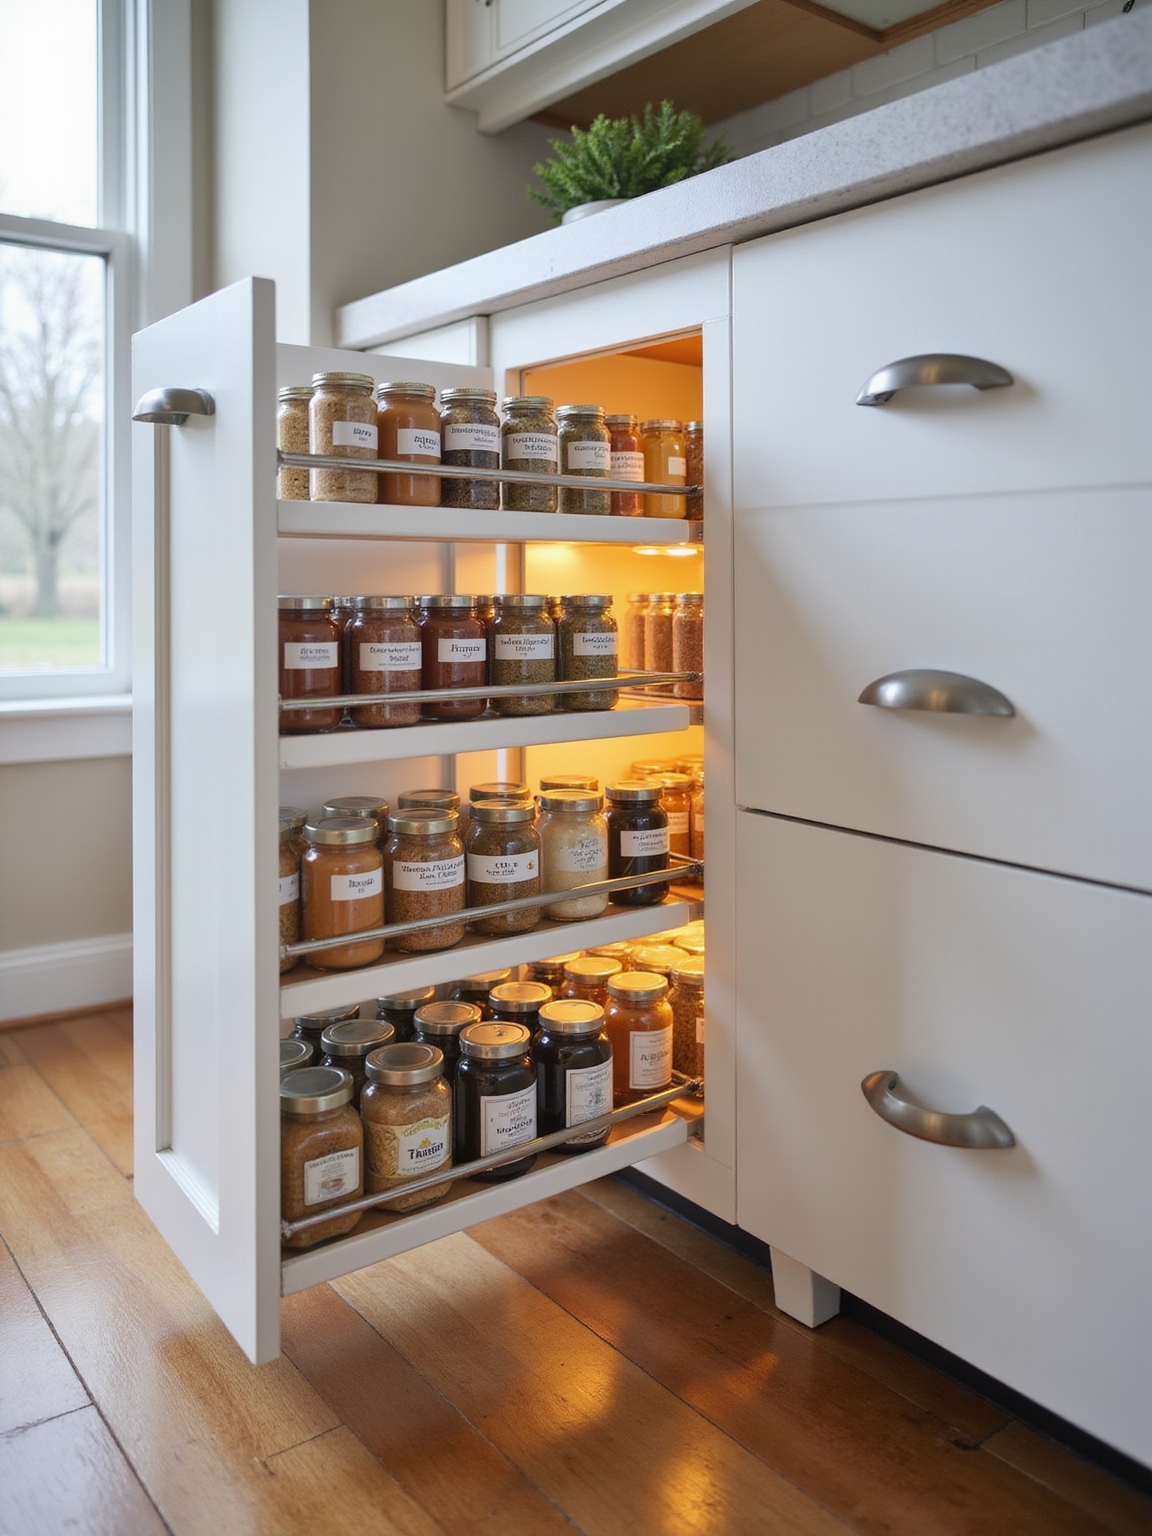
If full-extension drawers make heavy pots easy to handle, pull-out pantry shelves do the same for cans and spices—bringing a messy row of jars to eye level so nothing gets lost in the back.
I love how they tidy chaos, reveal labels, and make cooking quicker.
- Easy visibility
- Adjustable dividers
- Sturdy, quiet slides
- Shallow tiers for jars
- Simple installation
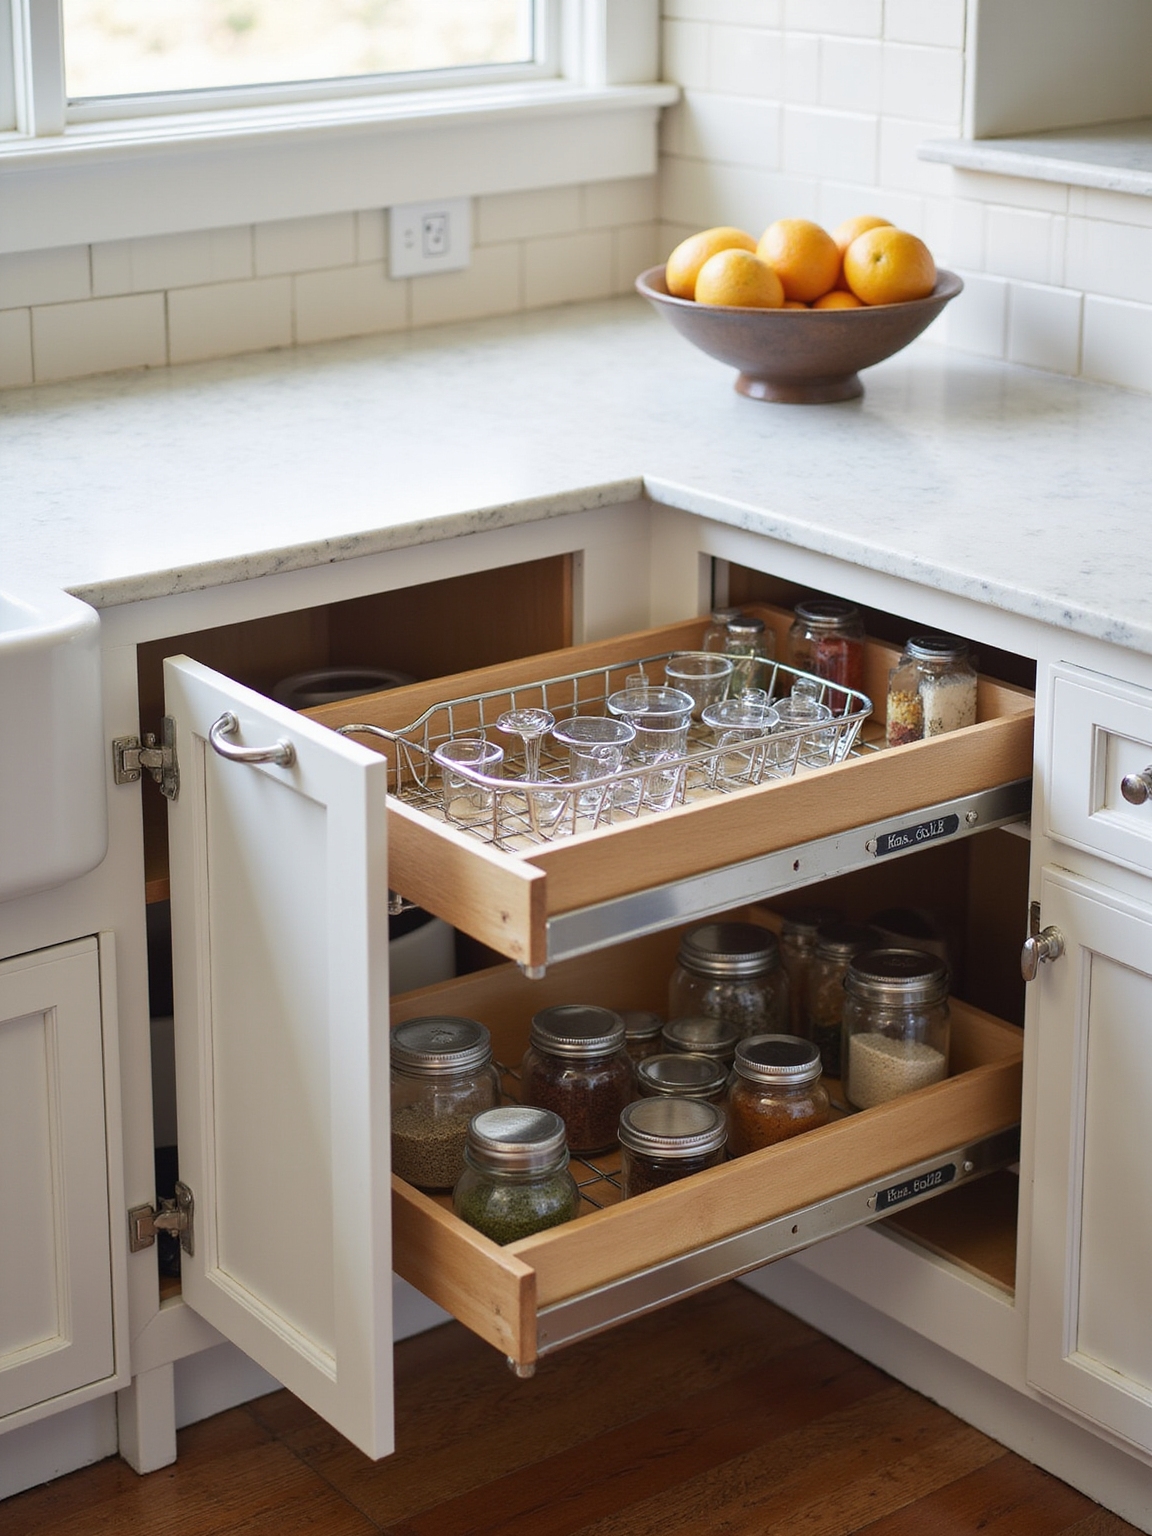
Slide-Out Trays for Pots, Pans, and Lids
I always reach for slide-out trays when I want pots, pans, and lids within easy reach without rummaging.
They keep things organized so I can see and grab what I need in one smooth pull.
Built strong for heavy cookware, they give me reliable support and peace of mind.
Easy Access Organization
I’ll show you how slide-out trays turn the back of a lower cabinet into a friendly, easy-to-reach workspace for pots, pans, and lids.
I love how they simplify daily cooking: grab what you need, slide it back, and keep order without fuss.
- Visible storage
- Quick retrieval
- Separated lids
- Neat stacking
- Gentle glide
Durable Weight Support
Think of slide-out trays as the heavy-duty helpers in your kitchen—I want them to hold up to real cookware without sagging or sticking.
I favor sturdy steel rails, reinforced bases, and smooth ball-bearing glides so pots, pans, and lids slide easily.
Proper mounting prevents wobble, protects finishes, and keeps heavy pieces accessible.
It’s simple, practical strength that makes daily cooking calmer and cozier.
Corner Pull-Outs and Blind-Cabinet Carousels
Let’s dig into corner pull-outs and blind-cabinet carousels—two clever fixes for those useless, hard-to-reach nooks in lower kitchen cabinets.
I love how they reclaim lost space, making every pot and pan easy to reach.
They’re sturdy, smooth, and quietly brilliant—perfect for a cozy, lived-in kitchen.
- Easy access
- Smooth glides
- Space reclaimed
- Organized storage
- Rustic charm
Vertical Pull-Outs for Baking Sheets and Trays
I love how a vertical pull-out tucks baking sheets and trays into a narrow strip of cabinet, freeing up shelf space for pans and mixing bowls.
It keeps each tray upright and easy to grab, so I’m not fishing through a messy stack when I need one.
Let me show you how this simple change makes access neater and much faster.
Space-Saving Vertical Storage
I’ve often found that the simplest pull-out—one thin vertical slot for baking sheets and trays—makes the biggest difference in a cramped lower cabinet.
It keeps metal flatware upright, accessible, and out of the way, giving a cozy, practical feel to the kitchen.
- Easy access
- Minimal footprint
- Gentle dividers
- Smooth glides
- Rustic charm
Organized Tray Accessibility
Pulling out a slim, vertical tray rack instantly changes how you grab baking sheets—no more digging or toppling stacks—so I keep mine stocked with the pans I use most and spaced just enough to slide a hand in.
I love that each tray sits upright, labeled by purpose. It’s tidy, quick, and feels like a small, hardworking workshop tucked into my lower cabinet.
Under-Sink Pull-Outs for Cleaners and Plumbing Access
When I open the cabinet under the sink, I want things to be tidy and still easy to reach, not a jumble of bottles and a tangle of plumbing.
I install a shallow pull-out shelf that clears pipes, keeping cleaners upright and accessible while leaving room for maintenance.
It feels cozy and practical.
- Shallow, pipe-cut shelf
- Non-slip liners
- Quick-release mount
- Soft-close slides
- Visible labeling
Pull-Out Recycling and Trash Centers
After sorting cleaners neatly under the sink, I like to carry that same sense of order to my trash and recycling—because nobody wants a bin area that smells or hides what goes where.
I favor sturdy pull-out frames with separated bins, easy lids, and liners that tuck away. It keeps compost, recyclables, and waste tidy, accessible, and oddly satisfying to use every day.
Hardware to Choose: Slides, Soft-Close, and Load Rating
I pick hardware the way I pick tools—by listening to how they feel in use—because the right slides, soft-close mechanisms, and load ratings decide whether a pull-out will be a joy or a pain.
I favor sturdy slides, reliable dampers, and sensible load margins for daily use.
- Full-extension slides
- Ball-bearing action
- Soft-close dampers
- 75–150 lb ratings
- Easy-install brackets
Durable Materials and Finishes for Pull-Out Systems
Because I want these pull-outs to last like the rest of a well-worn kitchen, I pick materials and finishes that stand up to spills, dents, and daily jostling—steel or solid hardwood for the frames, corrosion-resistant hardware, and finishes that hide wear instead of showing it.
I favor oil-rubbed or satin finishes, sealed edges, and powder-coated steel so cleaning’s simple and the pieces age gracefully.
DIY Retrofit Kits vs. Professional Installation
While I love the hands-on satisfaction of a weekend project, I also know retrofit kits and pro installs each have real trade-offs you should weigh before committing. I’ll be frank: kits are satisfying and quick, pros bring polish and fit.
Consider skill, time, tools, warranty, and cabinet condition.
- Skill level required
- Time commitment
- Tool availability
- Warranty and guarantees
- Existing cabinet condition
Budget Ranges and Cost Examples for Common Upgrades
Now that you’ve weighed DIY kits against professional installs, let’s talk money: I’ll show rough budget ranges and real-world examples so you can pick upgrades that match your wallet and goals.
Basic slide-out trays: $30–$150 each DIY. Full pull-out shelving with soft-close: $200–$700 installed. Waste pull-outs and spice racks: $100–$350. Custom cabinets run $800+. I’ll help prioritize.
Maintenance Checklist to Keep Pull-Outs Smooth
I always check my pull-outs on a regular schedule so small issues don’t become stubborn problems; with a few simple routines you can keep slides gliding and doors closing like new.
- Wipe tracks and rollers monthly
- Tighten loose screws and brackets
- Lubricate slides with silicone spray
- Remove debris and re-align runners
- Test full extension and soft-close function
I’ve found pull-out solutions transform cramped lower cabinets into welcoming, hardworking spaces—so you can stop digging and start enjoying cooking.
For example, a neighbor swapped fixed shelves for full-extension pull-outs and suddenly canned goods, pots and baking sheets were accessible and tidy, saving her time every week.
Pick durable hardware, measure carefully, and consider a pros’ install if you’re unsure. With a few thoughtful upgrades, your kitchen will feel cozier and more organized.