I’ve pulled together 16 island centerpiece ideas that mix style, function, and a welcoming mood you’ll love. From bold color pops and sculptural lighting to greenery, edible accents, and textured combos of metal, wood, and stone, there’s something for every kitchen vibe. I’ll show you budget-friendly options and practical, clutter-free ideas that feel polished yet cozy. Stick with me, and you’ll discover how to transform your island into a show-stopping focal point that invites conversation andCooking, too.
Core Design Criteria for a Show-Stopping Island Centerpiece

When designing a show-stopping island centerpiece, I start by identifying its core design criteria: it must complement the kitchen’s overall style, provide practical functionality, and deliver a focal point that’s welcoming rather than overwhelming.
I balance silhouette, material, and scale, ensuring durability and ease of maintenance while inviting conversation.
Thoughtful lighting and subtle texture finish the cohesive, inviting look for everyday meals. A well-designed island can also enhance open-plan kitchen dining experiences by creating a seamless flow between cooking and entertaining spaces.
Bold Color Pops to Elevate Any Island

I love a bold color pop on an island, and I’m curious how you’ll choose accents that feel both vibrant and balanced.
From bright dishware to statement stools, these color accents (and your ideas) can spark fresh energy without shouting.
Let’s explore smart ways to add island color that elevates the whole kitchen, one thoughtful choice at a time. Incorporating unique island designs can significantly enhance the overall aesthetic and functionality of your space.
Bold Color Accents
Bold color pops are the easiest way to make an island feel lively without overdoing it.
I’m sharing bold color accents that spark warmth without shouting. Think a single cabinet door, a statement chair, or a countertop herb tray in vivid hues. Incorporating blue gray kitchen cabinets into your design can enhance the cool and cozy vibe of your space.
You’ll notice personality, cohesion, and inviting energy—without clutter. Let’s keep the palette intentional, refined, and delightfully modern.
Island Color Pop Ideas
Love a kitchen island that feels bright without shouting? I’m sharing crisp color pop ideas that elevate without overpowering.
Think confident accents, not chaos, and playful contrasts that stay polished.
- Bold bar stools in jewel tones
- Painted base in sea-glass blue
- Brushed brass hardware with red tassels
- Coral or emerald countertop trim
- Soft white walls to ground the pops
Incorporating two tone kitchen cabinets can also enhance the overall vibrancy and style of your kitchen island.
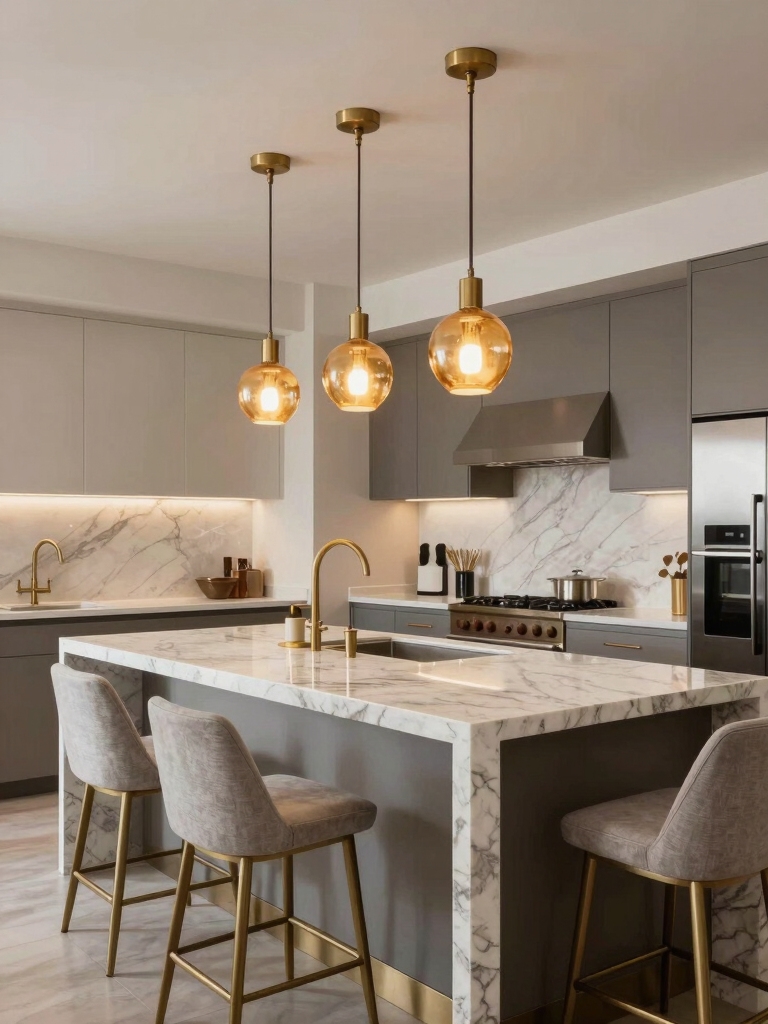
Sculptural Lighting Ideas That Anchor a Centerpiece Glow

A sculptural lighting piece can instantly anchor a kitchen centerpiece, casting a warm glow that feels both artful and inviting.
I love choosing unique silhouettes that cast playful shadows across tabletops and cabinets.
You’ll notice how shape and scale guide the room’s rhythm, drawing eyes to texture and color.
Let’s pick one that complements—and elevates—the entire island vibe. Additionally, consider how elegant lighting schemes can enhance your kitchen’s overall atmosphere, creating a truly five-star experience.
Greenery and Plant Hacks to Soften Kitchen Vibes

I love how a few greenery accents can lift the mood in our kitchen, even on busy mornings.
I’ll share simple planter placement tips and how to choose greens that feel easy to care for, so textures stay soft and inviting.
Together we’ll explore plant hacks that calm the space and subtly tie together color, light, and function. Adding cozy kitchen decor elements can further enhance the warmth and inviting atmosphere of your home.
Greenery For Mood Lifts
Greenery can transform a kitchen from functional to inviting, and I’ve found that a few well-placed plants or leafy accents soften hard lines and echo natural textures.
- Fresh herbs at arm’s reach boost mood and flavor
- Succulents add color with minimal care
- Hanging greenery creates vertical softness
- Potted ferns soften stainless surfaces
- Citrus slices in water trays spark brightness
Incorporating plants not only enhances aesthetics but can also improve indoor air quality, making it a great choice for durable flooring options.
Planter Placement Tips
Plant placement can make or break the mood I’m aiming for in a kitchen, so I start by noting where greenery reads best and how it interacts with daily tasks.
I favor reachable shelves, near sinks, and window ledges, keeping pots compact.
Group herbs for quick cooking, and vary heights to create a natural rhythm without clutter.
Subtle, practical, inviting. Additionally, consider incorporating custom kitchen shelf decor styles that harmonize with your plants to enhance the overall aesthetic.
Softening Kitchen Textures
Soft textures soften a kitchen’s edge, and greenery helps pull the room from stove-hot to welcoming.
I’m sharing easy greenery hacks to tone down chrome and boost comfort, without clutter.
- add trailing herbs in glass jars
- tuck a fern by the sink for moisture balance
- layer soft textiles on stools
- place low-maintenance succulents on open shelves
- use airy planters to soften edges and echo color
Edible-Art Accents With Fruits, Herbs, and Flowers

Edible-art accents are a delightful way to elevate any kitchen centerpiece, using fruits, herbs, and flowers to spark color, aroma, and a touch of whimsy.
I love pairing edible blooms with citrus, then balancing greens for contrast. You’ll notice guests linger, curious about flavors as much as visuals.
Keep guests guessing with small skewers and seasonal decorations for effortless elegance. Incorporating bright lemon accents can also refresh the overall aesthetic of your summer kitchen.
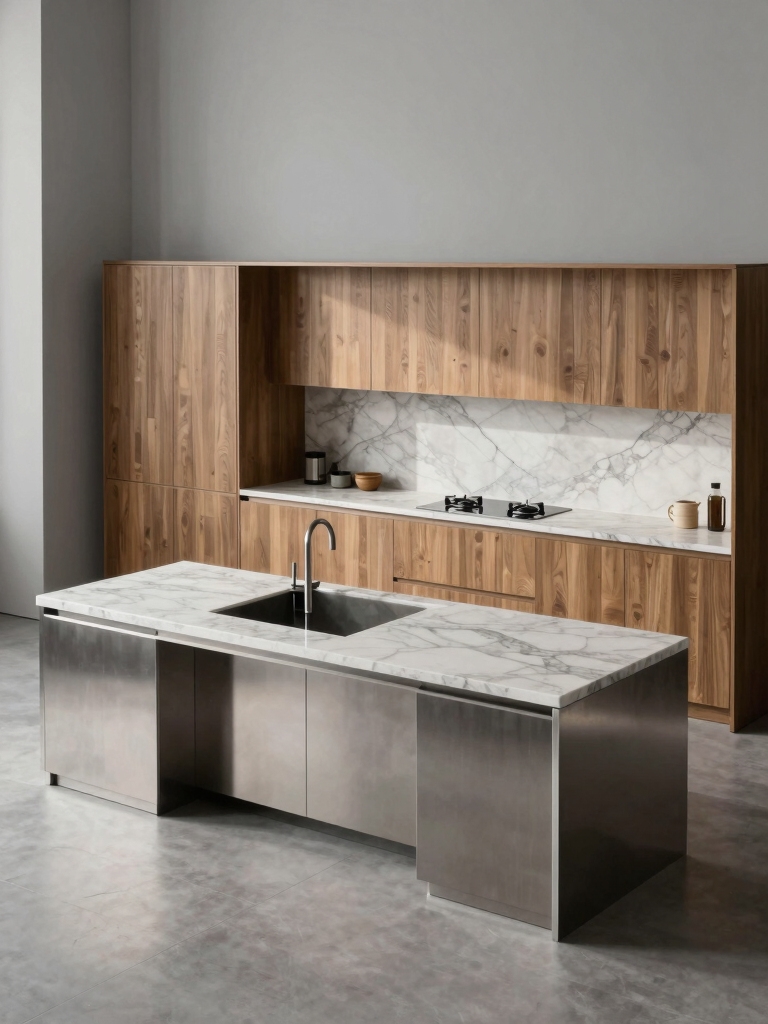
Textural Richness: Mixing Metals, Woods, and Stones
I love exploring how metal, wood, and stone can play off each other to create tactile, inviting textures on the island. I’ll mix cool metals with warm woods and stone accents to build layers that feel both modern and comforting. Let’s start a conversation about how these materials can balance sheen, grain, and grainy surfaces for a cohesive centerpiece. One popular trend is mixing metals to achieve a more dynamic and visually interesting kitchen space.
Metal-Wood-Stone Mix
Metal, wood, and stone come together to create a kitchen with depth and character.
I present a practical mix you can trust: bold metal accents, warm wood tones, and cool stone surfaces. This trio supports bold island statements and quiet corners alike.
- Metal hardware paired with wooden cabinetry
- Stone countertops softened by wood edges
- Dark metals across light woods
- Matte finishes for balance
- Textured backsplashes to unite elements
Tactile Material Layering
Tactile layering invites you to feel your island come alive by pairing textures you can practically touch and trust.
I mix metals, wood, and stone to create contrast that invites exploration, not overwhelm. You’ll notice warmth from wood, sparkle from metal, and grounded strength from stone.
I keep lines clean, scale balanced, and textures intentional for everyday polish. Enjoyable depth, effortlessly.
Hidden Storage Tricks That Double as Decor
Hidden storage can be chic, turning everyday clutter into an intentional design moment you’ll actually enjoy.
I’ll show you how to hide odds and ends while elevating the island’s look, one clever trick at a time, without sacrificing function or warmth.
- secret pull-out drawers beside the sink
- decorative baskets for pantry overflow
- hollow ottomans with hidden compartments
- open shelving with labeled containers
- magnetic under-cabinet spice strips
Minimalist Setups for Calm, Uncluttered Islands
I’m drawn to calm, uncluttered islands that let the room breathe, so I keep only the essentials within easy reach and leave space to move.
I favor clean lines, hidden storage, and purposeful decor that supports function. A simple tray, a single knife block, and minimal color keep the focal point serene, inviting conversation without visual noise or distraction.
Maximizing Counter Seating With Focal Points
When I think about maximizing counter seating, I start with a clear focal point—something that draws the eye and anchors the space without crowding it.
- Centerpiece as a simple, sculptural element
- Strategic lighting to highlight seating zones
- Neutral tones with subtle texture
- Bar stools that echo the focal shape
- Functional decor that stays uncluttered and inviting
Vintage and Heirloom Accents That Add Character
I love weaving vintage charm into our island, starting with small touches that tell a story.
I’ll mix heirloom material choices—like ceramicware, timber, and brass—with pieces that feel lived-in and fresh.
Let’s explore characterful farmhouse details that make the heart of the kitchen feel warmly unique.
Vintage Charm Touches
There are countless ways to weave vintage charm into a kitchen, and the simplest accents—the faded enamel, a tucked-away heirloom, or a well-loved wooden spoon—tell a story you can feel every day.
- A mismatched teacup set on open shelves
- A tarnished silver tray as a centerpiece
- A chalkboard with favorite recipes
- A worn cutting board heirloom
- Soft linen napkins in muted tones
Heirloom Material Choices
Heirloom materials bring instant character to a kitchen, offering tangible memory and timeless warmth.
I love selecting patinaed copper, beeswaxed wood, and worn ceramic that tells a story without shouting. You’ll notice these pieces quietly elevate your island, pairing beautifully with modern finishes.
I stay intentional, balancing history with function, so the space feels lived-in, effortless, and inviting every single day.
Characterful Farmhouse Details
Vintage pieces can softly pull a kitchen together after the warmth of patinaed copper and beeswaxed wood.
I’m sharing farmhouse details you can actually love daily, not just admire.
Let’s add character with thoughtful accents that age gracefully.
- Reclaimed wood open shelves
- Wrought-iron cabinet pulls
- Ceramic jugs and pantry canisters
- Copper or brass fixtures
- Distressed painted benches and stools
Centerpiece Layouts by Island Size: Small, Medium, Large
When you’re planning centerpiece layouts for a kitchen island, size truly matters, so I’ll walk you through options that fit small, medium, and large islands.
For small, think tight clusters: a compact vase, a single vessel, and a candle.
Medium invites a trio of elements with varying heights.
Large embraces a linear arrangement,—balanced greenery, sculptural pieces, and a centered focal point.
Seasonal Swaps to Keep the Look Fresh Year-Round
Seasonal swaps are a simple way to keep your island centerpiece feeling fresh, no matter the time of year.
I share tiny, thoughtful shifts that suit mood and season without overhauling the look.
- Swap citrus for berries with the breeze of summer
- Temper with pine and cinnamon in winter
- Fresh florals in spring, lightweight greens in fall
- Switch textures for variety, not volume
- Rotate keepsakes weekly, nothing cluttered
Layered Textures: Metal, Wood, Stone in Harmony
Layered textures bring warmth and depth to your island by pairing metal’s edge with wood’s softness and stone’s quiet strength.
I mix brushed steel, warm oak, and limestone accents to create a balanced scene you’ll notice in every glance.
You’ll feel refined energy without shouting, and the look stays versatile, inviting conversation while remaining elegantly simple and timeless.
Tech-Friendly, Clutter-Free Centerpiece Ideas
Growing up with layered textures gives me a clear sense of balance, and the same calm applies to a tech-friendly, clutter-free centerpiece.
I design with intention, keeping cords hidden, devices discreet, and ambient lighting soft. Here’s how:
- Slim smart speaker
- Wireless charger mat
- USB-C hub hidden beneath board
- Low-profile vase with greenery
- Minimal digital clock, tucked away
Budget-Friendly Centerpiece Ideas Under $100
If you’re decorating on a budget, you don’t have to sacrifice style: you can create a warm, inviting centerpiece for under $100 by mixing practical finds with a touch of natural charm.
I start with a simple vase, a handful of drab-to-dream-drape stems, and budget-friendly greenery.
Layer candles, textured linens, and a wood slab for polish without overspending. Your island stays stylish, affordable, effortlessly inviting.
A Practical, Step-By-Step Plan to Transform Your Island Centerpiece
Now that we’ve lined up a budget-friendly vision, let’s turn that idea into a practical plan you can apply step by step.
I’ll guide you clearly, with simple actions that fit your space and style.
- define focal point
- choose a cohesive palette
- group decor in threes
- mix textures, not clutter
- test, tweak, reuse fixtures
Conclusion
You’ve got this—your island can be the warm heart of your kitchen, a place that says “we cook, we gather, we linger.” Picture a sunlit still life of textures, greens, and a single focal flourish that speaks to your style. I’m cheering you on as you mix bold pops with soft layers, and keep it playful yet practical. Soon, every counter moment will feel like a cozy, inviting hello to all who stop by.