I’ve pulled modern kitchen mood boards that feel lived‑in, not trendy, so you can recreate them on any budget. Pick a focal style—Minimalist, Moody, or Chef’s Kitchen—then choose a dominant hue, two supports and an accent.
Layer warm wood, matte metal and honed stone, add textured textiles and dimmable task lighting, and mock up samples in real light. I’ll walk you through palette, materials, budget swaps and a zone‑based timeline if you want to keep going.
How to Use This Guide to Recreate Mood Boards
Before you open a mood board app or lay out swatches on the table, let me walk you through how I use this guide so you can recreate the looks with confidence.
I’ll show stepwise pairing of color, texture, and scale, suggest swaps for budget or boldness, and point out focal anchors.
Follow my notes, trust your instincts, and tweak until it feels like home.
This guide covers a range from minimalist calm to maximalist flair, helping you choose styles that match your space and personality.
6 Must‑Have Pieces for a Modern Kitchen Mood Board

Now that you’ve got the method down for pairing color, texture, and scale, let’s pick the actual pieces that make a modern kitchen mood board sing.
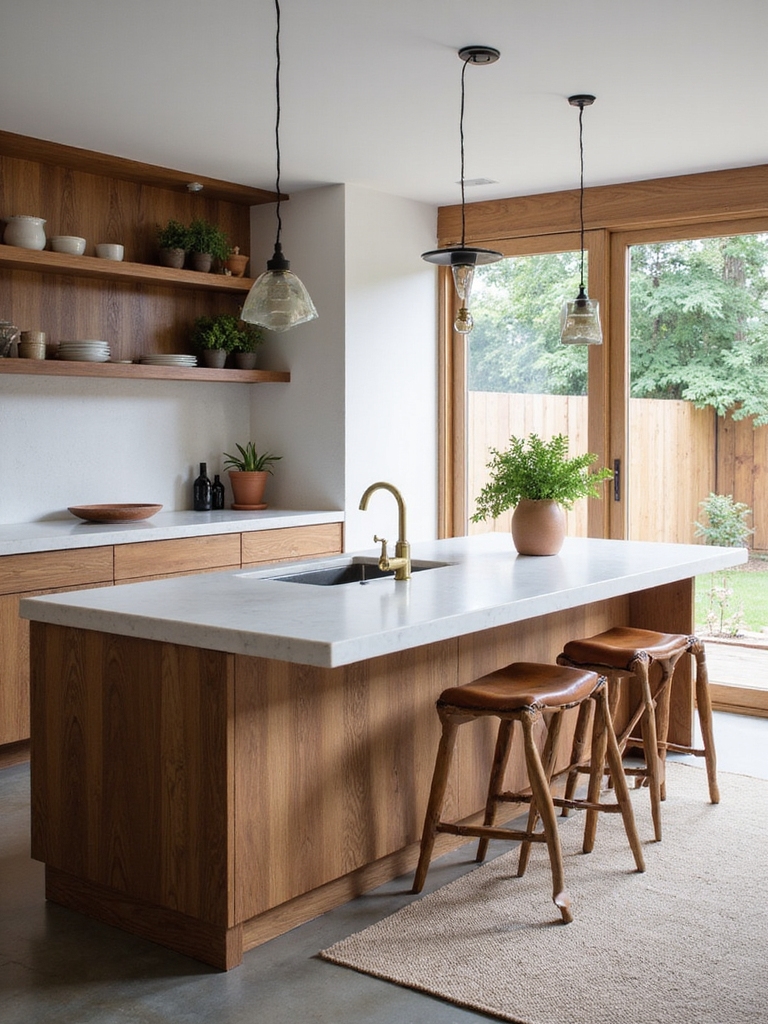
I choose a matte black faucet, warm wood open shelves, honed stone countertops, a patterned tile backsplash, brass hardware, and a textured linen runner.
These elements balance modern lines with rustic warmth, creating an inviting, lived-in kitchen.
Matte black finishes are a staple in contemporary schemes for their ability to create dramatic sophistication and visual depth.
Pick a Focal Style: Minimalist, Moody, or Chef’s Kitchen?

While you can mix elements, I like choosing one clear focal style—Minimalist, Moody, or Chef’s Kitchen—first, because it makes every subsequent choice easier and more intentional.
I pick a mood, then layer textures, lighting, and hardware that support it. Here are focal cues I use:
- Clean lines and natural light
- Deep colors, matte finishes
- Professional appliances, durable surfaces
- Warm wood accents and simple details
I often start with a few timeless minimalist decor elements from the kitchen to build the rest of the design around.
Building a Cohesive Palette That Actually Works
Once I’ve picked a focal style—Minimalist, Moody, or Chef’s Kitchen—I start building a palette that holds everything together without feeling forced.
I choose a dominant hue, add two supporting tones, and one accent for contrast. I test samples in morning and evening light, keeping warmth and texture in mind so colors read true and create that lived-in, rustic-modern comfort.
I also consider practical designer tips about balancing warmth and texture to ensure the palette feels cohesive in different lighting.
Mixing Materials: Pairing Wood, Metal, and Stone

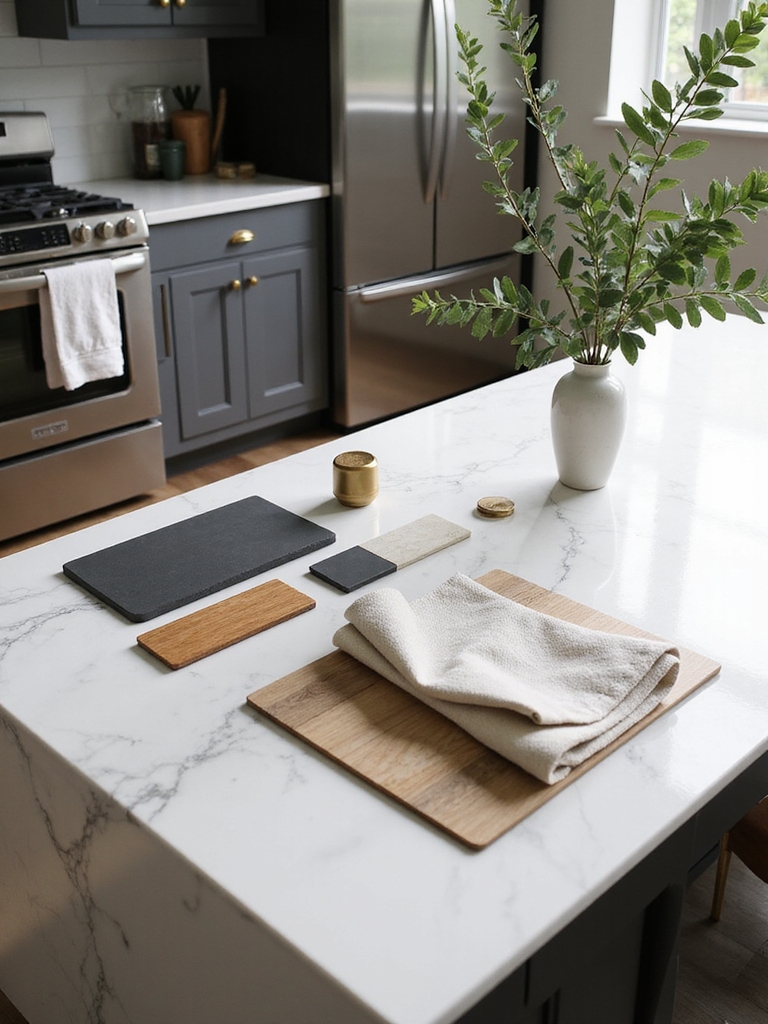
Because materials set the tone as much as color, I start by pairing wood, metal, and stone with intention—balancing warmth, patina, and texture so each element gets to sing without clashing.
I layer rustic oak, matte black metal, and honed stone for contrast, then refine with small accents that tie the trio together.
- Warm wood anchor
- Metal accents for edge
- Stone for weight
- Unified finish touches
Scandinavian kitchens often pair white with natural wood to create a calm, light-filled backdrop that emphasizes simplicity and function.
Budget‑Friendly Cabinet and Countertop Combos
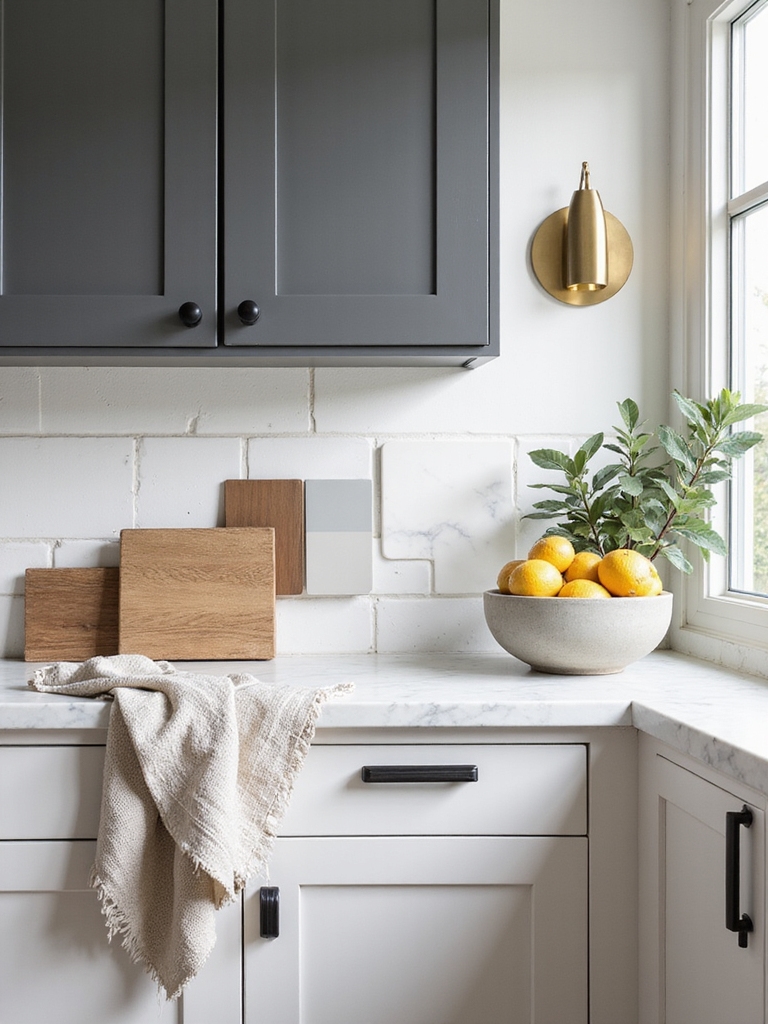
When I’m designing on a budget, I pair cabinets and countertops with intention so the whole kitchen feels deliberate rather than cheap.
I choose durable laminate or painted cabinetry with butcher block or low‑maintenance quartz to mimic pricier surfaces.
Contrast warm wood tones with matte neutral counters, add simple hardware, and focus on proportion and texture—small choices make the room feel curated and cozy.
Consider adding focus pieces like open shelving or statement lighting to elevate the overall look and draw the eye to thoughtful details like professional cabinet decor.
Kitchen Lighting That Turns Mood Boards Into Real Spaces
I like to think of lighting as the stitch that pulls a mood board into a lived kitchen—it’s what highlights your favorite textures and makes practical spaces feel inviting.
I choose layered light: ambient, task, accent, and dimmable options to craft mood and function.
Think warm bulbs, matte fixtures, and focused undercabinet glow to reveal grain and color without overpowering the room.
- Ambient overhead
- Task strips
- Accent pendants
- Dimmers
Layering light effectively combines ambient, task, accent sources to set mood while ensuring functionality.
Appliance Finishes and Hardware That Make an Impact
Choose finishes and hardware that feel intentional, because those small choices are what give a kitchen its personality.
I love mixing matte black pulls with warm brass knobs, pairing brushed steel appliances with wood accents, and choosing statement faucets that age beautifully.
These elements anchor a mood board, add tactile depth, and make the space feel lived-in yet modern without overwhelming the design.
The latest luxury kitchens often emphasize clean-lined cabinetry to reinforce a cohesive, modern aesthetic.
Textiles and Rugs That Soften Modern Kitchen Lines
After picking finishes and hardware that anchor the kitchen, I bring in textiles and rugs to soften the sharp, modern lines and make the room feel lived-in.
I choose natural fibers, subtle patterns, and warm textures that age well and hide life’s crumbs. Here are simple picks I love:
- Handwoven jute runner
- Wool braided mat
- Linen tea towels
- Cotton napkins
Accent Colors and Small Design Moves That Pop
Let’s punch up the room with small, thoughtful accents that feel like they’ve always belonged here—I’ll use a bold color, a vintage brass pull, or a hand-thrown ceramic to catch the eye without shouting.
I layer muted greens, terracotta, and charcoal, swap in patinated metals, and place textured bowls or woven tea towels to create warmth and surprise in quiet, well-considered spots.
Layouts Mapped: Galley, L‑Shape, and Island Plans
In mapping out kitchen layouts, I start by imagining how you move through the room—where you reach, pause, and set things down—because a well-planned plan feels effortless.
I favor cozy flow, durable surfaces, and honest materials that age beautifully. Consider these practical options:
- Galley: efficient, great for narrow spaces.
- L‑Shape: flexible, corner storage optimized.
- Island: social hub, workspace.
- Peninsula: compact island alternative.
Affordable Mockups and Sample Sources for DIY Mood Boards
A few smart swaps let me build a convincing mood board without draining the budget, so I start by collecting small, tactile samples—fabric swatches, peel-and-stick tile chips, laminate edge strips, and trimmed paint cards—to test how color and texture play together in real light.
I shop thrift stores, hardware sample bins, online swatch services, and local showrooms for inexpensive, honest pieces that read well together.
Step‑By‑Step: Turn a Mood Board Into a Shopping List and Timeline
I’ll help you turn that mood board into a practical plan by first picking the few key design elements that make the room sing and should be prioritized.
Then we’ll break the work into zones—cooking, prep, storage—so you can tackle tasks one area at a time.
Finally, we’ll set purchase-timing milestones so you buy big items early, accessories later, and keep the project on schedule.
Prioritize Key Design Elements
Because every kitchen project has limits—budget, time, space—I start by spotting the nonnegotiables on your mood board: the items that shape layout and workflow like appliances, sink placement, and primary cabinetry.
I rank them by impact, then build the shopping list and timeline around those anchors so the room feels intentional and functions beautifully.
- Range and hood
- Sink and faucet
- Main cabinets
- Countertops
Break Down Tasks By Zone
When you’re turning a mood board into a workable plan, I start by dividing the kitchen into clear zones—cooking, prep, cleanup, storage and dining—so each task has its own sequence and timeline.
I list tasks per zone, estimate effort, and group related purchases. This keeps installers focused, prevents overlap, and helps me pace work so the kitchen feels built with intentional rhythm and rustic-modern clarity.
Set Purchase Timing Milestones
Start by mapping out buy-by dates tied to the work sequence so purchases arrive just when you need them — not months too early, not at the last minute.
I plan milestones around demolition, rough-in, cabinetry, and finish work, so nothing bottlenecks.
Here’s a simple cadence I use:
- Demo complete — order essentials
- Rough-in — schedule fixtures
- Cabinet install — confirm hardware
- Finish — buy décor and textiles
Common Pitfalls When Recreating Mood Boards (And How to Avoid Them)
If I’m honest, recreating a mood board often feels trickier than it looks: colors that seemed perfect on screen can read muddy in the room, textures clash, and scale gets lost in translation.
I learn to sample paint, test textiles under real light, measure twice, and budget for unexpected tweaks.
That pragmatic, hands-on approach keeps the rustic-modern vision intact without costly surprises.
Quick Swaps and Scalable Upgrades Without a Full Renovation
After testing paints and fabrics and fixing scale issues, I look for changes that make a big impact without gutting the kitchen.
I favor swaps that feel lived-in and warm: new hardware, open shelving, light fixtures, and a durable countertop overlay.
Small investments, thoughtful finishes, and practical layouts transform function and mood with minimal disruption.
- Replace cabinet pulls
- Add open shelves
- Update pendants
- Apply countertop overlay
We’ve turned inspiration into a usable map — a mood board is your kitchen’s compass, pointing to a look that feels lived‑in and loved.
Use the palettes, materials, and simple swaps here to stitch modern warmth into your space, whether you crave minimal calm, brooding drama, or chef’s efficiency.
Start small, follow the steps, and let each thoughtful choice be a quiet ember that grows into a room that’s truly yours.