I’ve found a simple POP ceiling can lift a kitchen from plain to purposeful: I favor recessed trays for calm, easy upkeep or layered profiles for cozy, rustic depth, then add cove or strip LEDs to accent the shapes.
Match brighter task lights over prep zones and warm pendants above islands, keep finishes soft matte or warm white, and tuck vents and speakers into recesses for clean lines. Stick with me and I’ll show how to make it sing.
Quick Compare: Recessed Vs Layered POP Ceilings

When I size up recessed and layered POP ceilings, I look at how each one shapes a room’s mood: recessed ceilings tuck lights and lines into clean hollows for a calm, modern feel, while layered ceilings stack planes and trims to add depth and rustic charm.
I favor recessed for subtle brightness and easy upkeep, but choose layered when I want textured character and cozy charm.
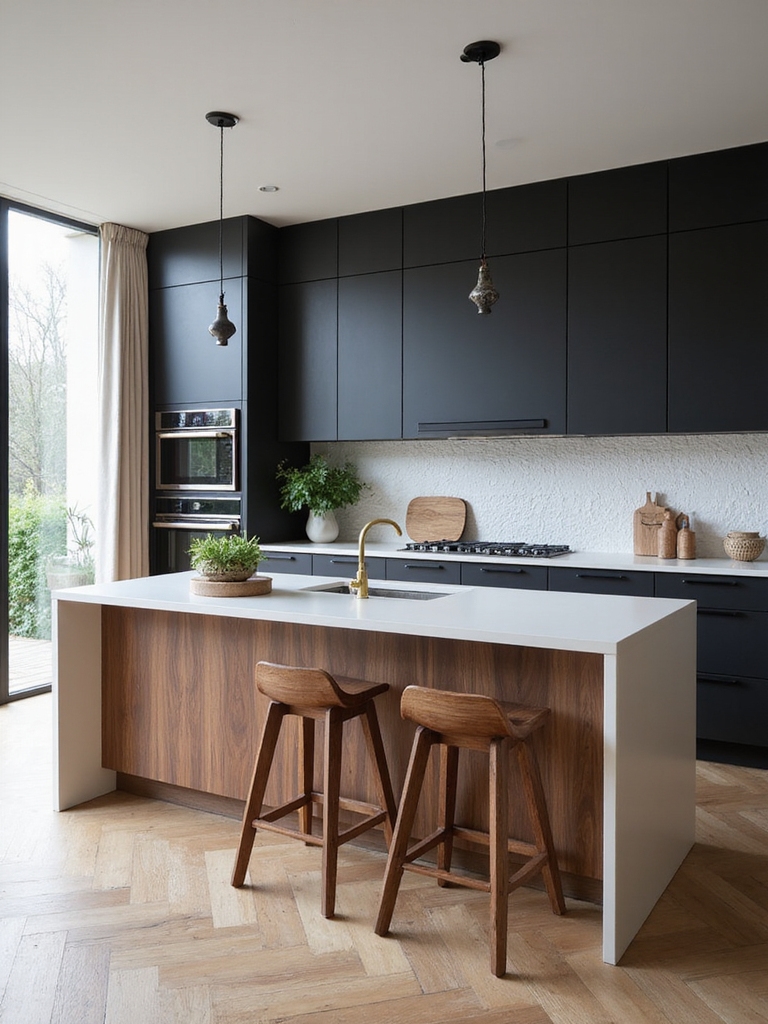
Bright white kitchens stay timeless and make spaces feel larger and more inviting, especially when paired with modern white finishes.
POP Ceiling Design Ideas for Modern Kitchens

I’m thinking about how sleek recessed lighting can make a modern kitchen feel both bright and uncluttered.
Pairing that with a layered tray POP ceiling creates cozy pockets and a bit of rustic charm without overwhelming the space.
Let me show you simple ways to balance clean lines and warm character.
Modern kitchen ceiling design ideas can draw every eye upward with striking ceiling designs that enhance both form and function.
Sleek Recessed Lighting
Because kitchens are where we cook and gather, I like recessed lighting that stays out of the way while giving the space a clean, warm glow.
I choose soft, dimmable LEDs set into simple POP ceilings to highlight work zones and keep sightlines open.
The result feels cozy and unfussy, like a well-worn farmhouse with modern clarity and gentle, practical light.
Layered lighting helps combine ambient, task, and accent fixtures to create a balanced, functional kitchen with multiple light layers.
Layered Tray Ceilings
If you want to add subtle drama without losing that homey kitchen feel, layered tray POP ceilings are a smart move.
I love how stepped depths create cozy pockets for warm downlights and natural wood accents. They define zones—dining, prep, island—without walls.
Install simple moulding, soft paint tones, and dimmable lighting to keep the look rustic, calm, and endlessly inviting.
Modern kitchen ceilings often explore options beyond basic white, including subtle tones and textures that enhance depth and warmth modern kitchen ceiling ideas.
Plan Ceiling Zones for Cooking, Dining, and Islands

I like to map out clear ceiling zones for cooking, dining, and islands so each area feels right for its job.
I’ll match lighting and POP textures to the function—brighter, focused fixtures over the stove and softer, warmer layers above the table.
That way the kitchen reads as a cohesive, lived-in space where form follows use.
Elegant lighting schemes can elevate the mood and functionality with layered solutions like task, ambient, and accent lighting layered lighting.
Define Functional Ceiling Zones
When I plan a kitchen ceiling, I think in zones—each area should feel like it has its own purpose and personality, whether it’s the heat-and-motion of the cooktop, the social pull of the island, or the quiet focus of the dining nook.
I map function first: define clear overhead planes for prep, serving and dining so movement and workflow feel natural and cozy.
Open-plan layouts benefit when ceiling treatments reinforce each zone and sightlines are kept clear to maintain flow, especially between kitchen, dining and living zones.
Coordinate Lighting And Materials
Although ceiling zones start with function, I lean on lighting and materials to make each spot feel distinct — warm, focused pendants over the island for conversations and casual meals, brighter task lights with a matte finish above the cooktop, and a softer, layered glow for the dining nook.
I pair reclaimed wood beams, textured plaster, and aged metal fixtures so each zone reads cozy, practical, and intentionally layered.
Elevated ceilings with modern statement details help unify these zones and amplify the room’s architectural impact.
Best POP Profiles for Minimal Kitchens (Tray, Reveal, Lip)

With a simple tray, a subtle reveal, or a clean lip, I pick POP profiles that keep minimal kitchens feeling calm and intentional.
I favor subtle lines, soft shadow play, and practical trims that hide wiring while staying spare.
- Tray ceilings for gentle depth
- Reveal edges for crisp shadow lines
- Slim lip for neat shifts
- Integrated cove for soft lighting
Modern kitchen designs often use tray, reveal, and lip profiles to create a polished, contemporary finish while concealing fixtures and wiring.
Geometric POP Layouts That Add Drama to Kitchens

If I want a kitchen to sing instead of whisper, I turn to geometric POP layouts—sharp chevrons, staggered hexagons, or bold intersecting rectangles that give the ceiling a sculptural presence.
I pair those shapes with warm plaster textures and natural wood beams, keeping finishes earthy.
The result feels handcrafted yet modern, a cozy dramatic overhead that anchors the room without fuss.
Cove and Strip Lighting for POP Ceilings
After using bold geometric POP shapes to give a kitchen character, I like to soften and highlight those forms with cove and strip lighting—those thin ribbons of LED tucked into recesses or along edges that make the ceiling read like a gentle, glowing sculpture.
I’ll gently guide you through choices:
- Warm vs cool LED tones
- Dimmer placement for mood
- Hidden profiles for clean lines
- Accent vs task layering
Integrating Ducts, Vents, Speakers, and Hoods Into POP Designs
Because functional elements can make or break a ceiling’s look, I plan POP layouts so ducts, vents, speakers, and hoods feel like intentional features rather than afterthoughts.
I tuck vents into recesses, hide ductwork behind gentle curves, and frame hoods with modest beams.
I position speakers for balanced sound and ease of access, keeping the ceiling warm, simple, and quietly purposeful.
Texture and Finish Options for POP Ceilings
I like to think of a POP ceiling’s finish as the last stitch that pulls a room together, and choosing between matte and glossy makes a bigger visual difference than you’d expect.
We can play with textured plaster patterns for a cozy, hand-crafted feel or add subtle metallic and pearl effects when you want a hint of shimmer without going overboard.
Tell me which direction you’re leaning and I’ll help match the finish to your space.
Matte Vs. Glossy Finishes
When I choose between matte and glossy POP finishes, I think about how each one changes the room’s mood and upkeep.
I prefer honest choices: matte hides flaws and feels cozy; glossy brightens and wipes clean.
- Matte: hides imperfections
- Glossy: reflects light
Matte: rustic, soft vibe
Glossy: modern, easy-clean
Textured Plaster Patterns
Since texture can make a ceiling feel like a hand-crafted surface instead of a flat plane, I like to think of POP plaster patterns as the room’s personality showing through.
I favor gentle swirls, basketweave, or soft stipple for a cozy, lived-in kitchen. They hide imperfections, add depth without glare, and pair beautifully with wood beams or vintage lighting for a warm, rustic vibe.
Metallic And Pearl Effects
Soft, tactile plaster can feel like a room’s story, but adding metallic or pearl finishes gives that story a hint of subtle glamour without losing warmth.
I love how these finishes catch morning light and soften at night. Consider simple choices that feel lived-in:
- Brushed gold accents for cozy glow
- Pearl wash for gentle shimmer
- Subtle silver veins for depth
- Patina touches for character
Color Choices: White, Neutrals, and Accent Ceilings
Although white ceilings feel timeless, I’ll admit I often reach for warm neutrals and bold accents to give a room personality without overwhelming it.
I like creamy taupes and soft grays to cozy a kitchen, then add a muted navy or terracotta stripe above a breakfast nook. That balance keeps things rustic, calm, and unexpectedly charming.
POP Ceiling Costs: Budget, Midrange, and High-End
Color choices can set the mood, but money often sets the limits, so I always weigh style against what I can realistically afford before committing to a POP ceiling.
I break costs into clear tiers and pick materials and details to match my budget and taste.
- Budget: simple flat designs, basic paint
- Midrange: layered profiles, modest lighting
- High-end: custom moldings, intricate finishes
- Extras: premium lights, wet-area treatments
Installation Timeline: Step-by-Step Expectations
I’ll walk you through the whole POP ceiling schedule so you know what to expect from start to finish, including how long each phase usually takes.
I’ll break it down day by day—preparation, framing and plastering, drying and finishing—so you can track progress on the spot.
Finally, I’ll explain the final inspection and touch-ups that wrap the job and give you a clean sign-off.
Project Timeline Overview
When we plan a pop ceiling installation, I walk you through each phase so you always know what to expect—prep, framing, plastering, painting, and final inspection—and roughly how long each step takes.
I keep things simple and honest, so you feel comfortable with the flow:
- Initial site prep and protection
- Framing and electrical adjustments
- Plastering and smoothing
- Painting, touchups, final check
Daily Work Breakdown
Because clear daily plans keep surprises low, I’ll walk you through what to expect each workday so you can plan around the noise and dust.
Day one: protect floors, move cabinets if needed.
Day two: framing and wiring.
Day three: plastering and POP panels.
Day four: sanding, priming.
Day five: painting and trim.
I check progress, tidy, and answer your questions.
Final Inspection Steps
Although the heavy work is done, I walk you through the final inspection so you know exactly what we check, when, and why. I’ll calmly review every seam, paint edge, lighting fit, and cleanup point together.
My checklist keeps us honest and timely:
- Seams and joints sealed properly
- Paint and texture uniformity
- Light fixtures secure and aligned
- Site cleaned, debris removed and inspected
How to Choose a Contractor and Key Questions to Ask
Since I’ve seen a few botched pop ceiling jobs, I always tell people to pick a contractor as carefully as they choose finishes: check credentials, review past work, and trust your gut about communication.
Ask about licenses, insurance, timelines, warranty, and references. Get a clear written estimate and schedule.
A good craftsman explains materials, timelines, and any site protection calmly and kindly.
Common POP Ceiling Problems and Quick Fixes
After you pick the right contractor and ask the right questions, you’ll still want to know what can go wrong and how to fix it without a panic. I’ve seen common POP issues and grabbed simple fixes you can try.
- Hairline cracks: sand lightly, fill, repaint.
- Water stains: find leak, treat mold, reseal.
- Bulging panels: tighten or replace studs.
- Loose fittings: resecure fixtures gently.
Styling Tips: Pair Cabinets, Backsplash, and Light With POP
When I plan a POP ceiling, I think of it as the crown that ties cabinets, backsplash, and lighting together—so I pick each element with the others in mind.
I balance warm wood cabinets with a matte tile backsplash and soft recessed lighting.
Contrast trim color subtly, add a textured pendant over the island, and keep finishes cohesive for a cozy, lived-in kitchen that feels intentionally styled.
Before-and-After Kitchen POP Case Studies and Photo Ideas
I love digging into before-and-after kitchen POP projects because they show how a simple ceiling update can pull an entire room together.
I walk you through photos, choices, and honest results, pointing out impact and budget moments.
- Dramatic light diffusion
- Cozy beam-style finishes
- Subtle molding for depth
- Paint and texture transformations
I’ve loved walking you through modern POP ceiling ideas—simple, dramatic, and practical.
Did you know a well-planned ceiling can boost perceived room value by up to 5%? That little stat always surprises me.
Think about zoning over the island, choosing a subtle tray or reveal profile, and matching warm wood cabinets and matte lights for a cozy, rustic vibe.
Pick a trusted contractor, ask the right questions, and enjoy the transformation.