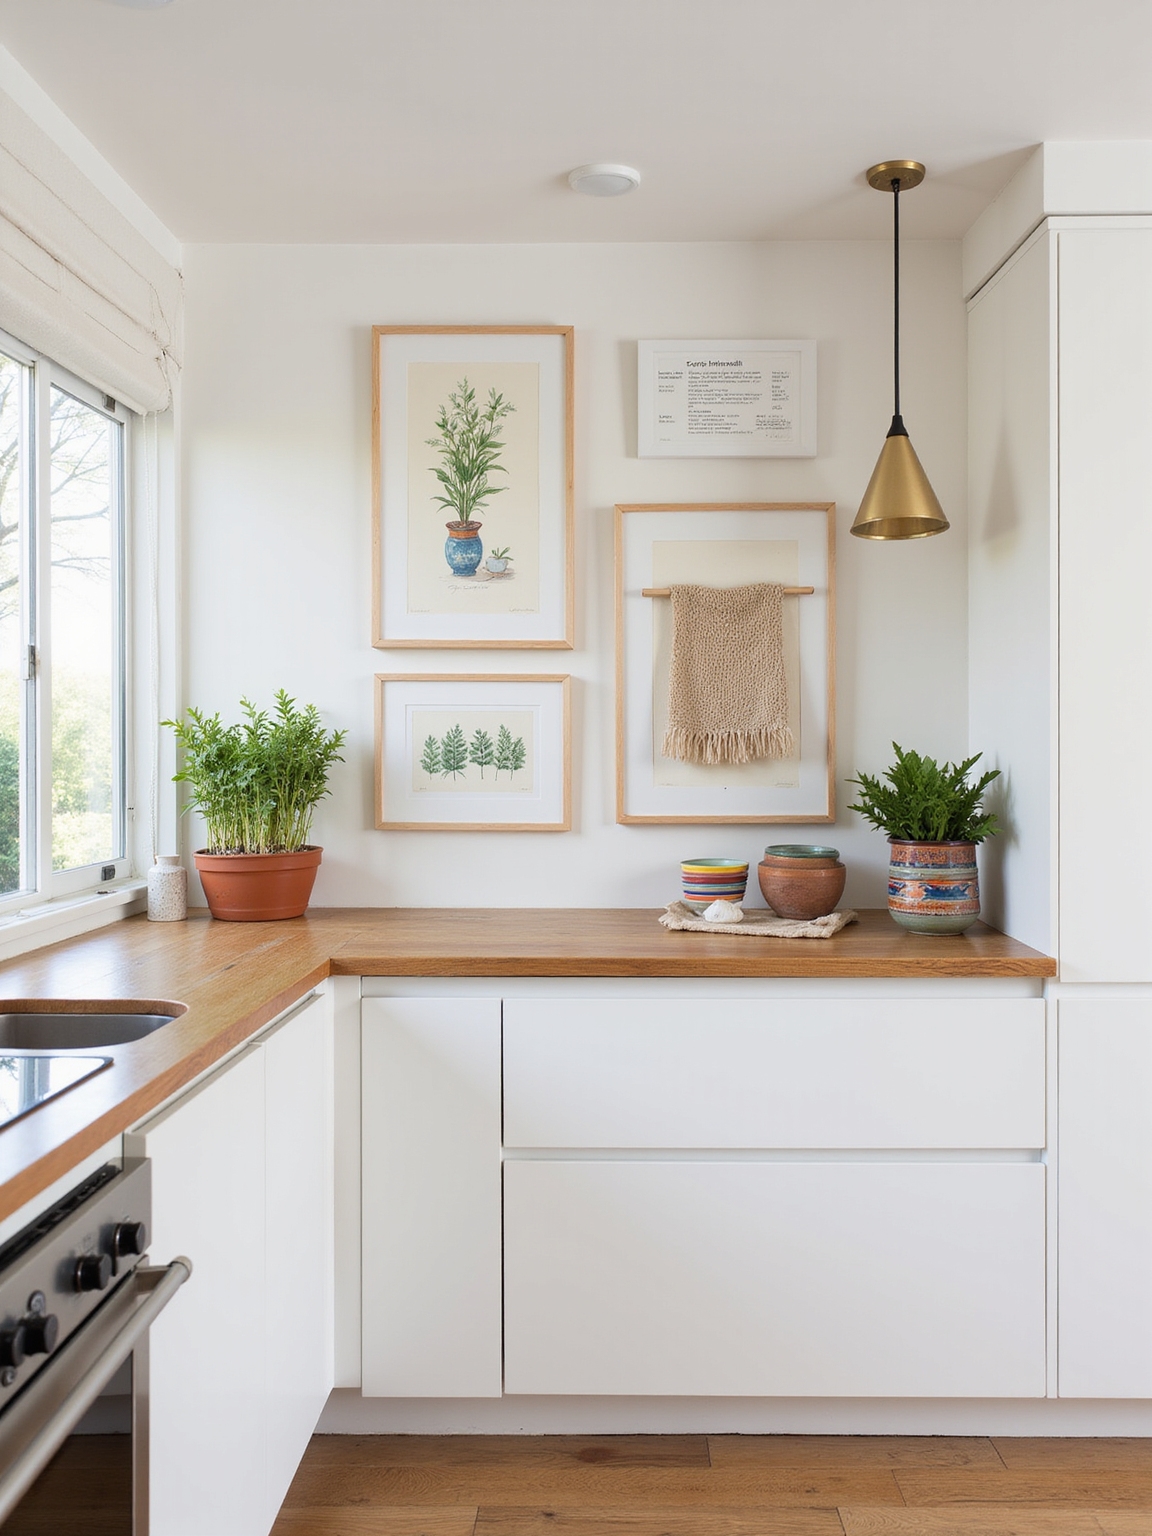
I’ll show you how a simple gallery wall—weathered wood frames, a vintage recipe print, and herb sketches—can make your kitchen feel cozy and creative. Start by measuring and mapping the wall, then anchor the layout with one or two large pieces and surround them with smaller botanical prints, plates, and found objects.
Use moisture-safe frames and paper templates to hang straight. Mix woven textures and a tight palette for cohesion, and keep things wipeable for easy upkeep—flip the page for practical how-tos.
Decide the Best Gallery Style for Your Kitchen

When I plan a gallery wall for the kitchen, I start by thinking about the room’s mood and how I want it to feel—cozy and lived-in, bright and airy, or a bit eclectic—because that choice dictates the style I’ll commit to.
I pick frames, artwork, and textures that echo that mood: weathered wood and linens for rustic, clean lines and whites for airy, mixed pieces for eclectic charm.
I also consider arranging pieces in a gallery-style layout to personalize the space and create visual cohesion.
Measure & Map Your Kitchen Wall First

Now that I’ve settled on the mood and picked frames that fit, I measure and map the wall so nothing surprises me later.
I mark studs, outlets, and shelving heights, note sightlines from the sink and table, and sketch a simple plan on kraft paper.
That way spacing, balance, and practical constraints guide placement — no guesswork, just a calm, sure layout.
I also plan for smart storage so frames and useful kitchen items coexist without creating counter clutter.
Mix Large Focal Art With Small Accents

Anchor the arrangement with one or two large pieces, then tuck smaller prints, vintage plates, or found objects around them to keep the eye moving.
I like mixing bold landscapes with tiny botanical sketches and worn enamelware; it feels lived-in and cozy.
Keep spacing deliberate, vary frame finishes, and step back often. The contrast between scale and texture makes the kitchen feel collected, not cluttered.
Chic kitchens often rely on neutral palettes to create a timeless, cohesive backdrop.
Choose a Theme: Family, Food, Vintage, or Herbs

Choosing a theme makes the whole gallery come together, and I usually start by picturing what I want the kitchen to feel like—comforting family hub, playful food-forward nook, timeworn vintage shop, or a fresh herb garden.
I pick images, colors, and motifs that echo that mood: black-and-white family photos, botanical prints, antique kitchen tools, or bright fruit illustrations.
It guides cohesive choices. Investment-worthy pieces can elevate the look and complete the design.
Kitchen-Friendly Frame Materials & Sizes

When I’m picking frames for a kitchen gallery wall, I lean toward metal options with rust-resistant finishes so they stay handsome near the sink and stove.
I also favor moisture-safe materials like sealed wood, acrylic glazing, or powder-coated metal to keep prints and photos from warping.
Let’s talk sizes next so your frames look balanced without crowding a busy cooking space.
For surfaces that get splashed or stained, consider choosing wall coverings that are easier to clean and more durable than paint to keep the whole area low-maintenance.
Metal And Rust-Resistant Frames
Although kitchens can be damp and busy, I still want frames that feel sturdy and lived-in, so I reach for metal options with rust-resistant finishes.
I love aged brass, powder-coated steel, and bronze tones that patina gracefully without corroding. They bring rustic charm, slim profiles, and easy cleaning — perfect for mixing prints and family photos near the stove or sink.
I also swap out cabinet knobs and pulls for complementary metals to create a cohesive look with framed art, especially when using simple hardware swaps to update the space.
Moisture-Safe Frame Materials
Pulling frames away from the sink, I look for materials that can actually stand up to steam, splashes, and the occasional sauce splatter.
I favor sealed hardwoods, powder-coated metals, and molded plastics—each resists warping and stains. Glass with silicone edges and water-resistant matboards keeps art safe.
Pick sizes that balance scale and easy cleaning; smaller, clustered frames work best near cooking zones.
I also recommend organizing frames and supplies with smart storage to maintain a consistently tidy kitchen.
Try These Quick Layouts: Grid, Salon, Rail, Staggered
If you’re short on time but want impact, I’ll show you four easy gallery layouts you can mock up in an hour: the tidy Grid, the collected Salon, the practical Rail, and the relaxed Staggered.
I’ll guide you through choosing sizes, spacing, and a simple mockup trick with kraft paper.
Each feels homey and lived-in, so you’ll get charm fast without fuss.
These layouts are especially suited to the needs of the modern content creator, offering aesthetic kitchen inspiration that doubles as a photo-friendly backdrop.
Balance Color & Pattern Without Overwhelming
When I mix color and pattern on a kitchen gallery wall, I aim for a simple rhythm that keeps the eye moving without wearing it out.
I pick a restrained palette, repeat a motif, and let one bold piece anchor the group.
Neutral frames and breathing space stop clutter.
The result feels lively but calm, like a well-loved farmhouse table.
Add Texture With Shelves, Hooks, and Planters
I like to layer in floating shelves to give a gallery wall some real depth and a place to sit a few favorite pieces.
I’ll hang sturdy hooks for utensils so they become part of the display and add useful texture.
A couple of hanging planters bring in greenery and soften the whole arrangement.
Floating Shelves For Depth
Along a well-worn wall in my kitchen, floating shelves bring instant depth and a bit of rustic charm, and I’m always surprised how much texture they add with so little fuss.
I arrange art, pottery, and plants to tell a small story.
Try these simple mixes:
- Weathered wood + ceramic mug
- Framed print + herb pot
- Small sculpture + trailing plant
Hooks For Utensil Display
Pulling a line of hooks across a backsplash livens up the wall and keeps the things you reach for every day right where you need them.
I hang wooden spoons, copper ladles, and a cast-iron spatula for a lived-in, rustic charm. Hooks add texture and rhythm, make cooking more efficient, and let me rotate pieces seasonally without crowding shelves or cluttering counters.
Hanging Planters For Greenery
Tucking hanging planters into a sunny corner brings an instant breath of life to the kitchen, and I love how they soften hard surfaces while adding texture.
I hang a trio at varying heights for rhythm and practicality.
- Macramé pots for warmth
- Small herb pots for cooking ease
- Trailing ivy to soften edges
Kid-Proof Ideas That Survive Spills & Bumps
I often opt for kid-proof gallery walls in the kitchen because I want art that stands up to sticky fingers, flying cereal, and the occasional elbow bump.
I choose laminated prints, sealed wooden frames, and cork-backed pieces hung with secure anchors. Easy-to-wipe surfaces, rounded corners, and low placement keep things reachable yet safe.
It feels cozy, practical, and lived-in.
Budget-Friendly Options: Thrift, DIY, Printables
I love hunting for mismatched frames and quirky treasures at thrift shops that only need a little sanding and paint to feel like new.
I’ll show you simple DIY frame fixes you can do in an afternoon and where to find printable art downloads that cost next to nothing.
Together these tricks let you build a warm, collected kitchen gallery without spending much.
Thrift Store Finds
You’ll find the best budget-friendly gallery pieces hiding on a thrift-store shelf, and I love the treasure-hunt feel of it.
I pick worn frames, folk art, and vintage plates to layer warmth into my kitchen. Try mixing unexpected finds for a curated, rustic look.
- Mismatched frames
- Small folk prints
- Borrowed ceramics
Easy DIY Frames
Roll up your sleeves—I’ll show you how to make simple, charming frames without spending much.
I hunt thrifted wood, sand rough edges, and stain or whitewash for that cozy, worn look.
You can cut mat board, reuse glass, or swap in fabric for texture.
I’ll also share quick fastening tricks so frames hang straight and stay put in your kitchen.
Printable Art Downloads
Often I turn to printable art when I’m aiming for a fresh gallery wall without blowing the budget. I hunt vintage-inspired files, tweak colors to match my cabinets, and print on textured paper for charm.
Here are quick ideas:
- Thrifted photo scans updated as high-res prints.
- Simple line art I color-match.
- Recipe cards printed on kraft paper for rustic warmth.
Tools & Hardware You’ll Actually Need
Before we hang a single frame, I like to gather just the essentials so the job stays simple and sturdy. I grab a stud finder, level, tape measure, pencil, and a compact drill.
Add mixed screws, wall anchors for drywall, picture hooks, and felt bumpers. That combo keeps frames secure, walls happy, and the kitchen feeling cozy without fuss or excess.
Hang a Perfect Gallery Using a Paper Template
When I’m ready to lay out my gallery, I make paper templates of each frame so I can move pieces around without putting a single nail in the wall.
I tape templates, step back, and tweak until it feels right — cozy, balanced, and a little imperfect.
- Arrange templates on floor
- Tape to wall, check sightlines
- Mark centers, hang frames
Maintain Your Kitchen Gallery: Clean & Protect
I usually wipe down frames and glass weekly so dust and cooking grime don’t build up, and I check for loose hanging hardware at the same time to keep everything secure.
I use a soft cloth, gentle cleaner, and felt bumpers to protect walls.
For kitchen humidity I rotate art away from the stove, avoid direct steam, and replace nails or hooks at the first sign of wear.
Styling Tips for Small, Open, and Rental Kitchens
Since space can feel scarce in small, open, or rental kitchens, I focus on making a gallery wall that breathes: I pick a tight color palette, mix in a couple of slim frames and a mirror to reflect light, and stagger pieces so sightlines stay open instead of crowded.
- Use slim frames and woven textures.
- Anchor with one reflective piece.
- Keep scale small and warm.
Kitchen Gallery Completion Checklist
Although the heavy lifting’s mostly done, I don’t call a kitchen gallery finished until a few practical checks are ticked off; think of this as the last sweep that makes it effortless and livable.
I check secure hanging, wipeable surfaces, reachable heights, balanced lighting, and easy-clean frames. I leave breathing room for function, add protective pads near work zones, and step back to enjoy the rhythm.
I hung my first kitchen gallery the same day my grandma taught me to knead bread — messy, comforting, and somehow perfect.
Studies show homes with personal art feel 30% cozier; that’s the warmth I wanted here. Use these tips like a recipe: a dash of family photos, a scoop of vintage prints, and a sprinkle of herbs.
Whichever ingredients you choose, your kitchen will become a creative, lived-in heart of the home.