I’ll help you craft a cozy gallery wall that feels like your kitchen: pick a style (farmhouse or rustic), measure the space, then choose a warm focal print—herbs, vintage recipes, or a worn wood frame—anchor it at eye level and build out with mixed frames, mats and a brass accent for warmth.
I’ll show how to balance scale with cabinets, install on tile or drywall, and plan easy seasonal swaps so the display stays fresh and lived‑in.
Choose a Kitchen Style to Guide Your Gallery
When I plan a gallery-style kitchen wall, I start by picking the overall style—farmhouse, modern farmhouse, rustic cottage, or sleek contemporary—because that choice guides every picture, frame, and layout.
I then choose a simple palette, mix vintage prints with meaningful pieces, and balance wood and metal frames. That foundation keeps the display cozy, cohesive, and true to the room’s character.
Using neutral decorating principles helps ensure the result feels timeless and refined, with an emphasis on chic neutral accents.
Quick 5‑Step Recipe for a Kitchen Gallery Wall
I’ll walk you through a quick five-step recipe to lay out a kitchen gallery wall that actually flows with your space.
We’ll focus on simple layout and flow tips, then mix frames and textures so the whole arrangement feels lived-in, not fussy.
Follow these steps and you’ll have a warm, balanced display that suits your kitchen’s rhythm.
Gallery Wall Ideas To Turn Your Kitchen Into A Creative Space creative focal point can help unify your kitchen’s aesthetic.
Layout And Flow
For a kitchen gallery wall to feel natural and easy, I start by mapping the space and traffic flow so frames don’t clash with cabinets, light switches, or the route to the pantry.
I keep placements practical, cozy, and steady.
- Measure clear zones.
- Anchor at eye level.
- Leave breathing space.
- Test with paper templates.
Adding a complementary ceiling treatment can tie the gallery to the whole room and enhance cohesion, especially when coordinated with overlooked ceiling treatments.
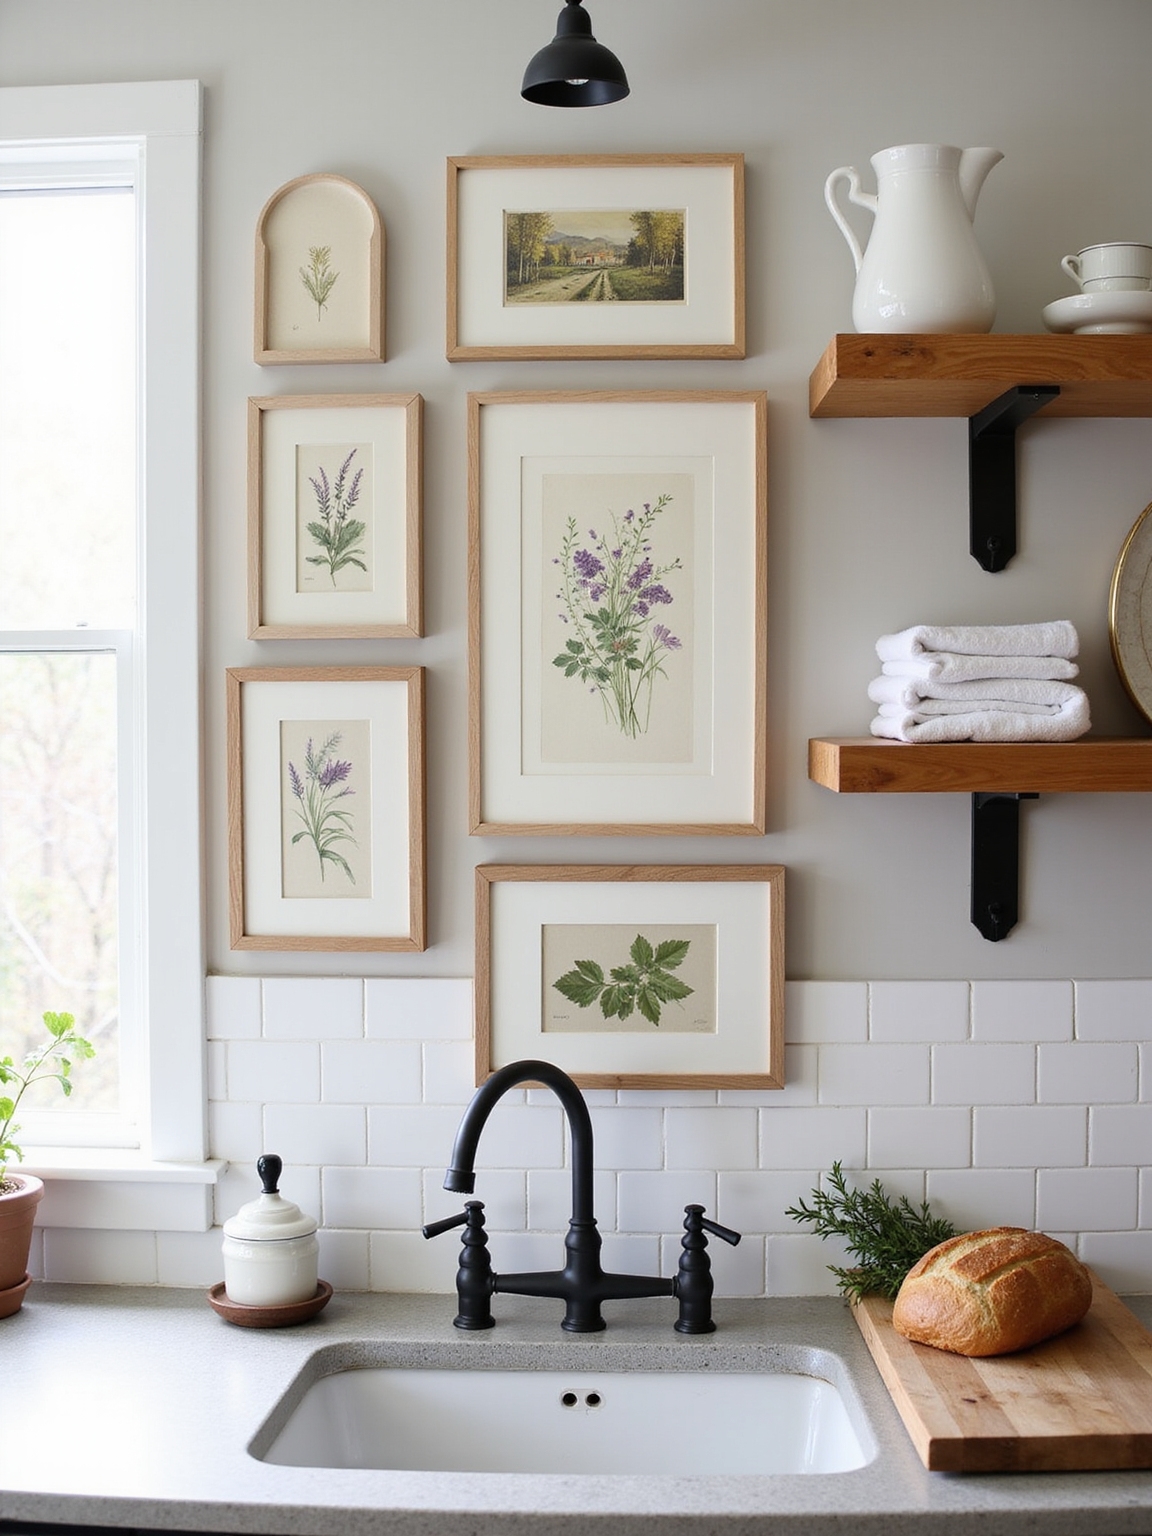
Mixing Frames And Textures
Mixing frames and textures breathes life into a kitchen gallery—I’ll start by choosing a unifying thread (like color, metal finish, or wood tone) and then add contrast with varied materials so the wall feels layered, not chaotic.
I mix thin black frames, reclaimed wood, and woven baskets, balancing matte and shiny surfaces. I step back often to tweak spacing until it feels warm and lived-in.
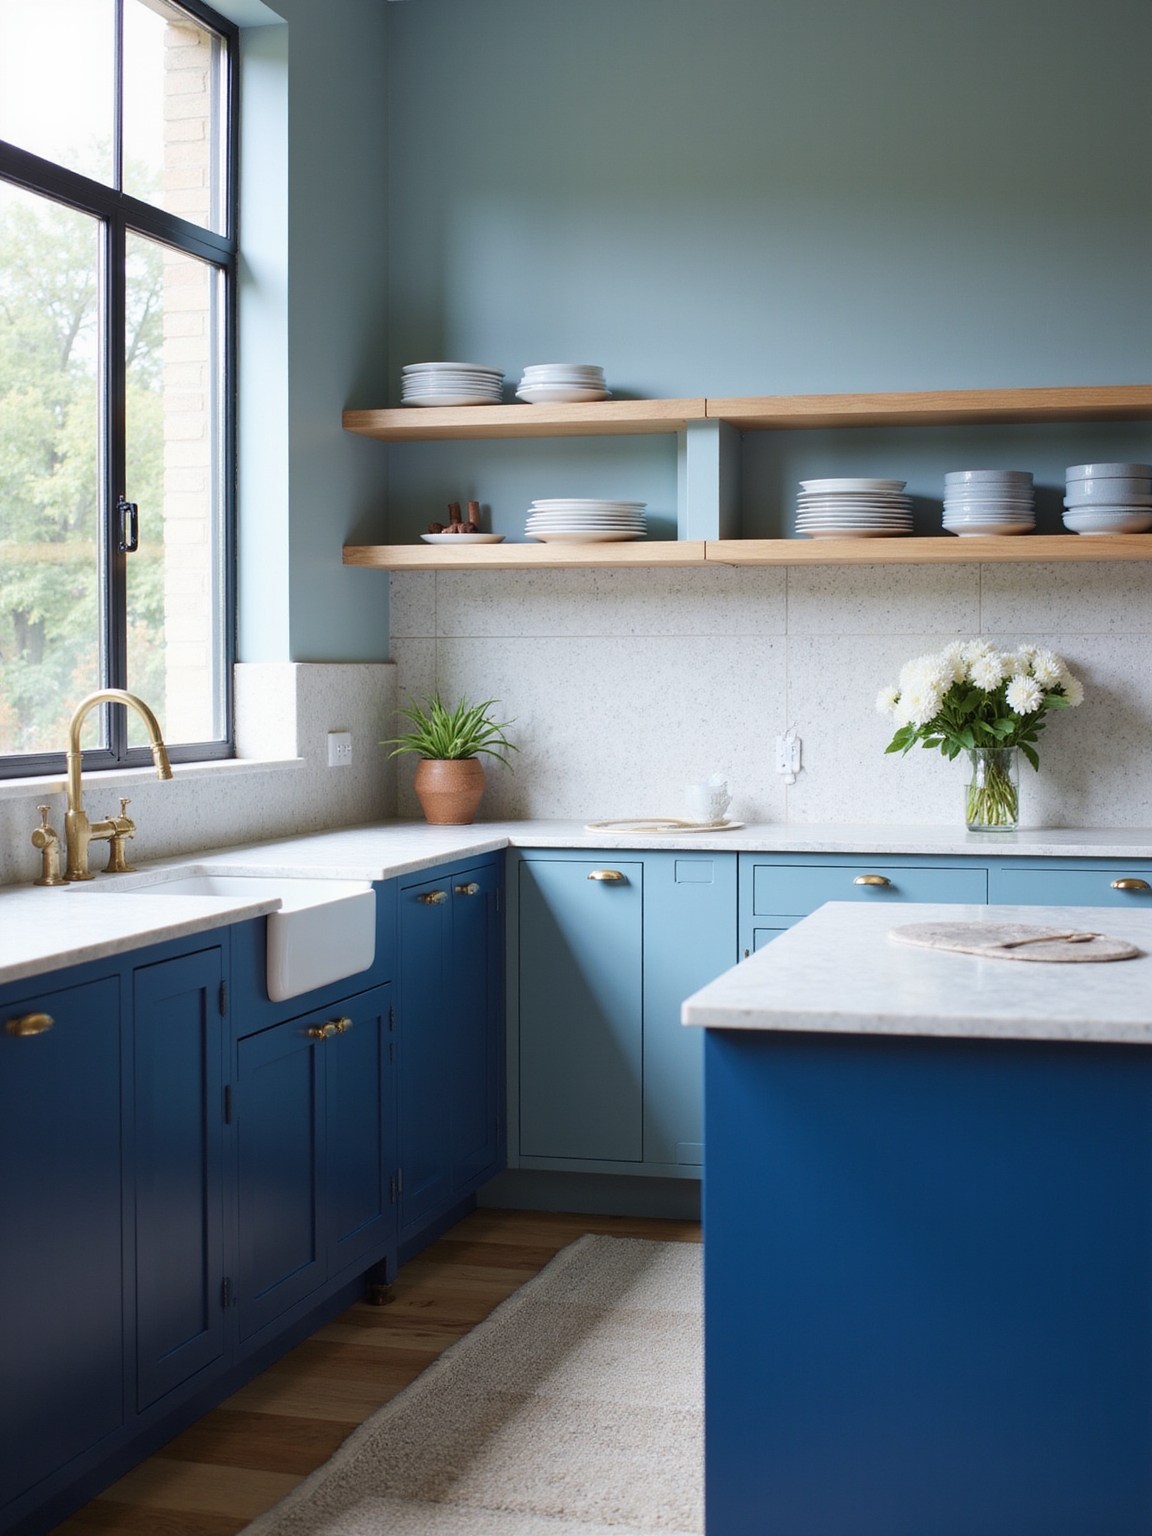
A cohesive palette helps tie the elements together and ensures the gallery complements your kitchen’s finishes, especially when you coordinate with cabinet and countertop tones.
Measure the Wall and Define Your Gallery Area
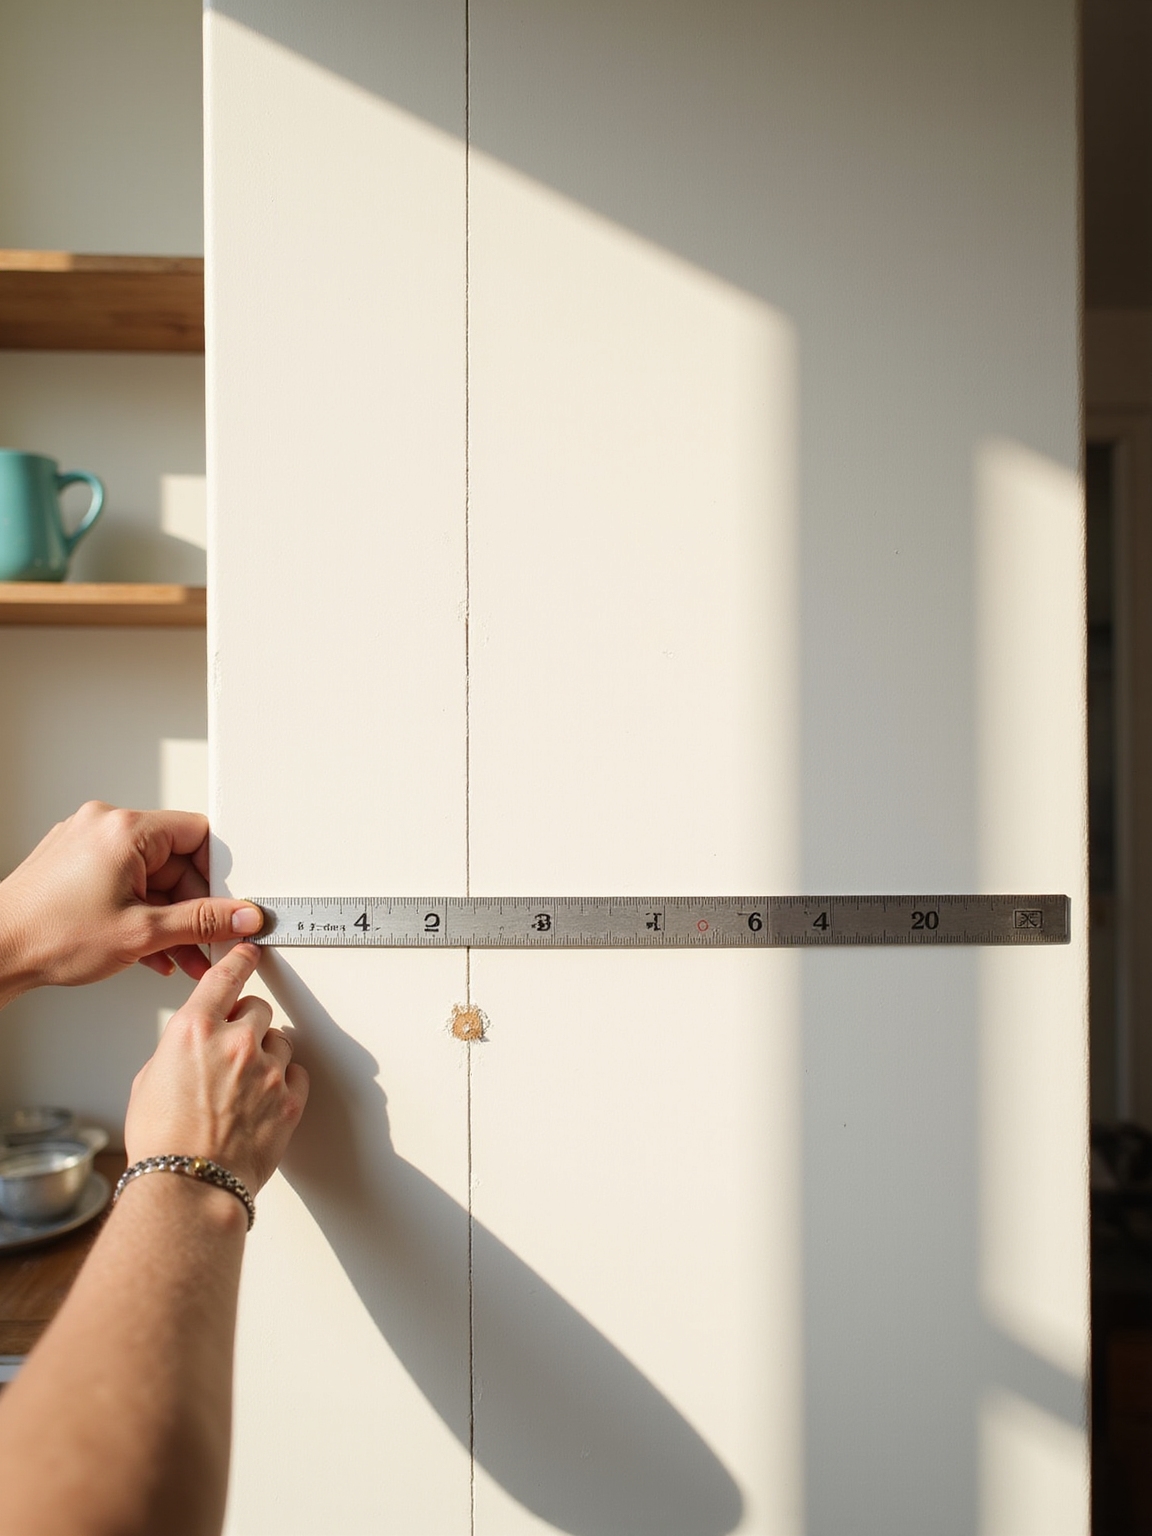
I always start by measuring twice so my layout fits the space perfectly, then I sketch the gallery area to know where everything will sit.
I pick a focal point—usually over a countertop or between cabinets—to anchor the arrangement.
I also account for appliances and switches so nothing gets awkwardly covered or bumped.
Large windows can brighten a kitchen and influence artwork placement, so consider how window styles will affect light and visibility.
Measure Twice, Plan Once
Because an even, well-measured start saves you headaches later, I always grab a tape measure and note the wall’s full height and width before I pick any frames.
I sketch a simple plan, leaving breathing room and considering appliances.
Then I:
- Mark usable wall space
- Note switches/outlets
- Measure sightline heights
- Decide overall arrangement size
A few smart storage hacks like vertical shelving can help keep surrounding counter and wall areas tidy while you arrange your gallery.
Determine Focal Point
When you stand back and really look at the wall, you’ll spot the natural place the eye wants to land—so I use that as my starting point.
I measure the width and height, note sightlines from the kitchen work zones, and mark a balanced rectangle. That defined gallery area keeps arrangements intentional, cozy, and grounded, avoiding crowded edges and awkward gaps.
I also consider how the pieces interact with adjoining rooms to maintain a seamless flow between kitchen and dining spaces.
Account For Appliances
Your stove’s backsplash and the fridge’s edge tell me as much about the wall as any tape measure, so I start by noting every appliance that interrupts the surface before I pick frames.
I map gaps and sightlines, then plan a gallery that breathes around hardware.
- Measure clear wall spans
- Note switches/outlets
- Respect appliance doors
- Center art between interruptions
I also consider how open concept sightlines influence where viewers will naturally focus so the gallery complements traffic and viewing angles.
Pick a Focal Piece to Anchor the Group
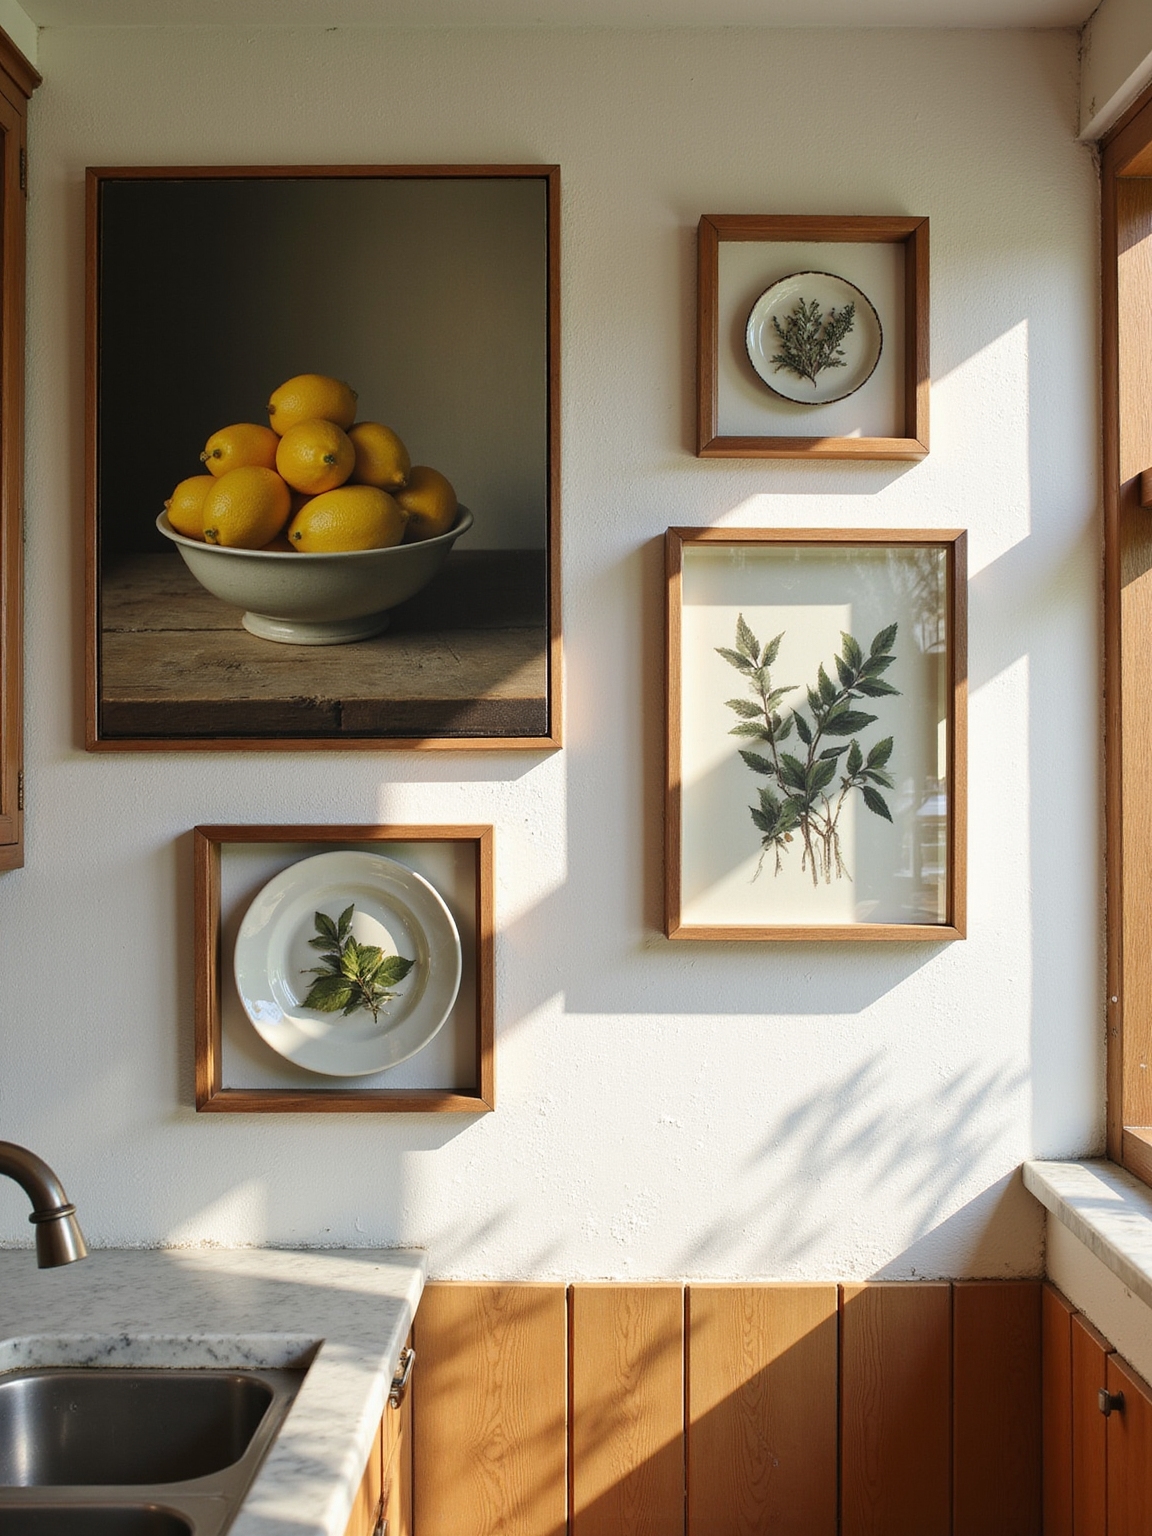
If I’m putting together a gallery-style arrangement in the kitchen, I always start by choosing one strong focal piece to anchor the group; it gives the whole collection purpose and keeps things from feeling scattered.
I pick something with character—a worn wood frame or a bold vintage print—then arrange smaller, simpler pieces around it so the wall feels cozy, grounded, and inviting.
Choose Subjects That Match Kitchen Life
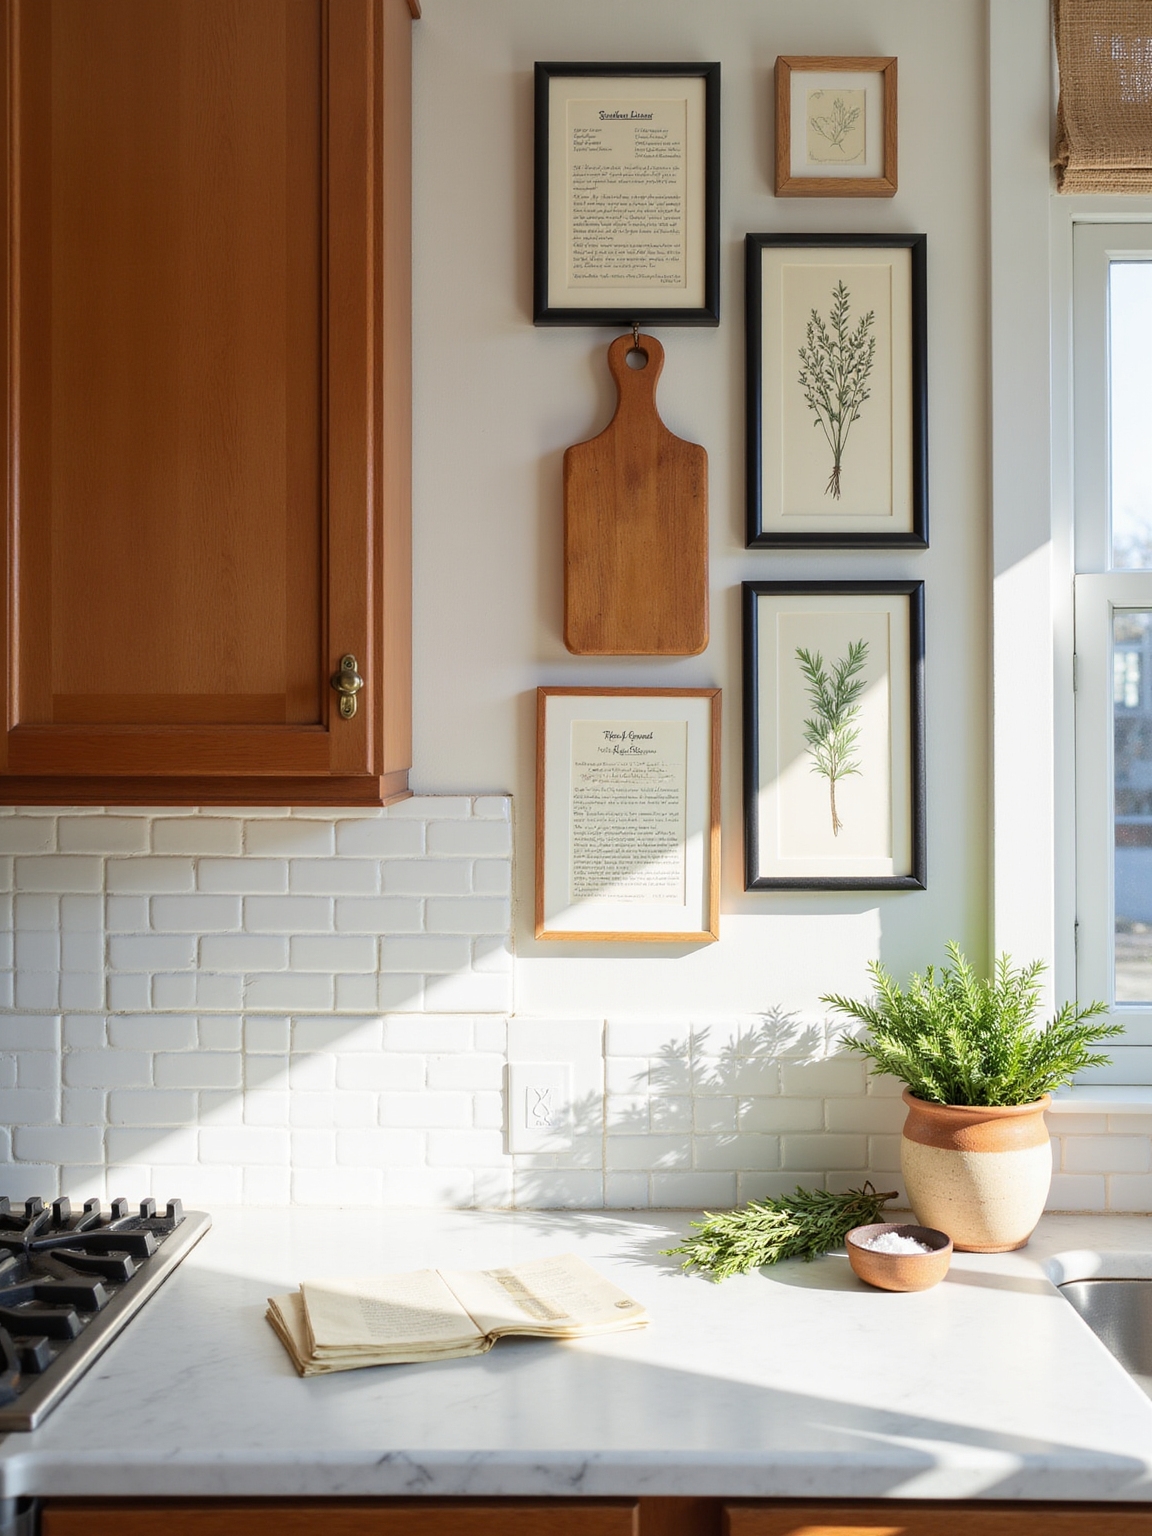
Because the kitchen is where we cook, laugh, and spill the occasional sauce, I pick artwork that feels lived-in and useful—herbs in clay pots, vintage recipe cards, or sketches of sturdy cast-iron pans.
I choose subjects that echo daily rituals:
- Fresh herbs
- Simple tools
- Family recipes
- Market scenes
They make the gallery feel warm, honest, and welcoming.
Mix Frame Sizes, Materials, and Mats for Depth
When I mix frame sizes, materials, and mats, the wall suddenly feels layered and intentional instead of flat and fussy.
I pair thin black frames with chunky reclaimed wood, toss in a brass frame for warmth, and use wide mats to give breathing room to smaller prints. It’s an easy, homey trick that adds depth without cluttering the kitchen.
Layout Options: Grid, Salon, Linear, Vignette
I like to start by choosing a layout that fits the mood of the room — a tight grid gives me that sweet symmetry and balance that calms a busy kitchen.
For a more lived-in, farmhouse feel I lean toward a salon arrangement, mixing sizes and frames for an eclectic layered style.
Once you pick grid or salon as a base, we can talk about linear runs or small vignettes to finish the look.
Grid: Symmetry And Balance
If you’re aiming for order and a cozy, farmhouse feel, I love the grid layout for kitchen wall art because it brings symmetry and balance without feeling stiff.
I hang similar frames, keep spacing even, and let rustic prints breathe.
Try these simple steps:
- Choose matching frames
- Align edges precisely
- Use consistent matting
- Keep spacing uniform
Salon: Eclectic Layering Style
Sometimes a jumble of pieces feels more like home than a matched set, and that’s exactly the appeal of the salon-style wall:
I mix art of different sizes, frames, and subjects to create a layered, collected-over-time look that still reads as intentional.
I tuck small prints beside big canvases, overlap frames, and let color repeats and odd finds tie the group together warmly and without fuss.
Spacing & Scale: Keep Art Proportional to Cabinets
When you hang art near cabinets, I treat scale like the kitchen’s quiet conversation—too small and the pieces get eaten alive, too big and they crowd every other element.
I aim for harmony: art that complements cabinet height and reveals wood grain. Consider:
- Match art width to cabinet run.
- Leave breathing room.
- Use repeating heights.
- Prioritize sightline flow.
Balance Color, Pattern, and Negative Space
I like to start by thinking about color temperature — cool blues calm a bright kitchen, warm ochres cozy it up — and I’ll mix those tones so the room feels intentional, not chaotic.
I also keep pattern scale in check, pairing one bold print with smaller, quieter textures so the eye has a place to rest.
Leaving generous negative space around each piece makes the whole arrangement breathe and keeps the gallery from feeling cluttered.
Color Temperature Choices
I usually start by deciding whether I want the kitchen to feel warm and cozy or bright and airy, because color temperature sets the room’s mood.
I pick tones that complement wood and tile, then balance negative space so art breathes.
I like simple palettes and rustic textures.
- Warm lights
- Cool accents
- Neutral backdrops
- Accent pops
Pattern Scale Control
Shifting from color temperature, I now think about pattern scale — how big and small motifs play together so the wall art doesn’t fight the room.
I favor one dominant large piece, then smaller, simpler prints to echo it. That contrast keeps a cozy, rustic kitchen feeling balanced.
I also leave breathing space on the wall so patterns settle and colors sing.
Mix Decorative and Functional Pieces (Plates, Chalkboards)
I like to mix a few decorative plates with useful pieces like chalkboards to keep the wall feeling lived-in and practical.
I hang mismatched ceramics, a small recipe chalkboard, a woven spoon, and a vintage print to balance charm and use.
- Mismatched ceramics
- Recipe chalkboard
- Woven utensils
- Vintage print
Lighting for a Kitchen Gallery Wall
You can bring those plates, chalkboard, and woven spoon to life with the right lighting—I’ve found the difference is night and day.
I like soft, warm bulbs in adjustable track lights or small picture lights to highlight textures.
Dimmer switches create cozy dinners, while under-cabinet strips add subtle wash.
Aim for layered, focused light that feels lived-in and inviting.
Mounting and Hanging Tips for Tile, Drywall, Plaster
When I tackle a gallery wall in a kitchen, the surface dictates everything—tile, drywall, and plaster each need different tricks so your plates and frames stay safe and straight.
- Use masonry anchors for tile; drill slowly with a carbide bit.
- For drywall, pick toggle bolts for heavy pieces.
- Plaster loves screws into studs or molly bolts.
- Level, protect surfaces, and hang slowly.
Budget & Time: Sourcing, DIY, and Prints‑On‑Demand
Although budget and time can feel like opposing forces, I’ve learned to make them work together by mixing sourcing strategies: thrifted frames and flea-market finds for character, a few DIY projects to stretch money further, and prints-on-demand for affordable, high-quality artwork when I need something specific and fast.
I pick a palette, repurpose wood, and order prints that fit frames — simple, cozy, efficient.
Seasonal Swaps and Rotating Displays Without Rehanging
After juggling thrifted frames, DIY pieces, and prints-on-demand, I like to keep the gallery lively without taking the frames off the wall.
I swap accents and inserts seasonally with simple tricks that feel cozy and rustic:
- Use mat inserts with themed prints.
- Clip seasonal postcards or herbs on strings.
- Slide in fabric swatches or tea towels.
- Add small wreaths or garlands to frame edges.
Troubleshooting: Overcrowding, Scale, Glare, Fading
If I’m honest, the trickiest part of a gallery-style kitchen is keeping it from feeling cluttered or washed out, so I watch scale, glare, and fading as if they’re kitchen pests to be managed.
I edit ruthlessly, stagger sizes, angle frames to cut glare, use UV-friendly prints, and leave breathing room so each piece feels intentional—simple, lived-in, and easy on the eye.
I’m thrilled you’ve stuck with me through the nitty‑gritty of building a kitchen gallery wall — it’s like painting with memories, not just frames.
Pick a style, measure carefully, choose a focal piece, and trust your gut; the rest is gravy. Don’t sweat perfection: a slightly crooked frame can feel charming instead of wrong.
Swap seasonally, guard against glare, and enjoy a wall that makes you smile every time you walk in — a million times better than bare paint.