
I love turning thrift-store dressers into chic, budget-friendly kitchen islands you’ll actually want to cook on. I’ll guide you through smart space planning, choosing the right dresser, and measuring for clearance so the island fits without tripping over doors. You’ll see budget-friendly materials, quick upcycling tricks, and solid safety tips to keep it sturdy. With a few handy tweaks—adjustable shelves, pull-out organizers, and hidden outlets—you’ll have a stylish, functional piece that earns its keep. Stick with me and you’ll get more tips.
Identify Your Kitchen Needs: Budget, Size, and Function
Deciding what your kitchen island should do starts with three simple questions: what’s your budget, how much space can you spare, and what tasks will you rely on it for?
I’ll map needs clearly: budget cap, footprint, priority functions.
I’ll suggest flexible ideas, not fussy rules, so you feel confident trying a bold mix, saving money while keeping timeless style intact. Incorporating unique island designs can elevate functionality and aesthetics, making your kitchen truly standout.
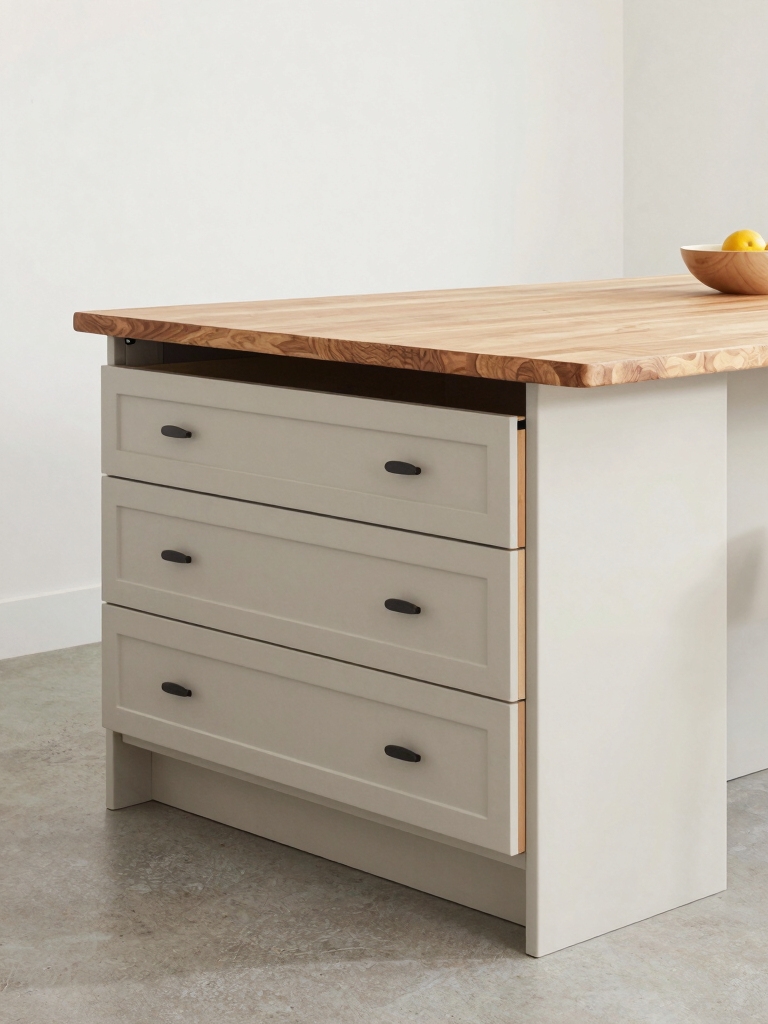
Pick the Right Dresser Based on Space and Budget
I’ll start by sizing up your space so the dresser fits like a charm, not a challenge.
Then I’ll point you to budget-friendly picks that still feel polished, because style shouldn’t cost an arm and a drawerful of groans.
Finally, we’ll scale the choice to your layout, ensuring the island stays comfy to work around and easy on the eyes. Additionally, considering kitchen ideas for small spaces can help you maximize functionality without sacrificing aesthetics.
Space Considerations First
When you’re choosing a dresser to repurpose into a kitchen island, space comes first, not last, because a good fit should feel effortless rather than squeezed-in.
I recommend sizing by footprint, clearance, and access.
1) Measure room flow and doorways
2) Pick a model with a shallow depth
3) Leave at least 36 inches of clearance
4) Choose a piece that balances weight and style
Additionally, consider selecting a dresser that can accommodate multifunctional island solutions to maximize utility in your compact cooking space.
Budget-Friendly Dresser Picks
If you’re working with a budget, start with a simple rule: pick a dresser that fits your footprint and leaves room to move.
I hunt for sturdy basics, not showroom flash, with clean lines and hidden storage.
Measure twice, compare prices, and trust our gut: durability beats trend.
Style comes easy when function first, scale right, and budget stays honest. Plus, choosing a dresser that complements your cozy kitchen spaces can enhance the overall aesthetic of your kitchen.
Scale For Layouts
Scale for layouts means picking a dresser that fits your space and budget without crowding the room or breaking the bank.
I’ll walk you through smart choices that balance style and square footage, so your island feels intentional, not cramped.
1) Measure twice, assume once—verify doorway clearance and floor space
2) Prioritize shallow depths for tight kitchens
3) Choose sturdy, no-slip legs or casters
4) 预算-friendly style: timeless finishes over trendy patterns
Additionally, incorporating smart storage ideas can further enhance the functionality of your DIY kitchen island.
Measuring for a Dresser Island: Clearances and Flow
Let’s talk clearances and flow so your dresser island actually works in the kitchen, not just looks wise.
I’m thinking about room to move, how you’ll pivot around cabinets, and the access space you need without bumping into breakfast chaos.
If we get these measurements right, the island becomes a frictionless hub, not a traffic jam in disguise. Additionally, incorporating mini kitchen ideas can help maximize functionality in your cozy space.
Clearances For Movement
Clearances matter more than you might think: when a dresser island sits between appliances, walls, and walking paths, every inch counts for safe, smooth movements.
I’ll share practical spacing that keeps traffic flowing and doors from crying uncle.
- Leave at least 36 inches for primary paths.
- Allow 42 inches if you’ll swivel around.
- Reserve open space for door swings.
- Measure before choosing handles or drawers.
Additionally, consider incorporating smart layout tips to enhance overall kitchen efficiency and usability.
Flow Around Kitchen
Flow around a dresser island isn’t just about inches; it’s about movement that doesn’t feel like a math problem.
I measure elbow room, door swing, and apron reach, then breathe easy when traffic flows. I stay adaptable, marking clearances with chalk and memory, not charts.
Practical, playful constraints keep this DIY project feeling timeless and doable for any budget. Additionally, incorporating clever ideas for maximizing space can enhance functionality in your small kitchen.
Island Access Space
If a dresser island is your center stage, you’ll want space to move without bumping toes or wrenched knees.
I measure clearance like a pro, then map flow so doors swing—without drama.
Here are quick guardrails:
1) keep at least 36″ around
2) allow 42″ for work zones
3) guarantee aisle symmetry
4) test with real-life traffic
Simple, timeless, practical. Additionally, consider incorporating space-saving kitchen islands that can double as dining tables for maximum efficiency.
Essential Tools and Materials on a Shoestring

Starting with a lean toolkit keeps DIY honest: you don’t need a warehouse of gadgets to breathe new life into a kitchen island, just a few sharp, versatile basics and a plan.
I keep my notes tight: a pry bar, tape measure, square, utility knife, screws, sandpaper, wood glue, a good drill, and a couple of clamps. Additionally, opting for an open kitchen design can enhance the overall feeling of space and light in your home, especially if you consider kitchen designs without upper cabinets.
Materials? Pine boards, paint, primer, and a budget-friendly finish.
Five Quick Upcycling Tricks That Save Time and Money
Three quick upcycling tricks that save time and money keep your kitchen island fresh without sabotaging your weekend.
I share simple swaps that work, then you reap the rewards.
- Refinish hardware with spray paint for instant upgrade.
- Repurpose a cutting board as a handy tray.
- Label jars for quick access and less clutter.
- Peel-and-stick wallpaper adds character in minutes.
How to Add a Sturdy Countertop Without Breaking the Bank
I’ll show you sturdy countertop options that don’t break the bank, from solid-wood vibe with affordable cores to durable laminates that look premium.
I’ll share budget-friendly laminate tips, plus smart edge choices, so you get a surface that lasts without wasting a penny.
And I’ll cover secure attachment methods you can actually trust for daily use, not just showroom charm.
Sturdy Material Choices
When you’re selecting a countertop on a budget, you’ve got options that don’t look bargain-bin once it’s installed.
I’m sharing sturdy materials that stay sturdy without draining your savings.
- Recycled glass butcher block blends durability with flair.
- Reclaimed wood with proper sealing for warmth and longevity.
- Concrete overlays priced per slab, polished to perfection.
- High-pressure laminates mimicking stone, but twice as practical.
Budget-Friendly Laminate Tips
If you’re smart about laminate, you can get a countertop that looks pricey without paying a premium, and I’ll show you how.
I choose high-pressure laminate with a faux-granite edge, seal edges with clear acrylic, and reinforce with a plywood substrate.
Measure twice, trim once, and skip fancy installers—this DIY time-saver still feels upscale without the bill.
Secure Attachment Methods
Secure attachment isn’t glamorous, but it’s the backbone of a sturdy countertop on a budget.
I’ll show practical grips, not gadgets, to keep it tight and stable.
- Use construction adhesive along the edge, press firmly, and clamp.
- Attach through the dresser top with long screws into a solid frame.
- Add corner bracing inside for shear support.
- Seal seams with silicone for moisture defense.
Smart Cabinet Modifications to Maximize Storage
Smart cabinets aren’t just for looks; they’re for grabbing stuff faster, and that starts with smart planning.
I’ll show simple tweaks: adjustable shelves, pull-out organizers, and labeled zones so daily items live where you expect them.
Measure, map, and mock up before drilling.
Tiny returns, big gains—your island suddenly feels spacious, efficient, and almost telepathic about where to put things.
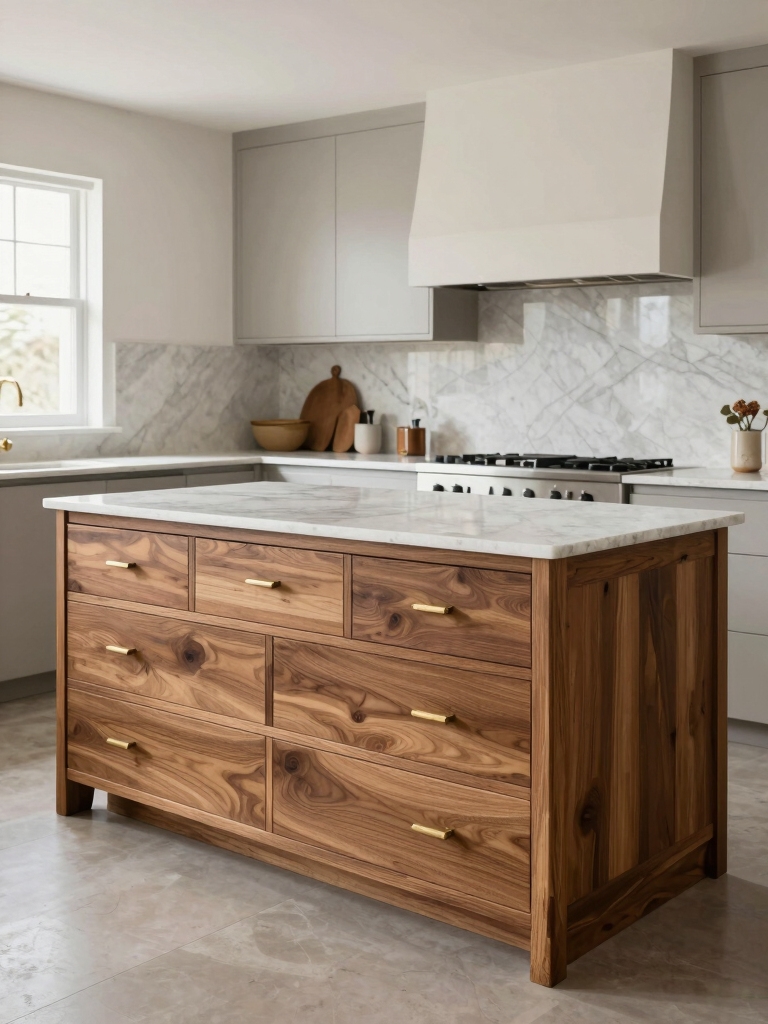
Finish It Right: Paint, Stain, or Real Wood on a Budget
Maybe you’re torn between a fresh coat of paint, a simple stain, or real wood that won’t blow your budget.
I’ll map out what each option feels like in use—durability, look, and how easy it’s to refresh later—so you can pick with confidence.
Let’s weigh paint or stain choices against real wood on a budget and get your island looking sharp without the sticker shock.
Paint or Stain Choices
If you’re deciding between paint or stain for your budget-friendly kitchen island, you’re not alone—and the choice isn’t as scary as it sounds.
1) Paint hides flaws, adds color, cleans easily.
2) Stain keeps grain for character, feels traditional.
3) Light hues brighten small spaces without glare.
4) Dark tones anchor a busy room; pick contrast wisely.
Real Wood on Budget
Real wood on a budget can feel like chasing a unicorn, but with the right approach it’s totally doable.
I’ll guide you to choose real wood wisely, avoid waste, and finish it cleanly. You’ll learn cost-savvy sourcing, smart cuts, and simple finishes that age gracefully.
It’s doable, durable, and strangely satisfying—your island gets character without breaking the bank.
Light as You Go: Castors for Mobility and Safety
Castors aren’t just an add-on for kitchen islands; they’re the backbone of safe, flexible design.
I’ll keep it simple, you’ll feel the difference as you glide, not grind.
- Choose locking wheels for stability
- Check weight rating—survive your pumpkin-spice latte moments
- Place on even floors to avoid wobble
- Use brakes before quick holds for safety
Create a Prep Surface and Seating Plan on a Budget
Whether you’re chasing a sleek prep zone on a shoestring or simply rethinking layout, you can whip up a functional surface and comfy seating without breaking the bank.
I sketch a compact plan: a sturdy dresser top, sealed against spills, paired with simple stools.
Maximize legroom, keep clutter minimal, and use removable organizers for quick cleanups.
Budget-friendly versatility, delivered with style and grit.
Power Up: Integrating Charging and Small Appliances
I’m thinking about a clean, clever setup with a Wireless Charging Hub tucked into the island edge, so phones vanish from the counter with a simple tap.
I’ll route outlets out of sight and label cords to keep appliances humming without chaos, making power feel invisible.
Let’s balance convenience and style as we talk about cord management, hidden outlets, and smartly placed small appliances.
Wireless Charging Hub
Think of a wireless charging hub as the nerve center of your kitchen—a single, polished spot where your phone, earbuds, and a compact power brick all land neatly while you cook.
- Leave cables hidden yet accessible
- Quick-charge compatibility for devices
- Non-slip mat keeps phones steady
- Built‑in surge protection, worry-free
Hidden Outlet Routing
Hidden outlet routing keeps your power flow invisible and efficient, turning a tangle of cords into a clean, usable surface.
I map outlets beneath the island edge, using grommets and shallow channels so cords vanish from sight but stay handy.
No drama, just smart, subtle power. You’ll glide from prep to plates without tripping over plugs or clutter.
Perfection, practically.
Appliance Cord Management
Now that we’ve tamed the outlets along the island edge, it’s time to tame the cords that feed those appliances.
I’ll keep cables clean, accessible, and safe with smart routing and discreet ties. No chaos, just clean function.
- Use under-counter clips to guide cords.
- Install a power strip inside a toe-kick drawer.
- Label each plug for quick rehousing.
- Opt for wireless or compact appliances where possible.
Budget-Friendly Lighting Ideas for a Dresser Island
Ever wondered how to make a dresser island glow on a budget? I’m right there with you.
Lighting can be thrifted, repurposed, or tucked under a cabinet lip for ambient warmth.
Try dimmable LEDs, clip-on desk lamps, or vintage sconces with plug-in cords.
Layer brightness, test color temps, and keep cords neat—your island stays stylish, not tangled.
Tie It Together: Backsplash and Wall Details
Mixing a new backsplash with wall details isn’t about matching colors at every seam; it’s about creating a confident rhythm that ties your dresser island to the room.
- Pick a focal tile that echoes countertop tones
- Use a thin, contrasting grout for subtle definition
- Mirror wall accents with cabinet hardware
- Finish with a light, unifying paint wash
Sustainable and Reclaimed Materials to Use
Sustainable choices aren’t just trendy—they’re smart, stylish, and surprisingly simple when you know where to look.
I’ve found reclaimed wood from old pallets and charity-store doors to add character without guilt. Look for salvaged hardware, unfinished surfaces, and locally milled options to reduce transport waste.
I mix DIY-safe finishes to keep grain alive, preserve charm, and curb budget-busting surprises.
DIY Sink Options and Plumbing for a Dresser Island
I’ve found that sinking a dresser island isn’t just about aesthetics—it’s about plumbing peace of mind, especially when you’re marrying reclaimed charm with modern convenience.
Here’s my quick take on DIY sink options and plumbing:
- Choose compact, shallow sinks to fit cabinet depth
- Use flexible supply lines for easier routing
- Install a vented trap combo for fewer clogs
- Consider a hand-wash pedestal or bar sink for simplicity
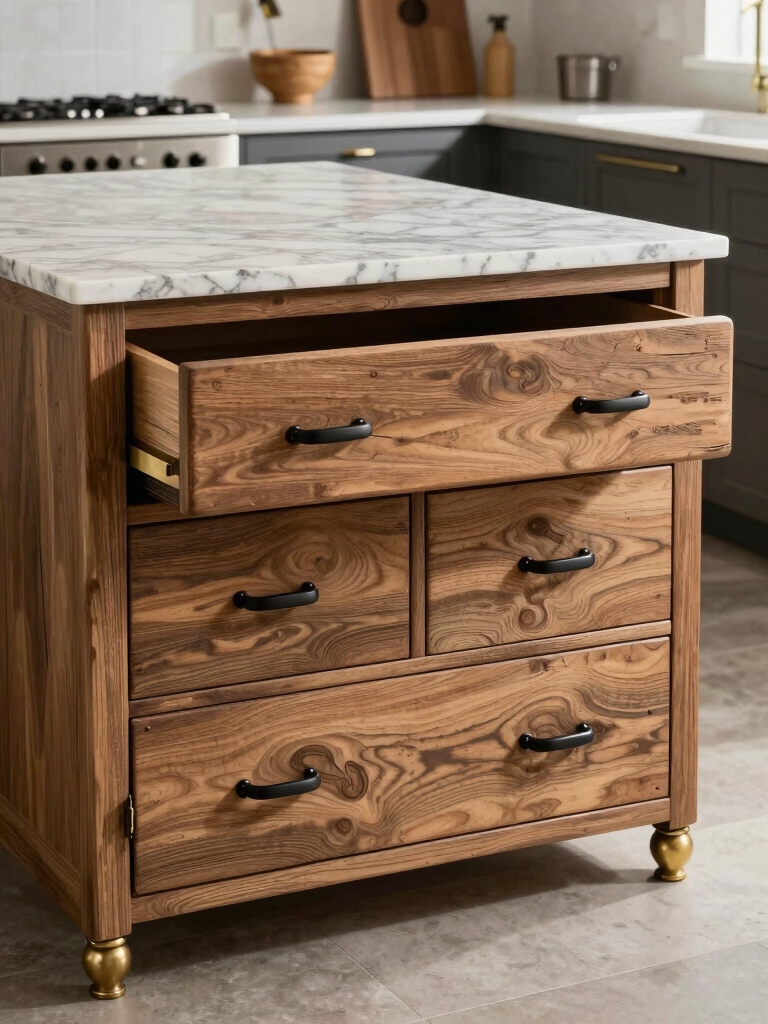
Hardware Upgrades That Make a Big Visual Impact
Want to transform a dresser island fast? I swap in bold hardware for instant impact.
Think chunky pulls, brass hinges, or matte black knobs that wink at your countertop. I keep lines clean, scale right, and avoid ooh-shiny clutter.
A simple upgrade changes the vibe, not the budget, so I’m sharing practical picks you’ll actually use.
Your island, upgraded stylishly.
Stabilize and Secure: Safety and Floor Mounting
To keep a kitchen island steady and safe, I start with a solid plan for stabilization and floor mounting.
I’m practical, not preachy, so here’s the core.
- Inspect the floor structure and choose a sturdy mounting method
- Use locking hardware to prevent drift
- Level the unit before securing
- Test torque and walk the line for wiggle-free confidence
Common Mistakes to Avoid When Building a Dresser Island
A dresser island looks great when it’s sturdy, but a few common missteps can turn a smooth project into a wobble nightmare.
I’ve learned to plan hardware placement, test weight distribution, and account for ventilation.
Don’t over-tighten screws, skip leveling, or skimp on trim. Measure twice, cut once, and embrace simple, sturdy joints—your future kitchen will thank you with years of quiet, confident service.
Real-Life Budget-Friendly Before-and-After Inspo
Sliding past the showroom gloss, real-life tweaks beat glossy demos every time, and I’ve got the budget-friendly wins to prove it.
I’m sharing true-before-and-after wins you can copy, no fluff.
- A thrifted tabletops transforms into a chic island surface.
- Repainted drawers cut costs and boost personality.
- Added casters for portable, flexible cooking zones.
- Open shelving stuns guests without draining funds.
Maintenance, Longevity, and Tiny Upgrades for Long-Term Value
Maintenance, longevity, and tiny upgrades aren’t glamorous, but they’re the quiet workhorses that keep a kitchen island looking sharp year after year.
I’ll share practical, punchy tips you can trust: seal pulls and edges, mop spills promptly, rotate finishes, and stash a mini kit for quick fixes.
Small tweaks compound, preserving charm without draining your budget or patience. Consistency beats flashy neglect.
Conclusion
So there you have it: a dresser island, born of thrift, thrift, and more thrift. I’ll admit, it’s genius—until you trip over a rogue drawer runner or spill a pot on the “granite” top and realize you’ve created a culinary sculpture, not a kitchen. Yet the irony lands soft: beauty on a budget, dangers on a budget, drama on a budget. Enjoy the clever chaos, and pretend the mess is intentional art.


