I’ve pulled together 14 practical island ideas that boost flow, storage, and comfort in any home style. Think clear traffic paths, varied heights, and smart storage with hidden niches for trash and tools. I’ll help you design a focal point that’s easy to cook at, easy to socialize around, and easy to maintain, with durable materials and good lighting. If you keep going, you’ll uncover exactly how to tailor these tips to your space and needs.
Plan the Kitchen Island: Define Goals and Priorities

When planning a kitchen island, start by defining clear goals and priorities so the design serves your daily workflow.
I’m sharing how I approach this: I list must-haves, nice-to-haves, and budget limits, then map tasks to zones.
This keeps decisions simple, practical, and repeatable, ensuring the island actually enhances cooking, prep, and casual dining without clutter.
Your priorities guide every choice. Additionally, consider various island configurations that can complement your specific floor plan and functionality needs.
Kitchen Island Layout: How to Maximize Traffic Flow

I’m thinking about traffic-flow principles and how island zones can keep the kitchen efficient.
I’ll share practical ideas for creating clear, usable paths around the island so prep, cooking, and cleanup don’t clash.
Let’s explore how to map zones and spacing to suit your space and habits. Incorporating kitchen flow principles can significantly enhance the overall functionality and comfort of your cooking area.
Traffic-Flow Principles
A well-placed kitchen island can guide traffic intuitively, preventing bottlenecks and making prep, cooking, and cleanup flow smoothly.
I design around clear pathways, keeping apron-fronts far from seating and ensuring doors swing open without collision.
Think generous clearance, practical asymmetry, and sightlines that reduce backtracking.
I tailor islands to how you move, so every task feels natural, efficient, and calm. Additionally, incorporating peninsula kitchen layout principles can enhance overall functionality and create a more seamless cooking experience.
Island Traffic Zones
Think of island traffic zones as the lanes in a kitchen choreography: clear, well-marked paths keep cooks, guests, and helpers moving without colliding.
I design flow by zoning tasks: prep, cooking, cleanup, and service. Height, clearance, and appliance placement guide footsteps.
I minimize cross-traffic with defined aisles, symmetrical islands, and smart seating angles, so every move feels seamless and safe. Additionally, incorporating open kitchen designs can enhance the flow and connectivity in your home, making it a more inviting space for social interactions.
Design the Island as a Functional Focal Point

Design the island as a functional focal point by pairing smart workflows with a standout design.
I tailor the layout to your daily routines, placing prep, cooking, and cleanup within a natural arc. Choose materials and a silhouette that feel timeless yet modern, so it stays compelling. Incorporating unique island designs will enhance both the aesthetics and functionality of your kitchen space.
I’ll help you balance beauty, efficiency, and a welcoming, used-everyday vibe.
Storage Solutions on the Island: Drawers, Cabinets, and Hidden Niches

We’ve set the island up as a functional focal point, so now let’s map out smart storage that keeps everything you need within easy reach.
I’ll share practical ideas you can actually use daily.
- Drawers with dividers for utensils and gadgets
- Deep cabinets for pots, pans, and small appliances
- Hidden niches for trash, recycling, and prep tools
Incorporating smart island storage can significantly optimize your kitchen space.
Built‑In Island Features: Appliances, Vents, and Utilities

A built‑in island is more than a pretty surface—it’s a coordinated hub of appliances, vents, and utilities that streamline cooking and cleanup.
I’d prioritize compact, efficient choices: a prep sink, integrated trash bin, and a quiet range hood. Additionally, consider multifunctional island solutions that maximize utility and space in your kitchen.
Plan electrical and water feeds beneath the counter, with accessible outlets for gadgets, chargers, and small appliances, keeping workflow smooth and flexible.
Casual Seating: Counter Space, Bar Stools, and Comfort
I’m exploring casual seating that makes counter space feel like part of the family hub, from smartly placed corners to chairs that invite a quick chat.
I’ll share ideas on maximizing counter space efficiency, choosing bar stools that fit your height and comfort, and keeping seating inviting without crowding the prep zone.
Let’s talk about practical tweaks that boost comfort and usability for everyday meals, chats, and quick breakfasts. Incorporating Green Island Kitchen Palettes can also enhance the overall aesthetic and functionality of your kitchen space.
Casual Seating Ideas
When you’re designing casual seating for a kitchen island, prioritizing comfort and practicality makes the space inviting and functional.
I’ll share simple ideas you can actually use today:
- Bar stools with supportive backs for extended chats
- Counter cushions or upholstered seats for coziness
- Mixed heights for a dynamic, multi-use surface
You’ll enjoy relaxed meals and quick, friendly gatherings. Additionally, incorporating stylish and comfortable kitchen island chair solutions can enhance both the aesthetics and functionality of your space.
Counter Space Efficiency
Counter space matters every time you design casual seating for an island.
I keep counter flow clean and practical, grouping prep area, dining, and movement so stools don’t crowd.
Plan clear zones, measure knee room, and choose compact supports.
I prefer adjustable stools and a shallow overhang to maximize usability without crowding.
Efficient layouts save time and energy every day. Additionally, consider incorporating expandable tables to enhance versatility in small kitchen dining areas.
Bar Stool Comfort
Bar stools should feel as good as they look, because comfort changes how often you actually use an island.
I want you to enjoy casual seating without sacrificing space or style. Here are quick tips you can actually apply:
- Choose cushion density that supports long chats
- Relaxed back height matches counter height
- Footrests ease posture during prep and conversation
Prep and Cleanup Zone: Sink, Waste, and Work Surfaces
A well-designed prep and cleanup zone starts with a practical layout: the sink, waste stations, and sturdy work surfaces should sit within easy reach of the fridge and cooking area.
I show you how to keep tasks smooth: place a pullout trash bin near prep, prep bowls close to water, and durable countertops for chopping, drying, and stacking.
Simple, efficient, approachable.
Open Shelving and Display Niches on the Island
I love the look of open shelving on the island, but I’ll keep it practical by choosing pieces that blend style with everyday use.
I’ll balance open shelves with display niches that show off everyday favorites without creating clutter.
Let’s talk about how the aesthetics of open shelving meet the practicality of curated display, so your island stays both beautiful and functional.
Open Shelving Aesthetics
Open shelving on the kitchen island can be a practical, stylish move that makes everyday cooking feel a bit lighter.
I’m sharing simple, intentional looks that highlight function and personality.
1) Curated color blocks
2) Mixed textures and glassware
3) Hidden storage slivers for balance
Display Niches Practicality
Display niches on the island blend function with flair, making everyday tasks easier while adding personality to the room.
I love keeping essentials accessible—glasses, spices, care items—without clutter. Display niches invite a curated peek, while open shelves hold daily staples.
I recommend adjustable shelves and labeled containers, so it stays neat. Practical, stylish, and surprisingly forgiving for real-life use.
Bold Finishes: Color, Material, and Durability Considerations
Bold finishes can transform a kitchen island from a work surface into a focal point, so it’s worth weighing color, material, and durability together.
I share practical picks that balance style with wear, ensuring longevity and easy upkeep.
- Color: choose high-contrast or warm tones to anchor the room.
- Material: prioritize solid wood or quartz for durability.
- Durability: sealant and maintenance routine protect against spills and heat.
Lighting for Task, Ambient, and Accent on the Island
So how should you light a kitchen island for every moment you spend there—task, ambient, and accent?
Start with bright, focused task lighting for chopping and prep, then add warm ambient fixtures to soften the space, and finish with accent lights to highlight architectural details.
Keep dimmers handy, and aim for about 2700–3000K for a welcoming, versatile glow.
Hidden Trash, Recycling, and Waste Sorting
I’m exploring hidden trash, recycling, and waste sorting right here on the island, so you can keep surfaces clean and workflows smooth.
I’ll look at hidden trash/csorting systems, integrated waste sorting stations, and concealed bin storage solutions that fit your space and routine.
Let’s figure out options that are practical, tidy, and easy to maintain.
Hidden Trash Csorting Systems
Hidden trash sorting systems keep your kitchen neat and efficient, and I’ve found they’re easiest when they’re simple to use.
I’ll guide you toward effortless waste flow that fits your island.
1) Pull-out bins
2) Labeled compartments
3) Easy-to-clean liners
Integrated Waste Sorting Stations
Integrated Waste Sorting Stations sit at the heart of a tidy kitchen, blending hidden trash, recycling, and waste sorting into one streamlined system.
I love how it simplifies cleanup: a single pull or tap keeps bins discreet, while labeled options guide guests.
You’ll waste less, sort more, and keep counters clear—no clutter, just effortless organization that fits your island’s flow.
Concealed Bin Storage Solutions
Concealed bin storage takes the next step from integrated sorting by tucking waste bins out of sight while keeping their function crystal clear.
I’m sharing clever setups that stay tidy and practical, so your mess dissolves into design.
- Pullout bins behind a cabinet door for easy access
- Corner pullouts with labels for recyclables, compost, and trash
- Slim cabinet dividers that maximize capacity without bulk
Accessibility: Varied Island Heights and Reach Ranges
When designing a kitchen island, I keep accessibility in mind by offering varied heights and reach ranges so everyone can work comfortably.
I mix counter, peninsula, and seated zones so standing and seated tasks fit different bodies.
Clear knee space, reachable drawers, and staggered work surfaces reduce stretching.
Practical adjustments, thoughtful layout, and simple tools keep kitchen flow inclusive and efficient.
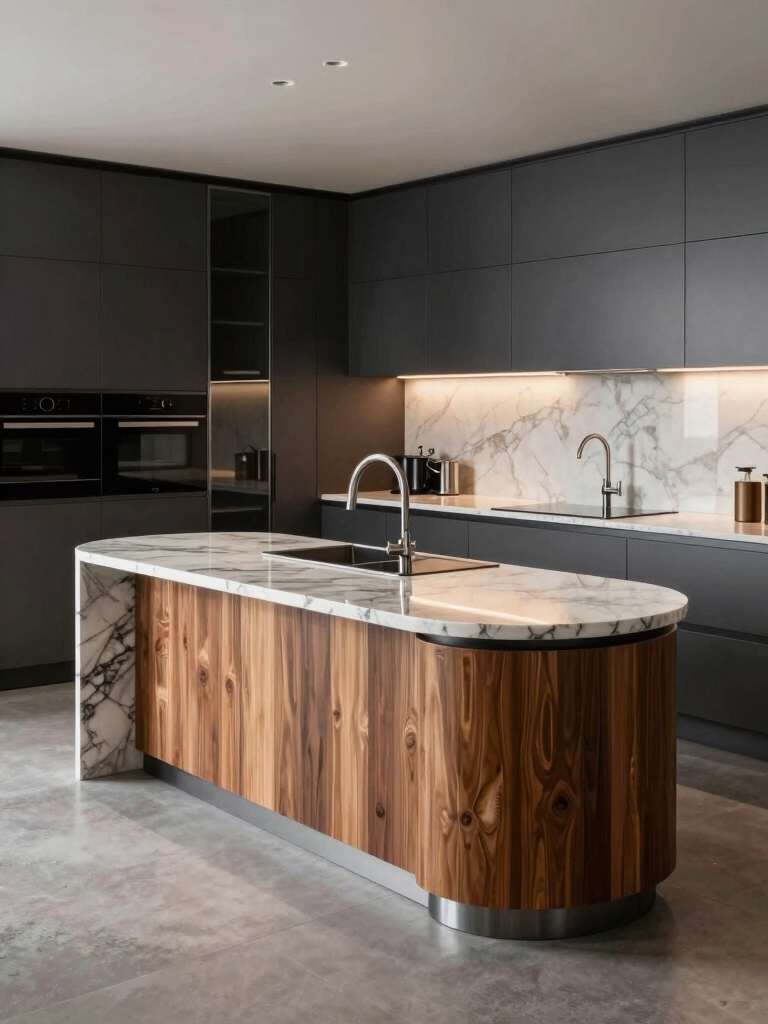
Island Materials: How to Echo Your Kitchen Style
Choosing materials for your kitchen island sets the tone for the whole space, so I start by picking something that echoes your cabinets, countertops, and flooring.
- Wood veneer or solid wood to warm tones
- Stone or quartz for durability and cohesion
- Butcher block or metal accents for contrast and texture
Future-Proofing and Flexible Design: Remodeling-Ease and Adaptability
To future-proof your kitchen island, I design for easy remodeling and flexible use from day one, so changes down the road feel simple rather than disruptive.
I prioritize modular components, hidden outlets, and adaptable storage that scales with family needs.
My practical plan minimizes wasted space, supports evolving tech, and keeps maintenance low while you enjoy a timeless, craft-friendly centerpiece.
Conclusion
Hey there, fellow cook‑in‑chief. Think of your island as the compass that guides every sizzle and scoot around the kitchen. Plan, layer, and love the details—the flow, the storage, the hiding of messes—so your space feels like a trusted friend. When you design with purpose, your island becomes a heartbeat you can lean into. Here’s to a chic, practical stage where every habit becomes delightfully simple and every meal feels like a small celebration.