I’ll help you fit a multifunctional island into a cozy kitchen by measuring traffic flow, choosing a slim or mobile island, and balancing prep, cook and seating zones. I recommend butcher‑block or honed quartz tops, tucked stools, hidden outlets and slim drawer dishwashers or inductive cooktops to keep sightlines open.
Add foldaway leaves, pull‑out spice racks and layered task lighting for real utility. Keep clearances and ergonomics in mind, and I’ll show practical layouts and DIY tweaks next.
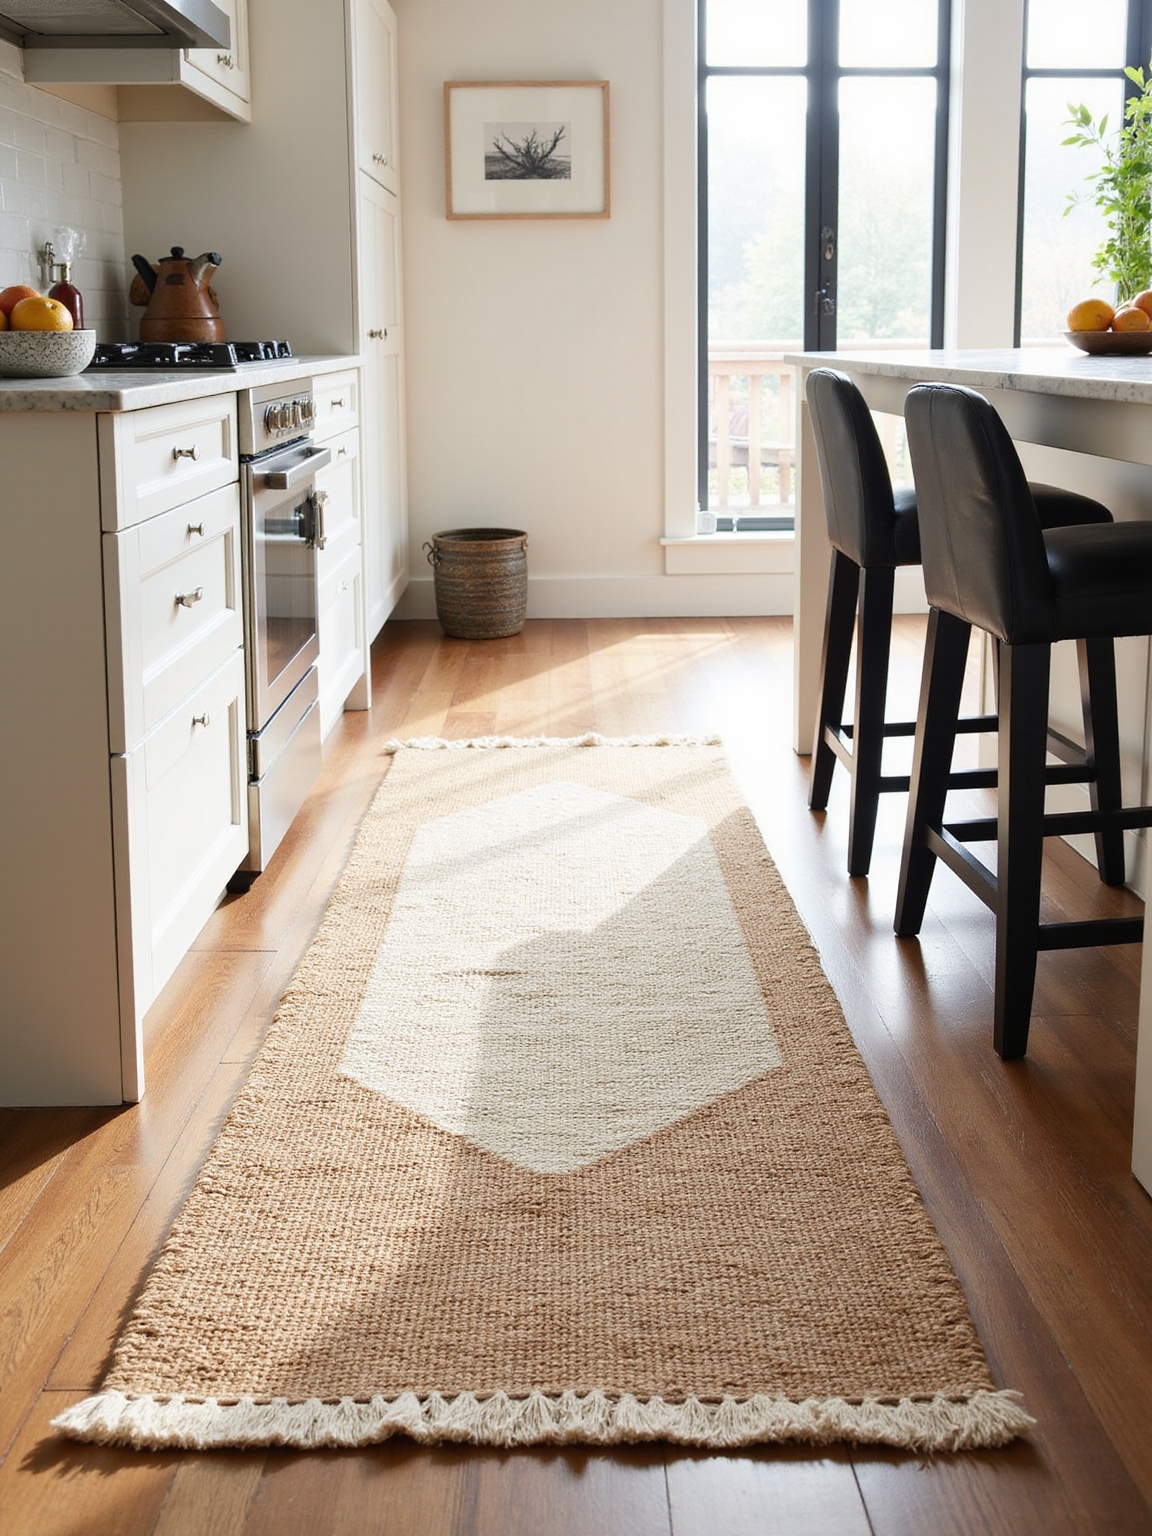
Decide If a Kitchen Island Fits Your Small Space

Before I commit to an island, I measure and imagine the way we move through the kitchen — from the fridge to the sink, around the stove — because in a small space every inch matters.
I weigh function: seating, prep, storage.
I prefer a slim, movable piece that complements my shaker cabinets, adds butcher-block warmth, and keeps clear sightlines so the room breathes and works.
Smart layouts like open-plan or galley conversions can make a tiny kitchen feel larger by improving flow and sightlines, especially when you choose a clever layout that maximizes circulation.
Measure, Map & Plan Traffic Flow for an Island

I’ll start by measuring the work triangle—sink, stove, and fridge—to make sure each leg feels effortless rather than cramped.
Then I map the walkways and clearances so friends can move through without bumping elbows or a chair.
Finally, I plan where appliances and seating sit together so the island becomes a useful hub, not an obstacle.
Architects often use smart layout tips to maximize flow and ensure compact islands serve multiple functions.
Measure Work Triangle Distances
Let’s measure the work triangle so we grasp how your island will really function in daily life. I walk you through measuring distances between sink, stove, and fridge, noting ideal ranges and how the island shifts those legs.
I record straight-line lengths, add appliance clearances, and flag awkward angles so we keep prep, cooking, and cleanup efficient without crowding the warm farmhouse flow.
A peninsula-style layout often benefits from planning for traffic flow along the island edge to maintain efficient movement.
Map Walkways And Clearances
With a tape measure and a clear floor plan in hand, I map every walkway and clearance to make sure your island won’t interrupt the kitchen’s rhythm.
I note paths, sightlines, and turning radii, then propose practical adjustments.
- Minimum clearance zones
- Main traffic corridors
- Appliance approach room
- Emergency exit paths
I also ensure the island complements the overall flow between the kitchen and dining area by considering seamless flow in every layout decision.
Plan Appliance And Seating
While keeping traffic flowing, I measure appliance clearances and seating zones so the island feels tidy, not cramped.
I note fridge and oven swing arcs, allow 36–42 inches for passages, and set bar stool knees and overhangs to 10–12 inches.
I sketch plug locations, cooktop ventilation, and chair spacing so cooking and conversation coexist without collisions or clutter.
High-end designs often include tailored island layouts that combine cabinetry, seating, and appliances for a cohesive, multifunctional centerpiece.
Choose the Right Island Type for Your Layout

I’ll help you pick the island type that fits your kitchen’s flow and function, starting by looking at how you move, cook, and gather in the space.
I’ll weigh storage, prep, seating, and openness so the island feels intentional and cozy.
- Narrow cart-style for tight aisles
- Peninsula for partial separation
- Compact island with drawers
- Moveable prep island for flexibility
You can achieve a custom look using standard IKEA units by combining and configuring cabinets and fronts to fit your island design and needs, especially when planning for efficient storage and workflow with standard IKEA units.
Lighting & Power for Kitchen Islands

I like to start by thinking about task lighting—pendants or under-cabinet LEDs that give crisp, shadow-free light for chopping and homework.
I also plan integrated power outlets into the island edge or pop-up units so chargers and small appliances stay convenient without clutter.
And since I’m aiming for both comfort and efficiency, I often specify dimmable fixtures and smart controls so the mood and brightness are effortless to change.
For the prep area I position task lighting directly over work surfaces so it minimizes shadows and provides clear illumination for food prep and other tasks.
Task Lighting Options
Let’s talk about task lighting for your kitchen island—this is where form meets function, and I’ll focus on practical choices that keep prep work easy and look cozy.
I prefer layered, focused light:
- Pendant fixtures with adjustable height.
- Under-cabinet strip lights aimed at work surfaces.
- Recessed adjustable downlights for even spread.
- Dimmable LEDs for flexible ambiance and clarity.
For a truly polished five-star kitchen ambience, consider combining these with layered lighting strategies to balance task clarity and mood.
Integrated Power Outlets
When I plan an island, I make integrated outlets a priority because they keep the counter clear and the workflow smooth; tucked into the sides, pop-up units, or under a lip, they give you power where you need it without ruining that warm farmhouse look.
I choose weathered brass covers, recessed USB ports, and discreet placement so appliances, chargers, and mixers stay handy yet visually calm.
Smart Lighting Controls
I often tie smart lighting controls into island planning because they let me tailor light levels to every task without fiddling with lamps or sticky switches.
I program scenes for prep, dining, cleaning, and cozy evenings, syncing pendants and under-cabinet strips for even glow.
- Task brightness
- Accent warmth
- Motion triggers
- Energy schedules
Integrate Cooktops, Dishwashers & Microwaves

Because space is tight in a compact kitchen, I prioritize integrating cooktops, dishwashers, and microwaves so every inch works smarter — not harder.
I choose a flush induction cooktop, a slim drawer dishwasher tucked under seating, and a microwave hidden in a lower cabinet.
These choices keep sightlines clean, maintain farmhouse warmth with tactile knobs and wood accents, and simplify daily routines.
Create Prep, Cook, Clean & Work Zones
Although I keep the footprint small, I divide the island into clear zones so every task has its own place:
A wide butcher-block prep area with a recessed cutting board and knife strip, a flush induction cooktop with a pull-out spice shelf nearby, a compact sink and under-counter dishwasher tucked to the side for quick rinse-and-load, and a narrow overhang with a laptop-friendly surface and charging pocket for email or meal planning.
- Prep: organized drawers and boards
- Cook: induction with spice pull-out
- Clean: compact sink and dishwasher
- Work: slim overhang with outlet
Two-Level Tops: Combine Prep And Dining
For a small island that has to pull double duty, I like pairing a deep prep surface with a raised dining ledge so chopping, plating, and eating all feel intentional and tidy.
I choose hardwood for the lower board for knife-friendly work and a durable stone bar above at stool height. The offset lets crumbs fall into an easy-to-clean groove, keeping cozy charm practical.
Seating Solutions That Don’t Block Traffic
I’ve found that slim counter-height stools keep a cozy farmhouse feel without crowding pathways, their narrow profiles tucking neatly under the overhang.
For even tighter spots, I like retractable stools that slide under the island when we’re not using them, so traffic flows freely. Both options let you balance warm, detailed style with real-world function.
Slim Counter-Height Seating
How can a slim counter-height seating plan keep your kitchen flowing without sacrificing charm? I choose narrow stools with low backs, tuckable legs, and tapered profiles to maintain sightlines and traffic.
They feel cozy yet open.
- Narrow seat widths
- Tuck-under capability
- Lightweight frames
- Complementary wood tones
Retractable Stool Options
Sliding smoothly beneath the counter, retractable stools keep walkways clear without sacrificing farmhouse charm.
I recommend wood-and-iron models with swivel seats and soft-close mechanisms so they tuck away quietly.
Choose heights that match your island overhang, slim legs to reduce visual bulk, and durable finishes for cooking messes.
They free space, look cozy, and make traffic flow effortless during busy gatherings.
Smart Storage: Pull-Outs, Vertical Shelves & Organizers
Think of pull-outs and vertical shelves as the quiet workhorses of a compact kitchen—I rely on them to turn cramped corners into tidy, reachable storage.
I prefer solid wood pull-outs, slim spice racks, wire baskets, and labeled dividers for clarity.
They keep frequently used tools visible and accessible, honoring a farmhouse ethos of practicality and simple charm.
- Pull-out trays
- Vertical plate racks
- Spice columns
- Drawer organizers
Foldaway & Drop-Leaf Extensions for Flexibility
I pull out a drop-leaf or foldaway extension when counter space gets tight, and it instantly makes the kitchen feel more accommodating without losing that lived-in farmhouse charm.
I love the simple hardware, beveled edge details, and hidden brackets that lift smoothly.
It gives me prep room, a breakfast perch, or an extra serving surface, folding flat when I need clear floor space.
Mobile Vs. Built-In Islands: When Wheels Win
When space gets tight or the mood calls for flexibility, I reach for a mobile island because wheels let the kitchen breathe and adapt to how we live.
I love its farmhouse warmth, the grainy wood top, and how it rolls for prep, serving, storage, or clearing sightlines.
- Easy repositioning
- Temporary extra seating
- Versatile storage
- Cleaner traffic flow
Durable, Compact Materials for Small Kitchens
I lean into materials that can take daily knocks without taking over the room: for a compact island I favor honed quartz or butcher block tops paired with painted hardwood or powder-coated steel bases, because they give you the farmhouse warmth and grainy texture I love while resisting stains, scratches, and warping in tight, busy kitchens.
I also pick low-profile edge details and sealed joins for longevity.
Budget-Friendly Island Ideas & DIY Upgrades
You can get a lot of farmhouse charm without blowing the budget by mixing thrifted finds with a few smart DIY moves.
I’ll show simple updates that punch above their weight.
- Refinish a thrifted table into a narrow island.
- Add beadboard panels and a coat of milk paint.
- Install open shelving with brackets.
- Use a butcher block top for warmth and durability.
Accessibility & Ergonomics for Kitchen Islands
Although farmhouse kitchens feel cozy, I don’t sacrifice function for charm—accessible islands make daily tasks easier for everyone.
I position seating for comfortable legroom, set counter heights to suit varied users, and keep drawers on soft-close slides within reach.
Clear sightlines, non-slip surfaces, and reachable outlets make cooking safe and pleasant, blending rustic warmth with practical, thoughtful design.
Maintain, Clean & Protect Your Multifunctional Island
I keep a simple daily routine for my island—wiping down crumbs and spills with a soft cloth and mild cleaner so the surface stays welcoming.
Every few months I apply the right protective treatment for the material, whether that’s a food-safe oil for wood or a sealant for stone.
And once a season I schedule a deeper clean and inspection to catch stains, loose hardware, or finish wear before they become bigger problems.
Daily Surface Care
Regularly I give my island a quick once-over so small messes never turn into stubborn stains. I wipe crumbs, check seams, and air the wood.
I keep gentle cleaners and a soft cloth handy, treating spills immediately.
- Wipe daily with damp cloth
- Sweep crumbs from joints
- Dry thoroughly after cleaning
- Check edges for wear
Protective Treatments
Because the island gets daily use, I treat its surfaces with simple protective coatings that keep wood warm and stone sealed without changing their character.
I rub in natural oil on butcher block, let it soak, buff lightly.
For stone, I apply a breathable penetrating sealer yearly and wipe spills promptly.
Hardware gets a thin wax coat to slow tarnish and fingerprints.
Deep Cleaning Schedule
Now that the surfaces are sealed and oiled, I’ll outline a simple deep-cleaning rhythm that keeps the island looking cared-for without wearing it out.
I check joints, scrub crevices, and refresh finishes gently. I follow these steps:
- Monthly: gentle scrub and inspect for wear.
- Quarterly: oil wood surfaces thoroughly.
- Biannually: tighten hardware and seal stone.
- Annually: professional touch-up if needed.
I’ve walked you through planning a compact, multifunctional island that feels cozy and works hard—because 70% of homeowners say small kitchens are their biggest regret, and I don’t want that to be you.
Picture a warm farmhouse island with butcher-block warmth, smart storage, and a hidden microwave that keeps counters clear. With measured traffic flow, durable materials, and thoughtful lighting, your island can be beautiful, accessible, and utterly livable—just like home.