I’ll show you 17 peel-and-stick backsplash ideas that deliver a quick, mess-free kitchen glow-up. From faux-marble to metallics and glassy tiles, there’s a pattern and finish for every vibe—plus easy installation in minutes. I’ll cover choosing the right scale, pairing with cabinets and countertops, and budget-friendly options that still look luxe. You’ll learn tips on prep, maintenance, and how to update without wasting a thing. Stay with me, and you’ll reveal even more smart ideas.
What Peel-and-Stick Backsplashes Do for Your Kitchen
Peel-and-stick backsplashes instantly upgrade your kitchen—without the mess or commitment.
I know you’re忙, but these panels simplify life: no grout, no tools, no chaos. They protect walls from splashes, reflect light, and add style without breaking the bank. Additionally, they can be installed in under one hour, making them perfect for a quick renovation.
You snap them on, wipe clean, and enjoy a fresh vibe—fast, reversible, and surprisingly forgiving.
How to Pick the Right Pattern for Your Space
Choosing a pattern isn’t about chasing trends, it’s about matching scale to your space and keeping color flow harmonious.
I’ll look at whether the motif feels bold or muted and how the scale plays with your countertops and cabinets.
Together we’ll balance Pattern Scale Match with Color Flow Harmony to keep the kitchen cohesive and visually pleasing. Incorporating bold kitchen backsplash ideas can also elevate the overall aesthetic of your kitchen.
Pattern Scale Match
When you’re picking a pattern, scale is everything: the right size will feel like it belongs, while the wrong one can read as chaos.
I’ll match pattern scale to your space by balancing tile dimensions with cabinet width, countertops, and sightlines.
Think larger rooms, bigger patterns; smaller areas, subtler motifs. Aim for harmony, not competition—your backsplash should whisper, not shout. Additionally, consider how stylish subway tiles can elevate the overall aesthetic of your kitchen.
Color Flow Harmony
Color flow isn’t just about colors matching your cabinets; it’s about how the eye travels from one element to the next.
I pick a main pattern, then echo its shapes in borders or accents, creating a gentle rhythm.
Don’t clash textures—let scale guide you.
Preview alternatives, trust balance over boldness, and finish with a cohesive, calm kitchen vibe.
Incorporating elegant kitchen backsplash ideas can elevate your space while keeping it budget-friendly.
Budget-Friendly Peel-and-Stick Backsplash Ideas That Look High-End
I’m all about budget-friendly material options that still read luxe, so we’ll zero in on peel-and-stick picks that feel upgrade-worthy without the price tag.
I’ll show you easy installation techniques that make a high-end look possible in minutes, not miracles.
Let’s mix smart choices with a polished finish and skip the cheap-goods vibes.
Budget-Friendly Material Options
If you’re chasing a high-end look on a DIY budget, budget-friendly peel-and-stick options are a game changer: they’re affordable, install like wallpaper, and mimic the luxe vibe of pricey tiles.
I’ll share smart picks that balance texture, shine, and resilience without breaking the bank.
- faux-marble patterns with sturdy vinyl
- metallic or glass-like finishes for drama
- textured brick or cement looks for depth
Incorporating budget-friendly materials can elevate your space without compromising style or quality.
High-End Look On Budget
High-end looks don’t have to mean a high price tag when you’re choosing peel-and-stick backsplash options.
I’ll show you chic textures, subtle metallics, and marble-esque patterns that read luxe without the cost.
You’ll mix in coordinating grout-like spacers and smart lighting tips, avoiding busy patterns.
We’ll balance scale and shine, achieving a polished, gallery-worthy vibe—on a realistic budget. Additionally, there are chic wallpaper backsplash ideas that can enhance your space without permanent commitment.
Easy Installation Techniques
Sometimes the simplest install is the slickest: peel-and-stick backsplashes can go up in minutes with a few smart tricks, leaving you more time to enjoy the look you paid for.
I’ll guide you through clean cuts, precise alignment, and choosing lines that fool the eye.
- Peel, align, press: minimal waste, maximum impact
- Use a straight edge for perfect gaps
- Tape seams, then smooth restoratively
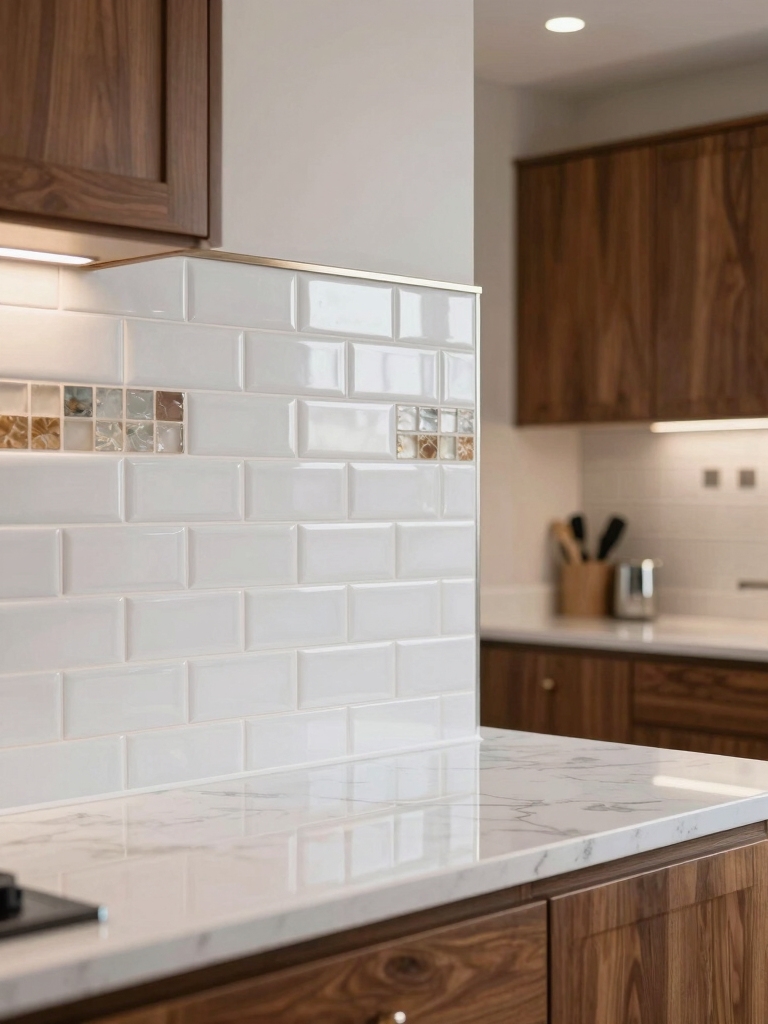
Finishes and Textures: Tile-Look, Metallics, and More
Texture and finish can make or break a backsplash, so let’s talk tile looks, metallics, and a few smart finishes that survive kitchens.
I mix matte subway with glossy accents for depth, then pair durable peel-and-stick options with warm neutrals.
Metallics wink without screaming, and ceramic-inspired textures hide fingerprints.
The goal: polished, resilient character that stays vibrant after weekly wipe-downs. In addition, glass backsplashes offer a modern twist that can elevate any kitchen aesthetic.
Quick Install: Three Easy Steps to a Smooth Finish
Sure! Here’s your revised content:
—
I’m keeping the peel-and-stick joy simple: here are three plain steps to a smooth, selfie-ready backsplash.
- Prep: clean, dry surface, trim edges for precision.
- Install: align, press firmly, smooth with a credit card.
- Finish: run a finger along seams, wipe excess adhesive, admire the seamless shine. Additionally, using easy installation techniques can ensure a perfect fit and long-lasting results.
—
Let me know if you need any further adjustments!
Patterns That Hide Imperfections and Provide Clean Edges
You’ll notice how patterns can hide imperfections while keeping edges clean and sharp. I’m talking about seamless shifts, depth, and flow that make misalignments fade into the background. Let’s explore how these choices read as polished, not busy, so your backsplash looks intentional from every angle. Additionally, stylish kitchen tile options can elevate the overall aesthetic while ensuring functionality in your modern home.
Hides Imperfections Effectively
Even when you’re aiming for a sleek look, some imperfect walls can steal the show; here’s how to choose patterns that hide flaws and still deliver clean edges.
- Favor busy textures or small-scale patterns to blur irregularities without shouting “spotty.”
- Use grout-like lines sparingly; let seams align with existing flaws for a seamless illusion.
- Pick matte finishes to reduce glare and reveal fewer imperfections.
- Consider unique backsplash ideas that creatively incorporate different materials for added visual interest.
Clean Edges, Seamless
When you’re chasing clean edges and a seamless look, the right patterns do more than just conceal flaws—they guide the eye.
I choose designs with subtle shifts, tight grouts, and consistent tile sizes that vanish seams rather than highlight them.
My secret: repeat, align, and stagger smartly, so your backsplash reads as one polished panel, not a patchwork.
Clean, confident, satisfying.
Pattern Depth and Flow
Pattern depth and flow matter more than you might think.
I show you how a thoughtful pattern hides flaws while keeping edges crisp, so your backsplash reads as intentional art, not accident.
Ready?
- Mix scale for motion and concealment
- Align joints to anchor edges
- Use subtle contrasts to guide the eye
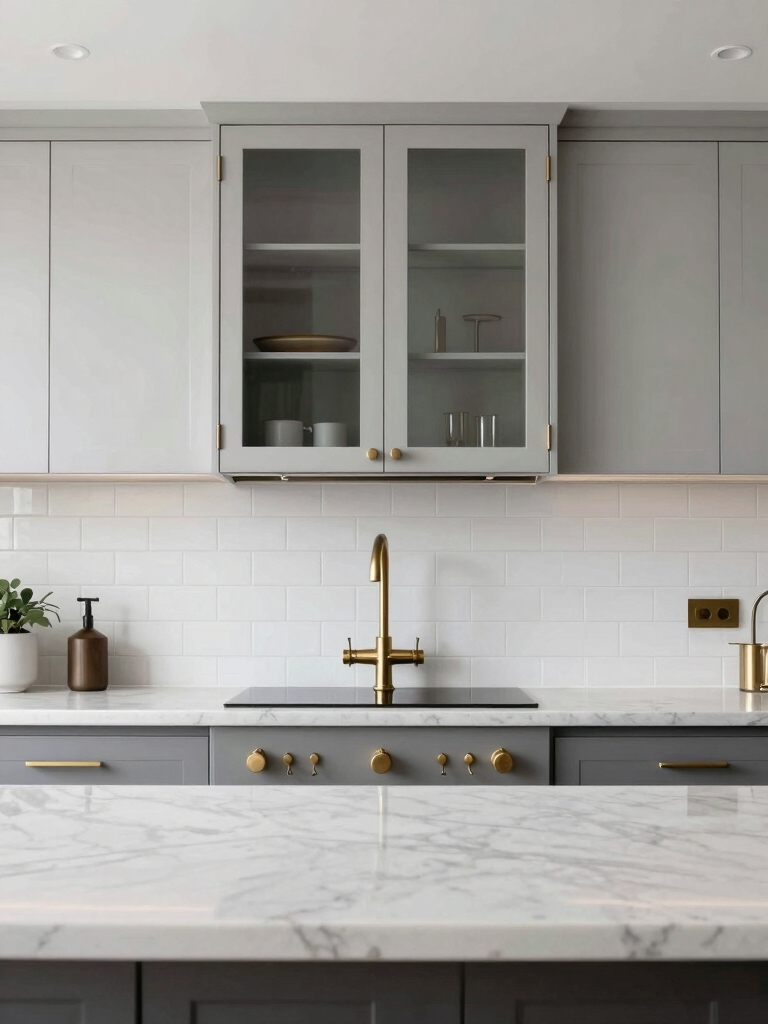
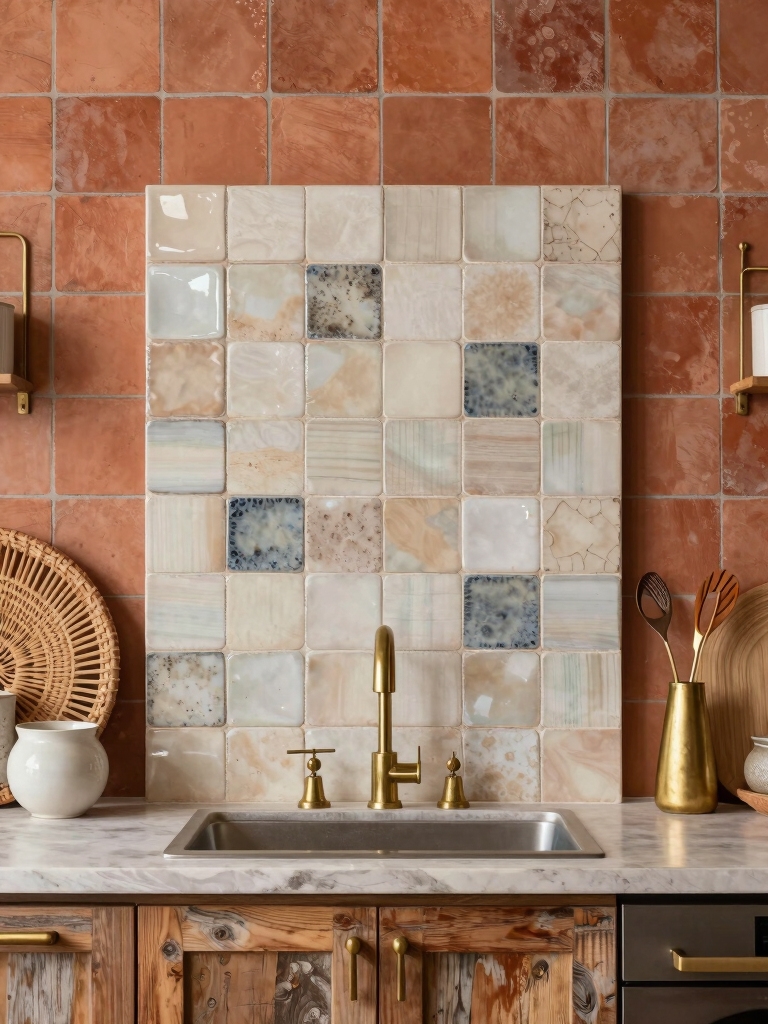
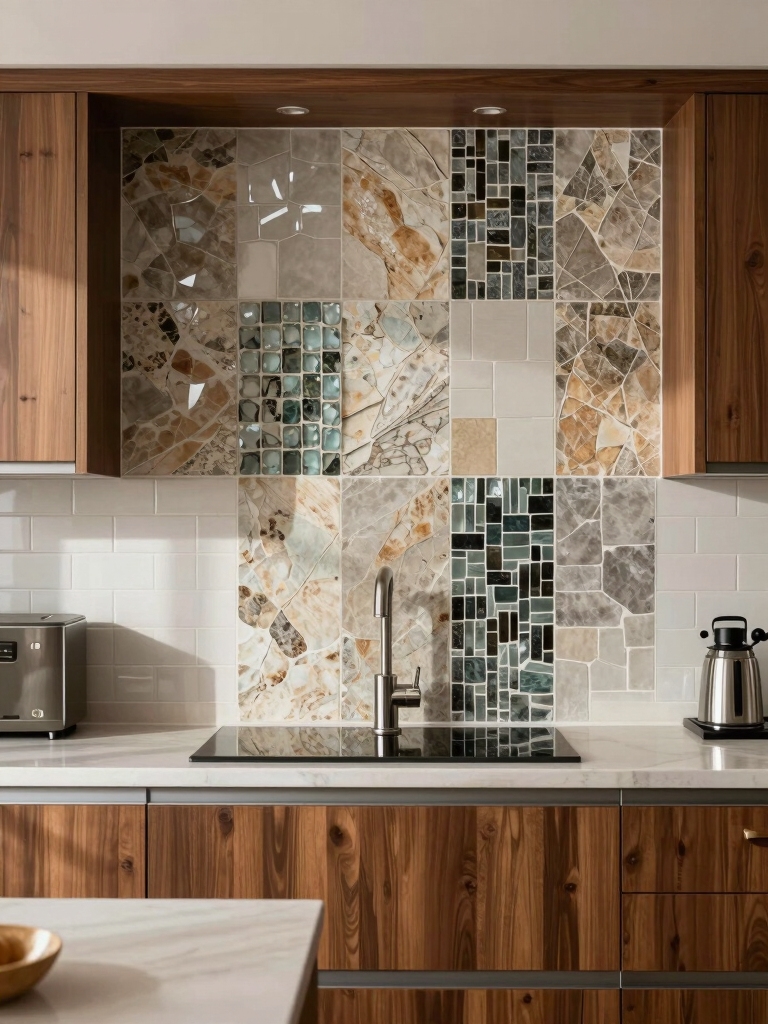
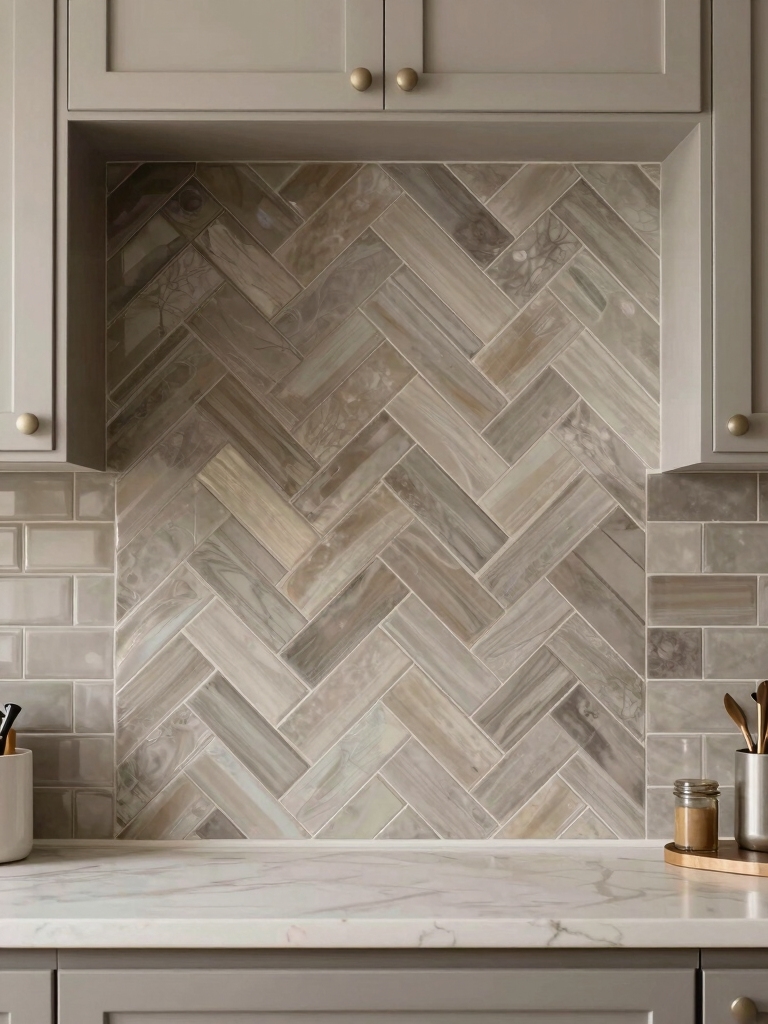
Bold Statements: Gemstone and Marble-Inspired Looks in Peel-and-Stick
Bold statements are in reach with gemstone- and marble-inspired peel-and-stick backsplashes that sparkle without the drama of real stone.
I adore how these patterns catch light and elevate cabinets with zero grout chaos.
I’ll pick patterns that read luxe yet readable, pairing with simple metals and white walls.
Practical, punchy, and effortlessly chic—that’s the vibe I’m chasing.
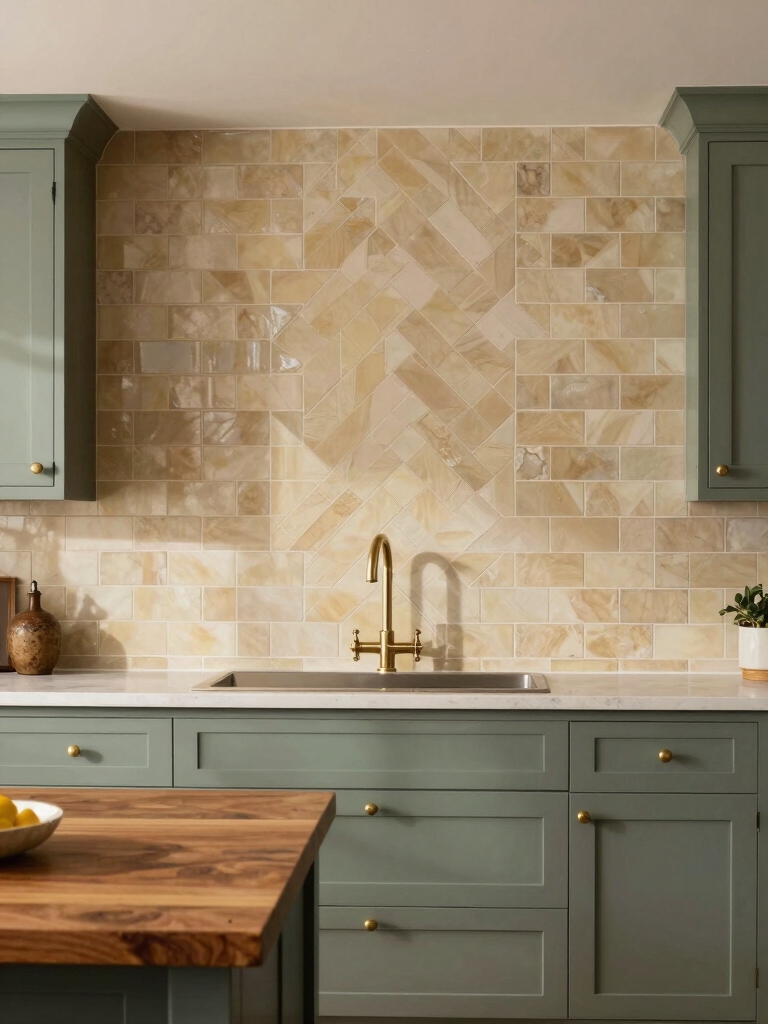
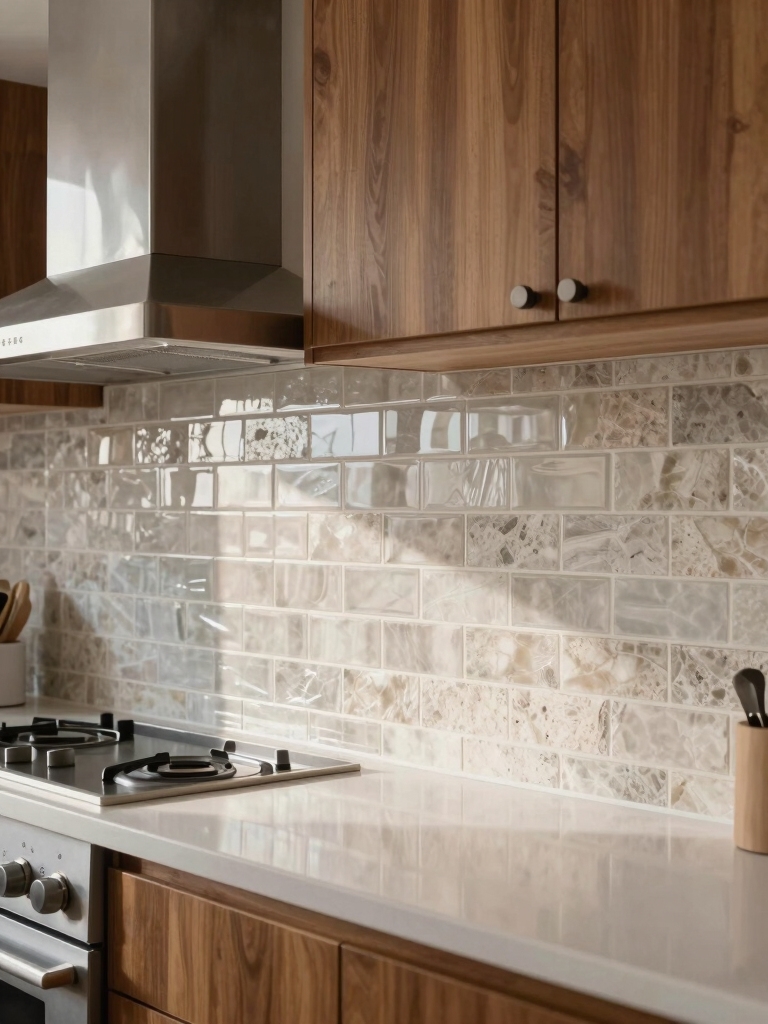
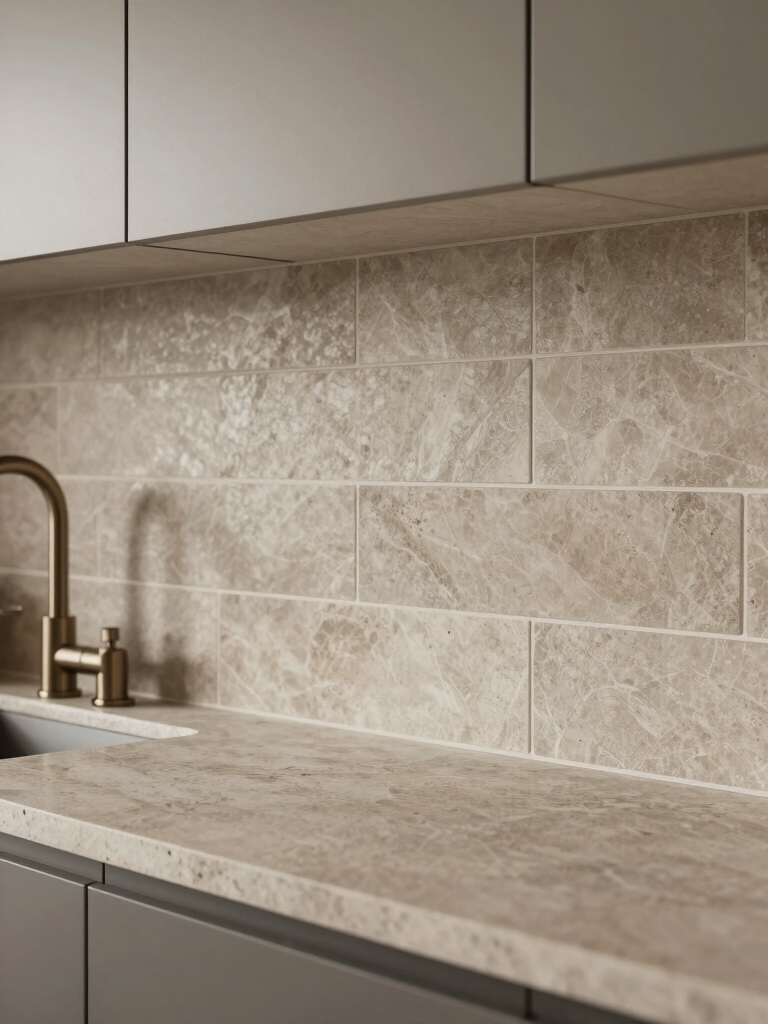
Classic Brick and Tile Looks Without Mess or Grout
Peel-and-stick brick and tile patterns give you classic charm without the grout chaos, and I’m here for it.
I love how these textures read traditional, but install like a whim. No mess, no mildew drama, just easy, timeless appeal.
- Instant retro vibe with zero grout
- Clean, edge-to-edge lines that polish any kit
- Budget-friendly, reusable, and surprisingly sturdy
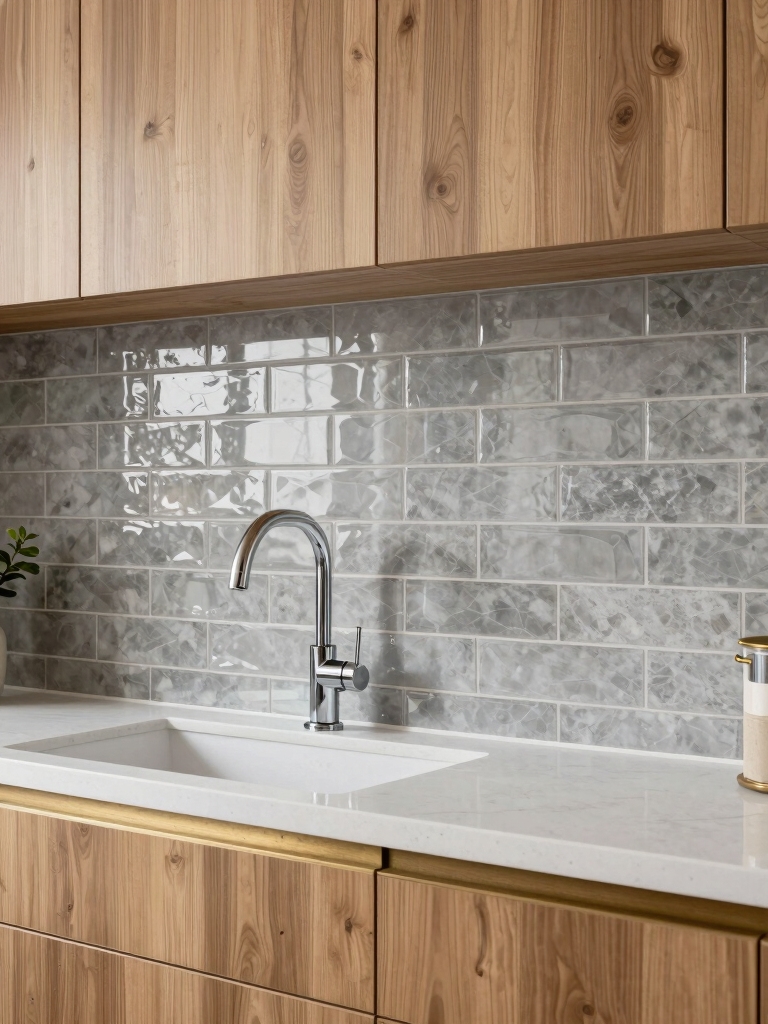
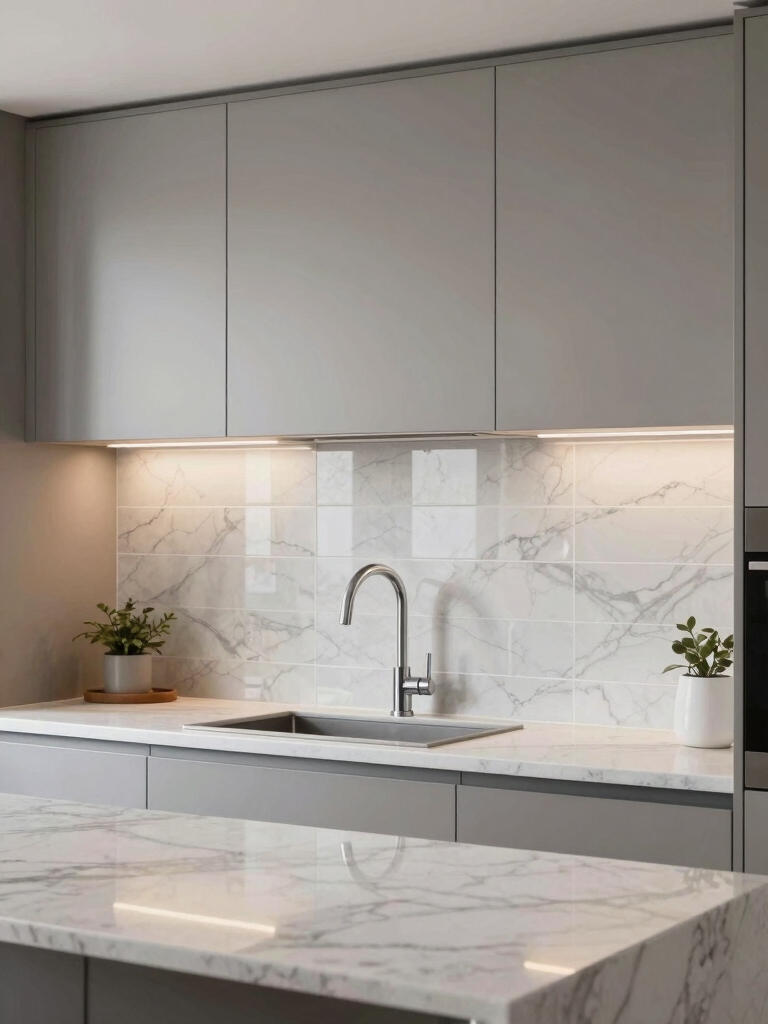
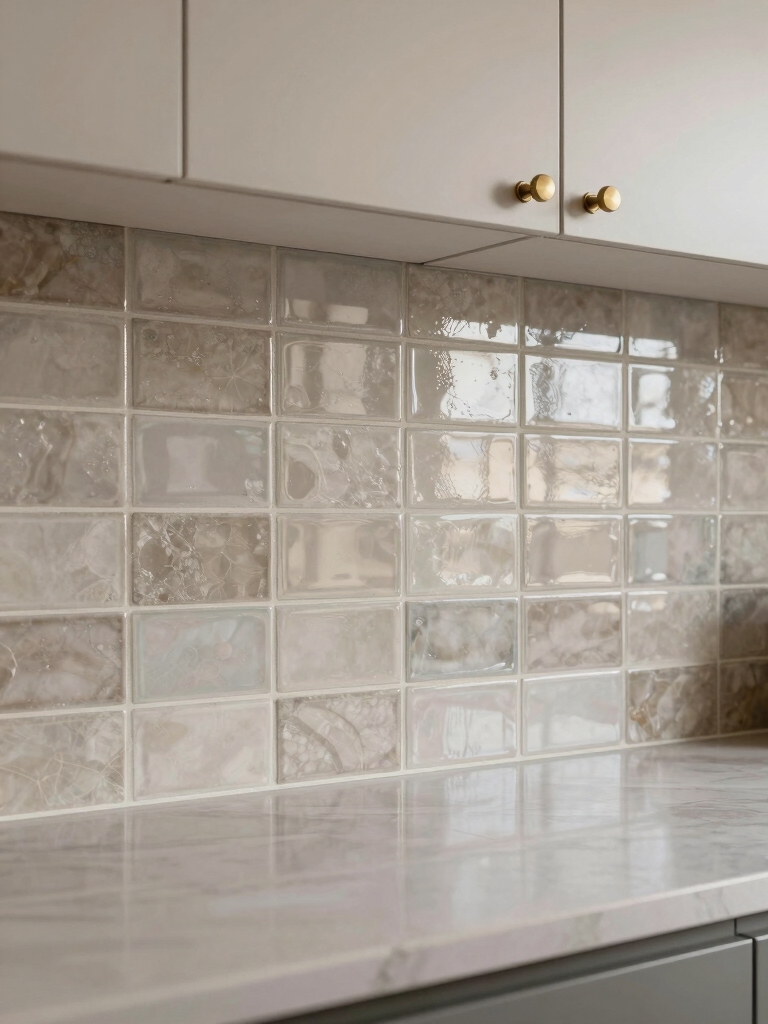
Glass and Mirror Effects to Brighten Your Kitchen
Glass and mirror effects can instantly brighten a kitchen, turning dull walls into reflective focal points that bounce light around like a mini solar panel.
I love how peel-and-stick options emulate glass without the drama: shimmering tiles, mirrored panels, and glossy accents that read spacious.
They’re easy, rental-friendly, and surprisingly forgiving, adding polish without shouting “decor project.”
Shine without the fuss, friend.
Patterned vs. Solid: When Each Works Best
You’ve seen how peel-and-stick options can mimic glass without the drama, but that doesn’t mean every backsplash should gleam.
Patterned for personality, solid for serenity—each has a moment. I’ll help you pick with purpose: patterns add drama in moderation; solids make kitchens look larger and calmer.
- Use patterns as accents, not overkill
- Choose light solids to open small spaces
- Mix textures, not too many motifs
Trimming for Odd Spaces: Corners and Outlets
Corners and outlets aren’t afterthoughts—they’re part of the design. I tackle odd spaces with clean trims, precise cuts, and peel-and-stick confidence.
When a corner bites back, I pre-measure, cut with a steady hand, and press firmly to avoid gaps.
Outlets? I cut around plates like a pro, sealing edges to prevent peels. Clean lines, seamless finish, effortless shine.
Color Strategies: Light, Neutral, and Dark Palettes
I’m curious how you balance light, neutral, and dark palettes to keep a peel-and-stick backsplash feeling fresh rather than fussy.
I’ll share simple checks for brightness, contrast, and cohesion so your kitchen reads as polished, not predictable.
Let’s tease apart light breeze, neutral anchor, and dark accents, then tailor the mix to your space and style.
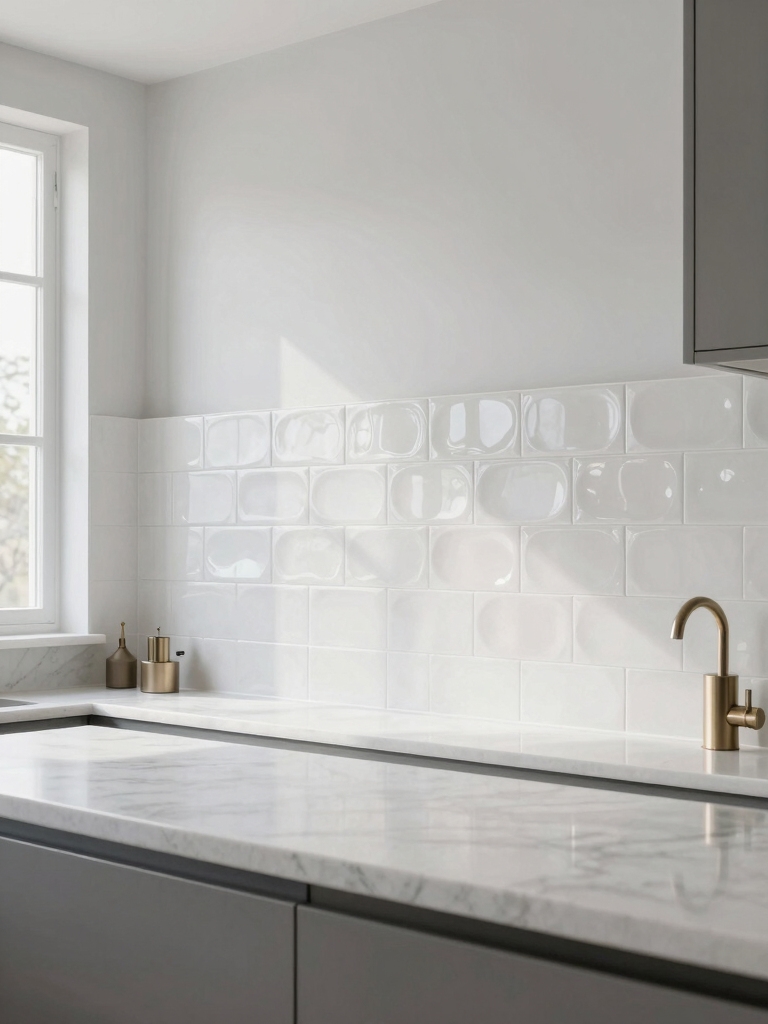
Light Palette Guidance
Choosing a light palette for your Peel and Stick kitchen backsplash keeps the space feeling open and breezy, so start with pale neutrals, airy whites, and soft beiges that reflect more light than they absorb.
- Pair gloss with matte for dimension
- Use small-scale patterns to avoid busy ceilings
- Add subtle metallic accents to lift the glow
Dark and Neutral Balance
Dark and neutral tones ground a peel-and-stick backsplash without weighing the room down, and the trick is balancing depth with airiness.
I favor charcoal or graphite accents paired with creamy neutrals, letting gloss or matte finishes play off light.
I’ll sprinkle subtle texture—tiles, grout, or a slim metallic edge—so contrast feels intentional, not cluttered or cold.
Maintenance Essentials to Extend Longevity
Maintenance matters, so keep your Peel and Stick backsplash looking sharp with a few simple habits: wipe up spills promptly, use a mild cleaner, and avoid abrasive scrubbers that scratch the surface.
- Regularly inspect seams for gaps and reseal as needed
- Clean with a soft cloth; avoid bleach or solvent abuse
- Schedule quarterly wipe-downs to prevent grime buildup
Prep and Surface Care: What to Do Before You Start
Before you lay down a Peel and Stick backsplash, set the stage with a quick, crisp prep routine.
I wipe surfaces down, mend minor imperfections, and blot away grease with a friendly grit.
I tape edges for clean lines, mask surrounding zones, and let everything dry fully.
Then I measure, plan, and breathe—ready to install with confidence and a smile.
Real-World Before-and-After Ideas to Spark Inspiration
Let’s explore real-world before-and-after ideas that spark inspiration.
I’ve watched tiny kitchens transform from drab to dazzling with peel-and-stick backsplashes, bold patterns, and smart lighting choices.
You’ll see how a simple swap creates perceived space and personality, not chaos.
- Transform a cramped nook with a glossy, light-hued tile
- Pair a patterned sheet with solid cabinets for punch
- Add under-cabinet LEDs to highlight the shine
How to Compare Peel-and-Stick Brands and Adhesives
When you’re weighing peel-and-stick brands and adhesives, the key is to look beyond pretty patterns and shiny promises.
I compare backing textures, adhesion claims, and removal ease, then call out aftercare needs and price per square foot.
I value real-world performance, flexible warranties, and clear application guides, so you don’t buy hype, only lasting, stylish practicality.
Remove or Recolor Later: Reusing and Updating Your Peel-and-Stick Backsplash
There are a few clever hacks to keep peel-and-stick backsplashes feeling fresh: you can remove, recolor, or swap sections without ripping out the whole wall.
I’ll show you simple, speedy ways to reuse and update without waste or drama.
- swap a panel for a bolder color
- blend textures by recoloring edges
- store extra pieces for future refreshes
Conclusion
Peel-and-stick backsplashes are a budget-friendly miracle, a quick glow-up that promises instant style—yet hides a caveat in plain sight. They’re chic, until you spill something stubborn or tape peels; they shine, then age with sunlight. The contrast is delicious: transformation without commitment, drama without drama. So yes, they elevate a kitchen in minutes, but expect occasional tweaks. You get bold looks with a polite warrant: refreshable, replaceable, and surprisingly forgiving—until you decide to upgrade again.