I help you pick an island that fits your plan and life — slim peninsulas or movable carts for tight studios, narrow linear islands for galley paths, L-shaped or longer islands to anchor corners, and big social islands for open plans.
I check clearances, seating, storage, plumbing and electrical so the island works for prep, cooking and casual meals. I pick durable surfaces and layered lighting to hide wear and keep flow tidy, and I’ll show practical layouts next.
Quick Decision Flow: Pick the Right Island for Your Floor Plan

If your floor plan already feels crowded, don’t force a full island — I’ll walk you through quick choices that match space and habits. I suggest evaluating traffic flow, prep needs, and seating goals.
Choose a slim peninsula, movable cart, or compact island with storage. I’ll help you balance function and charm so the kitchen feels open, practical, and welcoming.
Consider multifunctional options like a movable cart for added flexibility in tight spaces.
Island Clearance Checklist and Circulation Rules

Let’s talk about the practical clearances that keep a kitchen feeling roomy and working well, from specific distances around prep zones to the widths of walkways and aisles.
I’ll walk you through how much space each zone—cooking, prep, and cleanup—needs and how island placement affects the work triangle.
Together we’ll make sure your island doesn’t block flow or pinch the paths you and your family use every day.
Architects often recommend considering island clearance as a core part of the overall kitchen layout to preserve circulation and efficiency.
Clearance Distances By Zone
Because an island changes how people move through a kitchen, I always start by checking clearance distances by zone so the space works as a whole.
I measure clearances around prep, cooking, cleaning and seating: enough room for open doors, turning, and passing without crowding.
I favor comfortable gaps that respect workflow, sightlines, and a lived-in, welcoming feel.
Open kitchens often include breakfast counters that shape morning routines and circulation.
Walkway And Aisle Widths
After checking clearances around prep, cooktop, sink, and seating, I turn to walkway and aisle widths because they govern how people move through the room.
I aim for 36–42 inches for primary aisles and 30–36 inches for secondary paths, ensuring clear sightlines and easy passage with open doors or drawers.
It feels comfortable and invites lingering. A well-planned layout also adapts to different home footprints and open kitchen layouts to fit nearly any shape.
Island Work Triangle Rules
When I set up an island, I treat the work triangle as a practical blueprint: it’s about clear relationships between the sink, cooktop, and refrigerator and how the island supports or interrupts those flows.
I make sure 42–48 inches clearance for two cooks, 36 inches for one, clear sightlines, unobstructed appliance doors, and continuous circulation so movement stays effortless, safe, and welcoming.
I also apply smart layout tips architects use to improve kitchen flow, like ensuring continuous circulation and proper distances between work zones.
Island Size by Kitchen Type: Studio, Galley, L, Open

I’ll walk you through how island dimensions change with different kitchen layouts so you can picture what fits and functions best;
In a studio a compact island often doubles as prep space and a dining nook, in a galley you’ll want a narrow, linear island that keeps a clear walkway, an L-shaped kitchen can handle a longer island that anchors the corner, and an open plan calls for a larger, more social island that ties the room together.
I’ll suggest practical widths and clearances so each island feels rooted, usable, and cozy.
Island Kitchen Design Modern Variations often include options from waterfall to floating styles, offering both visual flow and practical storage solutions.
Prep-Only Islands vs. Seating-Only Islands: When to Choose
I often ask homeowners whether they want an island that’s all about prep—wide counters, clear workflow, and room for tools—or one meant just for seating with a slim footprint that keeps the room open.
Think about how traffic will move around it and what sightlines you want: a prep island can block views but centralize work, while a seating-only island keeps things airy but offers less surface for cooking.
Tell me how you use your kitchen and we’ll figure out which trade-offs make the most sense for your space.
Open Kitchen Islands: Designing the Heart of Your Home often highlights open kitchen islands as focal points that balance function and social space.
Prep-Focused Workflow
Think of the island as your kitchen’s workhorse or its welcome mat — I usually pick one role and commit.
For a prep-focused workflow, I keep surfaces clear, add a deep sink, knife storage, and appliance garages.
Open sightlines to stove and fridge matter most. This layout speeds cooking, reduces clutter, and feels pleasantly rustic without inviting casual lounging.
High-end kitchens also benefit from unique island designs like waterfall edges or mixed-material bases to elevate both form and function, and these design elements can make the island a standout feature.
Seating-Only Footprint
Having committed the island to a prep-first role, I’ve found there’s real value in knowing when to set that workhorse aside for a seating-only footprint.
I choose seating-only when I want relaxed gathering, clear sightlines to living areas, or simplified cleanup. Consider:
- Casual breakfasts and chats
- Extra dining without a formal table
- A cozy nook that invites lingering
Traffic And Sightlines
When you’re deciding between a prep-only island and a seating-only island, picture how people will move and what they should be able to see;
I like to place prep islands where they keep traffic flowing around work zones and seating islands where they open sightlines to the living area.
Prep islands tame hustle, preserve sightlines for socializing, and seating islands anchor conversation without blocking the kitchen’s rhythm.
Multi-Function Islands: Cooktop, Sink, Storage, and Seating

While I love the openness a single-purpose island can offer, I’ve come to prefer multi-function islands that blend cooktop, sink, storage, and seating into one warm, hardworking hub; they make the kitchen feel lived-in and invite people to gather without getting in the cook’s way.
- Central prep and social spot
- Clever concealed storage
- Seating that keeps conversation flowing
They feel practical, cozy, and communal.
Narrow Kitchens: Tall, Slim Islands and Peninsulas
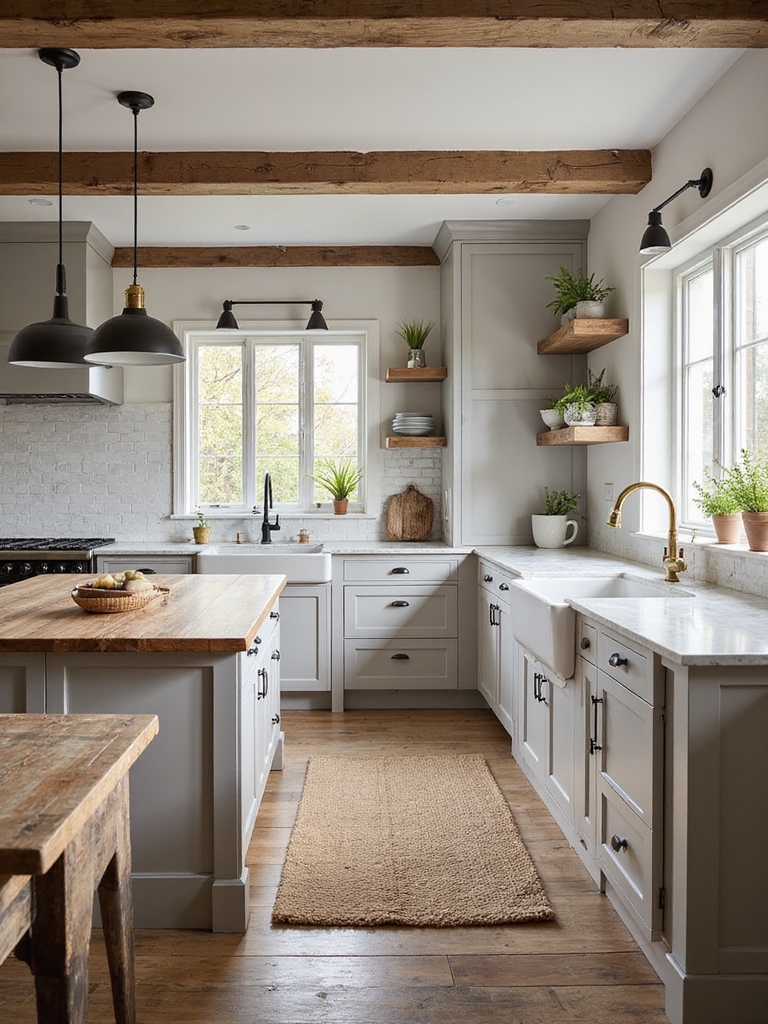
Because narrow kitchens demand a different kind of choreography, I lean toward tall, slim islands and peninsulas that tuck storage and workspace into tight footprints without blocking the flow.
I prefer warm wood tones, open shelving, and stool-friendly overhangs so people can perch without crowding the cook.
Clever pull-out drawers and vertical pantries keep clutter hidden while keeping the space cozy and practical.
Small Apartments: Portable Islands, Carts, and Folding Solutions
I lean into portable islands, carts, and folding solutions when space is tight because they let me reconfigure a small apartment kitchen in seconds—pull out a cart for prep, tuck it away for floor space, or flip down a leaf to host friends.
I love practical, rustic pieces that feel lived-in.
- Rolling cart for extra prep and storage
- Fold-down table for dining
- Slim pantry on casters for spices and linens
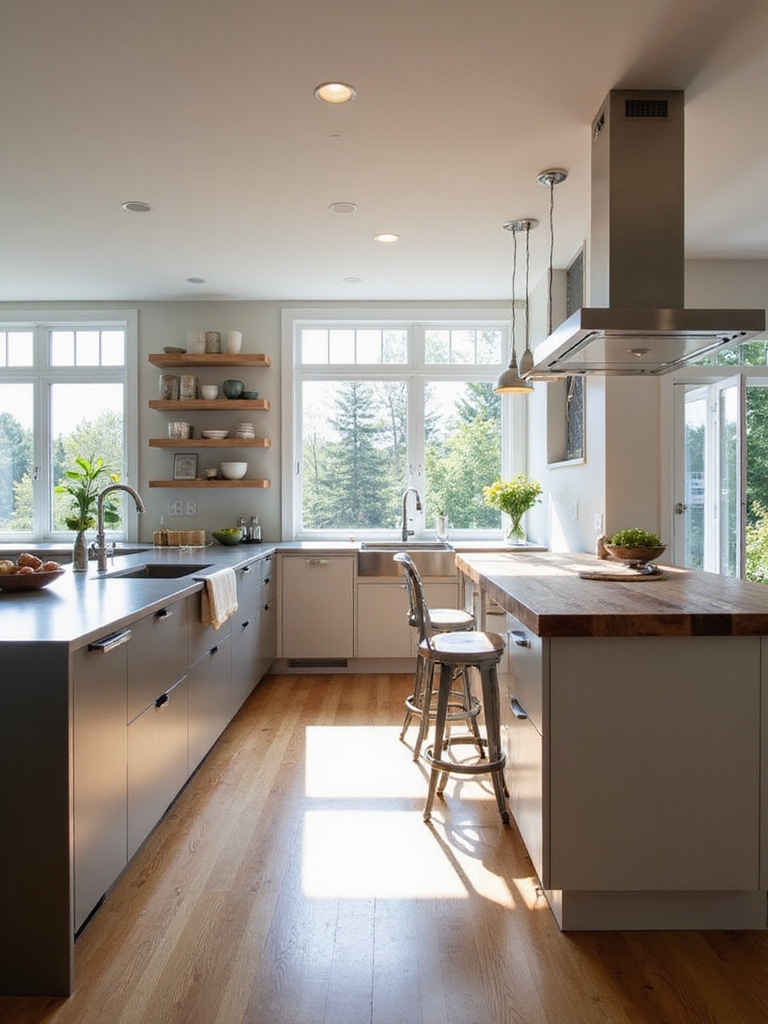
Open-Plan Islands as Zone Dividers and Sightline Keepers
I like using an open-plan island to carve out clear functional zones—prep, cooking, and casual dining—so everything has its place without closing the room off.
I keep sightlines open by choosing a low-profile counter height and slender storage so you can see across the space while I’m working.
And I often add flexible seating—stools that tuck under or slide away—so the island switches from workspace to gathering spot in seconds.
Define Functional Zones
When I’m planning an open kitchen, I treat the island like a friendly middle-manager: it keeps work flowing, signals separate zones, and keeps sightlines feeling intentional without shutting the room off.
I define clear functional zones around it—prep, cooking, and social—so everyone knows their role.
- Prep: roomy counter, sink access
- Cook: stove, spice reach
- Social: seating, serving space
Preserve Visual Sightlines
Usually I keep sightlines front and center when I place an island, because an island should guide the eye as much as it guides traffic.
I position low-profile storage and open shelving to frame views, keeping walkways clear so the room feels airy.
Rustic materials anchor the space without blocking sightlines, letting the kitchen flow into living areas while still defining cozy zones.
Incorporate Flexible Seating
Often I lean on flexible seating to make an island do double duty: it defines zones in an open plan while keeping sightlines open between kitchen and living spaces.
I choose pieces that shift easily, so the island feels inviting without blocking view.
- Stools tucked under for meals
- Bench that rolls away for parties
- Ottomans for casual lounging
Entertainer Islands: Bars, Buffet Layouts, and Guest Flow
With a glass in hand and friends milling around, I design entertainer islands to keep the party flowing — they’re my go-to for balancing bar seating, buffet surfaces, and clear paths for guests.
I favor reclaimed wood, sturdy overhangs for stools, integrated drink stations, and wide prep zones so plates move smoothly.
Thoughtful lighting and unobstructed circulation make mingling effortless and cozy.
Family Islands: Homework Nooks and Durable Surface Options
I like to picture a family island that doubles as a homework nook, with a broad overhang for stools and a clear work zone for pencils and laptops.
Choosing kid-proof surfaces like matte quartz or sealed wood makes spills and scuffs easy to handle, and I always plan drawers and cubbies nearby for school supplies and charging cords.
With a few thoughtful details, the island becomes a hardworking hub that still feels warm and lived-in.
Homework-Friendly Island Layouts
I usually imagine the kitchen island as the heart of family life, so I design homework-friendly layouts that keep kids close without crowding the cook.
I favor cozy nooks, smart storage, and sightlines that let you supervise while prepping. Consider:
- a lower counter zone for writing
- built-in charging and task lighting
- tucked storage for school supplies and art materials
Kid-Proof Durable Surfaces
Often I reach for surfaces that can take whatever family life throws at them—spilled juice, homework glue, or the occasional art project gone gloriously sideways—because practicality matters as much as style.
I prefer quartz or matte porcelain for islands: stain-resistant, low-maintenance, and forgiving under marker or scissors.
Warm wood-look composites soften the space while resisting dents, keeping our family hub both beautiful and battle-ready.
Storage For School Supplies
After choosing hardy surfaces that stand up to glue sticks and juice spills, I also think about where homework supplies will live so the island stays calm, not chaotic.
I carve a cozy nook with drawers and bins, keeping clutter out of sight but within reach.
- Shallow drawers for pencils and scissors
- Cubbies for notebooks
- Durable bins for art supplies
Plumbing & Power for Island Sinks and Cooktops
While planning your island, I’ll tell you the plumbing and power needs up front so we don’t run into surprises later: sinks need water, drainage and often an air gap or disposal hookup, while cooktops require dedicated circuits, venting considerations and careful placement of gas lines or electric feeds.
I’ll coordinate with plumbers and electricians early, choose accessible service routes, and keep rustic charm without cutting corners.
Storage Strategies for Islands: Drawers, Cabinets, Appliances
Let’s explore into how an island can pull double duty as storage, work zone, and appliance hub without feeling cluttered.
I favor deep drawers, closed cabinets, and tucked appliances that keep counters simple. Think about practical zones and easy access.
- Deep drawers for pots and pans
- Cabinets with pull-out organizers
- Built-in microwaves or dishwashers tucked beneath
Lighting and Outlets for Every Island Type
Because an island that stores gear and hides appliances should also be easy to use, I make lighting and outlets a practical extension of those storage choices.
I prefer layered lighting—pendants for mood, task lights under cabinets, and dimmable recessed fixtures—and tuck outlets into overhangs, drawers, and pop-up units.
That keeps surfaces clean, cords hidden, and everything within reach when you’re cooking or gathering.
Island Materials and Finishes That Hide Wear
I usually pick island surfaces that take life in stride, since a kitchen island is meant to be used, not coddled.
I favor materials that hide scratches and patina with charm and practicality:
- Honed granite or soapstone for forgiving marks and warm tones.
- Reclaimed wood with a hard oil finish that hides dings.
- Matte porcelain slab that masks stains and cleans easily.
Fixing Traffic Jams, Awkward Seating, and Budget Limits
While durable materials keep an island looking good through daily use, they won’t save you from a cramped layout or awkward seating; I’ve learned to treat flow and function with the same practical eye.
I rework aisles, shift seating to the ends, and pick sleeker stools. I balance splurges with smart trades—good countertop, simpler cabinetry—so the kitchen breathes without busting the budget.
I hope this guide helps you pick an island that actually improves how you live in your kitchen.
Remember: a well-planned island can add up to 20% more usable workspace and storage—big impact for the square footage it occupies.
Trust your floor plan, keep clear circulation, and prioritize the functions you’ll use daily. With warm materials and thoughtful lighting, your island will feel both practical and inviting—like the heart of a cozy home.