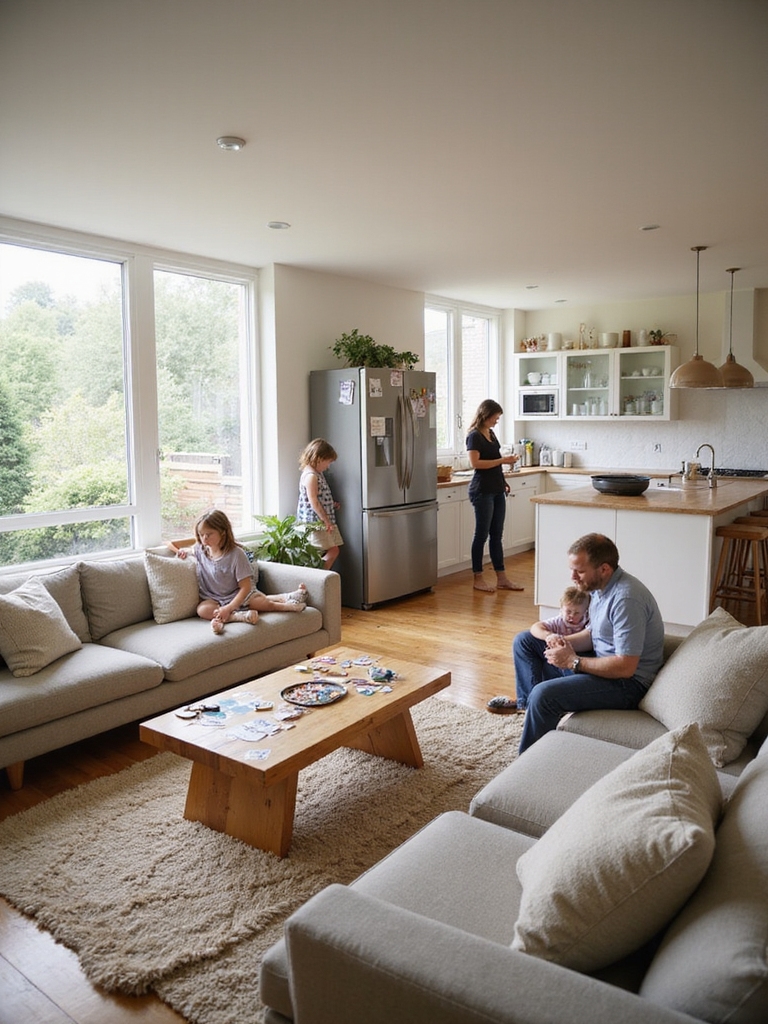
I’d open that wall to keep sightlines and traffic easy while protecting storage and atmosphere. I like a counter-height pass-through with a reclaimed-wood breakfast ledge for casual meals, or a gentle arched opening with shallow display shelves to hold cookbooks and ceramics.
Framed glass panels soften sound and light, and sliding wood screens add privacy when you want it. I’ll show you layout, structural steps, and cozy material choices next.
Design Goals: Flow, Sightlines, Storage, Seating
When I start planning an open wall between the kitchen and dining room, I keep four things front and center: flow, sightlines, storage, and seating.
I imagine easy traffic, clear views for conversation, clever cabinetry that hides clutter, and cozy spots to perch.
I favor natural materials, simple lines, and flexible solutions so the space feels lived-in, warm, and effortlessly practical.
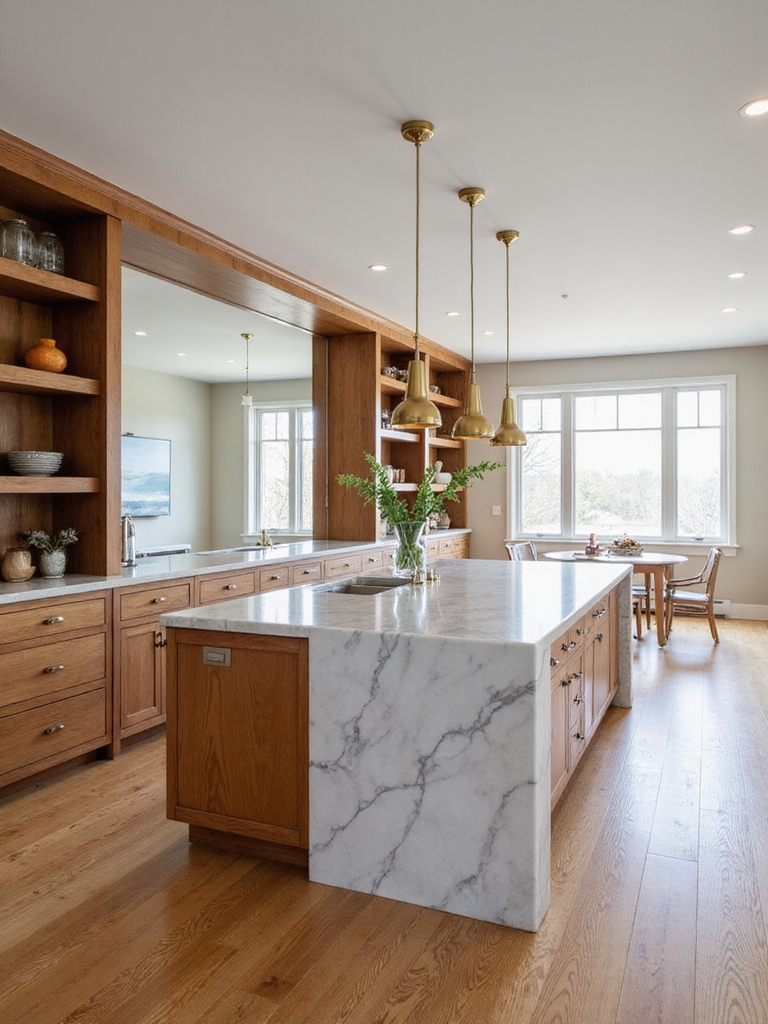
Open island kitchens encourage gathering and make cooking a social activity, especially when designed with a connected island that bridges both rooms.
When to Open a Wall: Checklist & Permits

Before you swing a sledgehammer, I want you to check a few practical boxes so the opening goes smoothly and safely.
I’ll walk you through confirming load‑bearing status, locating wiring and plumbing, securing permits, and budgeting for a pro if needed.
Call your local building department, get a structural consult, and plan temporary kitchen access — small steps that keep the project honest and calm.
Architects often reconfigure layouts to maximize kitchen flow by opening walls in strategic locations.
Right Opening Size: Pass‑Through, Arch, Full Removal

Pick the opening that fits how you live: a small pass‑through for quick plates, a gentle arch for character, or full removal for a true open plan. I’ll help you choose size, sightlines, and flow so the space feels honest and lived‑in.
- Consider daily traffic
- Keep structural needs first
- Match opening to sightline
- Balance light and privacy
- Think long‑term resale
Open layouts can be adapted to virtually any home shape with the right plan and floor plan options.
Breakfast Bars and Counter‑Height Pass‑Throughs

I like a counter‑height pass‑through because it keeps the kitchen connected to the dining area without losing the cozy, workaday feel of a home.
I favor a simple breakfast bar with wooden stools, warm trim, and open sightlines so conversation flows while I prep.
It doubles as a casual dining spot, homework station, and serving ledge—practical, inviting, and unpretentious.
Thoughtful island placement enhances flow and makes the kitchen the heart of your home.
Framed Openings and Stepped Cutouts

When I want a bit more structure than a simple pass‑through, I turn to framed openings and stepped cutouts for that tidy, intentional look that still feels homey.
I like how they define rooms without closing them off, adding charm and rhythm.
- Clean timber frames
- Soft rounded corners
- Varying step depths
- Contrast paint or stain
- Subtle trim lighting
Open kitchen partitions can preserve sightlines while defining spaces, especially when designed as framed openings that don’t block the view.
Built‑In Shelving and Display Niches
Built-in shelving is my go-to trick for blending function and character between the kitchen and dining room; I like to tuck display niches into the opening so everyday dishes and treasured finds become part of the conversation.
I favor reclaimed wood, soft task lighting, and staggered shelf depths to hold ceramics, cookbooks, and plants. It feels lived-in, useful, and welcoming without screaming for attention.
Gorgeous ways to style open shelving include thoughtful arrangement and editing to keep the look chic and clutter-free, with emphasis on open shelving as a curated display.
Sliding or Bi‑Fold Panels for Privacy
I like using sliding or bi‑fold panels when I want flexible privacy between the kitchen and dining room.
Thoughtful track systems keep the look clean and save floor space, while choosing the right materials—wood slats, frosted glass, or woven panels—lets me control how much light and sound pass through.
Let’s talk about the tradeoffs so you can pick a solution that feels cozy and practical.
Chic partition ideas often include open concept treatments that subtly define zones without closing them off.
Space-Saving Track Systems
A few clever track systems can give you privacy without eating into your floor plan, so I often recommend sliding or bi‑fold panels for kitchens that open to dining rooms.
I like tracks that tuck panels neatly, run smooth, and echo a farmhouse feel while staying modern and compact.
- Top-mounted smooth tracks
- Concealed floor guides
- Soft-close hardware
- Reversible panel layouts
- Flush pocket storage
I also recommend considering semi-open kitchen layouts to balance openness and functionality.
Material And Light Control
While keeping sightlines open is lovely, sometimes you’ll want panels that actually control light and glare without feeling heavy, so I choose materials that balance warmth and function.
I favor slatted wood, frosted glass, and woven rattan on smooth tracks or bi-fold frames. They soften sunlight, add texture, and fold away neatly for open meals, yet close for cozy, private evenings.
Glass Partitions and Interior Windows
I like using framed glass partitions to keep sightlines and light flowing while still giving each room a bit of character.
A simple pass-through interior window can make serving easy and keep the kitchen connected without losing a wall for storage.
Let’s look at how those two choices affect light, noise, and the feel between kitchen and dining.
Framed Glass Partition
Picture a framed glass partition that keeps the kitchen’s warmth visible while stopping cooking smells and noise from drifting into the dining room; I like them because they balance openness with function.
I love the rustic touch of steel or wood frames, letting light travel while defining space.
- preserves sightlines
- reduces noise
- blocks odors
- adds character
- easy to clean
Pass-Through Interior Window
If you like the framed glass look but want something even more social, I often recommend a pass-through interior window: it’s basically a framed opening with glass (or a counter-height shelf) that lets food, conversation, and light flow between kitchen and dining without fully opening the wall.
I love how it feels cozy, practical, and slightly rustic—perfect for casual meals and keeping company while you cook.
Materials: Wood, Metal, Drywall, Reclaimed
Let’s talk materials: when I open a wall between the kitchen and dining, I lean toward wood for warmth, metal for structure, drywall for clean lines, and reclaimed pieces for soul — each brings a different mood and practical trade-off.
- Wood frames for cozy texture
- Steel beams for slim support
- Drywall for simple passages
- Reclaimed mantels as focal points
- Mixed materials for balanced character
Lighting to Unify Kitchen and Dining
I like to think of lighting as the thread that ties the kitchen and dining room together, so I layer soft ambient light to keep both spaces cozy and usable.
I match fixture styles—pendants over the island and a complementary chandelier or sconces—so the look feels intentional rather than accidental.
Then I use zoned dimmer controls so cooking, dining, and casual gatherings each get the right mood without fuss.
Layered Ambient Lighting
I often start by thinking of light the way I do textiles—layers that pull the kitchen and dining into one cozy, functional whole.
I blend general glow, task spots, and soft accents so both spaces feel unified and hospitable.
- Warm dimmable ceiling wash
- Focused under-cabinet task lights
- Soft pendant accents over the table
- Hidden cove or toe-kick strips
- Table lamp or wall sconce for evenings
Coordinated Fixture Styles
After layering light like fabrics, I start thinking about the fixtures themselves—how their finishes, shapes, and scale can stitch the kitchen and dining room together.
I pick complementary metals, repeat a simple silhouette, and vary size for interest. A single rustic pendant family with mixed proportions ties both sides, keeping the vibe cohesive, warm, and intentionally humble without feeling matchy-matchy.
Zoned Dimmer Controls
Usually I reach for zoned dimmer controls as the simple trick that makes the open wall feel deliberate instead of accidental.
I dial zones warmer for dining, brighter for prep, and bridge moods with a soft middle setting. It tethers both spaces without changing architecture.
- Separate kitchen and dining circuits
- Smooth fade between scenes
- Memory presets
- Voice or app control
- Warm color dimming
Flooring and Trim Transition Details
When I open the wall between the kitchen and dining room, the flooring and trim become the quiet handshake that ties the two spaces together; I’ll look for progressions that feel intentional rather than forced.
I prefer matched hardwood with a subtle threshold, or complementary tile to wood with a slim metal or wood reducer. Trim profiles should echo moulding styles for a cohesive, lived-in feel.
Using the Wall for Cabinetry and Storage
The way the floors and trim meet tells you a lot about how the two rooms will live together, and I like to carry that conversation up into the wall itself by thinking of it as usable real estate.
I fit cabinets, open shelves, and hidden pantry nooks into that seam to keep things handy and homey.
- Shallow display shelves
- Built-in spice drawer
- Slide-out pantry
- Wine cubbies
- Concealed recycling bins
Style Examples: Farmhouse, Modern, Industrial
If you want the wall between kitchen and dining to feel like part of the home’s story, think about how each style speaks through material and detail:
I lean into reclaimed wood, beadboard, and apron-front warmth for farmhouse; clean lines, hidden hardware, and matte surfaces for modern; and exposed metal, concrete, and open framing for industrial.
I choose lighting, trim, and finishes to reinforce that voice.
Budget Tiers and Cost‑Saving Strategies
Across three clear budget tiers—basic, midrange, and premium—I’ll show you where to spend, where to save, and how small choices add up.
I guide you through practical swaps, prioritize structural needs, and suggest charm on a shoestring so your open wall feels intentional, cozy, and sturdy without breaking the bank.
- Choose paint over paneling
- Reuse trim or beams
- Buy secondhand fixtures
- DIY simple framing
- Invest in key hardware
Common Pitfalls and How to Avoid Them
Now that we’ve looked at where to spend and where to scrimp, let’s talk about the common mistakes I see people make when opening a wall between kitchen and dining.
I warn against removing structural supports, ignoring sightlines, and skimping on countertop overhangs.
Plan lighting and storage early, hire a good contractor, and choose durable finishes—small foresight prevents costly regrets.
I hope this sparks ideas for opening up your kitchen and dining—small tweaks can make big differences.
Did you know homes with open-concept kitchens often sell faster, cutting time on market by about 20%?
That shows buyers value flow and connection. Whether you choose a pass‑through, framed cutout, or full remove, aim for sightlines, storage, and cozy seating. Keep it warm, practical, and true to your home’s character.