If I were planning an open-plan kitchen extension to add serious square footage, I’d weigh quick wins like removing a non‑structural wall or a bump‑out against a full rear extension that brings light and true social space.
I’d prioritize big glazed doors or a glass box for daylight, a well‑sized island that anchors cooking and chatting, durable floors, and a structural engineer before cutting load‑bearing walls. Keep a realistic budget and contingency — stick with me and I’ll share practical layouts, costs, and pitfalls to avoid.
Decide: Wall Removal, Bump‑Out, or Full Kitchen Extension?
Let’s cut to the chase: before you get swept up in paint chips and fancy fixtures, decide whether you’re taking down a wall, adding a bump‑out, or going for a full kitchen extension.
I’d weigh cost, disruption, and how much daylight you need.
A wall removal feels immediate; a bump‑out gives usable space without massive upheaval; a full extension transforms everything — if you’re ready.
Open-plan layouts in top interior magazines often emphasize creating sightlines and social flow with open kitchen designs to maximize light and connectivity.
Planning Permission & Building Regs for Kitchen Extensions
When I first started planning our kitchen extension, the maze of planning permission and building regulations felt like a separate renovation of its own, but getting them right early saves headaches later.
I called the council, checked permitted development limits, and confirmed insulation, drainage and ventilation standards.
Keep records, get written approvals, and involve your builder early so compliance slips don’t stall the build.
Renovations like extensions are among the projects with the highest return on investment this year, so consider scope carefully and plan for resale value when designing the space.
When to Call a Structural Engineer (Beams, Lintels, Supports)
If you’re knocking through walls or planning a large opening for a new kitchen, I call a structural engineer early—before anyone starts cutting into beams—because they’ll tell you exactly what lintels, supports, or temporary propping you need to keep the house safe.
I’ll trust their checks for load paths, openings, and timber condition.
- assess load-bearing walls
- specify lintels/beams
- design temporary props
Carefully planning the layout first helps avoid costly layout mistakes that can derail your kitchen demolition and extension.
Set a Realistic Budget: Typical Costs and Contingency Tips
Because surprises eat into every renovation, I always start by setting a realistic budget that covers work, materials, and a sensible contingency—usually 10–20% of the project cost—so you won’t be caught off guard by hidden repairs, rising material prices, or design tweaks.
I tally essentials, prioritize must-haves, shop rough quotes, and leave wiggle room for finishes so the project stays joyful, not frantic.
Open-plan layouts can influence how much space you’ll actually need, so consider how different layout options will affect costs and flow.
How to Hire Contractors and Minimize Disruption
Although I know the thought of contractors traipsing through your kitchen can feel intimidating, I’ve found that choosing the right team early and communicating clearly cuts chaos and stress almost immediately.
I pick folk who respect my home, set clear arrival routines, and keep work zones tidy.
- Meet and vet references
- Agree daily cleanup
- Designate a temporary kitchen space
Professionals also recommend implementing pro kitchen organization strategies to keep the space functional during construction.
Timelines, Contracts, and Phasing a Kitchen Extension
When I plan a kitchen extension, I start by breaking the project into clear phases and pinning down realistic timelines so everyone knows what’s coming and when.
I set firm contracts covering scope, payments, and insurance, and build in contingency days for weather or delays.
Phasing lets us live around work, protect finishes, and hand over usable spaces as each stage completes.
I also prioritise creating an entertaining kitchen layout to make the most of the extra space.
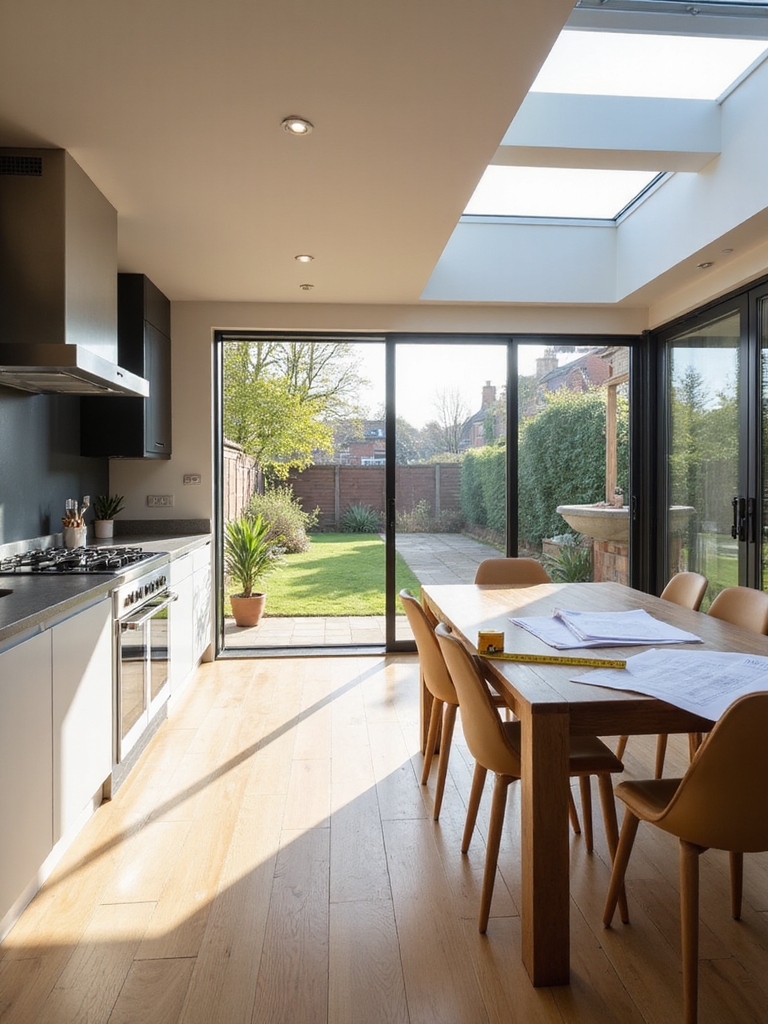
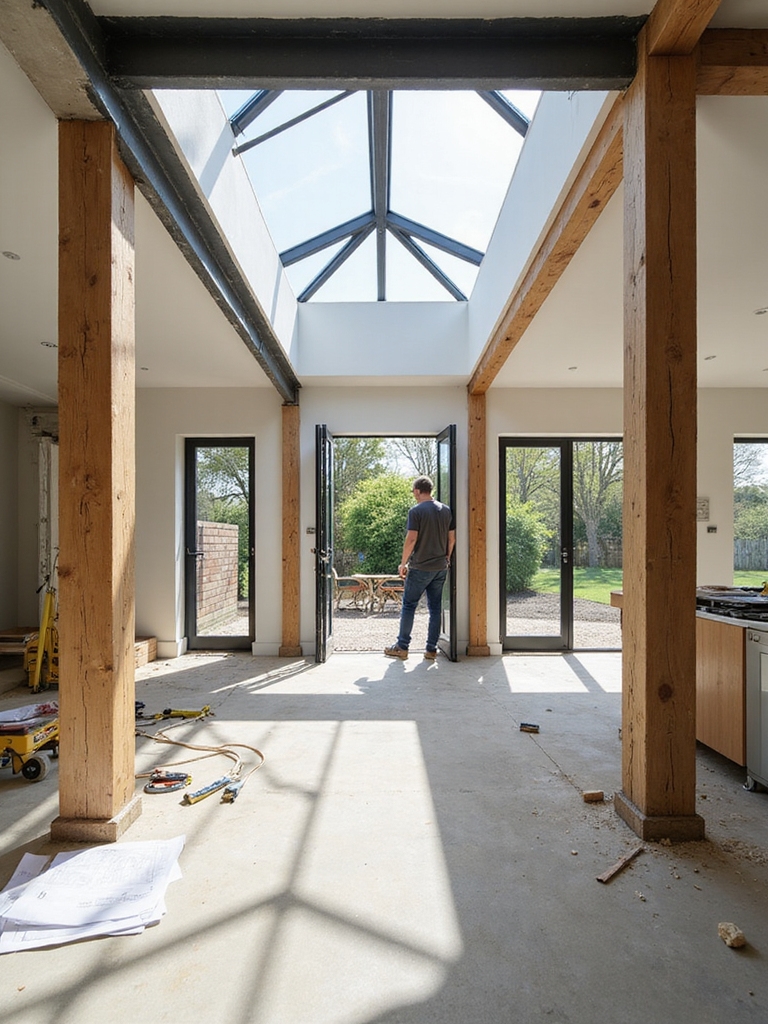
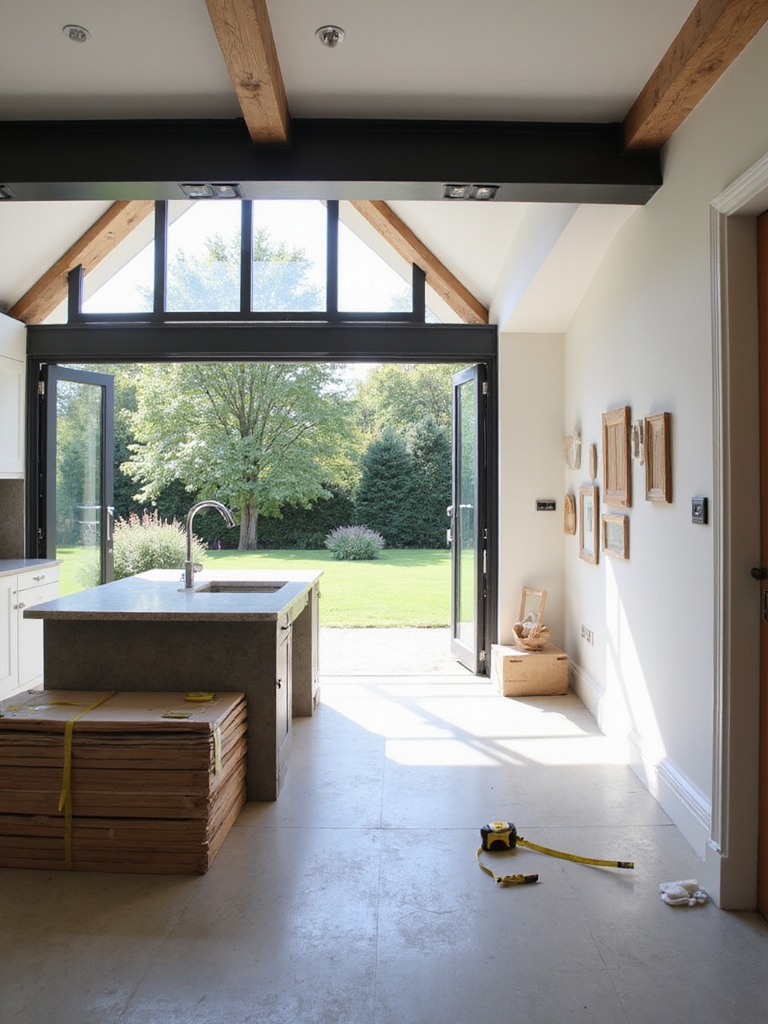
Natural Light for Kitchen Extensions: Rooflights, Glazed Walls, Bifolds
I like to think about light first when planning an extension, so I’ll show how rooflight placement can brighten worktops without overheating the room.
We’ll look at glazed wall options—from full-height glass to slim-framed panels—to balance views, insulation, and privacy.
And I’ll explain why bifold doors are such a versatile choice for linking inside and out while flooding the kitchen with daylight.
An open kitchen fundamentally changes how people use and feel about their home, creating improved social flow between cooking and living areas.
Maximising Rooflight Placement
Curious how a few well-placed rooflights can change a whole kitchen? I’ve found they lift mood, expand sightlines and reduce harsh shadows.
Position them over prep zones, the dining nook and a central island to balance light and heat. Consider spacing, orientation and roof pitch for even spread.
- Over worktops for task lighting
- Above island for drama and warmth
- Near circulation routes for safety
Smart layout choices maximize kitchen flow and complement rooflight placement for best results.
Choosing Glazed Wall Types
Although glazed walls can feel bold, I’ll tell you why they’re often the best way to flood a kitchen with natural light while keeping a cosy, lived-in vibe.
I prefer timber-framed panes for warmth, slim aluminium for a modern edge, and fixed panels where you want uninterrupted views.
Think proportion, sightlines, and thermal performance so light and comfort work together beautifully.
Bifold Doors Versatility
You’ve got the glazed walls doing a lot of the heavy lifting with light and view, so bifold doors make a natural next step — they open the boundary between kitchen and garden and let that daylight pour right through.
I love how they frame seasons, invite breezes, and widen usable space.
- Seamless indoor-outdoor flow
- Natural ventilation boost
- Flexible entertaining layout
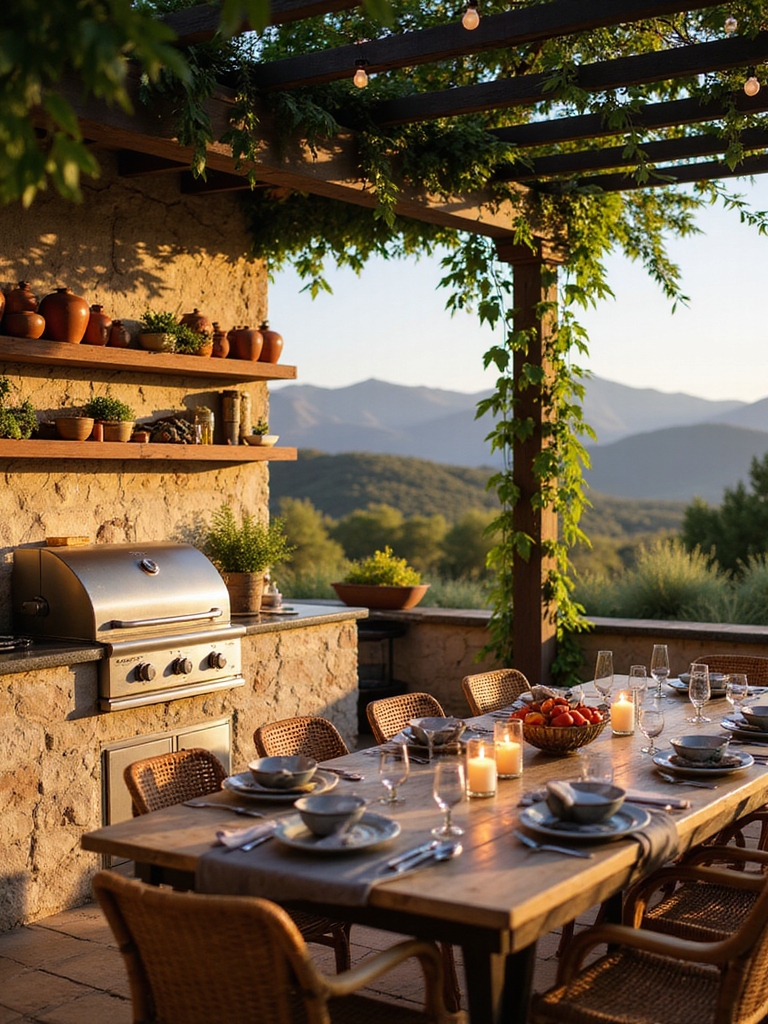
Create Seamless Indoor‑Outdoor Flow: Thresholds, Patios, Doors
I like to blur the line between inside and out so cooking, dining, and lounging feel like one continuous space; thoughtful thresholds, a well-placed patio, and the right doors make that possible.
I choose low-rise sills, natural stone floors that continue outdoors, and wide sliding or bifold doors. Add sheltering eaves, cozy lighting, and hardy timber furniture to invite year-round use.
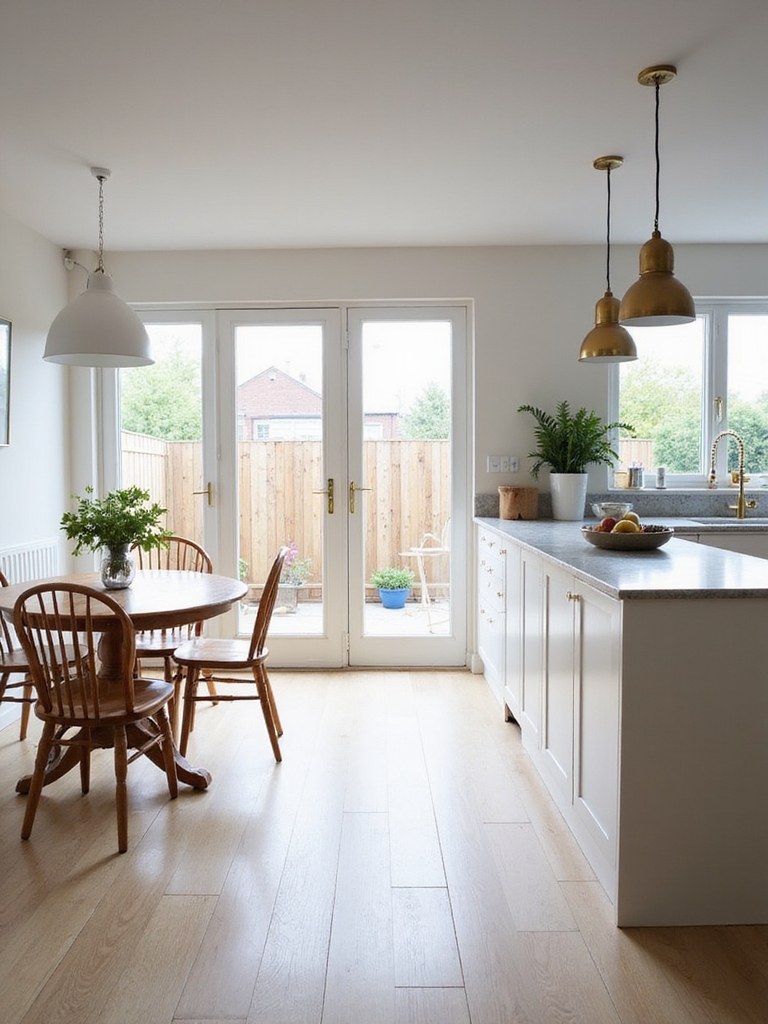
Open‑Plan Layouts That Work: Islands, Dining Zones, Sightlines
I like to start with a sturdy, well-planned island that serves prep, storage and a casual perch for guests.
Then I carve out a defined dining zone so meals feel intentional without interrupting the kitchen flow.
Finally, I keep sightlines clear between workspaces and seating so everyone feels connected and the space breathes.
Functional Kitchen Island
A well-planned kitchen island becomes the heart of an open-plan home, and I want to help you make it both useful and welcoming.
I picture worn oak, a generous prep surface, and hidden storage so clutter never ruins the view.
Keep sightlines open and movement smooth; choose durable materials that age beautifully.
- breakfast bar with stools
- pull-out storage drawers
- integrated prep sink
Defined Dining Zone
While you want the island to anchor the kitchen, you’ll also need a clearly defined dining zone that feels intentional and inviting;
I like to set it slightly apart with a change in flooring or a cozy rug, a long farmhouse table, and lighting that marks the spot without blocking sightlines.
I add weathered chairs, layered linens, and a simple pendant to create a warm, lived‑in nook for meals.
Clear Sightline Planning
Because good sightlines keep a kitchen feeling open and welcoming, I plan them like sightlines in a farmhouse: deliberate, simple, and practical.
I position islands low, align prep zones with dining, and leave a clear path to the garden so conversation flows.
I want every glance to feel calm, useful, and inviting.
- Low island, open view
- Aligned work and dining
- Unobstructed garden path
Clever Storage to Keep an Open Kitchen Tidy
I like to tuck things away so an open kitchen still feels airy and lived-in, and clever storage is the trick that keeps clutter from creeping in.
I favor deep drawers, pull-out pantry shelves, and woven baskets tucked under a reclaimed-wood island.
Hooks for mugs, a hidden knife strip, and labeled jars keep counters clear; everything has a home so the space stays warm and tidy.
Hide HVAC & Lighting: Clean MEP Solutions for Open Plans
I’ll show you how to tuck away mechanical and lighting systems so your open kitchen feels calm and uncluttered.
Thoughtful concealed ductwork, slim integrated lighting channels, and simple bulkheads or soffits can hide the mess without stealing character.
Let’s look at practical ways to make those elements part of the room’s rustic charm.
Concealed Ductwork Strategies
When you open up a kitchen to create an airy, connected space, concealing ductwork becomes one of those details that either tucks everything into the background or screams for attention—and I prefer the former.
I hide ducts in soffits, chase walls, or under raised floors so the room feels honest and calm.
- soffits with timber cladding
- slim wall chases
- underfloor plenums
Integrated Lighting Channels
With a few simple channels tucked into ceiling beams or timber soffits, I can blend lighting and HVAC into one clean, rustic line so your open plan stays calm and uncluttered.
I route slim LED strips and narrow vents together, keeping sightlines open.
The result is cozy, functional illumination and gentle air movement that feels handcrafted, not mechanical, throughout the kitchen extension.
Bulkhead And Soffit Design
Tucked just below the ceiling, a well-crafted bulkhead or timber soffit can quietly swallow ducts, vents and strips of LED so your kitchen extension feels deliberately simple rather than dissected by equipment.
I love using timber tones to warm the space while hiding MEP neatly. It keeps sightlines clean and the room cozy.
- Conceal HVAC runs
- Integrate strip lighting
- Match timber to cabinetry
Durable Floors & Finishes for High‑Traffic Kitchen Extensions
I often start by thinking about what the kitchen will really see day-to-day—kids running in and out, boots sliding across tiles, pots and pans clattering—because that practical picture shapes every finish choice I make.
I favor hardwearing oak or porcelain tile, matte stone-look surfaces, and washable paints. Rugs add warmth but must be non-slip. Choose finishes that hide wear and clean easily.
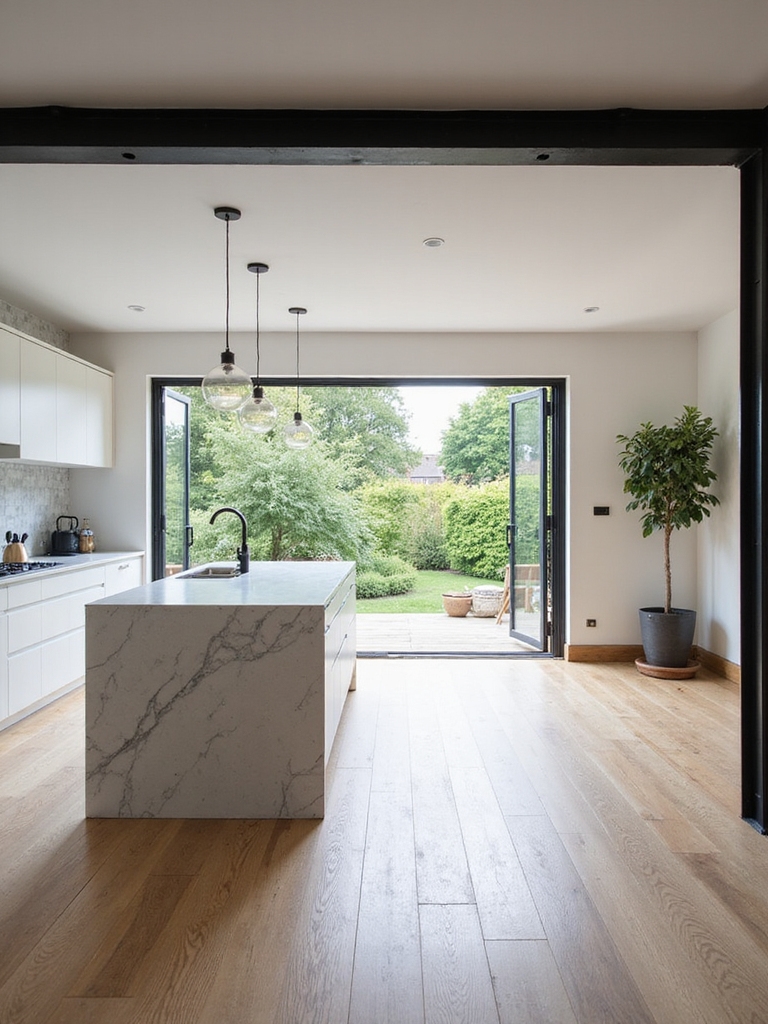
Styles for Kitchen Extensions: Glass Boxes, Lean‑Tos, Wraparounds
I’m keen to compare a sleek glass box that floods your kitchen with light against a humble lean‑to that keeps things simple and practical.
A glass box offers drama and views, while a lean‑to gives you easier construction, better insulation options and often lower cost.
Let’s also touch on wraparounds later, but for now I’ll focus on those two to help you weigh light, budget and buildability.
Glass Box Benefits
When I picture a glass box extension, I see a simple, light-filled room that brings the garden right into the kitchen; it’s both modern and warmly rustic.
I love how it widens sightlines, lifts moods, and makes cooking sociable. It feels honest, cozy, and airy.
- Seamless indoor-outdoor flow
- Abundant natural light year-round
- Simple, timeless aesthetic
Lean‑To Practicalities
While a lean‑to might seem plainer than a glass box, I actually love how practical and unpretentious it feels—leaned up against your house, it tucks into the roofline and works hard without fuss.
I favour its cosy proportions, simple pitched roof, and easy drainage.
It’s budget‑friendly, thermally sensible with the right glazing, and blends with cottage or farmhouse charm without shouting for attention.
Cost‑Saving Moves That Don’t Sacrifice Space or Function
Because you don’t need a mansion-sized budget to make your kitchen feel bigger and work smarter, I’ll show you practical, budget-friendly moves that keep both space and function intact.
I’ll guide you through simple tweaks that stretch every inch without fuss, keeping charm and usefulness.
- Swap bulky cabinets for open shelving and baskets.
- Use slimline, multi-use islands.
- Reconfigure lighting and storage zones for flow.
Avoid These Common Open‑Plan Kitchen Extension Mistakes
If you rush into an open‑plan extension without thinking about how people actually move and live in the space, you’ll end up with a pretty room that doesn’t work for you.
I’ve seen mistakes: poor workflow, insufficient storage, and zones that clash. Plan paths, pick durable finishes, and slot in clever cupboards.
Keep sightlines, but create defined areas so the room feels lived‑in, not staged.
So, if you’re hesitating because extensions seem costly or disruptive, don’t—I’ve seen clever designs and phased work keep costs and chaos down while adding real usable space.
Whether you remove a wall, bump out, or go full wraparound, plan for structures, permits and good contractors, pick durable finishes, and leave a contingency.
The result is a warm, open kitchen that fits your life—rustic, practical, and worth the effort.