I’ll help you lay out an open kitchen‑living room that truly works: start by measuring everything, protect a 90–120 cm main route and a clear 36–48″ aisle around the work triangle, then anchor the plan with an island or peninsula sized for prep and storage.
Use low backs, rugs and pendant clusters to define zones without blocking sightlines, pick durable finishes for family life, and layer lighting with zoning switches — keep going and I’ll show you practical layouts and measurements.
Open‑Plan Kitchen‑Living: Key Design Rules
When I plan an open kitchen‑living space, I focus on flow, sightlines, and a clear rhythm between zones so cooking and conversation feel effortless; you want each area to support the other without fighting for attention.
I choose natural materials, defined but flexible zones, layered lighting, and honest storage.
I balance scale and texture so the space feels warm, grounded, and welcoming to linger in.
I often place an island to anchor the plan and reinforce open kitchen and living room with island flow, creating a central hub for cooking, dining, and socializing.
How Open‑Plan Layouts Solve Common Pain Points
Although an open plan won’t fix every housing hiccup, I’ve found it cleverly eases the most common pain points—tight circulation, small kitchens that isolate hosts, and rooms that feel disconnected—by letting light, sightlines, and activity travel freely between zones.
I use cozy rugs, layered lighting, and strategic furniture to define areas while keeping flow, so spaces feel roomy, social, and genuinely lived‑in without losing warmth.
Designing with visual continuity in mind helps tie the kitchen and living areas together for a cohesive look.
Measure and Map Your Open‑Plan Footprint
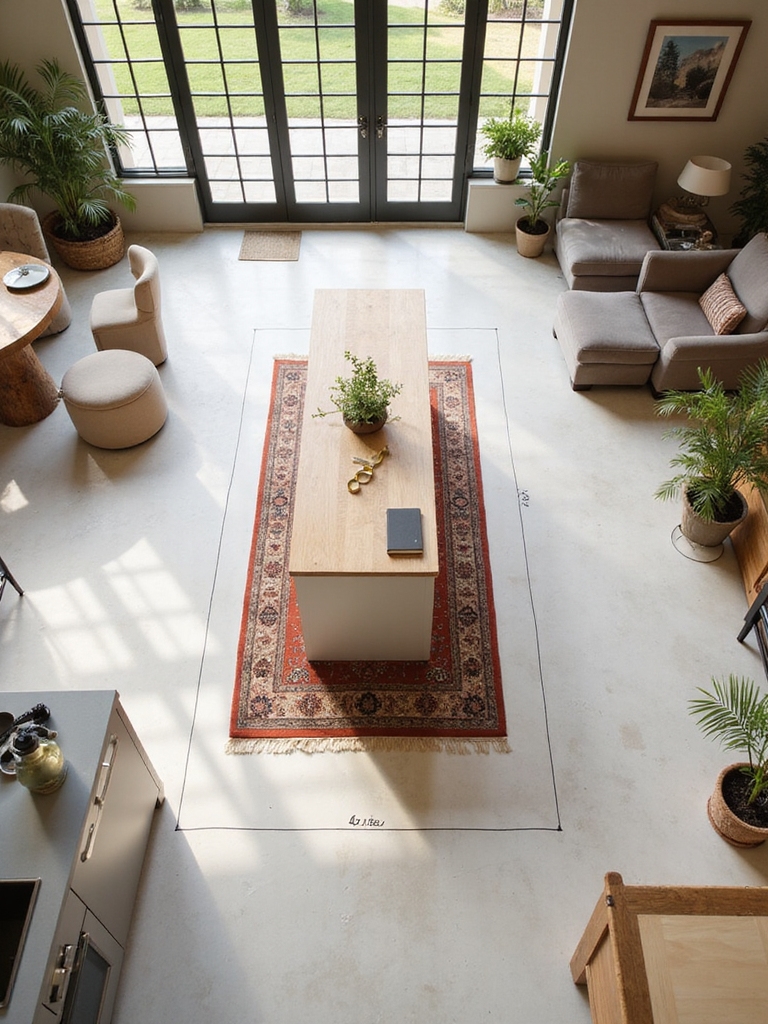
Before we move furniture, I always measure the room dimensions so nothing feels cramped or awkward.
Then I sketch the footprint and map the main traffic paths to make sure people can move freely between kitchen and living areas.
That little planning step saves a lot of trial and error and keeps the space feeling warm and natural.
I also consider different open kitchen layouts to ensure the plan fits the home’s shape.
Measure Room Dimensions
Because I want this open-plan space to feel intentional, I start by measuring every wall, window, doorway and alcove and jotting them down on a simple sketch.
Then I note ceiling height, radiators, vents and any uneven walls.
With tape, pencil and patience I capture true proportions so furniture, islands and lighting fit naturally — no guessing, just honest, usable dimensions.
Open-plan layouts often benefit from zoned furniture arrangements to define function while keeping sightlines open.
Map Traffic Paths
Now that I’ve measured the bones of the room, I sketch how people will actually move through it.
I trace main routes between sink, stove, fridge, sofa and entry, noting shortcuts and pinch points.
I keep clear 90–120 cm paths for daily flow, reserve cozy nooks, and mark furniture that must stay movable.
This map stops collisions and keeps the space alive.
Open shelving can showcase essentials and style with ease, so I plan sightlines to open shelf kitchens when positioning walls and seating.
Work Triangle Principles for Open‑Plan Kitchens
Now that you’ve mapped the space, I want to talk about the work triangle so your kitchen actually works — keeping the stove, sink, and fridge at comfortable distances so you don’t feel like you’re running a relay.
I’ll explain ideal triangle lengths, how to keep traffic flow clear of prep zones, and which appliances deserve prime placement for daily use.
With a few practical tweaks we can make the layout both cozy and efficient for cooking and socializing.
Architects also rely on smart layout tips to improve circulation and optimize task zones.
Ideal Work Triangle Distances
Think of the work triangle as the quiet backbone of your open-plan kitchen: I want you to picture the stove, sink, and fridge as three friendly neighbors whose paths should be short and unobstructed.
I aim for 4–9 feet per leg and a total triangle perimeter of 13–26 feet. These distances keep cooking efficient, cozy, and unstrained without crowding your living space.
Open plan kitchens transformed living by blending cooking and social spaces into one seamless area.
Traffic Flow And Clearance
While I want your kitchen to feel welcoming, I also expect clear paths so cooking doesn’t become a game of bobbing and weaving; in open-plan spaces that means planning traffic flow around the work triangle so people move naturally without cutting through your prep zone.
I suggest defining clear aisles, keeping a 36–48″ clearance where possible, and using islands or rugs to guide movement gently.
Open island kitchens make cooking social by turning preparation into a gathering spot, letting hosts interact with guests while they work and creating a natural focal point for conversation—consider the open island as both workspace and social hub.
Appliance Placement Priorities
Start by placing your major appliances so they support how you actually cook—I’ll treat the sink, stove, and fridge as the trio that keeps the kitchen functioning smoothly.
I aim for short, direct paths between them, keeping prep space near the sink and oven, landing zones by the fridge, and clear traffic routes so friends can pass without disrupting cooking.
It feels simple and sensible.
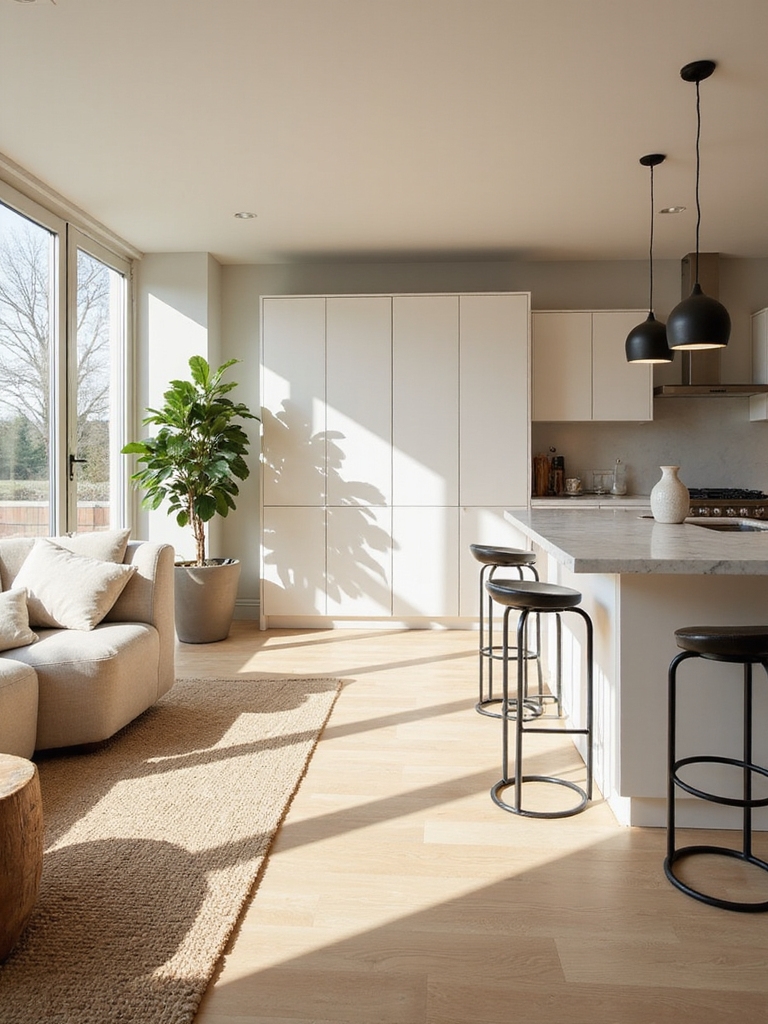
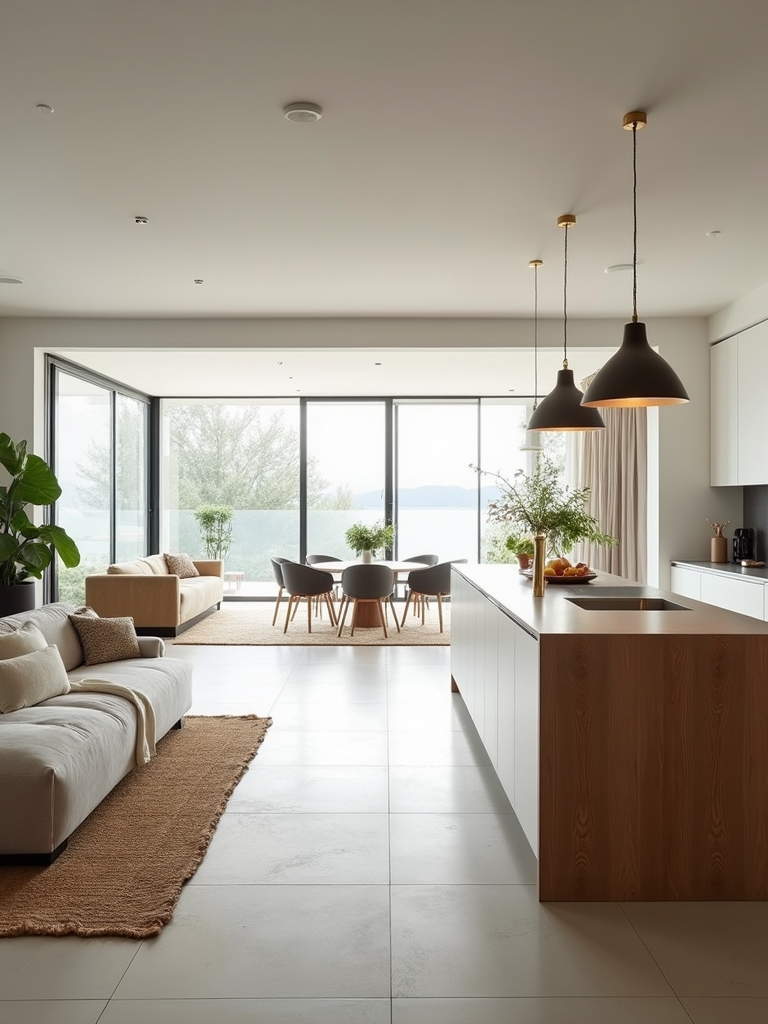
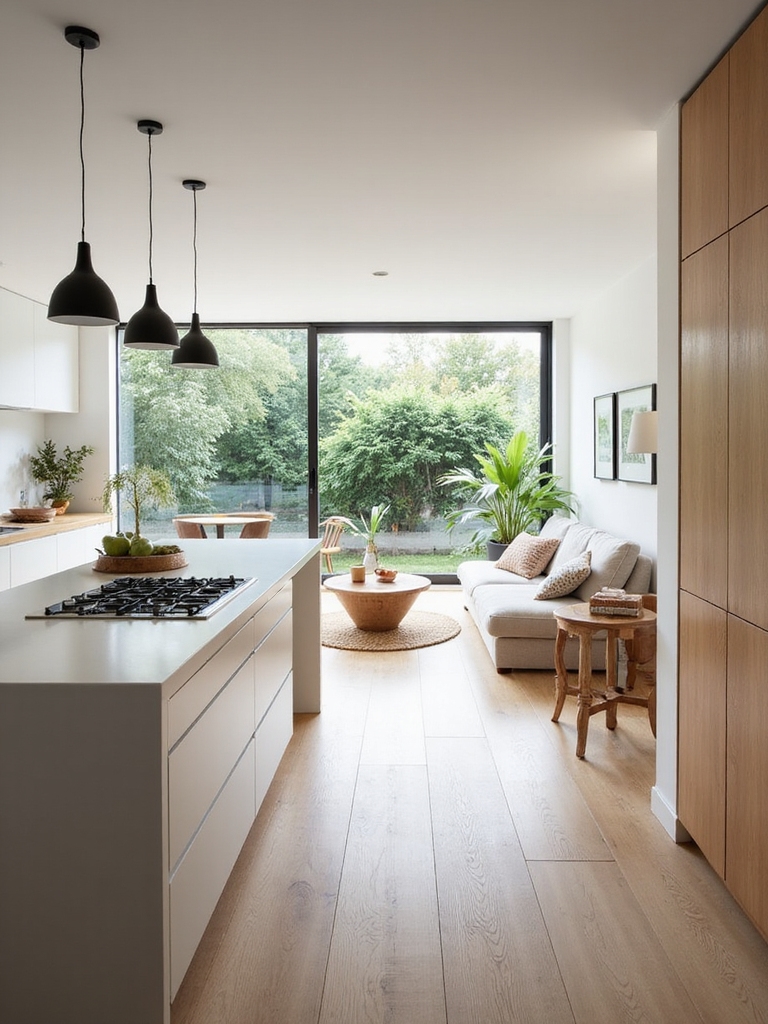
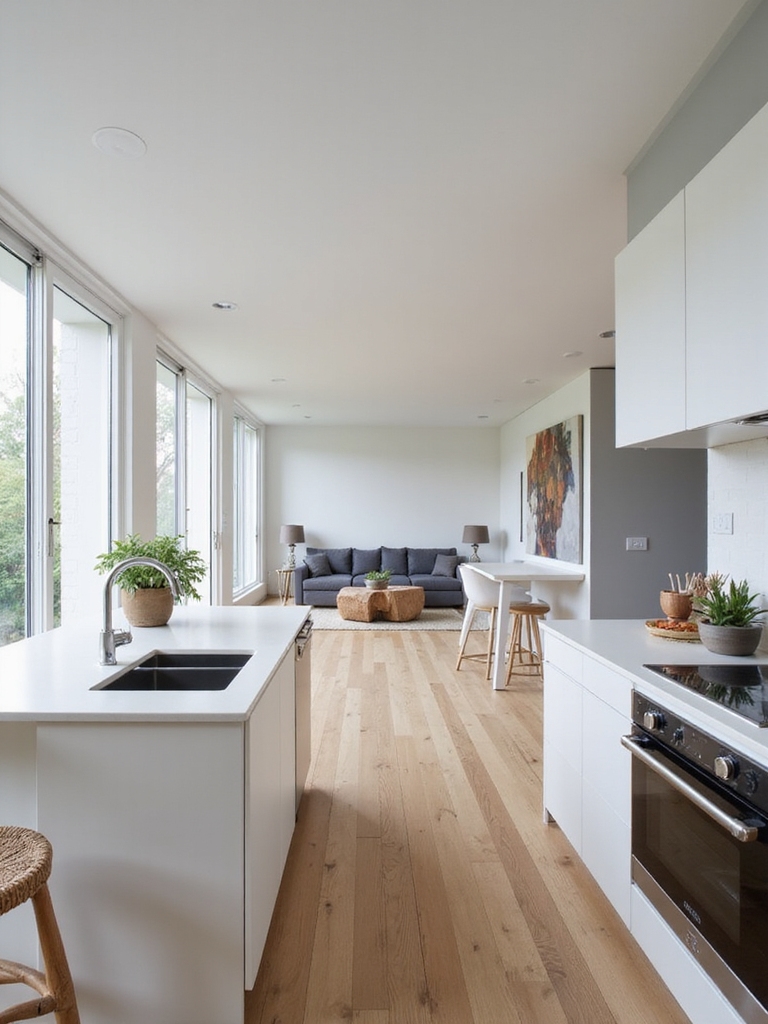
Islands & Peninsulas for Open‑Plan Layouts
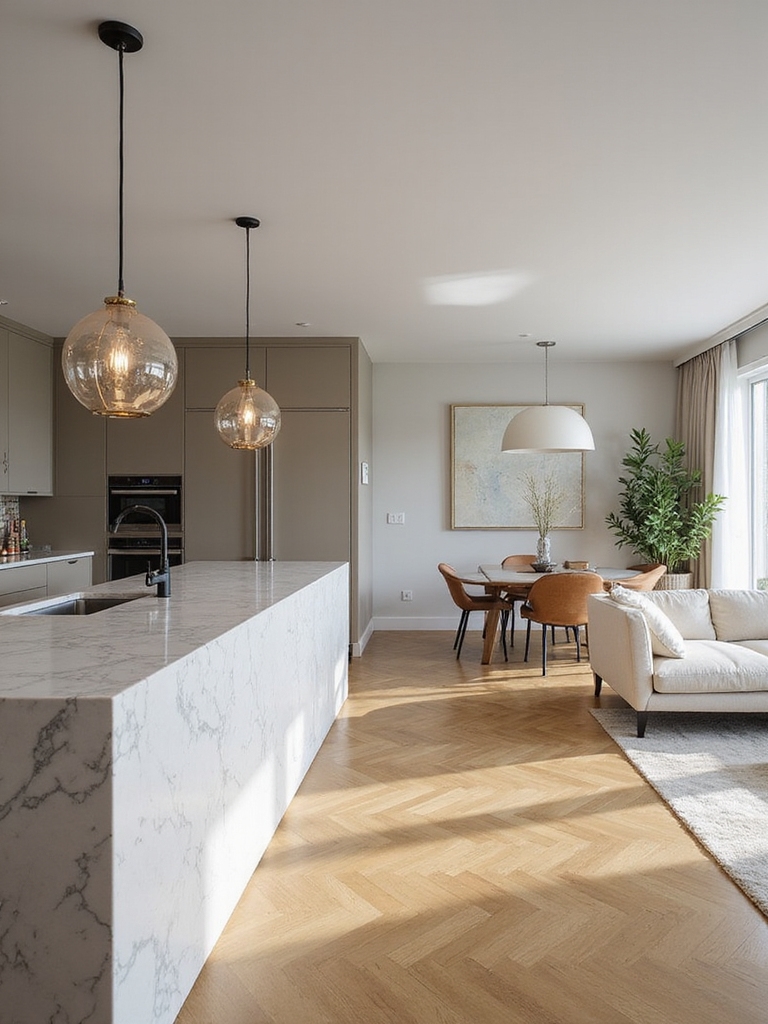
I love how an island or peninsula can anchor an open-plan kitchen living room, creating a natural hub where cooking, chatting, and homework flow together.
I favor sturdy wooden tops, cozy stools, and practical storage beneath. An island invites gathering; a peninsula defines a corner without closing it off. Keep proportions human-scaled, traffic paths clear, and surfaces resilient for daily life.
Zoning Without Blocking Sightlines
An island or peninsula gives you a natural anchor, but I also want the room to feel open and connected, so I look for ways to zone without closing sightlines.
I use low furniture, rugs, lighting warmth and natural materials to define areas while keeping eye lines clear, so conversations and cozy kitchen smells mingle freely.
- low-back seating
- area rugs
- pendant clusters
- open shelving
- subtle floor change
Traffic Flow and Seating for Social Cooking
With a pot bubbling and friends perched nearby, I plan traffic flow so people move smoothly between sink, stove and fridge without stepping on each other’s toes.
I place seating where cooks can chat yet stay clear of work triangles: a narrow island bench, a couple of stools at the end, and a cozy perch by the window. Movement stays easy, conversation stays warm.
Size Cabinets and Storage for a Tidy Open Plan
Think about cabinets as the backbone of a tidy open plan—I size them to fit what I actually use, not some generic checklist.
I favor deep drawers, open shelving, and pantry pull-outs so clutter hides and essentials stay reachable.
Here’s what I aim for:
- Deep drawers for pots and pans
- Tall pantry for bulk goods
- Drawer dividers for utensils
- Open shelf for everyday items
- Appliance garage for countertop calm
Lighting Layers to Separate Kitchen and Living Areas
Because light directs how we move and feel in a room, I layer it so the kitchen and living areas read as distinct but connected places.
I use bright task lights over counters, softer pendants above the island, and warm, dimmable fixtures in the living side.
Rustic fixtures, varied bulbs, and zoning switches create intimacy without losing flow—practical, cozy, and purposeful.
Anchor the Room With Complementary Focal Points
When I center the room around two complementary focal points, the open plan finally feels intentional rather than accidental.
I pair a cozy fireplace nook with a striking kitchen island so each zone sings without competing. I balance scale, color, and rhythm to guide movement and conversation.
- Fireplace nook with textured surround
- Statement island lighting
- Contrasting yet harmonious colors
- Deliberate sightlines
- Layered seating arrangements
Flooring and Material Transitions for a Unified Look
After anchoring the room with paired focal points, I pay as much attention to the ground beneath our feet—the way materials meet will make the whole plan read as one.
I favor continuous wood or complementary tiles, simple shift strips, and aligned grout lines.
Rustic textures tie kitchen and living areas; subtle color shifts define zones without harsh breaks, keeping flow warm and effortless.
Furniture Plans for Clear Sightlines and Conversation
As I arrange sofas and stools, I always prioritize sightlines so conversations can flow from the sink to the sofa without anyone craning their necks; low-profile backs, staggered seating heights, and angled placements keep views open while encouraging face-to-face talk.
I choose cozy, worn textures and simple rhythms to invite lingering.
- Low sofa backs
- Staggered stools
- Angled seating
- Clear pathways
- Centered rug
Kid‑ and Pet‑Friendly Open‑Plan Rules
Because kids and pets turn every surface into a stage, I plan the open kitchen–living area so messes are easy to manage and sharp corners are minimized.
I choose durable, washable fabrics, rounded furniture edges, and low, secured storage for toys. Rugs are stain-resistant and anchored.
I keep breakables up high, create a pet nook, and build clear traffic paths for safety and calm.
Small‑Space Open‑Plan Hacks That Still Feel Spacious
I still keep those kid- and pet-friendly choices in mind, but when space is tight I focus on tricks that make the whole room breathe without losing warmth.
- Use light, layered textures to add depth without weight
- Pick multiuse furniture with clean lines
- Keep sightlines open; low shelving works wonders
- Embrace vertical storage and hanging plants
- Limit patterns; choose a warm, cohesive palette
Layout Choices by Budget: Budget → Midrange → Luxury
When money’s tight, I focus on smart, simple layout moves that punch above their cost: orient the kitchen toward the room so cooking feels social, tuck a slim island or rolling cart where it can double as prep and dining, and keep paths clear so the space reads bigger than it is.
Midrange adds built-in seating, softer lighting, better traffic flow; luxury brings bespoke islands, zoning, and seamless materials.
I’ve walked you through the rules, measurements, and smart choices that make open-plan kitchens and living rooms feel effortless — and now it’s your turn to make a room that works for the way you live.
Like a well-seasoned recipe, a few simple proportions and thoughtful touches turn chaos into comfort.
Trust the guidelines, trust your eye, and remember: the best layout is the one that brings family, laughter, and life back to the heart of your home.