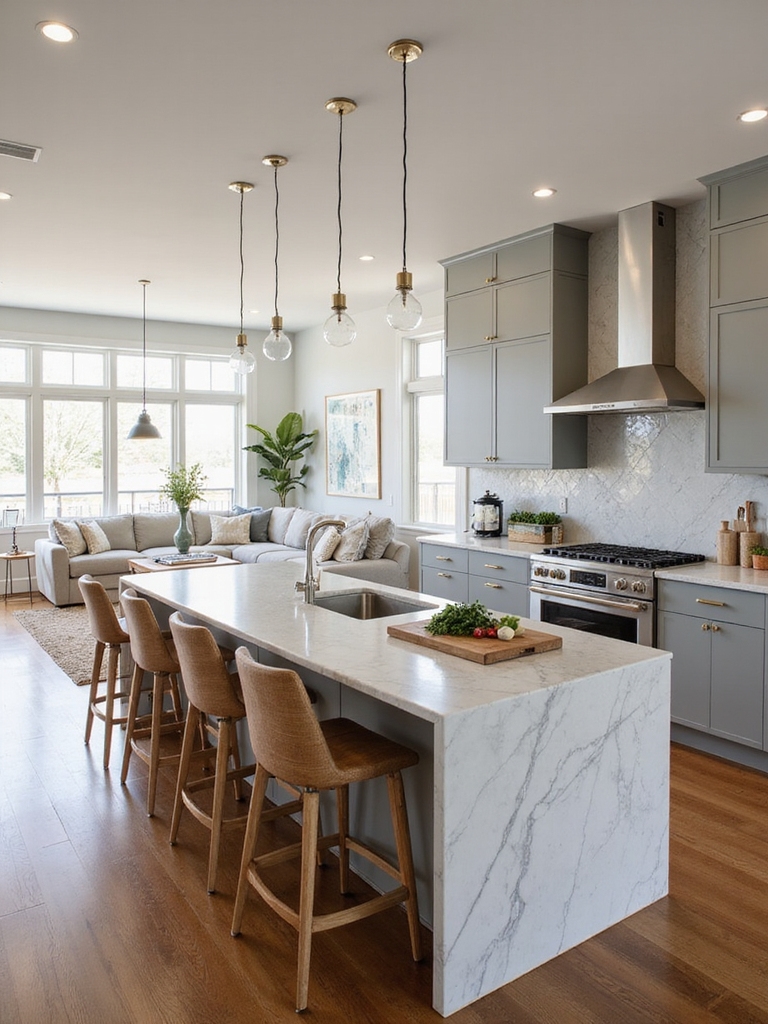
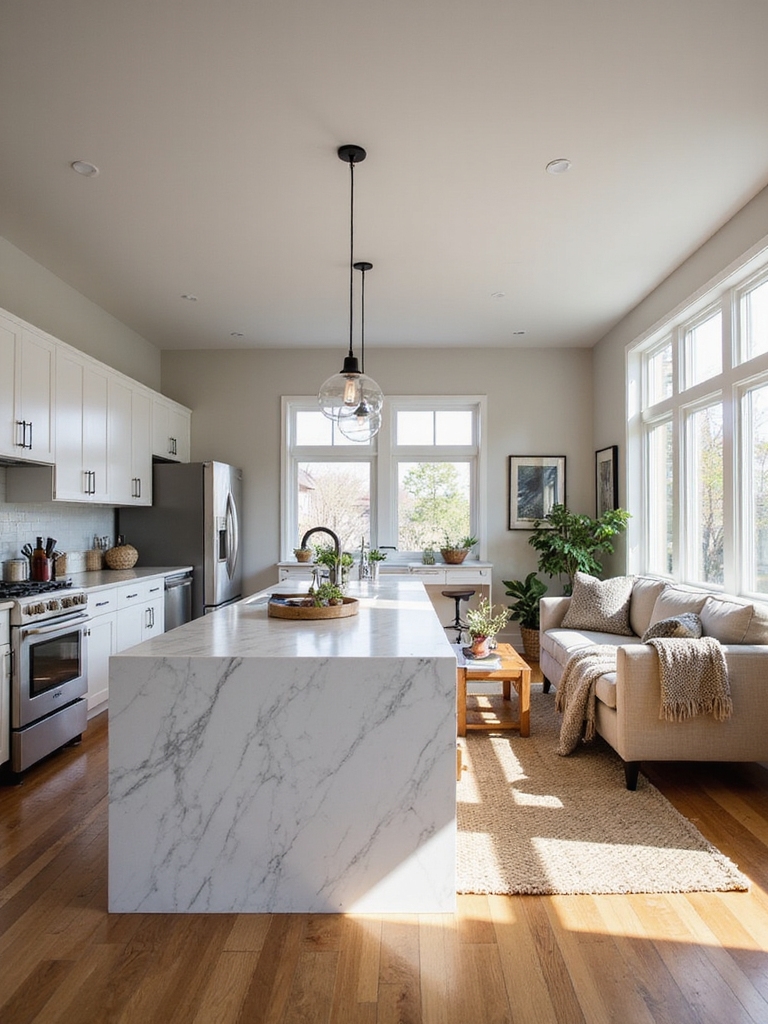
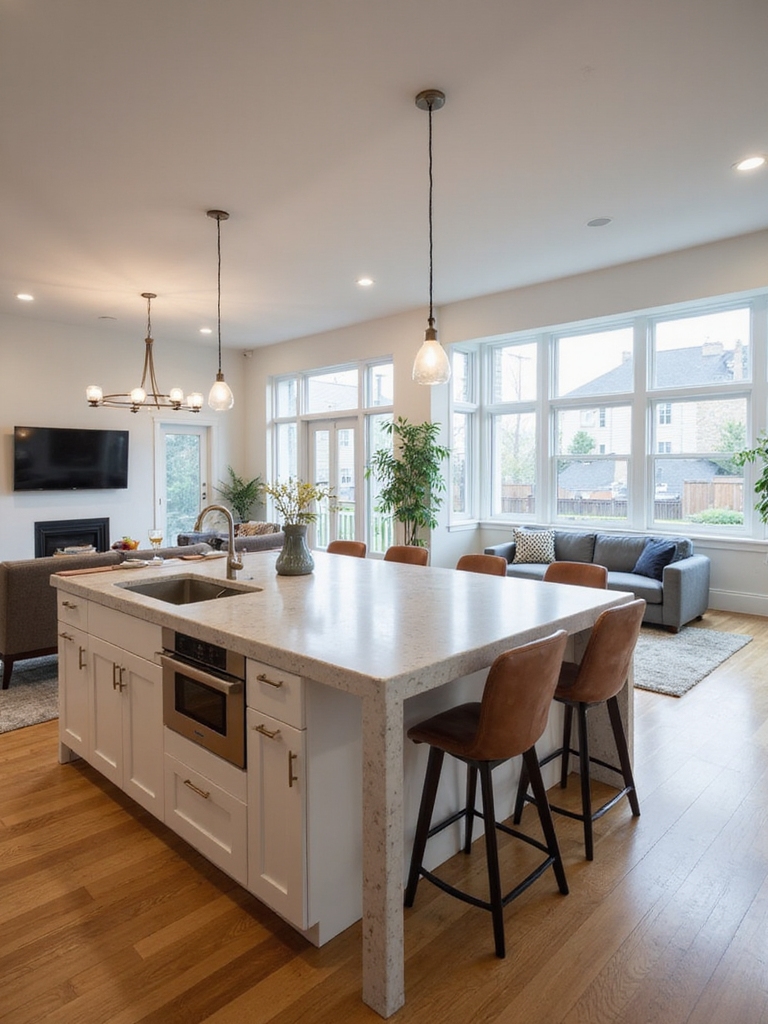
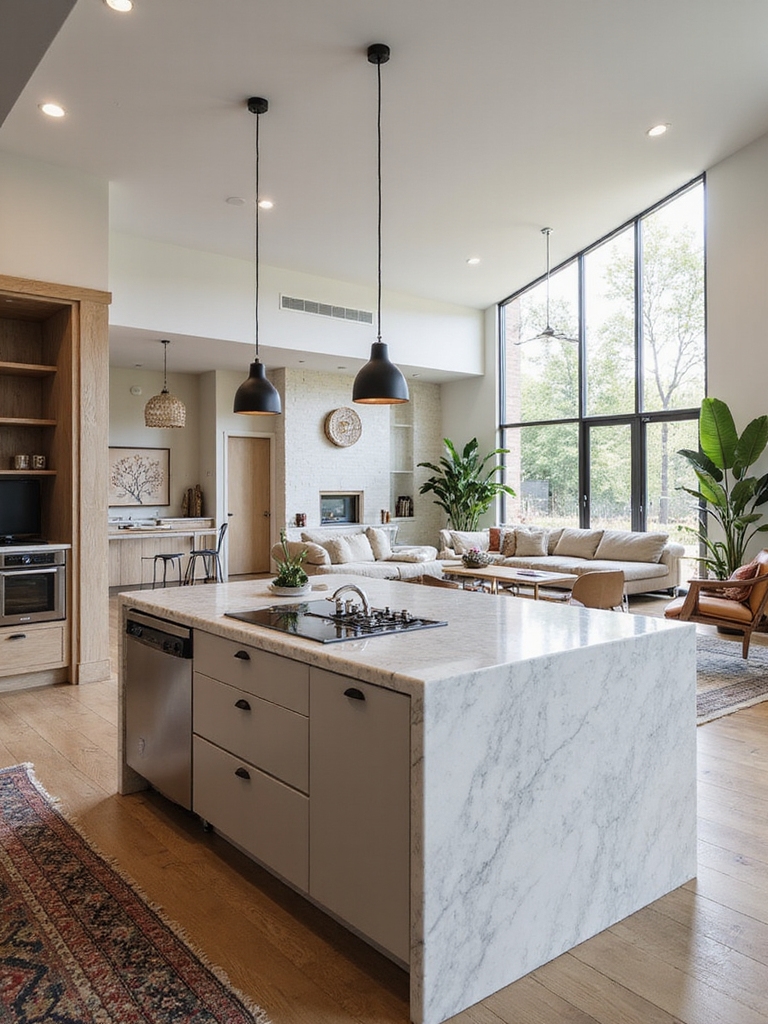
I design open kitchen–living rooms so the island does three jobs at once: prep, casual dining, and social hub. I size aisles 42–48″ for easy two‑way flow, tuck a sink and dishwasher near prep, and add a raised bar or low prep ledge for mixed seating.
I layer task and warm pendant lights, hide clutter in deep drawers, and pick durable tops that feel lived‑in. Keep going and I’ll show practical layouts and fixes to suit your gatherings.
Pick the Right Island Layout
When I choose an island layout, I think about how we’ll actually live in the space—where people will stand, cook, eat, and gather—so the design fits our daily flow.
I picture stools for morning coffee, a prep zone near the range, storage for cast iron, and a clearance for passing trays.
I favor sturdy wood, simple lines, and a convivial spot for friends.
Open Island Kitchens That Turn Cooking Into Social Time open island kitchens can make cooking into a shared activity with guests and family.
Clearances and Traffic Flow for Open Kitchen Islands
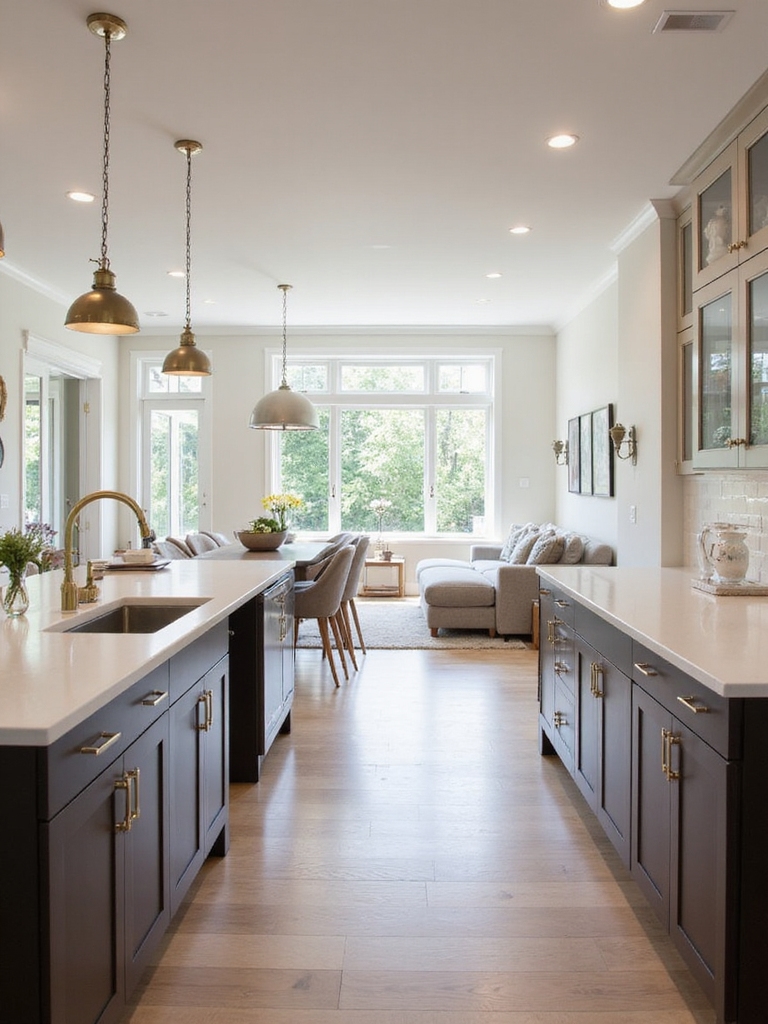
Standing where the island will sit, I think about how people move through the kitchen—who’s rushing to the stove, who lingers with a cup of coffee, and where kids might dart by with plates—so I can plan clear paths that keep cooking and conversation comfortable.
- Keep 42–48″ aisles.
- Leave 36″ for single-pass zones.
- Keep seating circulation clear.
- Zone prep and serving to avoid cross-traffic.
Open-plan layouts often benefit from clearly defined traffic flow to maintain function and social connection.
Place Appliances and the Sink for Island Efficiency
I place the sink and main appliances with people in mind, picturing how I move between prep, cooking, and cleanup so the island actually makes life easier.
I tuck the sink near prep space, position dishwasher and trash for quick transfer, and keep stove or fridge close enough to avoid long walks. It feels natural, efficient, and friendly for everyday use.
Architects often arrange work zones to create a smooth kitchen workflow that minimizes steps and keeps everything within easy reach.
Zone Cooking, Dining, and Lounging in One Open Plan
After placing the sink and appliances with how you move in mind, I like to think about how cooking, eating, and lounging will actually feel together in the same wide-open space.
I carve clear zones that flow, using textures and rugs to anchor each area:
- Prep zone with durable surfaces
- Casual dining nook
- Cozy lounging corner
- Traffic-free pathways for ease
Open kitchen islands often become the central hub of an open-plan home, serving as a workspace, dining spot, and social centerpiece for multifunctional living.
Choose Island Seating: Stools, Banquette, or Table
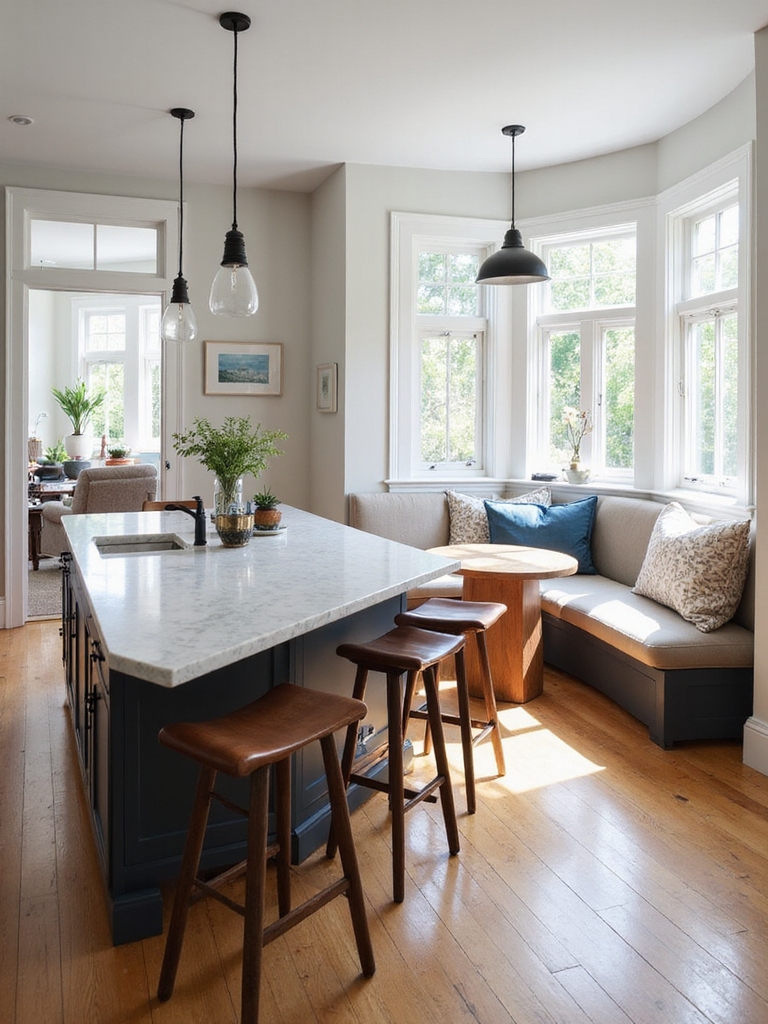
Think about how you’ll actually use the island—I’m always picturing morning coffee, quick homework sessions, or friends lingering with drinks—because that decides whether stools, a banquette, or a table will feel right.
I lean toward stools for casual flow, a banquette for cozy family nooks, and a small table when you need flexible dining.
Pick what matches your routines and circulation.
Consider also how a peninsula-style layout can inform traffic flow and work zones, improving overall kitchen efficiency with optimized circulation and clear task areas.
Island Height and Countertop Choices for Multiuse
When I’m planning an island that has to do everything—from prep to homework to casual dining—I think about the ideal height first so stools, plates, and laptops all feel right.
I also pick durable countertop materials like quartz or butcher block that can take spills and chopping without losing their charm.
Finally, I consider surface finishes—matte for hiding scratches, sealed wood for warmth—so the island stays useful and beautiful.
I often design islands as multifunctional solutions to maximize efficiency in compact cooking spaces.
Optimal Island Height
I like to start with height, because it’s the single detail that makes an island comfortable for everything from chopping vegetables to doing homework; the sweet spot for most kitchens is 36 inches for prep and general counter use, while a raised bar at 42 inches works better for casual seating and drinks.
- 36″ for prep
- 42″ for seating
- consider stool height
- match workflow and sightlines
Open Plan Kitchen Living Room with Island Layouts are great for flow and socializing, especially when the island helps define the space and supports multiuse layouts for cooking, dining, and lounging.
Durable Countertop Materials
I’ll recommend durable countertop choices that suit both a 36″ prep surface and a raised 42″ bar so your island stays useful and low-maintenance through cooking, homework, and casual drinks.
I favor honed granite, engineered quartz, and butcher block—each resists wear, cleans easily, and ages with character. Match edge profiles and finishes to keep the rustic flow between kitchen and living room.
Luxury materials can combine performance and elegance, with many options offering both durability and visual appeal—consider luxury countertops when making your selection.
Multiuse Surface Finishes
Moving from material choices to how you’ll use them, let’s look at finishes and heights that keep a shared island working for cooking, homework, and casual drinks.
I prefer mixed heights: a lower prep zone and a raised bar. Consider:
- Matte quartz for durability
- Butcher block for warmth
- Sealed concrete for character
- Stain-resistant laminate for kids
Storage Strategies to Keep the Island Clutter‑Free
Let’s clear away the assumption that kitchen islands are just for prep and serving—I keep mine organized by treating it like a small, hardworking room of its own.
I hide bulky appliances behind shaker-style doors, use deep drawers for pots, roll-out trays for spices, and a shallow top drawer for daily tools. A dedicated mail slot and basket prevent paper piles. It stays calm.
Lighting the Island and Living Area for Task + Mood
I like to layer light over the island and living area so there’s bright, focused illumination for cooking and softer glow for lingering.
Hanging pendants or recessed dimmable fixtures give me the task light I need without blasting the room when we’re relaxing.
Let me show you how mixing layered sources and dimmers creates a warm, functional rhythm for the whole space.
Layered Lighting Strategy
Often I start with three layers of light when I’m planning an island and living area: ambient for overall glow, task for chopping and reading, and accent for atmosphere.
I blend fixtures for warmth and function, keeping lines simple and cozy.
- Pendant ambient
- Under-cabinet task
- Floor lamp reading
- Wall sconce accents
Dimmable Task Fixtures
Having layered ambient, task, and accent lights around the island, I like to make the task fixtures themselves dimmable so they pull double duty — bright and precise for prep, mellow and inviting for evenings.
I choose warm-tone pendants with smooth dimming, so chopping, reading, and casual meals feel right.
Dimmers add control, save energy, and instantly set a cozy, lived-in mood.
Finish Pairings That Visually Link Kitchen and Living Room
Harmony matters when you’re pairing finishes between an open kitchen and living room; I want you to think of materials as conversation partners that should echo each other.
I favor warm woods and brushed metals, repeating tones for cohesion.
Consider:
- Wood floors matching island butcher block
- Metal trim echoing lamp finishes
- Stone countertops linked to fireplace
- Soft textiles reflecting cabinet hues
Control Noise and Sightlines While Keeping Openness
Now that the finishes are talking to each other, I want you to think about how sound and sight move through the same open space.
I place rugs, soft upholstery, and a driftwood screen to soften noise and guide views without boxing people in.
Low shelving, pendant grouping, and a planted corner break lines gently, keeping connection while calming echo and visual clutter.
Design Islands That Work for Kids and Homework
I lean into islands as more than a prep surface — I design them to be mini command centers where kids do homework, snack, and hang out without getting in the way.
I add durable surfaces, comfy stools, and smart storage. Try these essentials:
- Built-in charging
- Low drawers
- Wipeable counters
- Task lights
It keeps chaos cozy and tidy.
Island Layouts and Workflows for Entertaining
When I plan an island for entertaining, I think about a seamless host flow that keeps drinks, serving, and conversation moving without awkward trips around the room.
I like to carve out multi-tasking zones—one end for prep and plating, another for drinks and casual seating—so I can pivot from cooking to chatting in a heartbeat.
Tell me what kinds of gatherings you do most, and I’ll suggest a layout that fits.
Seamless Host Flow
Picture guests drifting from the living room to the kitchen island as I juggle a cocktail in one hand and a platter in the other—an island’s layout should make that flow effortless.
I arrange stations to welcome company and keep conversation going:
- Pouring and glassware
- Hot bites near oven
- Clearing and trash
- Seating and mingling
This keeps hosting relaxed, warm, and efficient.
Multi-Tasking Zones
Because guests circulate and my tasks change by the minute, I design island zones that let me shift from bartender to chef to host without missing a beat.
I carve stations: a drink prep area with sink, a cooking zone with counter space and tools, and a cozy seating edge for conversation.
It’s practical, warm, and keeps service smooth during lively gatherings.
Small‑Space Island Ideas for Compact Open Plans
If you’re working with a tight footprint, I’ll show you how a small island can anchor an open plan without crowding it—think skinny, mobile, or multifunctional pieces that bring warmth and workability to the space.
I prefer rustic wood, slim profiles, and clever storage. Consider:
- Narrow prep island
- Rolling cart island
- Fold‑down extension
- Bench with shelf seating
Universal Design Tips for Open Kitchen Islands
I want to talk about making your island welcoming for everyone, starting with accessible counter heights that work for seated and standing use.
Let’s also keep clear circulation paths around the island so people move safely and the room breathes.
With a few thoughtful tweaks, your open kitchen can feel cozy and easy for every guest.
Accessible Counter Heights
Comfort guides my choices when I plan accessible counter heights for an open kitchen island, and I want to help you get them right.
I prefer simple, practical solutions that feel homey and sensible.
- 28–34″ base for prep
- 36″ standard bar seating
- 30″ lowered section for wheelchair access
- Adjustable stools and clear knee space
Clear Circulation Paths
Because people move through the kitchen for so many reasons, I plan clear, generous circulation paths around an island so everyone can get where they need without awkward turns or crowding.
I leave at least 42–48 inches for main aisles, tuck seating to one side, and keep walkways free of rugs or obstructions. It feels welcoming and easy to live in.
Common Island Layout Mistakes and Quick Fixes
While you might love the look of a big island, I’ve seen layouts that end up cramped, awkward, or just plain impractical; luckily, small tweaks usually fix them.
- Too narrow — widen circulation to 42–48″.
- Blocking work triangle — relocate sink or cooktop.
- Poor seating — raise counter or set overhang properly.
- Insufficient storage — add drawers or open shelves.
I’ve walked you through layouts, clearances, zones and seating, but before you pull the trigger on cabinets or stools, pause—there’s one quiet test I always use.
Picture yourself at the island at dusk: a glass in hand, someone laughing on the sofa, the sink within reach.
If it feels natural, you’ve won. If it feels cramped or awkward, tweak the plan. Trust your gut—your island should invite, not resist.


