A perfectly seared shrimp is a tiny bronze trophy on a plate, and you’re about to learn how to make it feel intentional. You’ll treat shrimp like steak: dry, hot fat, one confident flip, and a glossy finish from reduced bone broth or melted butter.
Expect crisp exterior, sweet tender meat, and minimalist plating that still looks deliberate—stick around and you’ll get exact steps, fixes, and timing so nothing arrives limp.
Quick Plan for Restaurant‑Quality Carnivore Shrimp
Think of this as your one-page route to restaurant-quality shrimp without the fuss: you’ll pick the freshest shrimp you can find, pat them dry, season simply with salt and a touch of acid-free fat like butter or tallow, then sear or grill over high heat to get that blistered, caramelized exterior while keeping the inside tender.
You’ll let the pan smoke a little, resist overcrowding, and flip once. Rest briefly so juices redistribute. Serve immediately on warm plates, maybe with a drizzle of rendered butter.
You’ll look like you planned this for days, though you didn’t. Consider also keeping plain water or other simple beverage options on hand to stay hydrated while enjoying rich, fatty dishes.
What to Expect: Texture, Flavor, and Plating
When you bite into properly cooked carnivore‑style shrimp, you’ll get an immediate contrast: a crisp, bronzed exterior that yields to a sweet, juicy interior, with butter or tallow carrying the savory notes and a faint caramel edge from the Maillard reaction.
You’ll notice texture shifts — firm snap, then silk — so time your cook to avoid rubber.
Flavor stays straightforward: clean sea sweetness amplified by browning and finishing fat.
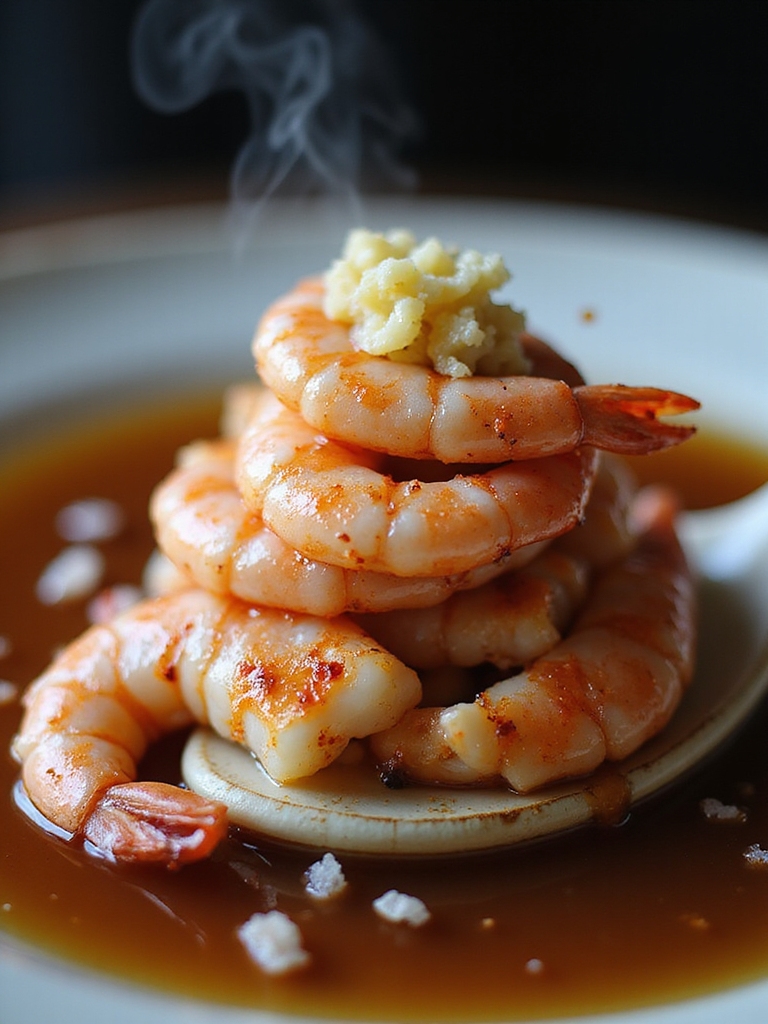
Plate with intent: small stacks, staggered tails, and glossy fat pooled like a deliberate brushstroke.
You’ll eat with your eyes first, then savor the concise, unapologetic meatiness.
Simple carnivore meals rely on quality ingredients and minimal steps to stay practical, especially when using tallow for cooking.
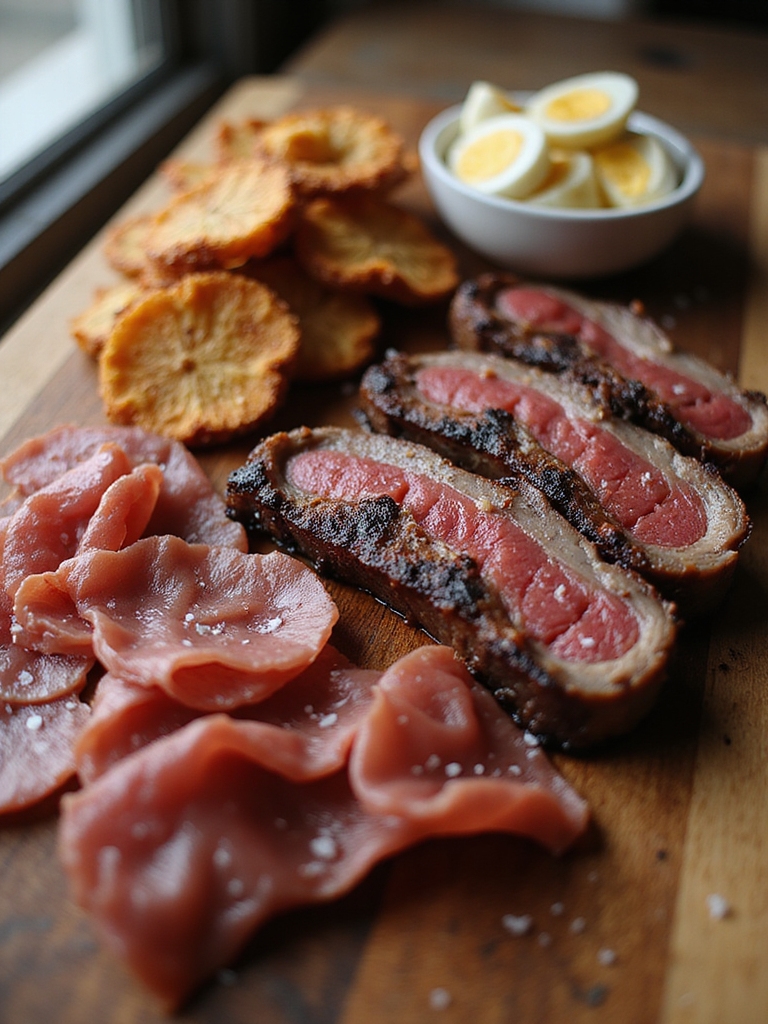
Essential Animal‑Only Ingredients: Fats, Broths, Salts
Gathering your animal-only arsenal means focusing on three simple pillars: melting fats for cooking and finishing, concentrated broths for moisture and depth, and salts—both flaky and mineral-rich—to lift every savory note.
You’ll render beef tallow or pork fat for high-heat sears and silky finishes, and clarify butter or ghee if you tolerate dairy.
Keep a jar of chilled bone broth—reduced until glossy—to baste or spoon over shrimp for umami punch.
Use flaky sea salt for texture, and a touch of smoked salt when you want grill-like char without smoking.
Taste as you go; adjust boldly.
These approaches mirror the simplicity of slow, set-and-forget cooking found in crockpot methods, where concentrated broths and rendered fats do the heavy lifting for flavor.
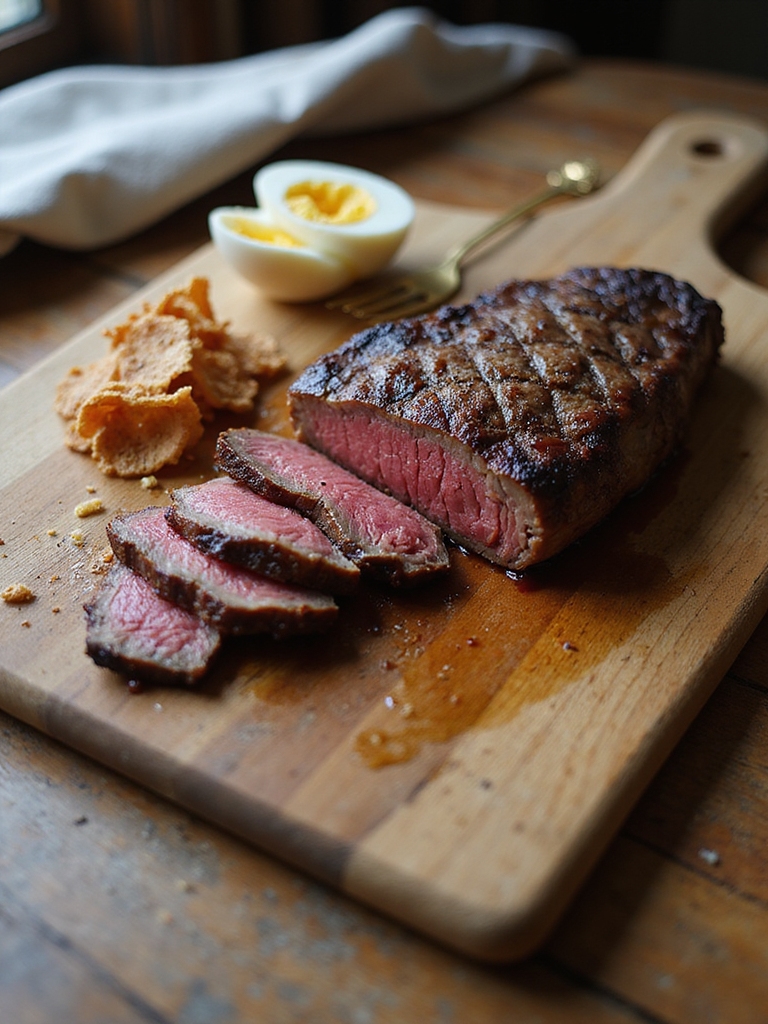
Choose the Best Shrimp for Texture and Flavor
After you’ve got your fats, broths, and salts ready to work, pick shrimp that’ll stand up to high-heat searing and a generous spoonful of glossy bone broth.
You want shrimp with a firm snap, sweet meat, and clean ocean notes that won’t collapse into mush under intense heat.
Size matters—choose consistently sized pieces so they finish together. Wild-caught or frozen-at-sea often deliver better texture than fussy supermarket thawed ones. Trust your nose: fresh shrimp smell briny, not fishy.
- Large (16/20) for bold sear and meaty bite
- Wild-caught for flavor depth
- Frozen-at-sea for peak texture
- Consistent sizing for even cooking
Choose animal-based fats and broths to round out the dish and enhance mouthfeel, since animal-based eating emphasizes nutrient-dense, minimal-ingredient components.
Prep Shrimp: Peel, Devein, and Dry Correctly
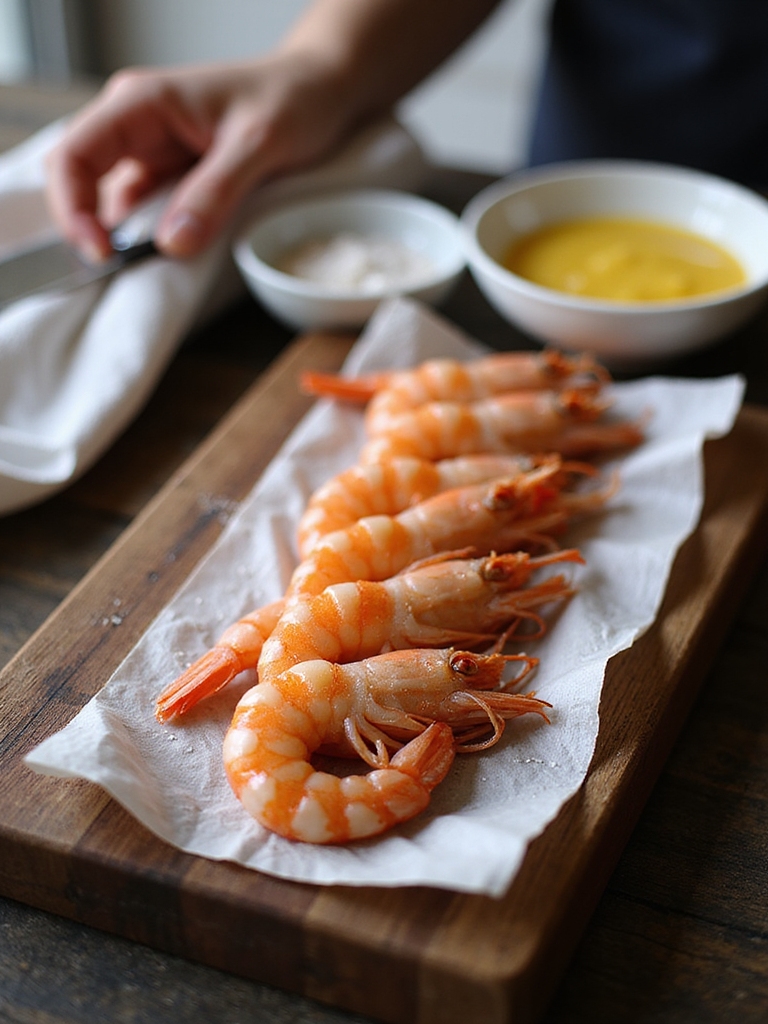
Peeling shrimp without mangling them keeps your pan-sizzle and presentation intact.
Take out the vein with a steady hand so you won’t get a bitter surprise mid-bite.
Then pat each shrimp bone-dry—moisture is the enemy of a crisp, caramelized crust.
Air fry for a few minutes at high heat to get a crispy crust while keeping the interior tender.
Peel Without Breaking
Start by loosening the shell at the head and working toward the tail so you strip the shrimp clean without cracking the meat—do it with a firm, steady pull rather than tugging and you’ll keep the body intact for nicer presentation and even cooking.
You want clean curves, not mashed shrimp.
Keep shells slightly chilled for easier removal, work over a bowl for quick cleanup, and save shells for stock if you like.
Be gentle around the tail fan if serving whole.
- Chill shells slightly.
- Use thumbs to lift at joints.
- Pull in one steady motion.
- Collect shells for stock.
If you need a quick, protein-rich option for busy days, consider snack-friendly carnivore ideas that pair well with prepped shrimp.
Devein Cleanly Every Time
You’ll want to slice down the back and lift the dark vein out in one clean pull—no poking around or leaving gritty surprises for your guests.
Work over a bowl, use a paring knife or clean fingernail, and keep the shell to guide your cut. Quick, confident motions preserve texture and speed service.
| Tool | Tip |
|---|---|
| Paring knife | Thin cut, steady hand |
| Toothpick | Gentle lift, minimal flesh damage |
| Fingers | Fast, tactile control |
Finish with a quick rinse if needed, then move on—your diners will taste the care. Many people find starting with simple, high-quality ingredients makes these dishes approachable and satisfying; consider focusing on simple carnivore meals when planning your menu.
Pat Shrimp Bone-Dry
Pat the shrimp bone-dry before they hit the pan—wet shells and flesh steam instead of sear, and you’ll lose that sweet, caramelized crust you came for.
You want firm, dry surfaces so butter or tallow kisses them into golden perfection. Dab gently with paper towels, give them a minute on a wire rack, then finish seasoning right before cooking so salt doesn’t pull moisture.
- Use paper towels or a clean cloth.
- Let shrimp rest briefly on a rack.
- Salt sparingly pre-sear; finish after browning.
- Don’t overcrowd the pan—space equals crust.
Dryness = flavor. For lazy cooks, sticking to simple fats like butter or tallow makes consistent results easy and reliable—try keeping a tub of rendered tallow on hand.
Which Fat to Use for Cooking (Butter, Tallow, Duck Fat)
Pick a fat that makes your shrimp sing: butter gives you that familiar, nutty richness and quick browning; beef tallow adds savory depth and a high smoke point for sturdier sears; duck fat brings a silky mouthfeel and a slightly gamey note that pairs beautifully with bigger, meatier crustaceans.
You’ll choose based on mood and match: butter for comfort and sauce-building, tallow when you want beefy backbone and crisp edges, duck fat when you crave luxury.
Use enough to coat the pan, let the fat flavor the shrimp rather than overpower it, and finish simply — salt, maybe a squeeze, and serve.
High‑Heat Sear for a Perfect Crust
Crank the pan until it’s seriously hot so the shrimp hit the surface and snap into a golden, lacy crust—this is where flavor and texture are made.
You won’t fuss with sauces here; searing concentrates sweetness and gives you that restaurant oomph.
Dry shrimp thoroughly, salt just before they hit the heat, and don’t crowd the pan.
Flip once, toward the end, for even color without overcooking.
- Use a heavy pan and a high‑smoke fat.
- Pat shrimp bone‑dry; seasoning sticks to dryness.
- Give space—work in batches.
- Watch time: quick sear, then rest briefly.
Butter‑Basted Garlic Shrimp (Carnivore‑Only)
Turn your pan to medium‑high, lay in cold butter, and let it foam gently while you drop in well‑dried shrimp; the sizzling, garlicky butter will spoon over them to build glossy flavor and a tender finish without any non‑animal additions.
You’ll tilt the pan, spoon molten butter repeatedly, and watch edges curl and brown in seconds.
Pull them at just‑opaque, rest briefly so carryover keeps them perfect.
Serve piled on warm plates, spooning extra butter over top.
It’s simple, showy, utterly carnivore, and proves you don’t need anything green to make shrimp feel restaurant‑worthy.
Make a Brown Bone‑Marrow Jus
Brown the marrow bones until they’re deeply caramelized—this is where the jus gets its soul—then deglaze the pan and coax every browned scrap into a silky, meaty sauce you’ll want to spoon over everything.
You’ll render marrow, reduce with a splash of beef stock, and strain for gloss and purity.
Taste for depth, not salt; marrow brings richness, not sodium.
- Roast bones until dark, not burnt.
- Deglaze with hot stock, scraping fond.
- Reduce to nappe consistency, skim fat if needed.
- Strain, season lightly, finish with a drip of marrow.
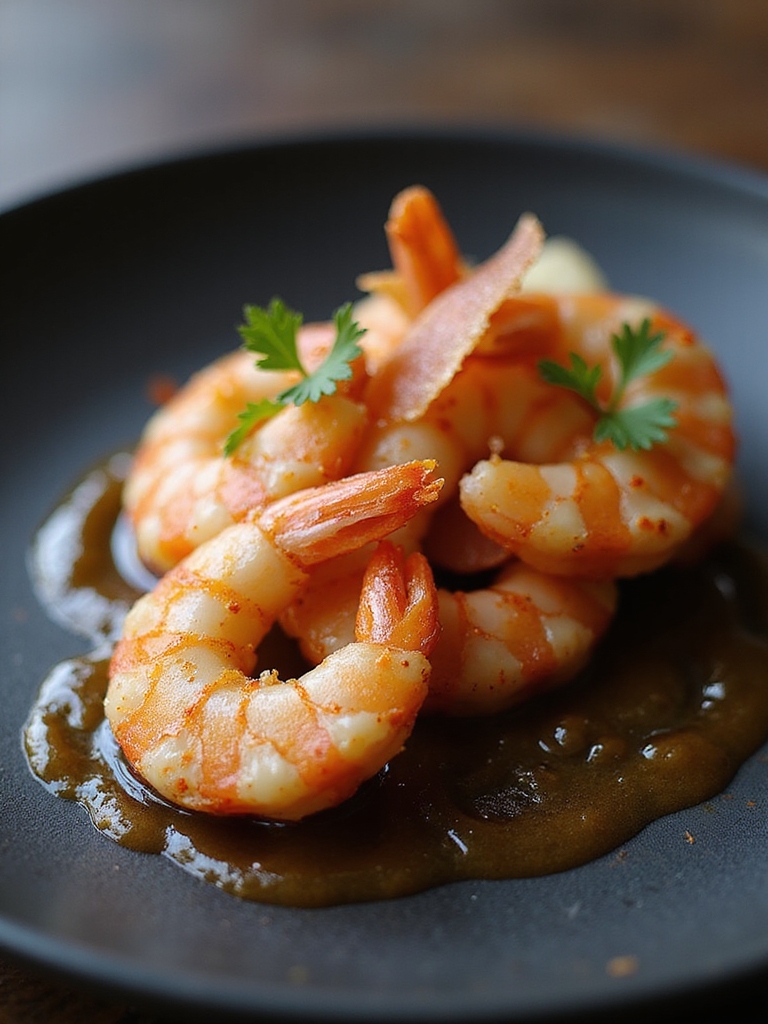
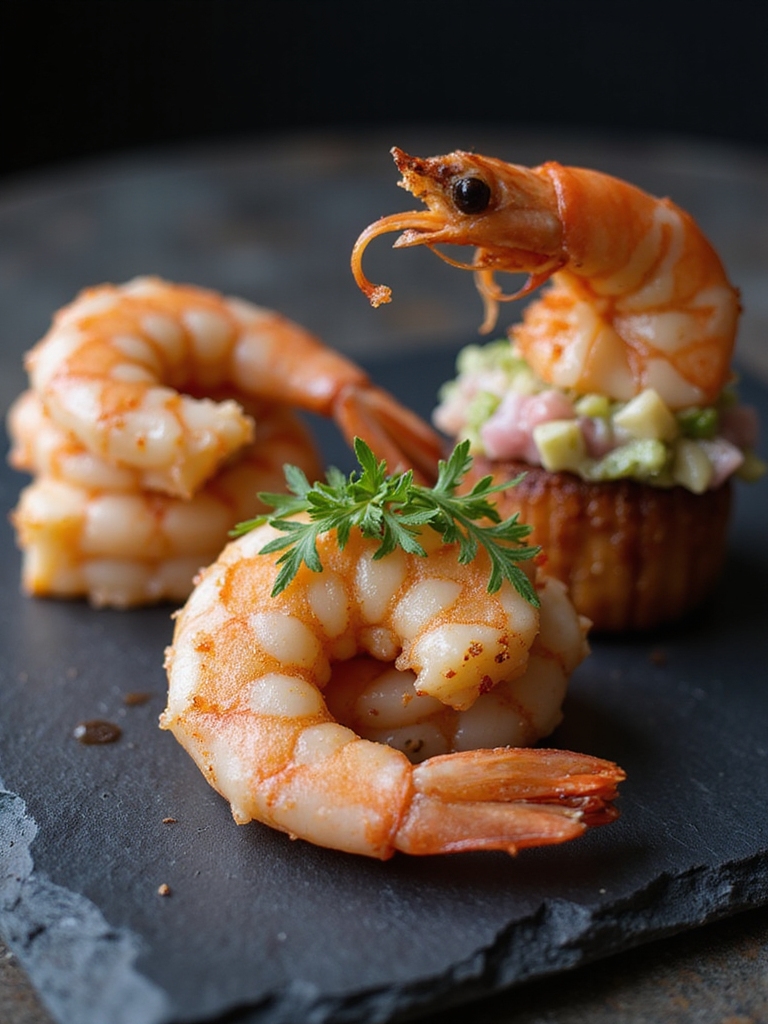
Charred Shrimp With Tallow and Duck Fat
You’ll love how the tallow and duck fat seal in shrimp juices and give you a perfectly crispy exterior with almost no fuss.
The fats bring a deep, savory richness that turns simple shrimp into something brazenly indulgent.
Keep the pan hot and the bites quick, and you’ll get that winning contrast of char and silky flavor every time.
Perfectly Crispy Exterior
Sear shrimp hard in a smoking-hot pan so the shells blister and the flesh snaps to the bite — that’s the secret to a perfectly crispy exterior.
You want a quick, unapologetic char: don’t crowd the pan, flip once, and let steam escape so texture wins.
Dry shrimp well and salt just before cooking; wetness is the enemy. Finish with a brief rest so juices settle and the crust stays intact.
- Use high heat and a roomy pan.
- Pat shrimp bone-dry.
- Flip only once.
- Rest briefly before serving.
Rich Fat Flavor
When you toss shrimp into a screaming-hot pan slicked with a mix of tallow and duck fat, they take on a deep, savory hit that butter alone can’t touch; the rendered fats carry char and umami into every crevice while crisping the shells to a brittle, flavored snap.
You’ll notice how tallow gives beefy depth and duck fat offers silky richness, so each bite feels layered rather than one-note.
Salt and a quick squeeze of lemon finish it, cutting through the fat and highlighting sweetness. Serve immediately—you want that contrast of charred exterior and plush, unctuous interior.
Silky Poached Shrimp in Rich Bone Broth
If you want shrimp that practically melt on your tongue, poaching them gently in a deeply savory bone broth is the trick—low heat keeps them silky while the broth adds umami and body without any starch or filler.
You’ll taste pure seafood sweetness amplified by marrow richness; don’t rush it or you’ll lose that tender texture.
Keep aromatics minimal—think bay, peppercorns, a scrap of onion—so shrimp and bone do the talking.
Finish with a drizzle of rendered butter for shine.
- Use cold broth, bring to warm, not simmer.
- Add shrimp, watch color change.
- Poach briefly, 2–4 minutes.
- Rest before serving.
Sous‑Vide Shrimp for Exact Doneness
Although precision sounds clinical, sous‑vide lets you dial shrimp to the exact tenderness you want and then relax while it happens; you’ll set the temperature, seal the bag with a touch of fat and aromatics, and walk away knowing every bite will be consistent.
You’ll pick a target—120°F for tender, 130°F for firmer—and trust time, not guesswork. A quick chill in ice stops carryover if you’re not serving immediately.
Finish briefly in a hot skillet or under a broiler for color if desired, but keep it short: you’ve already done the heavy lifting, and the texture will sing.
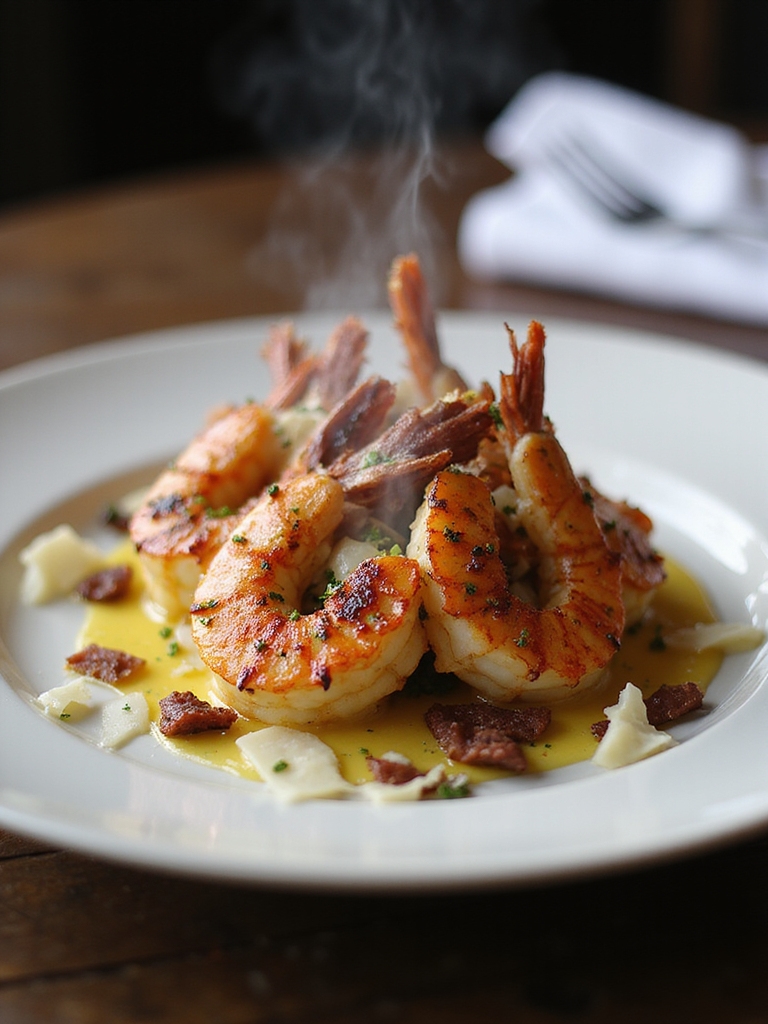
Plating Tricks for Fine‑Dining Carnivore Shrimp
Now that your shrimp are cooked precisely, think about how they’ll look on the plate—because texture and temperature matter, but so does the moment they meet the eye.
You want contrast, clean lines, and a little mischief: a smear of rendered beef tallow, a tower of charred shrimp tails, and a glossy pan jus spooned with intention.
Keep garnishes carnivore-friendly — crisp pork crackling, shaved cured ham — for crunch and perfume without weeds.
Aim for balance: weight, color, and bite.
- Arrange shrimp in a stagger, not a pile.
- Use negative space generously.
- Add one crunchy element.
- Finish with a tiny glossy sauce dot.
Timing and Staging When Serving Multiple Components
You’ll prep each element to finish at the same moment so shrimp don’t sit lonely on a cold plate. Keep hot items on one heat zone and chilled or room-temp garnishes elsewhere to protect texture and temp.
Plate in a steady sequence—sauces first, shrimp next, finishing touches last—so service flows without frantic juggling.
Prep Components By Finish Time
When you’re juggling sizzling shrimp, a butter-poached sauce, and a quick charred vegetable, think finish times the way a stage manager thinks cue lights — line everything up so each component hits the table at its peak.
You’ll prep by reverse-engineering service: decide what must be hot, what tolerates rest, and what benefits a brief finish.
Par-cook longer elements, chill them, then reheat gently; keep sauces warm in a shallow pan; plan a two-minute shrimp sear last.
Timing saves flavor and dignity.
- Par-cook and chill.
- Warm sauces low and slow.
- Reserve quick-sear protein.
- Plate in stages.
Keep Heat Zones Separate
If you want everything to hit the plate at the right temperature, carve your cooktop into distinct heat zones and treat each like its own tiny stage—high for quick sears, medium for saucing, low for holding and finishing.
You’ll juggle shrimp, butter, and any crisped bacon without melting texture or patience. Think of timing like choreography: start the slow bits earlier, keep fast bits visible, and move finished pieces to the low zone to rest.
| Zone | Purpose |
|---|---|
| High | Sear shrimp fast |
| Medium | Reduce sauces gently |
| Low | Hold, finish, rest |
Sequence Plating For Flow
Like a conductor cueing sections, you’ll plate in a deliberate order so every component arrives at the diner exactly as intended; start with the elements that need a stable base, add sauces and delicate garnishes last, and reuse low-heat zones to keep finished items warm without overcooking.
You’ll work quickly, confidently, and with purpose, so shrimp stay snappy and bacon stays crisp.
Think choreography: staging, timing, and tiny adjustments make home plates sing.
- Lay a warm protein base first.
- Arrange shrimp neatly, leaving space.
- Spoon sauces sparingly, near but not over shrimp.
- Add fragile garnishes last.
Fixes for Rubbery, Underseasoned, or Oily Shrimp
Although shrimp can turn rubbery, underseasoned, or greasy in a blink, you can rescue most mishaps with a few smart moves and zero guilt.
If they’re rubbery, slice them into thin pieces or chop for a creamy shrimp salad or fast stir‑in—texture disappears, flavor stays.
For blandness, finish with a quick fry in butter, a sprinkle of fine salt, and a squeeze of lemon or vinegar to lift taste without carbs.
If oily, blot, chill briefly to let fat firm, then drain and reheat briefly in a hot pan to crisp edges.
Small fixes, big payoff.
You’ve got the tools and the taste—now get to work. Treat shrimp like steak: dry, hot, and unafraid, and they’ll reward you with bronze crust and sweet, yielding meat.
Keep fats, broths, and cures simple, plate warm, and finish with a sly lemon squeeze to cut the richness.
Practice once and you’ll see: small details make a big difference—so respect the shrimp, and they’ll sing like a sous‑chef in your skillet.