I’ve rounded up 19 smart, space-saving kitchen island ideas with built-in seating that fit tight layouts and keep prep, dining, and chats flowing. Think all-in-one benches, breakfast-bar heights, and cantilevered bases that maximize legroom. I’ll show you how to mix materials for warmth, wire in hidden outlets, and use curved edges to invite conversation. With clever lighting and compact layouts, you’ll get a polished hub that feels bigger than it is—stick with me to learn more.
What Makes a Small Kitchen Island With Seating Work

A small kitchen island with seating works best when the space around it feels intentional, not crowded.
I design around flow, not cliques, so you can move freely and conversations stay comfy.
Pick a height that invites lounging, add clear surfaces, and stash essentials out of sight.
Keep lines clean, textures warm, and seating integrated, not shoved, for effortless, everyday polish.
Incorporating space-saving designs can further enhance the functionality of your small kitchen island.
Key Criteria for Choosing an Island With Seating
So, after nailing a small island with seating, the next step is figuring out what actually makes it work in practice.
First, measure the flow: clearance for chairs, leg room, and prep space.
Then pick height, edge exposure, and seating depth that invite conversation.
Finally, plan power access and lighting to keep every chat, meal, and recipe scroll effortless. Additionally, consider incorporating small kitchen layouts that maximize your space for a more efficient design.
All-In-One Islands With Built-In Benches
I’m convinced built-in benches on all-in-one islands rethink seating with a clean, unified line. We’ll explore smart bench layouts, clever nooks, and how to tuck seating where space is tight without sacrificing flow. And I’ll show you how materials prioritize comfort, so long chats don’t end with sore backs or restless legs. Incorporating small kitchen island ideas can maximize functionality while maintaining aesthetic appeal.
Built-In Bench Layouts
Built-in bench layouts turn a kitchen island from a pretty centerpiece into a people-friendly workhorse. I’ll walk you through choosing lengths, angles, and legroom that invite conversation without cramping circulation. Think U-, L-, or straight run benches paired with task lighting and power access. Match seat heights to counter stools, and keep clear pathways for effortless flow. Practical, polished, doable—your island earns its keep. Additionally, consider incorporating multifunctional island solutions that maximize space efficiency and enhance usability in your small kitchen.
Space-Saving Seating Ideas
If you’re aiming for space-saving seating, all-in-one islands with built-in benches are the smart move: compact footprint, built-in comfort, and a social hub all rolled into one.
I love how the benches tuck neatly against walls or counters, freeing floor space.
Choose slim legs, hidden storage, and a tidy overhang for a sleek, practical gathering spot. Additionally, these designs can incorporate creative kitchen island solutions to maximize functionality without sacrificing style.
Comfort-Driven Materials
Comfort-driven materials turn a compact island from practical to inviting.
I mix durable surfaces with warm textures, so built-ins stay comfy after spill-worthy meals. Think butcher-block prep paired with easy-clean quartz, or a linen-toned seating cushion that resists crumbs.
I choose integrated benches that hide storage, keep lines clean, and invite lingering chats—without fussing over maintenance. Modern kitchen islands are often designed to be the heart of every home, creating a central gathering space for family and friends.
Perfection, served simply.
Breakfast-Bar Heights: Ideal Heights and Proportions

I’ll break down the sweet spot for a breakfast bar that feels effortless to use and look at.
The goal is a height that makes bench-sitting, quick meals, and show-off snacks all pleasantly comfortable.
Let’s map out ideal heights and proportions so your island earns its keep without asking you to crane your neck. Additionally, consider that unique island designs can enhance both functionality and aesthetics in your kitchen.
Ideal Breakfast-Bar Height
A good breakfast-bar height is all about balance: it should feel natural to chat with someone across the counter while still letting you slide a plate in and out without craning your neck.
- Aim for 42 inches for a comfortable conversation zone.
- Use 34–36 inches for a more casual bite.
- Adjust with stools that let feet rest flat and hips clear.
Incorporating elements from small kitchen peninsula ideas can enhance the usability and aesthetic of your breakfast bar.
Proportions For Comfort
Think of breakfast-bar heights as a simple equation: the right distance between you and your guests adds ease to conversation and flow to service.
I tune proportions by comfort, not whimsy. Aim for 42 inches max for tall folks, 36 to 38 inches for regular counters, and seat depth that leaves hip room.
Subtle overhangs prevent crowding; clear sightlines keep the kitchen friendly.
U-Shaped Seating Niches for Tight Spaces

Have you ever tried to fit a cozy dining nook into a tight kitchen? I have, and a U-shaped seating niche nails it.
It maximizes corner space, keeps conversation flowing, and hides clutter.
Try:
- inset stools
- angled backrests
- slim table extension
This setup feels intimate yet efficient, turning small footprints into social wins without crowding prep zones.
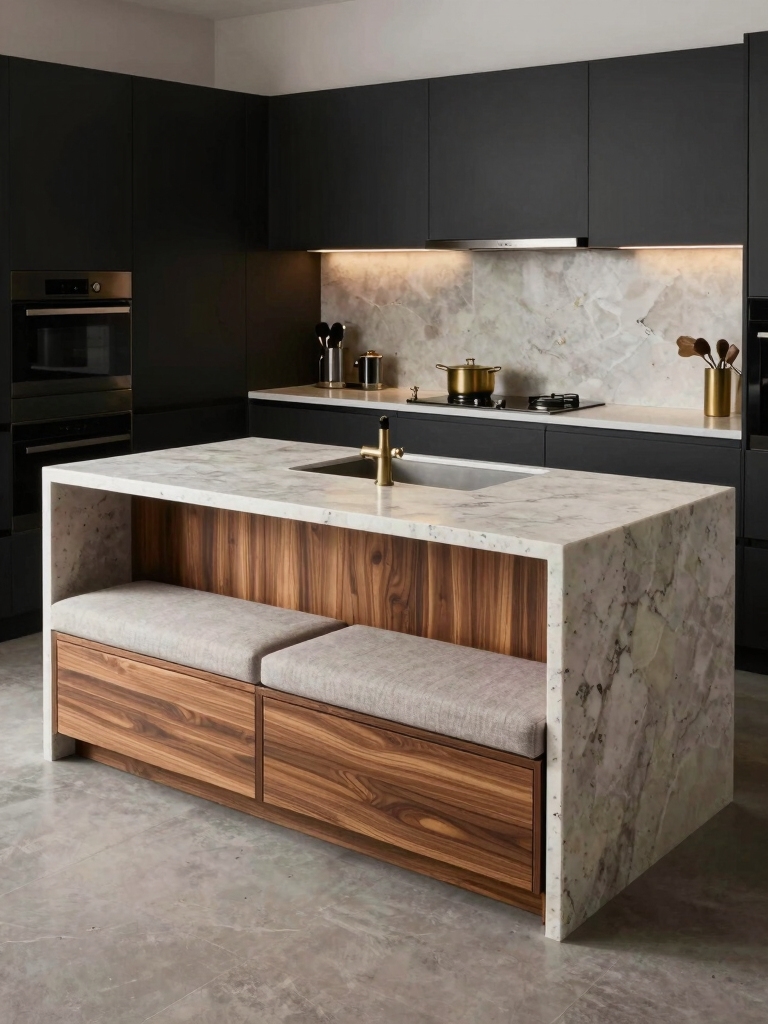
Floating Islands With Hidden Storage and Seating
Floating islands with hidden storage and seating offer a sleek, space-smart solution that hides clutter while delivering counter-height versatility.
I design yours to maximize storage behind panels and drawer stacks, then pair a comfortable overhang for casual dining.
You’ll gain prep space that doubles as a homework nook, plus easy access to utensils—without sacrificing a clean, curated look.
Easy, right?
Narrow Islands That Maximize Legroom
I’m sharing three tight, purposeful ideas to keep your kitchen moving: narrow proportions that feel comfy in practice, widths tuned for open pathways, and smart seating access that doesn’t block the work zone.
I’ll show you how to preserve legroom while still giving guests a place to perch, with clear choices you can actually implement.
Let’s talk concrete layouts and practical tweaks that balance flow, seating, and style.
Narrow Proportions for Comfort
If a kitchen’s layout leaves you with a narrow island, you can still boost comfort by prioritizing legroom and clear traffic paths. I’ll show you how:
- Measure knee clearance and keep it at least 28 inches.
- Choose a slim, impact-resistant top to maximize usable space.
- Install push/pull seating that tucks away neatly when not in use.
Legroom Through Widths
Legroom through width isn’t magic—it’s smart planning.
I design narrow islands that keep paths clear while still hosting seating. Think slim profiles, rounded corners, and pull-up stools you can slide under without bumping knees.
I measure knee bend, cabinet depth, and toe space, then zone flow so guests mingle without crowding prep zones.
Simple, practical, stylish restraint.
Seating Access Strategies
A skinny island is only as good as the seats it invites, so I tailor seating so guests can pull up and chat without doing head-in-kettles gymnastics.
- Opt for backless stools that tuck fully beneath.
- Choose cantilevered or pedestal bases for footroom.
- Use slim, armless chairs with narrow profiles for easy conversations.
Corner Islands With Built-In Seating
Corner islands with built-in seating are a smart way to maximize function without sacrificing style.
I love tucking a small stool under the overhang and letting guests perch while I chop.
Choose a compact L-shape for flow, add a slim shelf for cookbooks, and pick a durable, easy-clean surface.
We’ll both enjoy efficient, inviting mornings.
Drop-Leaf and Flip-Top for Flexible Layouts
Drop-leaf and flip-top islands are the gymnasts of small kitchens: they fold, spring back, and vanish into a tighter footprint when I don’t need them.
I love their flexibility, and you’ll too.
- Save counter space
- Create spill-free dining
- Reconfigure instantly for guests or chores
Chalkboard or Illuminated Seating Edges for Mood
Chalkboard edges or softly lit seating lines can transform a small kitchen from functional to memorable without stealing footprint or clutter.
I sketch quick moods with chalk or glow, then notice how subtle cues spark conversation and keep tasks flowing.
A skinny cue light adds ambiance, while a chalk jot keeps notes handy.
Practical charm, zero fuss, clear style.
Enjoyable, efficient, inviting.
Seated Workstation Islands for Multitasking
I like to think of a seated workstation island as a multitasking ally: a compact surface where you prep, type, and chat with a quick swap of stools.
1) Choose a height that suits sitting and standing breaks
2) Add a slim rolling cart for quick file swaps
3) Layer outlets and USB hubs for gadgets on demand
Witty, practical, chic guidance for busy days.
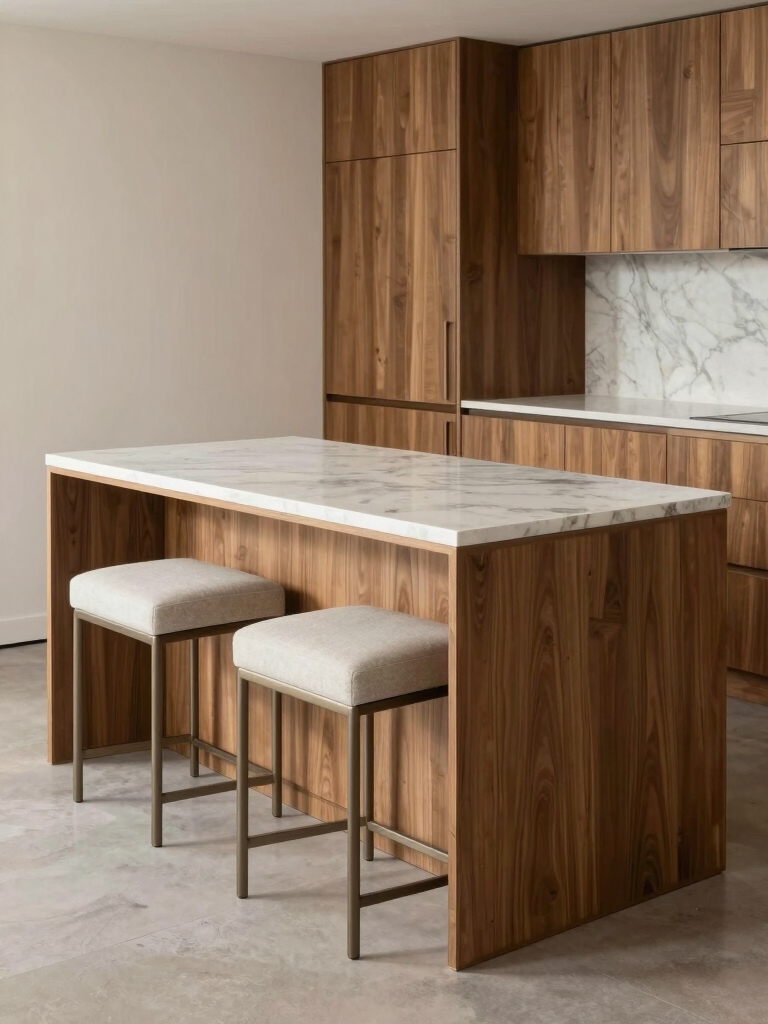
Mixed-Material Islands That Anchor Small Kitchens
Mixed-material islands bring a grounded, gallery-like vibe to small kitchens, blending warmth, texture, and a hint of industrial edge.
I lean into contrast—bold countertops with sleek cabinets, or timber tops paired with steel accents.
Keep lines clean to avoid crowding. Use integrated seating sparingly, let materials speak, and seal surfaces well.
Practical, stylish, and remarkably versatile.
Banquettes and Curved Seating on Islands
Banquettes and curved seating on islands add a welcoming, social pulse to small kitchens.
I mix comfort with function, showing you how to shape intimate, conversation-friendly corners.
Here are quick ideas:
- Choose curved stools for flow
- Build a slim banquette with storage
- Use high-contrast cushions for personality
Ready to host, without sacrificing space.
Hidden Seating: Pull-Out Stools and Benches
Hidden seating can be a game changer in small kitchens, letting you tuck away extra spots until they’re needed.
I love pull-out stools that vanish into the island when not in use, then glide out with a polite whisper when guests arrive.
Benches collapse to slim profiles, freeing floor space while still offering comfy perch for quick meals or chats.
Smooth, simple, practical.
Power and Plumbing-Smart Islands for Sinks and Outlets
I’ll walk you through smart island layouts that keep power and plumbing tidy without tripping over them.
We’ll map out power access points, plan plumbing routes, and wire outlets safely so your sink and chargers never feel left out.
Let’s cover safety basics first so your island stays functional and stylish, not a shock hazard or a leak waiting to happen.
Power Access Points
Power access is where smart island design really earns its keep, especially when you’re juggling sinks, outlets, and the occasional blender on a tight countertop.
I’ll show you three essentials for seamless power:
- Hidden outlets that pop when needed
- USB ports near prep zones
- GFCI protection with clean cord routing
Effortless, sleek, and ready for anything.
Plumbing Layout Considerations
If you’re planning a smart island with sinks and outlets, you’ve got to map plumbing and power hand in glove from the start.
I sketch routes, note clear clearance, and pair venting with trap placement so nothing fights gravity.
Keep access panels handy, and batch rough-ins before countertops go in. Precision saves leaks, trips, and frustrated guests mid-dinner.
Island Outlet Safety
So you’ve mapped every vent and trap like a kitchen-borne architect; now it’s time to pair that plumbing-savvy with plug-and-outlet know-how for a truly smart island.
Safety matters first, friend. I’ll keep it tidy and legal.
1) GFCI outlets installed per code
2) Childproof covers when not in use
3) Waterproof seals around splash zones
Materials That Invite Conversation and Are Easy to Clean
Materials that invite conversation and are easy to clean come down to texture, not just looks.
I’m sharing practical picks that stay friendly to spills and fingerprints: sealed butcher-block for warmth, easy-clean quartz for sheen, and ceramic or glass accents that resist smudges.
Pair with matte finishes to hide wear, and keep a damp microfiber cloth handy for instant polish.
Style-Forward Island Ideas: Mid-Century to Modern
When you’re choosing a style-forward kitchen island, mid-century curves and modern minimalism aren’t lockstep rivals—they’re opportunities to tell a cohesive story in your space.
- Mix warm woods with sleek metal accents
- Embrace rounded edges for approachability
- Pair iconic silhouettes with current hardware
I’ll guide you: lean into contrast, curate a bold focal point, and keep proportions honest.
Style-smart, confident, editable.
Budget-Friendly Built-Ins: Affordable Seating Solutions
Budget-friendly built-ins can transform your kitchen without breaking the bank, especially when you focus on seating that pulls its weight and looks effortless.
I’m showing you simple, sturdy options: drop-in benches from Ikea knockoffs, faux-leather cushions, and old dining chairs repurposed under a slim overhang.
Add hidden storage under seats; small-space wins feel big with smart, budget-conscious choices.
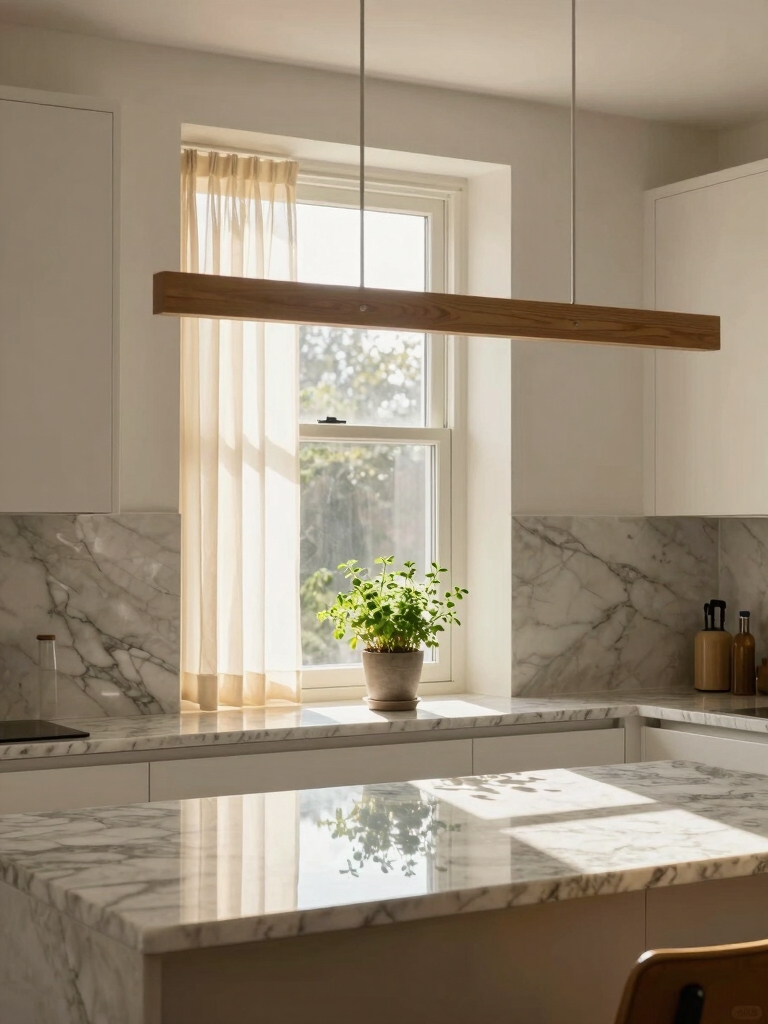
Lighting Strategies for Islands With Seating
Let me walk you through lighting layers that keep your island both functional and flattering for seated moments.
We’ll mix ambient, task, and accent cues to highlight the seating area without glare.
Think of it as a simple recipe: dimmable fixtures, smart zoning, and a dash of under-counter glow to guide the eye.
Lighting Layering Techniques
Layering lighting around a kitchen island with seating isn’t just a nice-to-have—it’s a smart move that blends function with mood.
I’ll show you how to layer, balance, and boost ambiance without clutter.
- Highlight work zones with focused pendant clusters
- Add ambient wall wash to soften edges
- Use dimmers to shift energy from prep to post-meal chats
Island Seating Illumination Tips
A well-lit island with seating isn’t just for show—it keeps conversations flowing and meals memorable.
I let task lighting guide tasks, while pendant glow creates intimacy for chats. Use dimmable LEDs to shift mood, and under-counter strips for safe prep.
Place two fixtures over seating, one above the cook zone, and guarantee color temperature stays consistent for a unified look.
Conclusion
I used to think built-in seating on small islands was a pricey pipe dream, but the truth is simple: it’s all about clever space math and comfy confidence. If you test one idea, you’ll likely test another, and that trial-and-error vibe makes the whole kitchen feel livable. So trust the process, pick a style that sparks joy, and remember that curves, height, and lighting are your backstage crew—tuning them bakes you a space everyone wants to gather in.