I’ll show you how to get instant style with minimal fuss: start with a 3‑minute sweep, group essentials on a wooden tray, and pick one strong focal piece like a vintage bowl or tall vase to anchor the space.
Layer mixed‑wood cutting boards, add a sculptural fruit bowl, and corral appliances in a tidy zone with baskets or canisters. Keep elbow room for prep, swap seasonal accents, and follow simple scale and rule‑of‑three tips to finish — keep going and I’ll share the step‑by‑step.
3-Minute Declutter + Styling Checklist

I like to start with a quick sweep—grab a basket, toss anything that doesn’t belong on the counter, and carry it away; a few minutes of focused clearing makes styling feel effortless.
Then I group essentials: cutting board, oil, a small plant. I keep clutter minimal, rotate seasonal accents, and leave a clear workspace.
Simple edits make the whole space welcoming. A tidy counter with grouped essentials always elevates the kitchen’s look.
How to Assess Your Counter: Size, Use, and Clearance

Before we start styling, I figure out the counter’s exact dimensions and shape so I know what fits and where.
I watch how we use the space each day and note traffic patterns so my decor doesn’t get in the way.
Then I check clearance around appliances to keep things functional and safe while still looking cozy.
I also apply practical storage hacks from proven kitchen organization strategies to keep the space tidy and efficient.
Counter Dimensions And Shape
When I’m sizing up a counter, I first look at its actual dimensions and how I use the space day-to-day — length and depth tell me what tools fit, while the shape and clearance tell me how comfortably people can move and work.
I consider edges, overhangs, and cozy corners for styling and function.
- Rectangular vs. island balance
- Depth for appliances
- Overhang seating fit
- Rounded edge ergonomics
I also think about how to layer accessories to enhance both form and function, especially when planning for countertop decor placement.
Daily Use And Traffic
Since we use this counter every morning and through busy dinner prep, I size it by watching how people move and where things actually end up — that tells me whether I’ve got enough working area, safe clearances, and room for traffic to flow without elbows colliding.
I note hotspots, stash zones, and walk paths, then trim decor to keep essentials handy and traffic easy.
Stagers also recommend keeping the island scaled for movement and adding a balanced focal point to elevate style without blocking workflow.
Clearance Around Appliances
If I’m honest, the easiest way I size a counter is by measuring the clearance around each appliance and imagining the motions I make while cooking—opening oven doors, swiveling a mixer, or pulling out a toaster tray.
I keep things practical, cozy, and uncluttered.
- Allow elbow room for prep and appliance handles
- Keep a clear zone beside fridge and oven
- Stow small appliances when not used
- Consider swing arcs of doors and lids
I also rely on smart storage ideas to eliminate clutter and preserve those clear work zones.
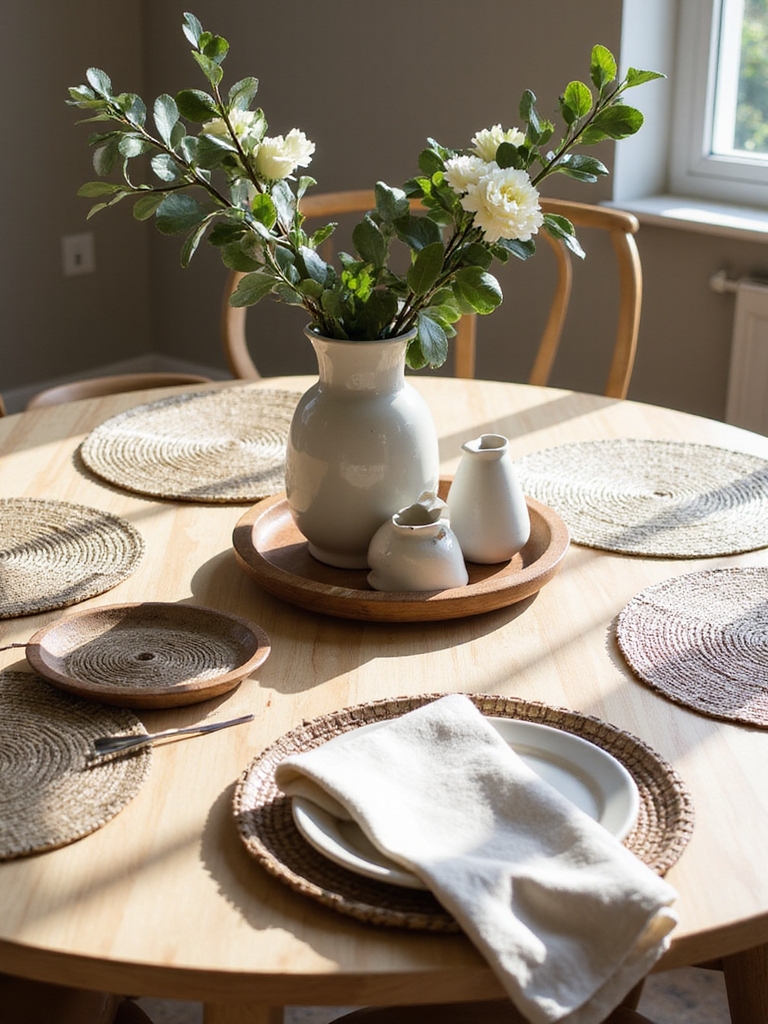
Choose a Focal Point for Your Counter

I like to start by picking one strong statement piece—like a vintage bowl or a bold vase—to anchor the whole counter.
Then I usually add a piece of artwork nearby to tie the look together and give the eye a resting point.
If you prefer something useful, a functional centerpiece—fresh fruit, a wooden cutting board, or a pretty utensil crock—can be both beautiful and practical.
For a cohesive modern look, balance your pieces with clean lines and simple textures to reflect urban kitchen style.
Statement Piece Selection
When I think about a kitchen counter’s personality, the statement piece is what brings everything together—it sets the tone and tells a small story about the room.
I pick one object that sings against wood and stone, then keep surroundings simple. It should feel lived-in, useful, and timeless.
- Vintage pitcher with fresh herbs
- Handcrafted bread board
- Bold ceramic vase
- Cast-iron skillet on display
Professional Kitchen Tray Decor Ideas for Countertop Order can help organize those items into a cohesive vignette with stylish tray decor.
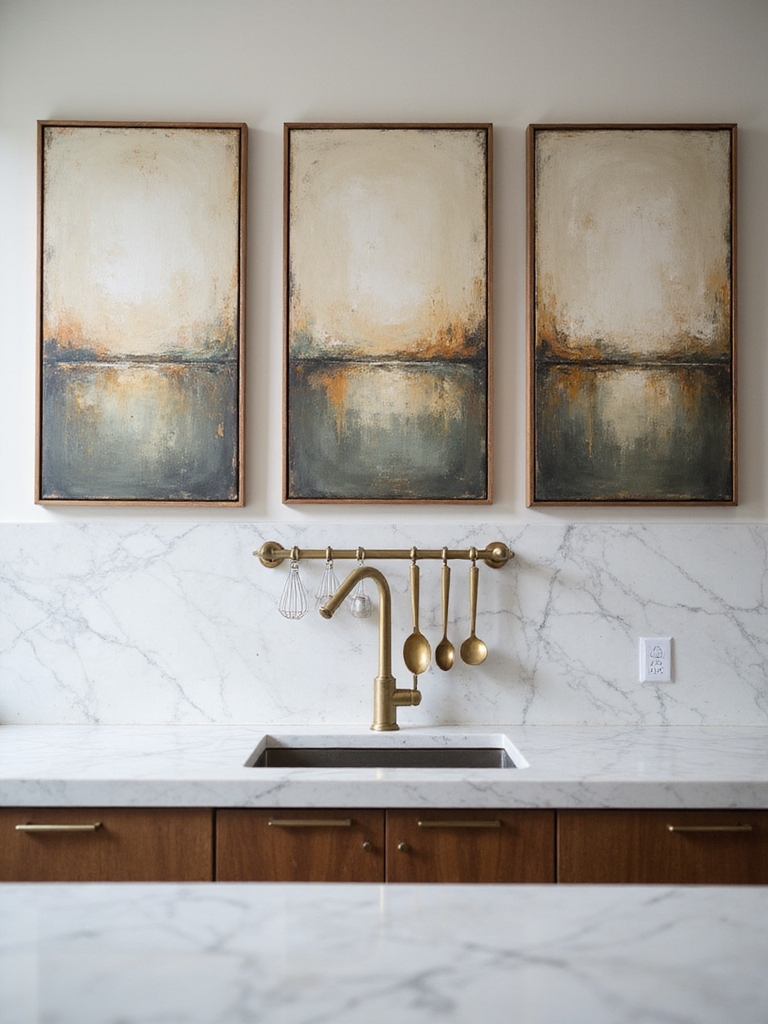
Anchor With Artwork
After picking a statement piece, I like to anchor the counter with artwork that gives the whole vignette direction and heart.
I choose a simple, rustic print or small framed painting that complements colors and textures.
Lean it or hang low, keep it slightly off-center, and pair with a ceramic jar or woven tray.
It instantly feels curated, cozy, and intentional.
Consider adding layered objects like bowls and books to create depth and visual balance.
Functional Centerpiece Options
Let’s pick a focal point that’s as useful as it’s beautiful — a functional centerpiece can pull the whole counter together while serving a real purpose.
I love choosing pieces that look lived-in and work hard: they anchor the space without fuss, invite touch, and make cooking feel more homely.
- Wooden bowl with fruit
- Ceramic utensil crock
- Cast-iron skillet on a trivet
- Fresh herb planter
Layered Cutting Boards for Texture and Function

With a stack of mixed woods leaning against the backsplash, I get both texture and utility from layered cutting boards; they instantly warm the counter while being ready for slicing, serving, or protecting stone from hot pans.
I mix sizes, shapes, and grain directions so each board reads like a small rustic vignette—easy to grab, swap, and tuck away, practical and charming.
Sculptural Fruit Bowls That Double as Decor

Layered cutting boards bring warmth and function to the counter, and I like to carry that same tactile charm into sculptural fruit bowls that act as art.
I pick pieces with organic shapes and weathered finishes, letting fruit become part of the vignette while keeping the look relaxed and usable.
- Hand-carved wooden bowls
- Hammered metal forms
- Glazed ceramic sculptures
- Woven wicker nests
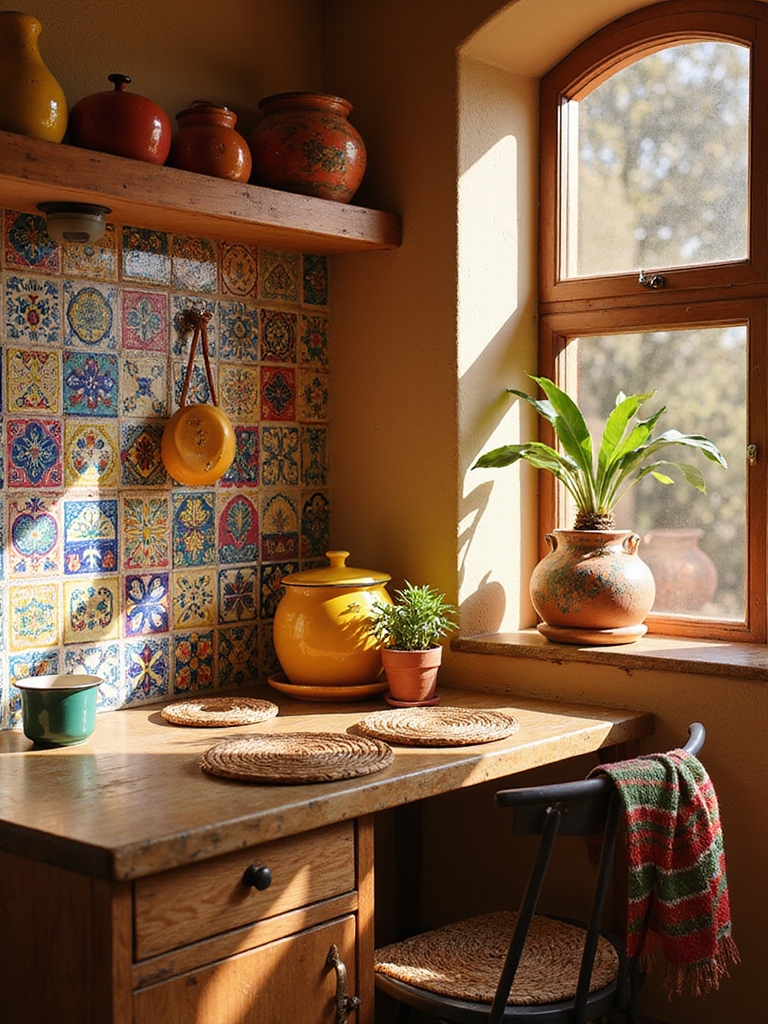
Curated Canisters: Mix Materials and Sizes
I like grouping canisters that mix metals and textures—copper, matte ceramic, and woven baskets play so well together.
I’ll vary heights and widths to create a casual rhythm along the counter. I also keep them organized by function so the arrangement looks steady and actually works for cooking.
Mix Metals And Textures
Because I love a kitchen that feels collected, I mix canisters of different materials and heights to give the counter a lived-in, purposeful look.
I lean into mixed metals and textured surfaces to keep things cozy and interesting, balancing shine with patina and matte clay with hammered brass.
- Copper lid with ceramic jar
- Brushed steel next to raw wood
- Aged brass accent piece
- Tactile linen-wrapped canister
Vary Heights And Widths
Start by grouping canisters of different heights and widths so the arrangement reads like a small, intentional collection rather than a row of identical jars.
I love mixing ceramic, glass and metal pieces—taller jars anchor the back, squat ones sit forward.
The variety feels lived-in and cozy, and it lets each container show its character without feeling cluttered or fussy.
Functional Grouping And Flow
Once you’ve played with heights and widths, think about how those pieces work together when you reach for them—group like items by use so the counter flows with your routines.
I arrange curated canisters—mixing ceramic, glass, and metal—in clusters that feel lived-in and tidy, so daily tasks are easy and charming.
- Cooking essentials: utensils, spatulas
- Coffee zone: beans, filters
- Baking corner: flours, sugars
- Quick snacks: fruit, granola
Use Trays to Corral Small Appliances and Clutter
I like to corral my toaster, blender, and that ever-growing pile of chargers on a single tray—it’s the easiest way I’ve found to make clutter look intentional rather than chaotic.
A wooden or metal tray anchors items, defines a zone, and makes wiping crumbs simple. I group frequently used tools, hide cords, and rotate decorative pieces seasonally for a tidy, lived-in counter.
Counter-Friendly Greenery: Low-Maintenance Plants
After I corral appliances on a tray, I like to add a little life with counter-friendly plants that won’t demand much from me. They warm the space, smell fresh, and feel lived-in without fuss.
- Potted rosemary for scent and sturdiness
- Small snake plant for low light tolerance
- Spider plant to trail softly
- Succulent trio in a shallow dish
Style Cookbooks So They Look Intentional
Layer your cookbooks so they feel like part of the decor, not clutter—stand a few favorites upright with a simple bookend, lay a beloved vintage volume flat, and tuck a recipe card or small herb sprig between the pages for a lived-in touch.
I arrange titles by color and size, spill a wooden spoon nearby, and keep volumes within reach so style and usefulness coexist.
Lighting Accents for Counter Styling (No Rewiring)
I love how a little light can make countertops feel cozy and purposeful, and you don’t need an electrician to get that glow.
Simple solutions like under‑cabinet stick‑on lights, plug‑in pendant lamps, or battery‑operated LED strips give instant warmth and highlight your favorite bowls and herbs.
Try one or a mix to see what softens the space and makes those rustic touches pop.
Under-Cabinet Stick-On Lights
I often reach for stick-on under-cabinet lights when I want instant warmth on my counters without calling an electrician; they peel and stick in minutes, plug into a nearby outlet or run on batteries, and give a soft, usable glow that makes prep and presentation feel cozier.
- Easy installation, no tools required
- Dimmable options for mood control
- Warm LED tones for rustic charm
- Conceals neatly under grainy wood cabinets
Plug-In Pendant Lamps
You can instantly dress up a countertop without calling an electrician by hanging a plug-in pendant lamp—I’ve done it in my own kitchen and love how it adds height and personality without the mess.
I pick woven shades or aged metal for a cozy, rustic vibe, plug into a nearby outlet, and use a simple cord cover. It’s instant charm and focused task light.
Battery-Operated LED Strips
Often I reach for battery-operated LED strips when I want soft, no-fuss lighting to highlight a countertop vignette.
I peel, stick, and tuck them under shelves or behind jars for a cozy glow that feels lived-in, not staged.
They’re perfect for renters, weekend refreshes, or seasonal displays.
- Easy installation, no tools
- Adjustable length and warmth
- Hidden with trim or plants
- Battery life varies by use
Use Textiles: Runners, Folded Towels, and Placemats
I like to layer textiles on the counter to bring warmth and personality to the kitchen. I’ll use a linen runner, fold a few dish towels nearby, and tuck a woven placemat under a bowl of fruit.
Textiles soften hard surfaces, add color and texture, and create cozy, lived-in charm. I switch pieces seasonally for a fresh, effortless look.
Grouping by Three and Scale Rules for Balance
When I arrange objects on the counter, I rely on the rule of three and simple scale rules to keep things feeling intentional, not cluttered.
I mix heights, textures, and color weight so each trio reads like a small vignette. Keep negative space; let pieces breathe.
- Tall vase, medium bowl, small candle
- Vary material and finish
- Anchor with a darker tone
- Leave empty counter between groups
Practical Storage-First Decor: Baskets, Rails, and Appliance Homes
Think of storage-first decor as dressing your counter for everyday life—I lean on baskets, rails, and designated appliance homes to make things useful and beautiful at once.
I tuck fruit and linens in woven baskets, hang frequently used tools on a simple rail, and create cozy niches for mixers and toasters. It keeps clutter down and gives the kitchen a lived, welcoming rhythm.
Seasonal Swaps to Refresh Counters Cheaply
If you want to freshen your counters without spending much, I swap a few small things each season to change the whole mood: a bowl of bright citrus for winter, a cluster of dried wheat in autumn, lightweight linens and a sprig of herbs in spring.
I keep swaps simple, cozy, and functional.
- Mason jar herbs on a sunny sill
- Neutral linen runners
- Ceramic fruit bowl
- Small wood cutting board
Budget Sources and Simple DIY Decor Projects
I like to hunt down budget-friendly pieces and pull together a few DIY projects that make counters feel personal without breaking the bank.
I browse thrift shops, flea markets, and clearance aisles for wooden cutting boards, mason jars, and woven baskets.
I stain, sand, or paint them, add herbs in repurposed tins, and arrange small vignettes that feel warm, lived-in, and intentional.
I hope these quick, rustic ideas spark confidence to tame your counters — I know the difference a small change makes.
Did you know kitchens are the most used room, accounting for about 30% of home activity?
That means a little styling goes a long way. Keep a focal piece, group in threes, and swap seasonally; practical storage lets beauty breathe. Try one tweak this week and enjoy the instant lift.