I’ll show you how top architects make open kitchens feel like the home’s warm heart: we place the island first to anchor sightlines, protect the work triangle, and keep traffic flowing.
Tuck tall appliances to hide clutter; use continuous materials and layered, dimmable lighting to knit rooms together; and add hidden storage and soft textiles so cooking stays social and calm. Stick with me and I’ll walk you through the practical details that make it all work.
Why Architects Prefer Open‑Concept Kitchens
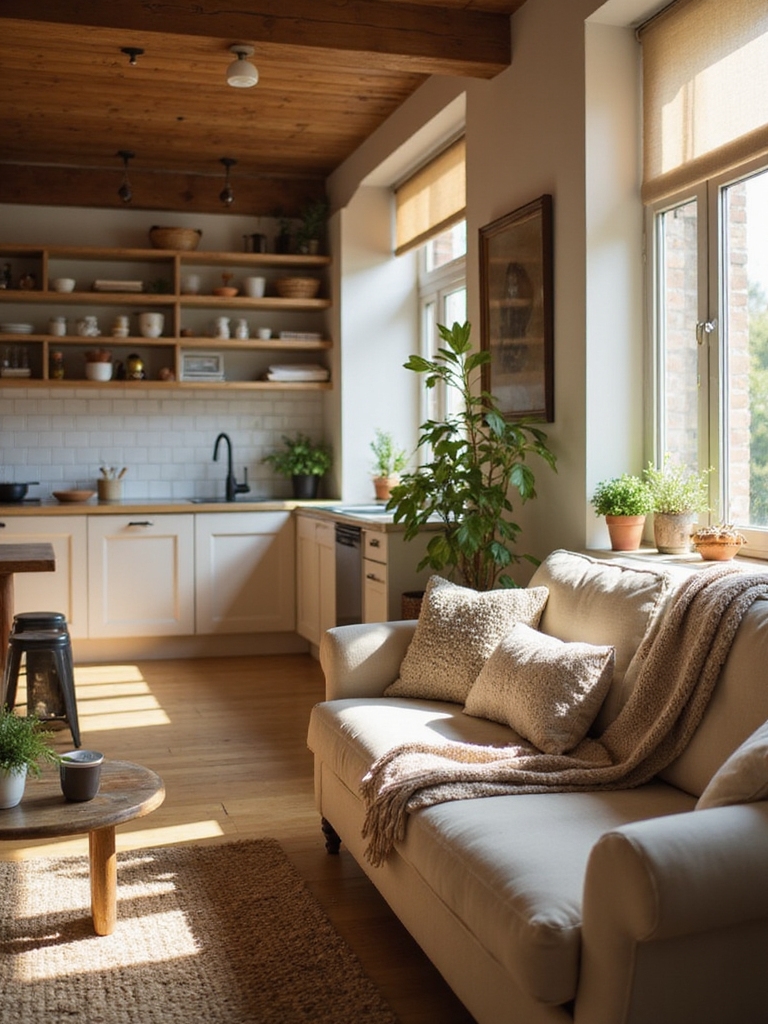
Because I’ve spent years working on home plans, I’ve come to prefer open‑concept kitchens for the way they knit a house together — they let light and conversation flow, make cooking feel social, and turn a tucked‑away chore into the heart of daily life.
I favor sightlines, flexible islands, and material continuity that warm a home, encourage gathering, and simplify circulation without losing cozy character.
Open plan kitchens have transformed living by removing barriers between cooking, dining, and living zones to create more adaptable, sociable spaces.
Open‑Kitchen Quick Wins: Decisions to Make First
When I start an open‑kitchen plan, I tackle a few quick decisions that make everything else fall into place: where the island will sit, how the main work triangle aligns with sightlines, and which surfaces will carry through to adjoining rooms.
I pick durable countertops, decide on lighting zones, and choose a flooring seam that flows. Those choices give warm, rustic cohesion before deeper details. Open island kitchens turn cooking into social time.
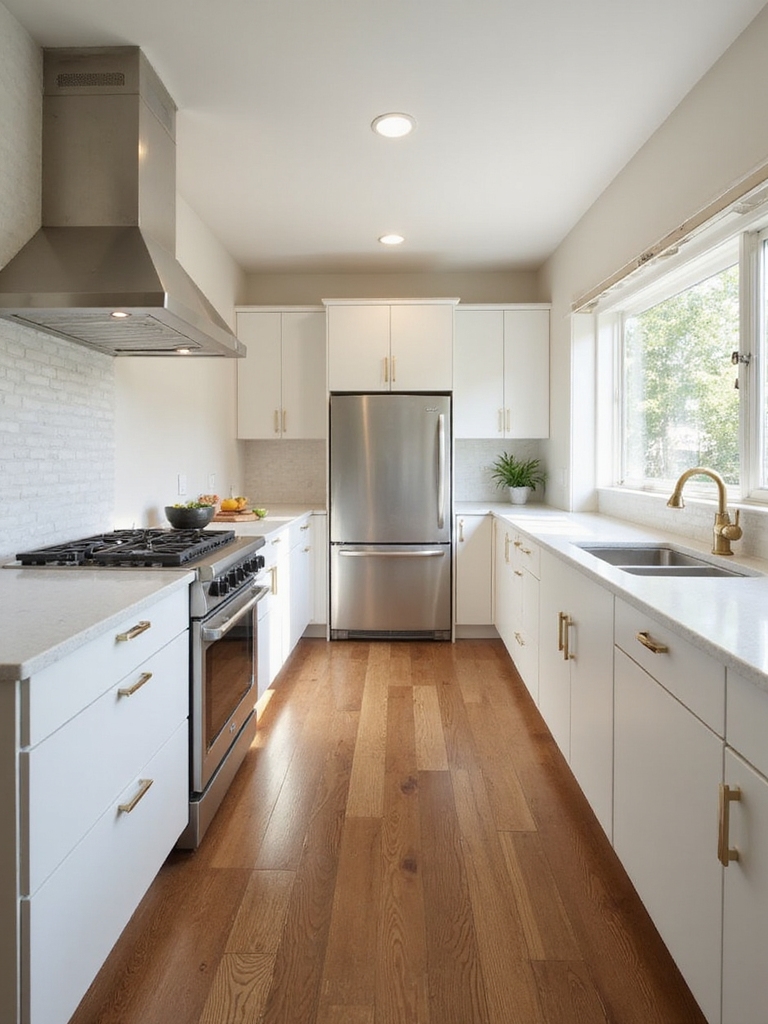
Sightlines: Position Appliances for Clean Views
Now that the island, work triangle and finishes are set, I think about sightlines—how appliances sit in the room so every view feels tidy and welcoming.
I choose placements that hide clutter, celebrate craftsmanship, and keep traffic calm.
- Align tall units to block messy backs of counters.
- Recess ovens for a flat, calm wall.
- Place fridge near pantry for discreet access.
Open Kitchen Layouts to Fit Any Home Shape often guides these choices with practical layout options and examples, emphasizing open kitchen layouts that work for different home shapes.
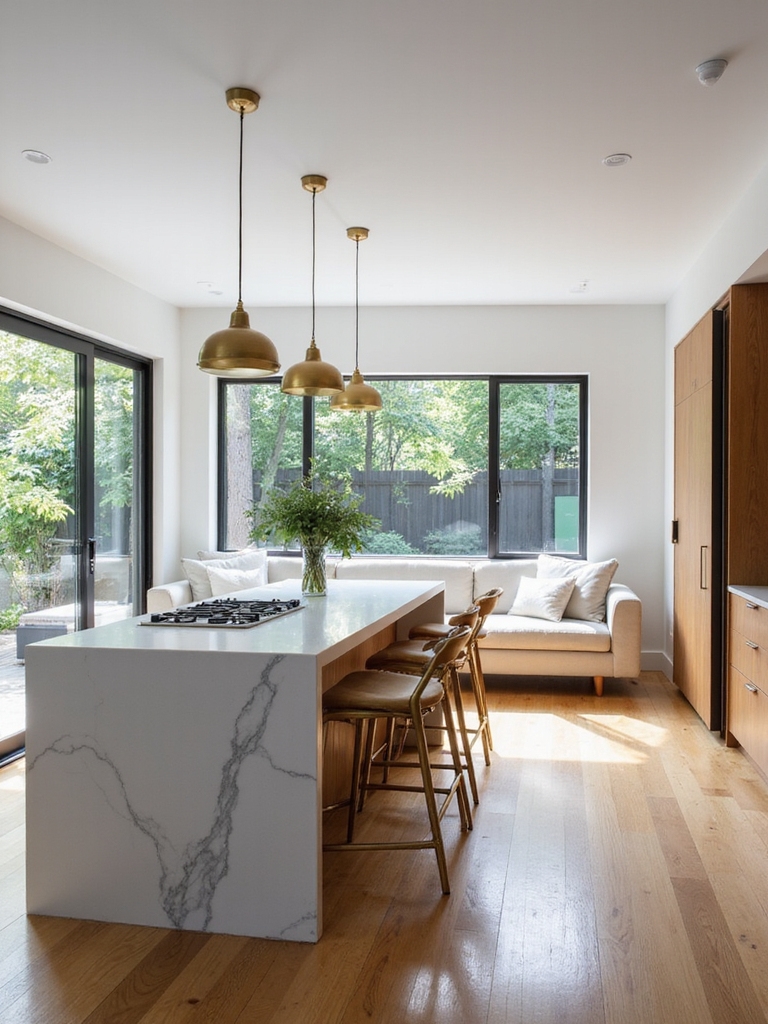
Island Placement: Protect Traffic and the Work Triangle
As I set the island, I think of it as the room’s anchor—big enough to work from but placed so people flow around it, not into it.
I plan clear lanes between sink, stove and fridge so cooking feels effortless.
I leave generous clearance for passing traffic, tuck storage under the counter, and keep sightlines open so conversations and chores move together without stumbling.
I also follow peninsula-layout principles to boost workflow by keeping prep, cooking, and cleanup zones efficient and connected to the main triangle with clear circulation.
Island Size & Seating: Dimensions That Work
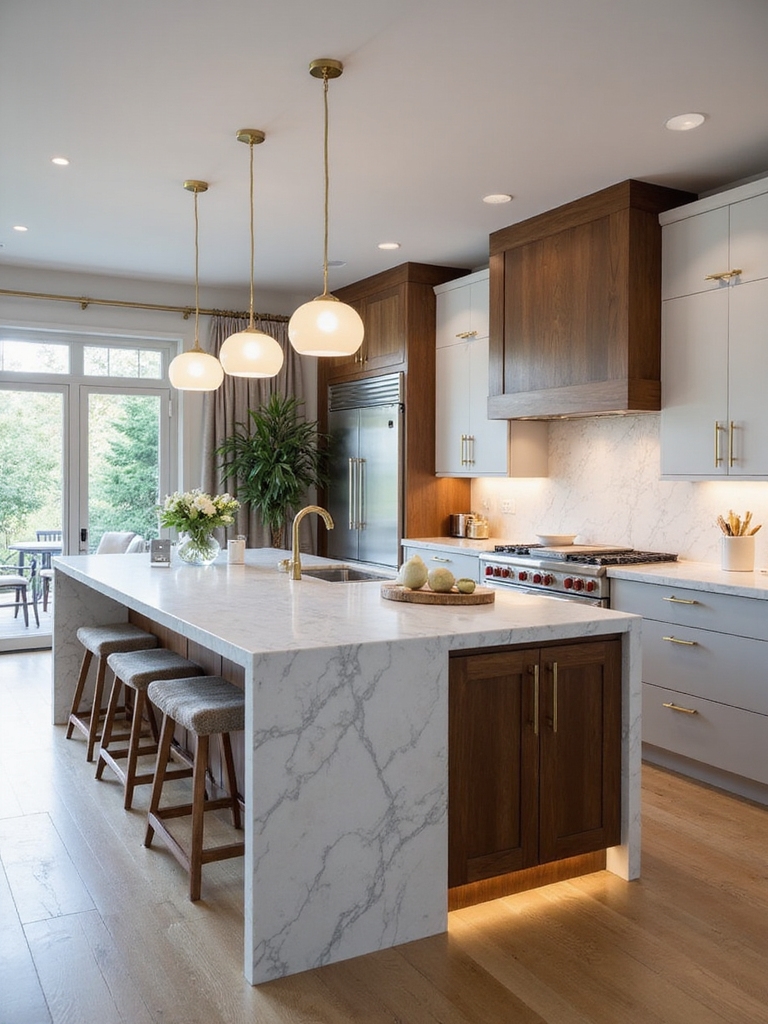
Now that we’ve talked about placement, I want to get practical about island size and seating so your kitchen feels roomy but welcoming.
We’ll cover minimum clearance guidelines, how much seating space each person needs, and how island shape affects traffic flow.
I’ll help you pick dimensions that balance comfort, function, and that cozy rustic vibe.
Open Kitchen Islands are increasingly designed to be the focal point where cooking, dining, and socializing converge, so it’s worth considering how an island can serve multiple roles in your layout — from prep station to casual dining spot to gathering hub.
Minimum Clearance Guidelines
While you’re picturing the perfect island where friends gather and meals get made, I’ll walk you through the clearances that keep traffic flowing and cooks sane.
I like cozy, functional spaces—here’s what I follow:
- 36–42 inches between island and counters for prep and appliance doors.
- 42–48 inches for active work zones (two cooks).
- 48–60 inches if you need passing room or seating behind.
Architects often rely on smart layout tips to maximize kitchen flow and make these clearances work in real homes.
Seating Space Per Person
Think about how you want people to sit and mingle around your island—I aim for comfortable elbow room without wasting square footage.
Allow about 24 inches per person for stools, 30–36 inches if people dine with plates and conversation.
Keep 12–18 inches knee space below the counter. I prefer a modest overhang of 10–12 inches for casual leaning and ease of movement.
High-end islands often include multi-level surfaces to separate prep, dining, and social zones.
Island Shape And Flow
Having figured out seating spacing, I next consider how the island’s shape and flow will make the room feel — it should invite traffic, not block it.
I picture movement, cozy gathering spots, and clear walkways.
- Rectangular for long rooms, allows continuous counter and clear aisles.
- Rounded corners soften flow, ease circulation.
- L-shaped offers casual seating and work zones.
Open-plan layouts with islands often improve sightlines and social interaction, especially in kitchen living room arrangements.
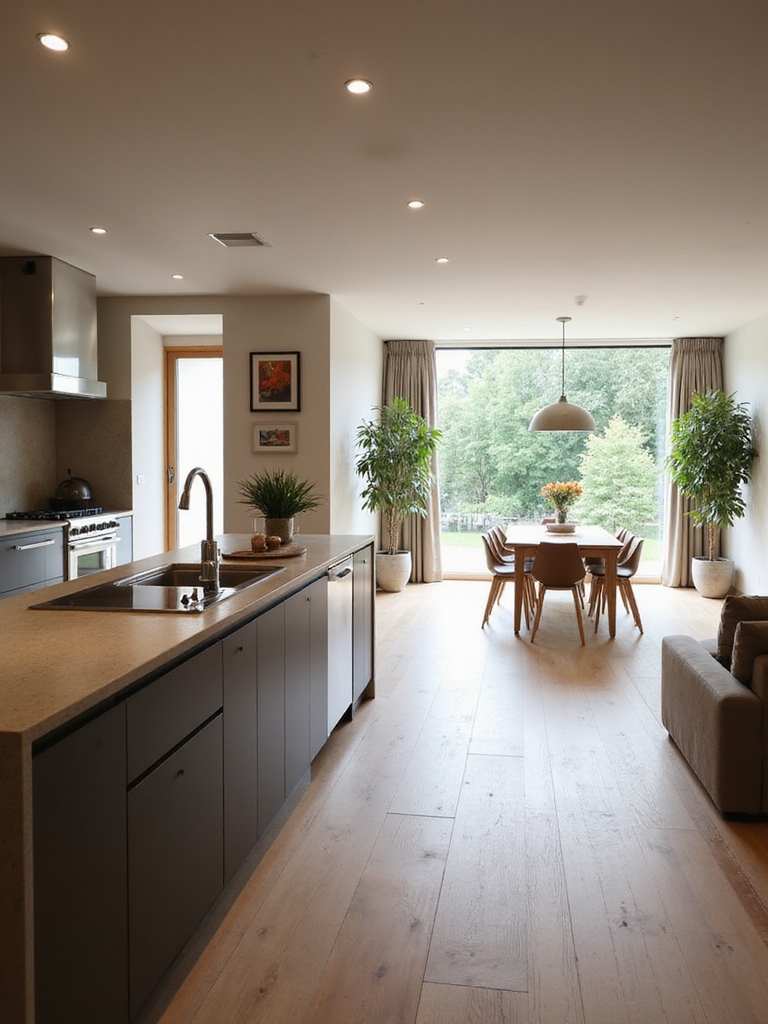
Zone Without Walls: Counters, Cabinets, and Layout Tricks
I like to think of counters and cabinets as the gentle fences of an open kitchen, guiding movement without closing the room.
Keeping a continuous countertop gives a calm, flowing surface while using cabinetry—tall, low, or even open shelving—to suggest separate zones.
Let me show you simple layout tricks that balance function and warmth so the space feels both connected and purposeful.
Continuous Counter Surfaces
A continuous counter surface feels like the backbone of an open kitchen, and I’ll show you how it ties cabinets, appliances, and traffic flow into one steady rhythm.
I favor a single slab that eases prep, hides seams, and encourages gathering. It’s practical, cozy, and visually calm.
- Seamless prep zones
- Integrated appliance spots
- Clear circulation paths
Cabinetry As Spatial Dividers
Think of cabinetry as more than storage—it’s the skeleton that sculpts space without building walls, and I’ll show you how to use it to define kitchen zones while keeping things open and inviting.
I place islands, half-walls of lower cabinets, and open shelving to guide flow.
Wood tones, textured fronts, and strategic overhangs create cozy separations that feel natural, tactile, and uncluttered.
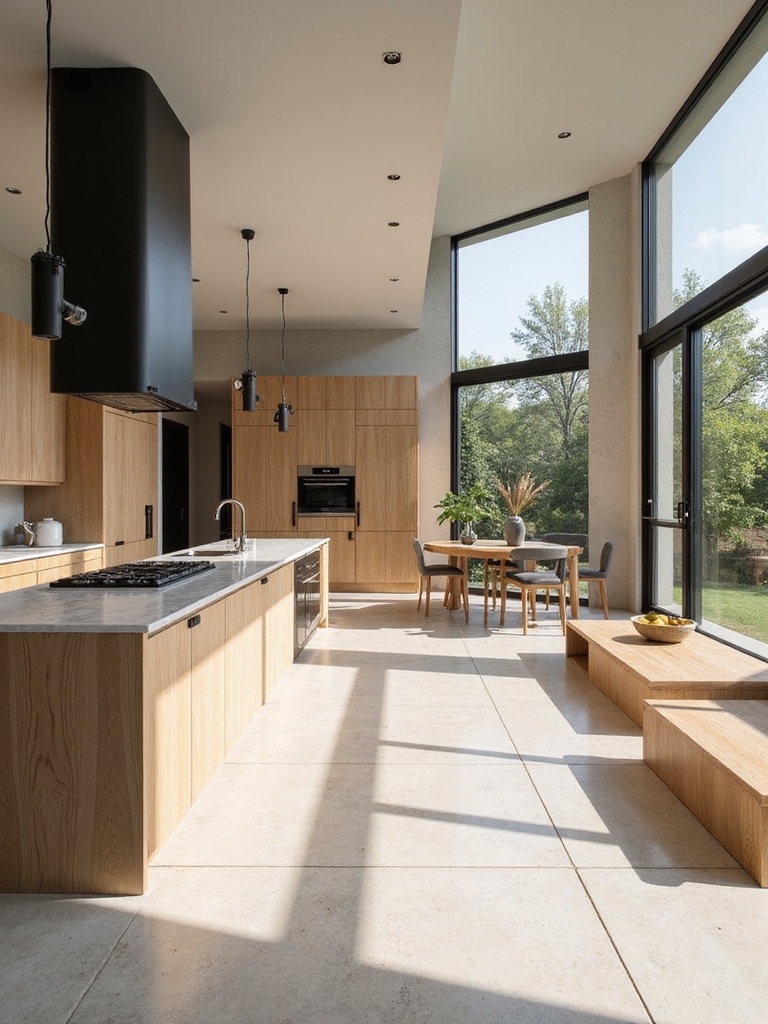
Open‑Concept Kitchen Materials and Color Strategies
Textures set the tone, and I want you to picture how wood, stone, and metal play together across an open floor plan.
I favor natural palettes, muted contrasts, and tactile finishes that age well.
Here’s how I balance materials and color:
- Warm wood floors with cool stone counters for grounding.
- Matte metals for subtle sheen without glare.
- Earthy paint tones to unify sightlines.
Open‑Kitchen Lighting: Layers for Function and Mood
When I plan lighting for an open kitchen, I think in layers—bright task lights over work zones, soft ambient illumination to tie the space together, and little accents to highlight texture or a favorite piece.
I like warm, dimmable fixtures so the room feels cozy for evenings but practical for chopping and cooking.
Let’s look at how to balance these layers so function and mood work together without competing.
Layered Task Lighting
I often tell clients that good kitchen lighting is like a well-layered wardrobe: each piece has a job, and together they make the whole room work and feel right.
I focus on task layers that are warm, practical, and tucked into the room.
- Under-cabinet strips for chopping clarity.
- Directional pendants over islands.
- Adjustable recessed spots for stove and sink.
Ambient & Accent
Because ambient and accent lighting set the kitchen’s mood just as surely as the hearth sets a room’s tone, I use them to make open kitchens feel lived-in and welcoming.
Soft, dimmable overheads provide whole-room comfort while focused accents highlight rustic beams, tile, or a herb nook.
I favor warm LEDs, layered controls, and subtle shadows to invite lingering, not glare.
Acoustic Solutions for Open Kitchens
Although open kitchens sing with light and sociability, they also bounce sound in ways that can turn a cozy evening into a clatter, so I focus on practical acoustic fixes that keep conversation clear and dishes pleasant.
- Soft textiles: rugs, curtains, upholstered stools to soak noise.
- Absorptive panels: wood-backed felt or cork for warmth.
- Quiet appliances: choose low-decibel models and vibration mounts.
Visual Buffers: Low Partitions, Glass, and Furniture Placement
Sound control helps the room feel calm, but how you shape sightlines matters just as much for comfort and flow.
I favor low partitions, half-walls or glass panels, to keep openness while hinting at zones.
Placing a cozy bench or open shelving softens shifts and blocks direct views of messes, keeping the kitchen inviting without closing it off.
Circulation Design: Avoid Pinch Points and Create Clear Paths
I want to make sure your kitchen flows the way it should, so I focus on a clear work triangle that keeps stove, sink, and fridge within easy reach.
I also plan unobstructed walkways and steer clear of pinch points that slow traffic during busy meals.
Clear Work Triangle
When I plan a kitchen, I start by sketching the work triangle—stove, sink, refrigerator—so I can see and fix any pinch points before they slow you down; a clear triangle keeps movement smooth, minimizes backtracking, and makes cooking feel effortless.
I aim for cozy practicality, balancing flow with rustic charm.
- Position for short, direct steps.
- Keep counters between zones.
- Avoid overlapping prep aisles.
Unobstructed Walkways
With the island moved just enough to let two people pass comfortably, I make circulation my priority so every path feels natural and unforced.
I clear sightlines, stash bulky decor, and favor wide, unobstructed aisles so cooking, serving, and quick chats flow without bumping into each other.
It’s practical, welcoming, and quietly cozy—an honest, working kitchen that invites movement.
Zoned Activity Paths
Because every task in the kitchen has its own rhythm, I map out zoned activity paths so cooking, prepping, and cleanup don’t collide.
I keep routes clear, avoid pinch points, and balance work triangles for flow.
Here’s how I think about it:
- Define prep, cook, and clean zones.
- Make certain 36–48″ shared aisles.
- Place storage near tasks for efficiency.
Small Homes: Open‑Concept Tips for Tight Footprints
Opening up a tiny footprint doesn’t mean losing character — it means choosing the right moves so your kitchen feels roomy and welcoming.
I favor light woods, open shelving, and trimmed-down islands that double as prep and dining spots.
Keep sightlines clear, layer warm task and ambient lighting, and pick scaled appliances.
These rustic, practical choices make small spaces cozy without crowding them.
Large Homes: Zoning Big Open Kitchen–Living Areas
In a big open kitchen–living area, I start by imagining distinct zones that still feel connected, so cooking, lounging, and dining each have purpose without chopping the room into islands.
I use texture, rugs, and lighting to whisper separation while keeping sightlines.
- Rug and furniture groupings
- Layered lighting (task, ambient, accent)
- Partial dividers like a low shelf
Storage Systems That Hide Clutter and Simplify Zones
When I plan storage for a big open kitchen–living area, I think about hiding the everyday chaos so each zone keeps its mood without feeling sterile.
I favor deep drawers, lidded baskets, and built-in cabinets with warm wood faces that tuck toys, gadgets, and mail away.
Open shelving stays minimal—display only lived-in ceramics—so surfaces feel calm and zones read clearly.
Appliance Placement and Sightlines That Stay Tidy
If I tuck the toaster and coffee gear into a shallow appliance garage, the counters instantly look calmer and the room feels more intentional.
I favor sightlines that hide mess but stay accessible, pairing warm wood with clean islands so the space reads as cozy and ordered.
- Keep prep tools in shallow drawers near the work triangle.
- Store small appliances behind lift-up doors.
- Align tall units to frame views.
I’ve shared why architects love open kitchens, what to decide first, and how to place islands, appliances, and storage so life feels easier.
Take what’s practical and what’s beautiful, balance sightlines with seating, tuck clutter behind cabinet faces, and shape traffic around the work triangle.
Think small but clever, think big but zoned. If you’ll cook, gather, or simply linger, design it to welcome, to work, and to warm your life.