I’ll show you how to make your kitchen feel five‑star by layering a warm ambient glow, focused task lights over prep zones, and soft accents on shelves and art. I favor warm 2700–3000K LEDs with high CRI so food looks delicious and finishes sing.
Think under‑cabinet strips, adjustable island pendants, and toe‑kick warmth, all on dimmers and simple scenes for cooking, cozy dinners, or hosting. Keep fixtures honest, wired in zones, and I’ll guide you through the rest.
Quick 5-Step Lighting Plan for a Hotel-Worthy Kitchen

Let’s cut to the chase: I’ll walk you through five simple, practical steps to light a kitchen that feels as polished and welcoming as a boutique hotel.
First, layer ambient, task, accent.
Second, pick warm color temperature.
Third, use dimmers for mood.
Fourth, place task lights over prep zones.
Fifth, highlight textures with low-angle accents to add cozy, lived-in charm.
Layering light creates depth and helps every surface and activity feel intentional, so always start with a strong layered lighting plan.
Define Lighting Goals: Task, Mood, and Entertaining Use Cases

When I plan kitchen lighting, I start by naming the three things it has to do: help you cook safely (task), make the room feel inviting (mood), and adapt when you’re hosting (entertaining).
- Bright, focused light for chopping and reading recipes.
- Soft, warm glow to cozy the space at dinner.
- Flexible options—dimmers and zones—for effortless hosting.
Good task lighting is best placed directly over prep areas to eliminate shadows and improve safety, often using pendant or under-cabinet fixtures to concentrate light where you need it most.
How to Layer Ambient, Task, and Accent Lighting (With Examples)

I’ve found the easiest way to meet those three lighting goals is to layer ambient, task, and accent light so each purpose gets its own job without fighting the others.
Start with a warm overhead glow, add focused under-cabinet and pendant task lights for chopping and prep, then tuck in accent spots to highlight open shelving, art, or a rustic beam for depth and charm.
Consider treating the ceiling with distinctive finishes to add character and tie the whole scheme together.
Bulbs, CRI & Brightness for Kitchen Tasks and Surfaces

I’ll cut straight to it: the bulbs you pick determine how your kitchen looks and how well you can work in it.
I favor high-CRI options so colors read true and food shines. Match brightness to task areas, avoid glare, and layer light for depth.
- Prep: bright, focused
- Cooking: even, shadow-free
- Surfaces: gentle, reflective
Interior designers often recommend pairing these lighting choices with sophisticated paint shades to enhance warmth and contrast.
Choose the Right Color Temperature for Warm, Luxurious Light

Because the color temperature sets the mood, I pick warm tones to make a kitchen feel luxurious and inviting while still functional.
I favor 2700–3000K for that golden, rustic glow, using slightly cooler accent lights where clarity’s needed.
Layering warm ambient with targeted task warmth preserves intimacy without sacrificing visibility, giving a cozy, five-star charm you actually want to live in.
I also consider stylish kitchen ventilation as part of the overall design, ensuring form and function complement each other with sleek ventilation choices.
Plan Lighting Zones Around Workflow and Social Areas
Warm, golden light sets the mood, but you’ll want to plan lighting by how the kitchen actually works and where people gather.
I divide the room into practical zones so life flows naturally and guests feel welcome.
- Prep zone: brighter, focused warmth for comfortable chopping.
- Cooking island: adjustable glow for activity or conversation.
- Dining nook: dimmable, cozy light for lingering. Architects also often design zones to align with workflows and circulation so movement between tasks is effortless.
Select Task Lighting That Makes Prep and Cleanup Easy
When I’m chopping and washing up, I want lamps that actually show me what I’m doing, so I favor focused task lighting that cuts shadows and glare.
Under-cabinet fixtures are my go-to for bright, even light over counters, and I like them tucked out of sight to keep the kitchen cozy.
I also choose adjustable brightness controls so I can crank the light for prep and tone it down for late-night cleanup without fuss.
I’ll often choose pendant lighting over the island as a splurge to add style and targeted illumination.
Focused Task Lighting
I’ll focus your attention on task lighting that actually helps you chop, stir, and clean without squinting or casting weird shadows.
I prefer focused beams that feel like a friendly lantern over worktops, highlighting texture and color so prep is safe and pleasant.
- Adjustable pendant for island work.
- Slim directional spots above stove.
- Bright, glare-free fixtures near sink.
Large windows can boost overall illumination, so position task lights to complement large window styles rather than compete with them.
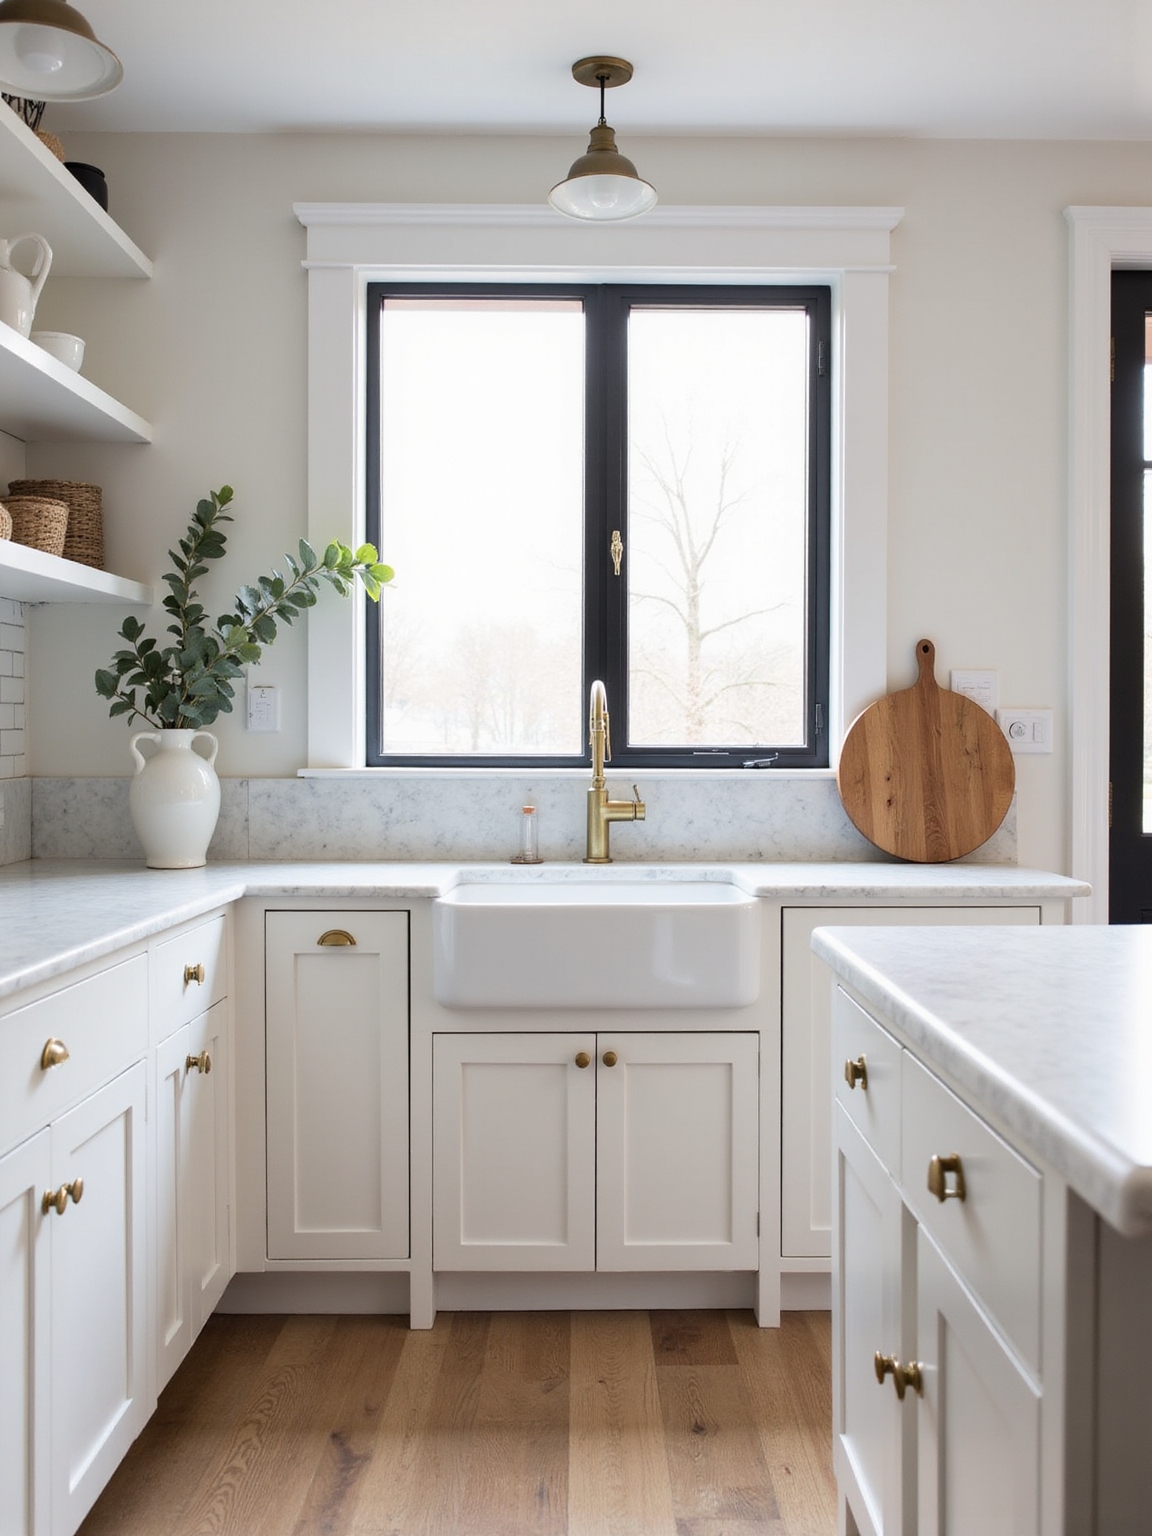
Under-Cabinet Fixtures
You like those focused beams over the island and stove, and I do too — but under-cabinet fixtures are where the everyday prep happens, so I make them a priority.
I choose warm, low-profile strips or puck lights that wash the counters evenly, reveal texture, and cut shadows for chopping. They hide neatly, feel cozy, and make cleanup quick without glare or fuss.
Adjustable Brightness Controls
Because morning tasks and late-night snacks call for different light levels, I make adjustable brightness controls a nonnegotiable in my kitchen.
I dim for cozy breakfasts, brighten for chopping, and gently night-light for midnight tea.
My rustic kitchen feels alive and practical with simple sliders and smart dimmers.
- Soft dawn for coffee
- Crisp task light for prep
- Low glow for cleanups
Under-Cabinet & Toe-Kick Lighting to Flatter Surfaces
I like how a seamless under-cabinet glow makes countertops look softer and more inviting while still giving you the practical light for prep.
I also use discreet toe-kick accents to add a quiet, grounded warmth that makes the room feel finished.
Let me show you how these subtle layers can flatter surfaces without shouting for attention.
Seamless Under-Cabinet Glow
Often I reach for a hidden switch and watch the under-cabinet glow wake the kitchen like a quiet sunrise.
I love how it sculpts bowls, warms wood, and keeps prep gentle on the eyes.
- Soft, warm LEDs highlighting butcher block.
- Even wash eliminating harsh shadows.
- Dimmed amber tone for cozy evenings.
Discreet Toe-Kick Accents
Usually I tuck a soft band of light beneath the cabinets and watch how it lifts the floor and baseboards, making the room feel grounded and a touch more elegant.
I use warm, low-profile LEDs in toe-kicks to outline cabinetry, hide scuff marks, and add depth without glare. It’s subtle, practical, and gives a cozy, handcrafted glow to the kitchen.
Accent Lighting to Highlight Architecture, Art, and Backsplashes
Accent lighting is my favorite way to make a kitchen feel lived-in and intentional; I use it to draw the eye to a stone arch, a favorite painting, or a patterned backsplash.
I favor soft, warm beams that layer with task light, revealing texture without glare.
- Slim wall washers for arches
- Picture lights for art
- Under-shelf strips for tile grout
Add Statement Pendant Lighting and a Centerpiece Fixture
I like to anchor a kitchen with a bold pendant or a centerpiece chandelier that sets the room’s tone and ties the rest of the lighting together.
I choose shapes and scales that balance island length and ceiling height, creating a warm focal point.
That single, soulful fixture brings personality and gathers people—practical light, rustic charm, and an inviting sense of home.
Choose Fixtures and Finishes That Match Your Design Style
Think of fixtures and finishes as the wardrobe for your kitchen—they dress the space and reveal its character.
I pick metals, glass and wood to echo the room’s soul—warm brass for farmhouse charm, matte black for modern rustic, soft nickel for timeless calm.
Choose textures that feel honest and durable; they anchor the mood and make the space feel lived-in.
- Hand‑hammered brass
- Matte black iron
- Brushed nickel and frosted glass
Dimming Strategies and Controls for Mood and Function
I like to think of dimming as the kitchen’s volume control, letting me balance task, ambient, and accent layers with a single touch.
Smooth fade timing makes those shifts feel natural, whether I’m waking up the room for breakfast or settling in for dinner.
I also program a few scene presets so I can call up bright prep light, cozy dining, or clean-up mode without fuss.
Layered Lighting Control
When I’m choosing dimming strategies for a kitchen, I focus on how each layer of light can be adjusted to match the moment—bright and efficient for prep, softer for dining, and subtle for late-night cleanup.
I like tactile controls and zones so lighting feels natural and honest.
- Task: bright, focused undercabinets.
- Ambient: warm ceiling glow.
- Accent: dimmable pendants for character.
Smooth Fade Timing
Shifting from how each lighting layer behaves, I pay attention to how quickly lights change — the timing of fades shapes the room’s mood as much as brightness does.
I favor gentle, measured fades for dinner and slow ramp-ups for mornings, letting the kitchen breathe.
Quick fades suit task moments. Tunable dimmers and tactile controls keep adjustments intuitive, comforting the space without fuss.
Scene Preset Integration
Because a kitchen wears many hats, I lean on scene presets to make lighting both effortless and purposeful.
I set dim levels for tasks, dinners, and late-night snacks, then let simple controls do the rest. Here are staples I use to build mood and function:
- Bright, cool task for chopping.
- Warm, low glow for dining.
- Night-safe path lighting.
Smart Lighting Scenes for Effortless Mood and Function
I like to set smart lighting scenes that take the guesswork out of mood and function, so I can walk into the kitchen and have everything feel right without fiddling with switches.
I program bright, cool light for cooking, soft warm glow for dining, and a gentle night mode for late snacks. Automation saves time and preserves that cozy, lived-in charm.
Budget Tiers: Low, Mid, and Luxury Options
I’ll show you how a modest budget can still give your kitchen real impact with affordable pendants, under-cabinet strips, and clever placement.
If you want to splurge, I’ll walk through high-end luxe fixtures—handblown glass, artisan metalwork, and statement chandeliers—that become the room’s focal point.
Along the way we’ll compare mid-range options that balance cost and character so you can pick what fits your space and soul.
Low-Cost Impact Lighting
Let’s get practical: I’ll show you how to make a real impact with lighting even on a tight budget, and I’ll spell out options for low, mid, and luxury tiers so you can pick what fits your kitchen and wallet.
I’ll keep it simple, cozy, and slightly rustic—bright accents without breaking the bank.
- LED strip under cabinets for warm task light.
- Plug-in pendant with farmhouse charm.
- Dimmer switch upgrade for mood control.
High-End Luxe Fixtures
Imagine sinking into the warm glow of statement lighting that still feels lived-in and inviting — that’s what high-end luxe fixtures should do, even when we’re working within different budgets.
I guide you through low-cost brass-look pendants, mid-tier handblown glass or aged-metal chandeliers, and true luxury artisan pieces.
Each choice layers texture, warmth, and polish so your kitchen feels both grand and comfortably homey.
Wiring, Placement, and Contractor Tips to Avoid Common Mistakes
When I walk through a kitchen and look up, wiring and fixture placement tell me whether the room will feel easy and safe to work in or fussy and frustrating, so I make decisions that keep circuits simple and lights where you actually need them.
I insist on clear plans, labeled circuits, and practical swaps.
- Zone lights for tasks.
- Keep switches reachable.
- Inspect before drywall.
You can absolutely get that five-star kitchen feel without renovating the whole house. I’ve walked through lighting goals, layers, bulbs, temps, dimming, scenes, budgets and wiring so you can plan confidently.
Start by prioritizing task and ambient layers, add a couple of warm accent lights, and pick dimmers and high-CRI bulbs for the finishing touch.
If you’re worried it’ll look fussy, keep fixtures simple and the palette warm—elegant, cozy, and utterly livable.